
The cost of installing a bathtub or a shower liner depends on the type of tub or shower, size, and features. This guide will show what you can expect to pay for your project.
Make your tub look new—without the brand-new price tag

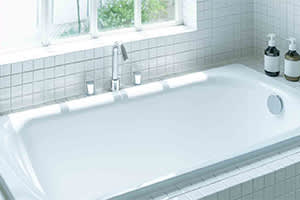
Installing a bathtub liner gives your existing tub a fresh look without the full replacement cost, as long as your tub has no cracks or drainage issues.
Expect to pay $500 to $2,800 for DIY materials or around $6,400 for professional installation, while tub replacement costs $2,000 to $9,400.
You'll need to clean your tub thoroughly, remove all hardware, apply primer and adhesive, then carefully fit the liner to avoid trapping moisture underneath.
Hiring a local bathtub repair professional provides reliable help with proper sealing and adhesive application, preventing water damage and mold from improper installation.
Replacing a bathtub can be a complicated and costly endeavor, so learning how to install a bathtub liner might be worth it if your tub is in good condition. You can float past a replacement, keep your budget intact, and enjoy a like-new bathtub. Here are nine steps to help you get your bathtub shiny again.

Clean your bathtub rigorously with a limescale remover. You can also make your own cleaner with a 1-to-1 ratio of vinegar and water. While cleaning, look for any signs of mold or rot. If you don’t take care of it now, your liner will seal it in place.
It’s also important that your tub is pristine and as clean as possible to get a secure adhesion. Any soap film or bath oil on the tub will prevent the adhesive from bonding correctly.
In addition to looking for mold or rot, check for any cracks or drainage issues in the tub. Take the time to repair any of these issues before installation. If it’s beyond your DIY abilities, hire a bathtub repair company near you.

Using a wrench or screwdriver, remove any objects or hardware on your tub, like nonslip strips, drain covers, and faucets. Now would be a great time to deep clean your showerhead or replace any outdated fixtures while you’re at it.
Do a dry fit of the bathtub insert before applying any adhesive to get comfortable with the installation process. The liner will come as one single piece of PVC or acrylic that will fit over your existing tub. You may need to trim some edges to create a perfect fit. If this is the case, carefully use a utility knife to remove any excess material.
Once the entire area is dry from the cleaning and you’re sure the liner fits, it’s time to start the installation. Start by applying butyl primer along all the areas the new liner will touch. Butyl primer is a high-tack primer designed to enhance maximum adhesion, which you’ll need for this task. Check the manufacturer’s instructions for drying times. Once the primer is dry, spread a silicone adhesive over all bathtub surfaces, especially around the drain and overflow areas.
Carefully set the liner into place. Apply ample pressure across all surfaces to ensure the liner connects with the adhesive. If necessary, place heavier objects on top of the liner or use a mallet wrapped in a towel to remove any trapped air.

Insert your silicone caulk into your caulk gun. Glide the tip along the edges of the liner, leaving a thin line of caulk as you go.
If you don’t have a steady hand, you can tape off the edge where the wall and tub meet, leaving about a 1/4 inch of space for the caulk. And don’t rush this step. Caulking around a bathtub establishes a seal to protect your walls from water damage and helps create a more finished look. You’ll thank yourself later for taking your time.
Reinstall the faucet and other hardware. For added peace of mind, clean the new liner, too. Just be careful to use only a little cleaning solution and keep any liquid away from the caulk or sealant.

For the best results, wait a day (or the recommended time in the manufacturer’s instructions) before using your new tub. This will allow the seal to bond correctly.
Bathtub liners are a cost-effective way to update your bathtub without paying for a replacement. Bathroom remodeling costs can add up quickly, so installing a tub liner could allow you to save and fund other upgrades like new cabinetry or lighting. This can really help you bring your bathroom remodel ideas to life.
Liners last for 3 to 5 years, so although it’s not a permanent solution, it can work well depending on your needs.
In most cases, it’s best to hire a pro to install the liner for you, so you can be sure it’s done properly and will have a long lifespan. Otherwise, make sure you have the DIY skills to get the job done right.
After installing a brand-new liner in your tub, you’ll want to help keep it in the best shape possible. The easiest way to do this is by cleaning it properly using the right products.
Although it might seem like a good idea to reach for common cleaning products on your shelves, it’s usually best to stick to something mild and simple, like dish soap or vinegar. If you want to do a thorough cleaning job, you can use diluted bleach.
Avoid abrasive cleaning products like harsh disinfectant cleaners or anything with acetone or aerosols. Don’t use rough cleaning pads either, as they can scratch your liner. Instead, use soft microfiber towels.
Tub liner installation costs $6,400 on average for materials and labor if you hire a pro. Costs depend on whether you choose an acrylic or PVC liner, the size of your tub, and if you need repairs done before the installation. The other common alternative to installing a liner is refinishing the tub. On average, bathtub refinishing costs $480.
In comparison, a new tub replacement costs $2,000 to $9,400. If your bathtub is in poor condition, a local bathtub installer can give you a quote and refresh your bathroom with a new tub.
While you can save on the cost of labor and the steps in this project aren’t necessarily complicated, there are a few risks you must be aware of if you decide to tackle this on your own. The biggest issue you may face is ensuring a tight, waterproof seal. If you skimp on the adhesive or skip a step altogether, you risk trapping water underneath the liner—which can lead to unsanitary conditions, stinky smells, and even health issues like mold.
Hire a bathtub refinishing pro near you or a plumber if you want someone knowledgeable to take on this job. If you have any other plumbing issues that need fixing during this project, you will likely pay between $45 and $200 for a plumber’s hourly rate on top of the liner installation.
Jason has helped me with multiple household projects, with the most recent being new door installation. He has always showed up on time and organized and has done an incredible job! Jason is very professional and he's now my go-to for anything around my house that needs to be fixed or...
Cole has been handling plumbing and general contracting for our four properties over the past three years, and he’s always done a great job. Most recently, he installed a sink and countertop in our retail store where none existed before, and it turned out exactly how we needed. He’s...
 ANB Renovations LLC
1st Choice Renew is simply the best! We hired them for a complete home renovation, and they transformed our space into something truly amazing. The team attention to detail and commitment to quality were evident throughout the project. They were easy to work with, very responsive, and always...
This company went above and beyond with their work, chimney sweeps are usually pretty messy, but the clean up was spot on.!! Josh explained every thing that he was doing, and the things that he was checking to make sure the chimney was safe for me and my family. He was very professional,...
 Supreme brick & chimney
Custom Paint Jobs LLC turned our outdated bathroom into a modern masterpiece.
Excellent customer service and knowledge. I was recommend to him from my neighbour. My front door and window came in great and were installed beautifully perfectly, I m very satisfied with their excellent work, so decided to order one more big bow window for my living room. I cant wait for...
If I could give 10 stars for Kitchen Tune Up, I would. I cannot say enough good things about my experience with Kitchen Tune Up and the entire team involved in the process of my kitchen project. They went above and beyond as far as service and quality with my cabinets, paint, countertops, and...
It was wonderful working with Yordy and his team. They were very professional and are experts in what they do. They have completed the work on time, with better quality and with in fairly reasonable price. We just started with backsplash work , but liking his work, we went on to provide...
We were having 2”x 2” tile installed . There was a small installation error and the new additional replacement tile was from a different lot and the colors didn’t match. Joe assured us that he would rectify everything , which he did without hesitation. We decided to go with the 18” x 36” tile...
 CarifaTile
They work that 360 did on my kitchen cabinets is nothing short of amazing. I still cannot believe the difference from before and after. Jon and Jeff were both so incredibly professional throughout the whole process and their communications with me were constant and consistent. These guys...
 360 Painting Columbus
From average costs to expert advice, get all the answers you need to get your job done.
The cost of installing a bathtub or a shower liner depends on the type of tub or shower, size, and features. This guide will show what you can expect to pay for your project.

How much does a pond liner cost? Get detailed price breakdowns, installation factors, and tips to save on your pond liner project.

An updated bathtub can give a bathroom a whole new look. Find out how much it costs to replace a bathtub, including prices by type and labor costs.
Expand your DIY skills by learning how to install a bathtub in your existing bathroom and how to remove an old tub. Follow these steps to get started.
If you’re looking for a bathtub upgrade, a liner is a quick and easy choice. Here are the different types of bathtub liners and a little bit about the process.
Need a new bathtub liner installed or shower liner repaired? Prepare for your conversation with pros by answering these bathtub liner questions first.