
A clogged main sewer line can lead to gas or wastewater leaks. Find out what main sewer line clog repair costs by type of service, clog severity, and more.
Lawnmower take your sewer pipe cap for a joy ride? Check out these tips to replace it and keep your sewage contained.

A broken sewer cap leaves your system exposed to dirt, debris, and small animals that can cause blockages and costly repairs down the line.
Expect to pay $250 to $1,175 for a sewer line camera inspection and $100 to $600 for professional cleaning if debris enters your system.
Measure your cleanout cap accurately before buying a replacement, since sizes range from one-half to four inches and this isn't something to eyeball.
Hiring a local plumbing professional provides reliable support with stuck caps, thread repairs, and proper sealing to keep your sewer system protected.
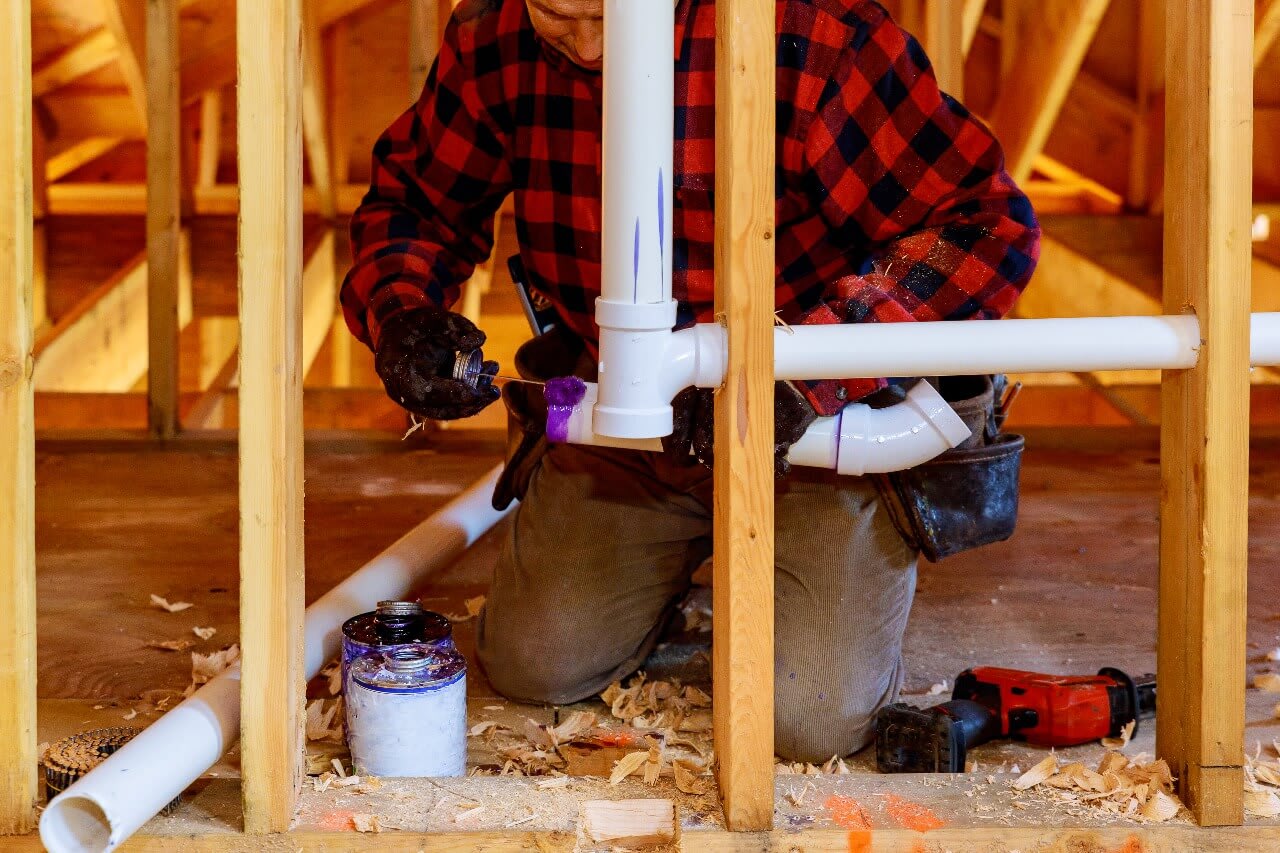
Nothing’s worse than when you’re mowing your lawn and you hear an unexpected noise only to find out that you went too close to your sewer pipe cap, and now the sewer cleanout cap is broken.
A sewer pipe cap, also known as a sewer cleanout plug, is a removable cap that gives you or a licensed plumber access to your sewer line when it needs maintenance, like during a sewer backup. Before you prepare to replace your cap, there are a few things you need to know to make the process easier and safer.
When taking on this project, expect questions only a pro can answer. With our network of local pros, you'll get the job done and your questions answered—without the hassle and stress of doing it yourself.
To get a replacement plug, the first step is to make sure that you know what type of plug you need. So, start by measuring its size, which can range from one-half to four inches in length, because this isn’t something you want to eyeball. We recommend using a measuring tape to accurately assess the dimensions of the plug.
Depending on how much of the sewer cap is left, you can identify what kind of material it’s made of before you purchase a new one. Most sewer caps are made from metal, ABS, or PVC material. In most cases, the sewer pipe cap is made from the same material as the sewer pipe itself. So, cross-check the pipe material to see what you need.

Some sewer cleanout caps are a cinch to remove—others, not so much. Over time, it’s common for some caps to become rusted and fused to the threads, making it a headache to replace. While this happens more frequently with cast-iron fittings, it’s also possible if you have a plastic one.
So, if your sewer cleanout plug is stuck, here are a few methods you can use to unscrew it.
Sometimes, the only thing required is to apply a little extra strength to get the cap to come off. But be careful: If you feel like it’s taking too much force to remove it, stop and try something else.
Heat has always been an effective way to loosen up any stubborn material. For cast-iron fittings, use a propane torch to loosen the threads. If you have a plastic-fitting, a torch might melt it, so use a hairdryer instead. If you decide to use heat, use caution so you don’t burn yourself.
If rust is causing the threads and cap to be stuck together, you can also apply this type of lubricant to loosen the threads. However, never apply lubricant to a hot cleanout cap or pipe because lubricant is a flammable substance.
Just a few taps from a framing hammer or sledgehammer should make it easier for you to unscrew the sewer cleanout cap.
By placing a wrench on the plug’s nut and turning it counterclockwise, you might be able to loosen it up enough for the cap to come off.
If none of these methods help you remove your cap, then you might need to cut out the fitting to replace it. But if you’re not comfortable cutting it yourself, contact a sewer service to do it for you.
It’s also worth noting that your threads won’t hold a new sewer pipe cap if the previous one was stuck. So, you might need to use a rubber coupling to get the threads to seal correctly.
We get it, the cap broke, but as long as your sewer pipes are still functioning, then there’s really no rush, right? Unfortunately, if you discover that your cap is no longer protecting your sewer cleanout, then you need to grab the necessary materials and fix it immediately.
If there’s any blockage in your sewage system, you can potentially release pressure buildup and sewage water onto your property by removing the cleanout cap. But this depends on whether there’s any blockage present and how your cap broke. Just exercise caution when completing this task.
Positive experience. As previously stated, the replacement/repair could not be completed (no fault of the plumbing tech) b/c misinformation was rec?d by property management maintenance. Thanks to the plumbing tech for your efforts. Appreciate you!
 The Waterworks
If you want to pay the most exorbitant prices possible for your job, this is the company for you. “By the job” pricing is a rip-off, at least how these people use it. Every job is plugged into a category and prices are set by category. You might have a job that takes half an hour or one that...
 Benjamin Franklin Plumbing
Cole has been handling plumbing and general contracting for our four properties over the past three years, and he’s always done a great job. Most recently, he installed a sink and countertop in our retail store where none existed before, and it turned out exactly how we needed. He’s...
 ANB Renovations LLC
Matt is a consummate professional. The work turned out to be far more difficult than expected and rather than turn the job down, Matt rose to the occasion and completed a near impossible task. I can not recommend Greene's Plumbing Service more highly. On a scale of 1-5 I would give Matt a...
Involved an extensive bathroom remodel, including removing tub & installing walk in shower, new drywall, custome tile work to ceiling, plumbing, etc. Overall, job was done on time and on budget. Nick & his team were very professional and had high attention to detail. Quality was great. Highly...
 Stamos Flooring and Remodeling LLC
Awesome company. Had a jacuzzi tub taken out and replaced with huge walk in shower with partial glass enclosure. Onyx to the ceiling with a decorative border, moved plumbing and installed hand held shower, new ceiling, flooring, and paint. Replaced window with glass block. Everything was done...
 Columbus Bath Design
The initial quoted price from a walk-through seemed high, but we discussed that the quote represented worst case scenario (re-wiring to two floors) and we were excited about the opportunity to have the work done in a timely manner with closing for fire safety reasons, etc. When the job was...
Initially, I called the Service People to have a leaking garbage disposal replaced. I had purchased a special deal through Angie's List: $79 for $200-worth of plumbing services. <br /> When I went to schedule the work, the earliest date I could get through Angie's List was after the upcoming...
This company did a very good job on the brick wall and it looks just amazing. The staff was always professional and was practically OCD on how the bricks were stacked and how they were laid. Although it took longer than expected, I am willing to sacrifice time over perfection anyday. The...
 My Handy Mate LLC Improvement & Remodeling
<p>I am so glad we called Rotor-Rooter. I was hesitant to call them because we usually prefer to give business to local providers. But when we had sewage back up in our basement on a Saturday evening, I had a hard time getting a hold of someone, not to mention the high weekend/evening rate...
From average costs to expert advice, get all the answers you need to get your job done.
A clogged main sewer line can lead to gas or wastewater leaks. Find out what main sewer line clog repair costs by type of service, clog severity, and more.

The average cost to connect to a public sewer line can vary depending on the linear foot, piping material, local regulations, and more.

Sewer cleanout costs depend on the type of cleanout and how long the line will be. Click here to start planning your budget for this project.

If you’re considering getting your sewer line replaced or repaired, there are a few things that you should keep in mind. We’ll cover tips and strategies to prepare for a new sewer line, along with mistakes you should avoid.
A clogged main sewer line can lead to sewage leaks in your yard or home. Look for these eight signs of a clogged septic line to fix this problem ASAP.

Gurgling, slow drains could mean a main sewer line clog, which can be messy and smelly. Learn how to clear a main sewer line clog yourself with this guide.