


If your bathroom vanity top is damaged or cracked, removing and installing a new one can be an easy project to tackle. Learn the cost of replacing your vanity top.
Make it stick with the right adhesive

Choosing an adhesive for an undermount sink depends on your sink material, with silicone adhesive working for most bathroom sinks while heavy stone sinks need epoxy.
Waterproof silicone caulk is the most common choice because it's flexible, mold-resistant, and bonds well to ceramic, porcelain, acrylic, and metal surfaces in your bathroom.
Epoxy resin or two-part epoxy adhesives provide the strongest hold for your heavy granite or marble sinks, preventing sagging and ensuring long-term stability in your vanity.
Hiring a local sink installation professional takes the guesswork out of adhesive selection and ensures your new sink stays securely attached to your vanity for years.
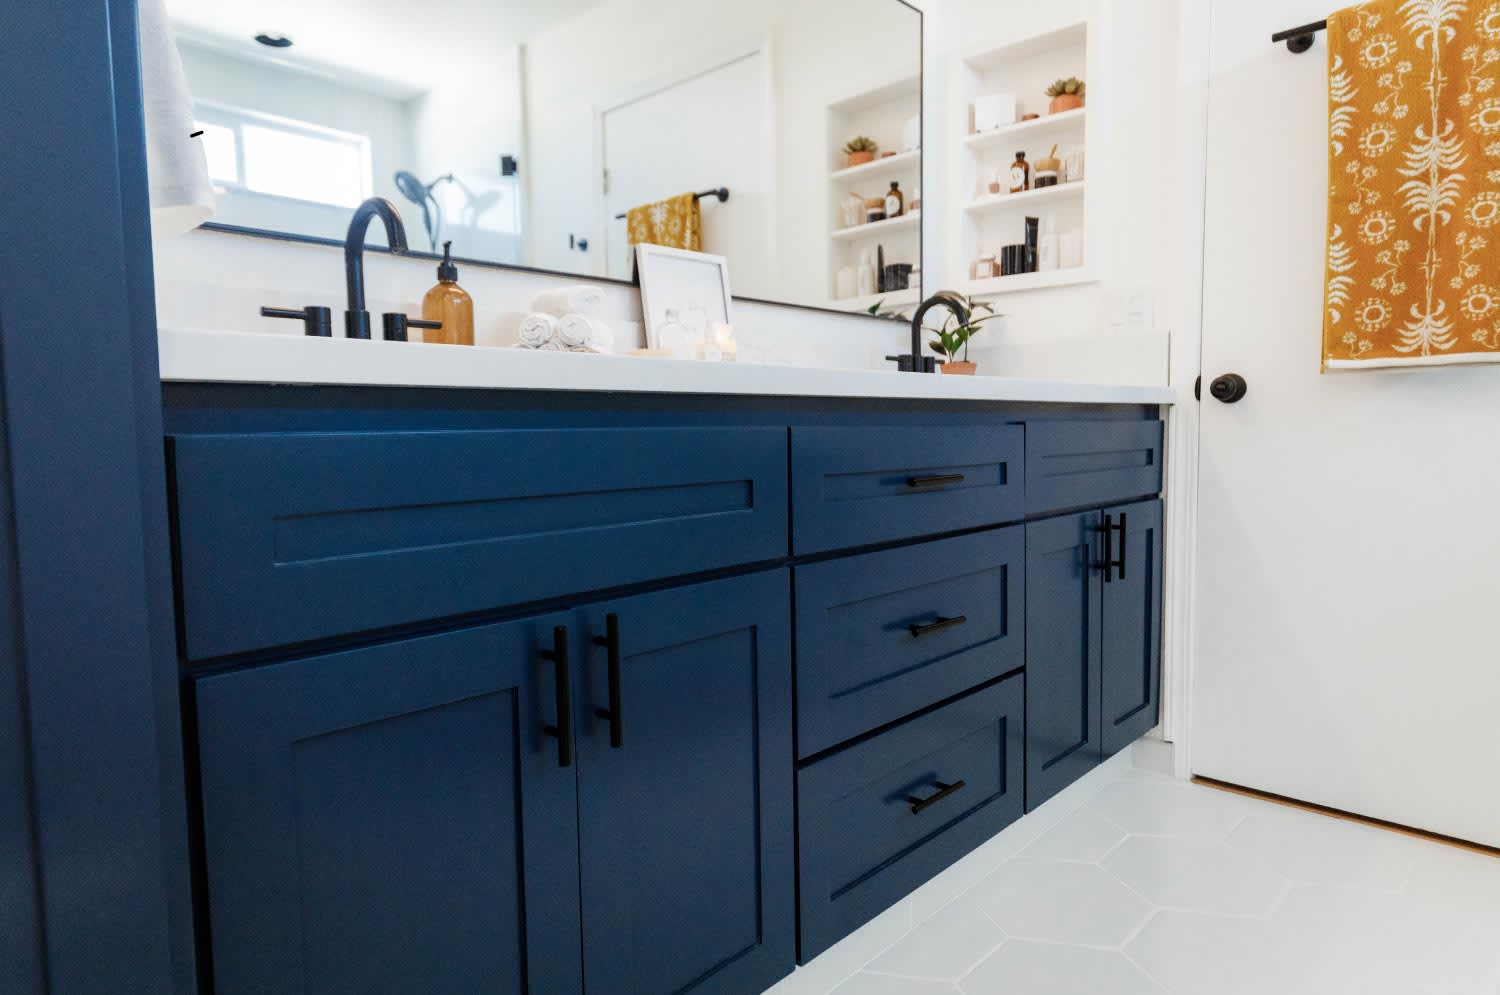
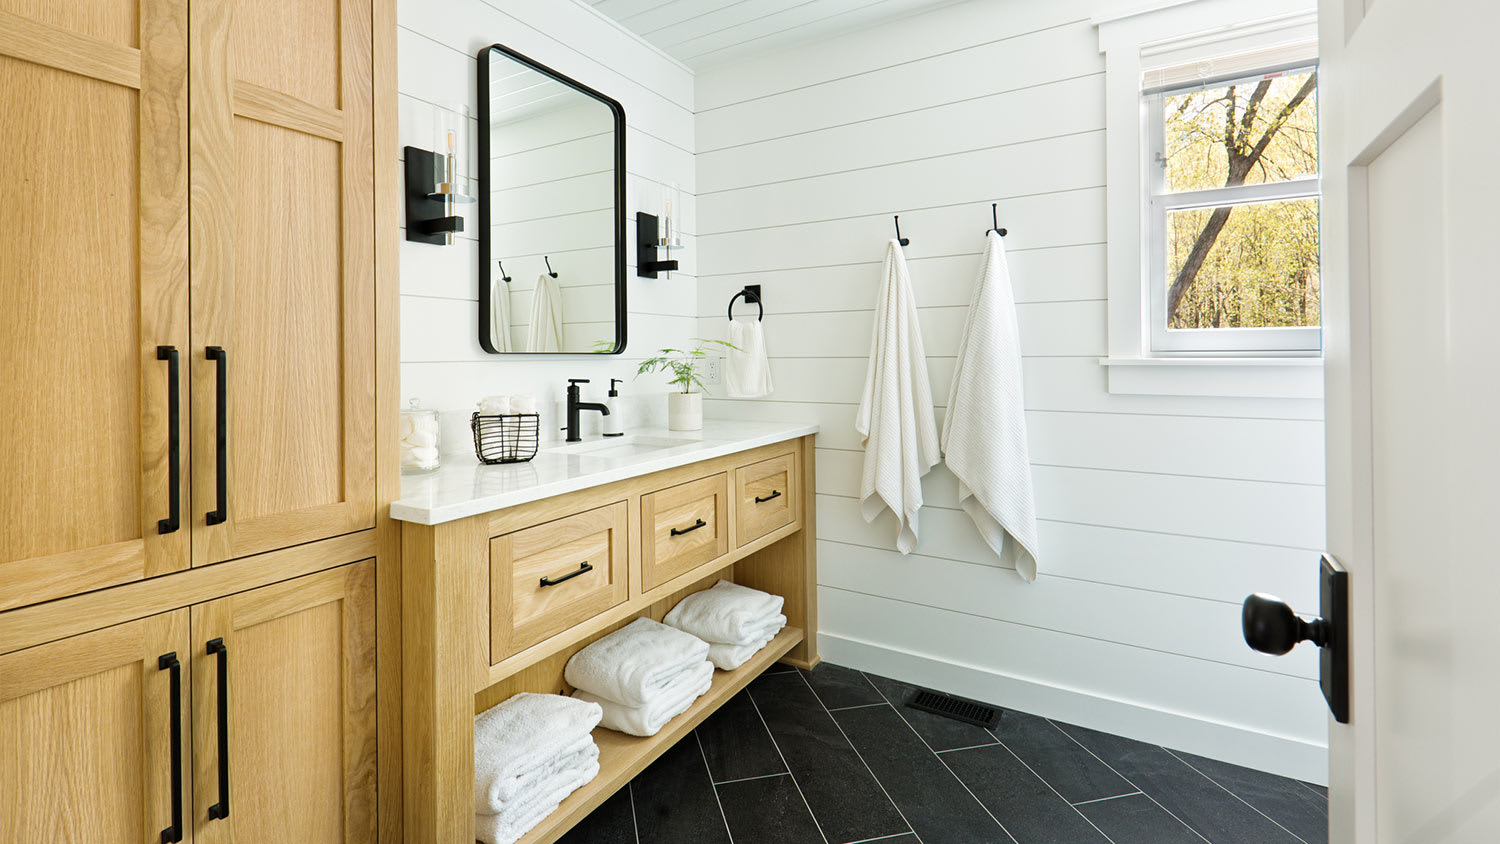
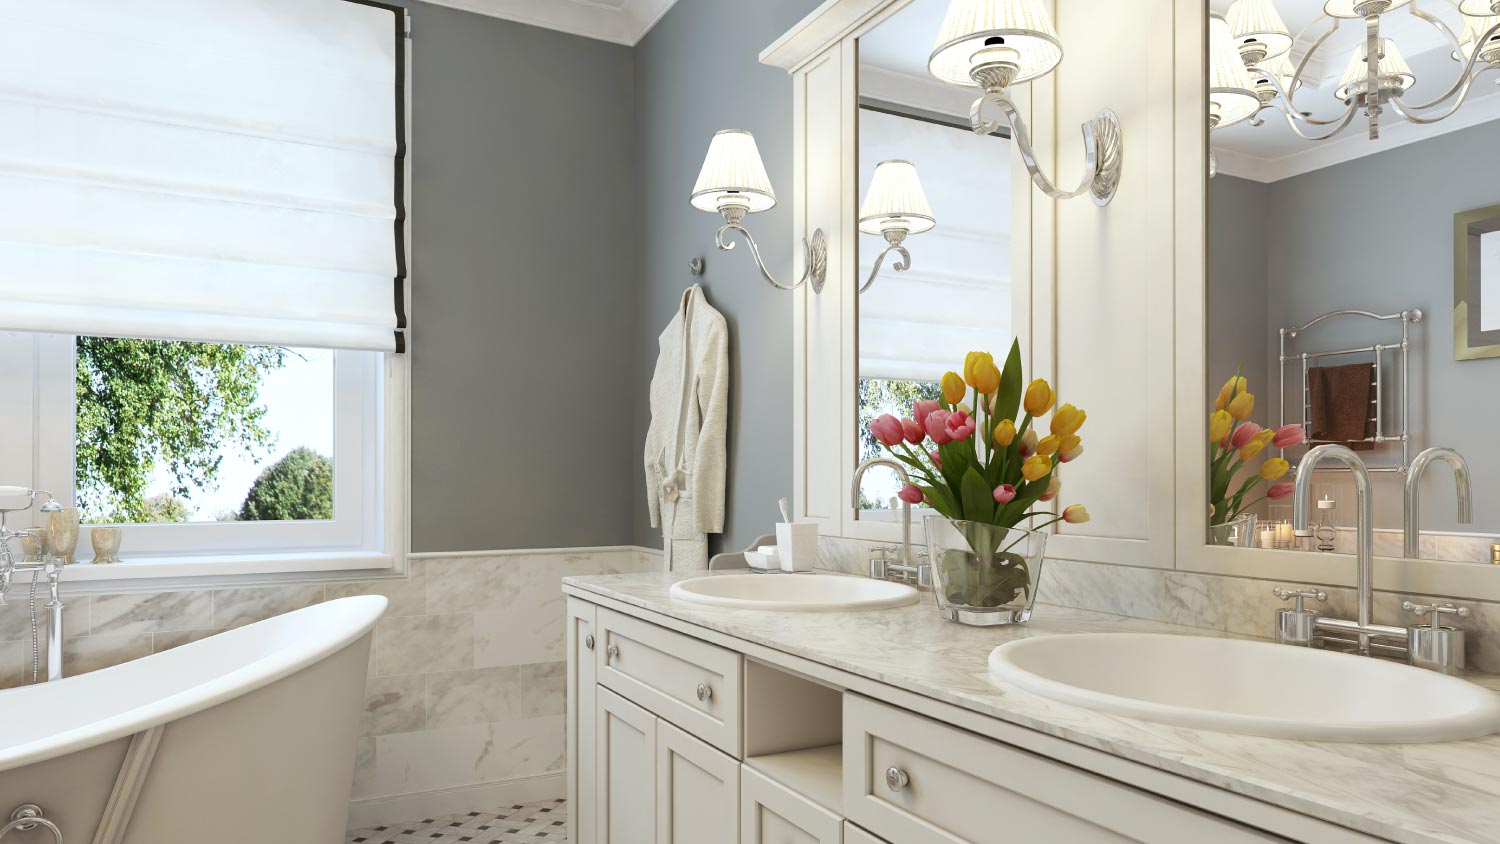
If your old, drab sink is bringing down the look of your bathroom, it’s time to upgrade. When switching out your undermount bathroom sink, you’ll use an adhesive to attach the new sink to your vanity. Choosing the right adhesive is key to a proper, long-lasting installation. Here are all the adhesive options and factors to consider when choosing one for your sink.

Before choosing one for your sink installation, find out what makes each adhesive unique.
Silicone caulk is the most commonly used adhesive to attach sinks to vanities because it’s waterproof, flexible, and strong. Its waterproof qualities also make it mold- and mildew-resistant, which is essential in high-moisture environments like a bathroom. Permanent flexibility also means that your caulk can withstand temperature changes, so it’s less likely to crack.
You can caulk various surfaces with silicone, including natural stone, porcelain, ceramic, acrylic, and metals. Look for a silicone caulk for bathrooms and kitchens for the best results. It dries in 30 minutes and takes 24 hours to cure.
Compared to other adhesive options for sink installation, silicone is easier to remove if you want to switch out the sink later. However, this adhesive isn’t always visually pleasing, and you can’t paint over it, so look for a close color match when shopping for a tube.
Epoxy resin adhesives are often used for epoxy resin sinks, although they also work well for natural stones like granite and marble. Similar to two-part epoxy, this option is moisture- and chemical-resistant and offers a strong adhesion. The strength of the adhesive is what makes
it effective for both porous and nonporous heavy sinks. Keep in mind that it’s not as flexible as silicone adhesives.
It takes about 45 to 60 minutes of dry time before you can handle the sink and another 24 hours for the adhesive to cure fully.
Two-part epoxy is a mixture of a resin and a hardener. The result is a heavy-duty and permanent adhesion that’s moisture- and chemical-resistant, so it’s a common supply in chemical labs or mechanical shops. Installation is straightforward but requires some finesse to create clean joints. It takes about 45 minutes of drying time before you can handle the sink, and it cures in 24 hours. Use this adhesive on wood or metal materials.
Polyurethane adhesives are permanently flexible, strong, and water-resistant. They’re also heat- and cold-resistant with low VOCs. You can use them with different materials, including ceramic, concrete, stones, and metals. They’re a go-to adhesive for a variety of construction needs. If you decide to use them for your sink, plan for a 24-hour curing time.
Construction adhesive is a broad term covering various adhesive types, although they’re mostly polymer- or polyurethane-based. The polymer-based construction adhesive is waterproof, dries quickly, and is easy to use. Curing takes 24 hours, and you can use it on concrete, stone, wood, and stainless steel, but you can’t use it on other metals.
Here are factors to keep in mind when looking for the right adhesive for your sink installation. If you’re unsure which one to use, consider hiring a sink installer near you. A pro can give you advice and handle the installation so you can have a picture-perfect vanity.
Ensure the bathroom sink adhesive you choose works for your sink and vanity material. For example, if you have a stainless steel sink, you can use epoxy or polyurethane adhesives but not polymer-based construction adhesives. Using an adhesive type that isn’t compatible with your vanity or sink means the installation will fail sooner rather than later. For the best results, brush up on how to install a bathroom sink before tackling this DIY job.
While silicone caulk works for many bathroom sink types, opt for something more heavy-duty if your sink is heavier. For example, natural stone sinks like granite or marble can weigh 40 pounds or more. Depending on the manufacturer’s recommendations, heavier sinks can require epoxy resin adhesives.
You'll need to build a support frame for extra reinforcement for even heavier natural stone sinks, like large marble ones weighing 200 pounds or more.
Additionally, if you plan on installing a hefty sink, it’s vital to ensure your countertop can handle the weight. If in doubt, it’s a great idea to call in a pro to handle the job for you from start to finish, including the vanity installation. This isn’t the time to try to learn how to mount a vanity top yourself since a mistake during these steps, like choosing the wrong materials, can cause serious damage or injury.
Some sinks see more wear and tear and water than others, depending on the level of use and the location in the home. If you expect to use the sink in a high-traffic room or a high-moisture one like a bathroom, it’s vital that you use a high-quality adhesive.
Keep drying and curing times in mind when working on a tight deadline to get your kitchen or bathroom remodel done. Every adhesive requires at least 24 hours to cure, so work that into your schedule to avoid unexpected delays.
Jason has helped me with multiple household projects, with the most recent being new door installation. He has always showed up on time and organized and has done an incredible job! Jason is very professional and he's now my go-to for anything around my house that needs to be fixed or...
Cole has been handling plumbing and general contracting for our four properties over the past three years, and he’s always done a great job. Most recently, he installed a sink and countertop in our retail store where none existed before, and it turned out exactly how we needed. He’s...
 ANB Renovations LLC
1st Choice Renew is simply the best! We hired them for a complete home renovation, and they transformed our space into something truly amazing. The team attention to detail and commitment to quality were evident throughout the project. They were easy to work with, very responsive, and always...
This company went above and beyond with their work, chimney sweeps are usually pretty messy, but the clean up was spot on.!! Josh explained every thing that he was doing, and the things that he was checking to make sure the chimney was safe for me and my family. He was very professional,...
 Supreme brick & chimney
Custom Paint Jobs LLC turned our outdated bathroom into a modern masterpiece.
Excellent customer service and knowledge. I was recommend to him from my neighbour. My front door and window came in great and were installed beautifully perfectly, I m very satisfied with their excellent work, so decided to order one more big bow window for my living room. I cant wait for...
If I could give 10 stars for Kitchen Tune Up, I would. I cannot say enough good things about my experience with Kitchen Tune Up and the entire team involved in the process of my kitchen project. They went above and beyond as far as service and quality with my cabinets, paint, countertops, and...
It was wonderful working with Yordy and his team. They were very professional and are experts in what they do. They have completed the work on time, with better quality and with in fairly reasonable price. We just started with backsplash work , but liking his work, we went on to provide...
We were having 2”x 2” tile installed . There was a small installation error and the new additional replacement tile was from a different lot and the colors didn’t match. Joe assured us that he would rectify everything , which he did without hesitation. We decided to go with the 18” x 36” tile...
 CarifaTile
They work that 360 did on my kitchen cabinets is nothing short of amazing. I still cannot believe the difference from before and after. Jon and Jeff were both so incredibly professional throughout the whole process and their communications with me were constant and consistent. These guys...
 360 Painting Columbus
From average costs to expert advice, get all the answers you need to get your job done.
If your bathroom vanity top is damaged or cracked, removing and installing a new one can be an easy project to tackle. Learn the cost of replacing your vanity top.
If your bathroom needs sprucing up, a new vanity will make a big difference. Vanity installation costs depend on the size and type of the countertops and fixtures you choose.

Sink installation costs depend on the type of sink, the material, and the labor. This guide can help you budget for your project—from pedestal to farmhouse.

Explore the pros and cons of pedestal sinks vs. vanities. Find the perfect balance between space-saving elegance and abundant storage options.
A handyperson is an ideal pro to remove and install your new bathroom vanity and sink. We have rounded up the best people who can get the job done.
Ready to upgrade your bathroom? Get clued in on how to install a bathroom vanity so you can confidently take on this DIY job.