
Whether or not the cost of installing a pot filler is worth it depends on your kitchen needs. Learn why the faucet itself is often the least expensive factor.
Cooking is about to get a whole lot easier

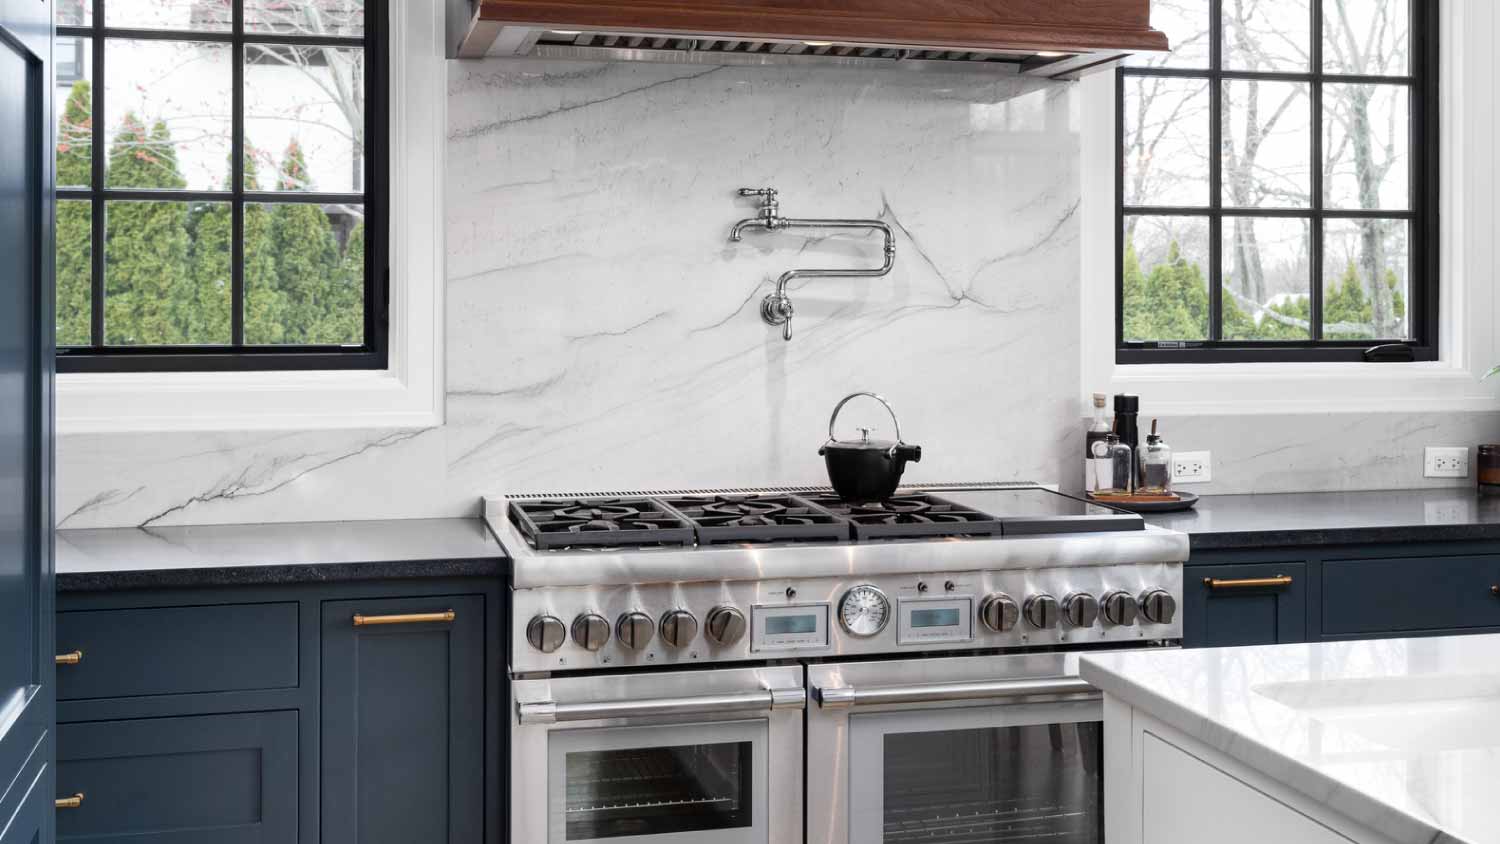
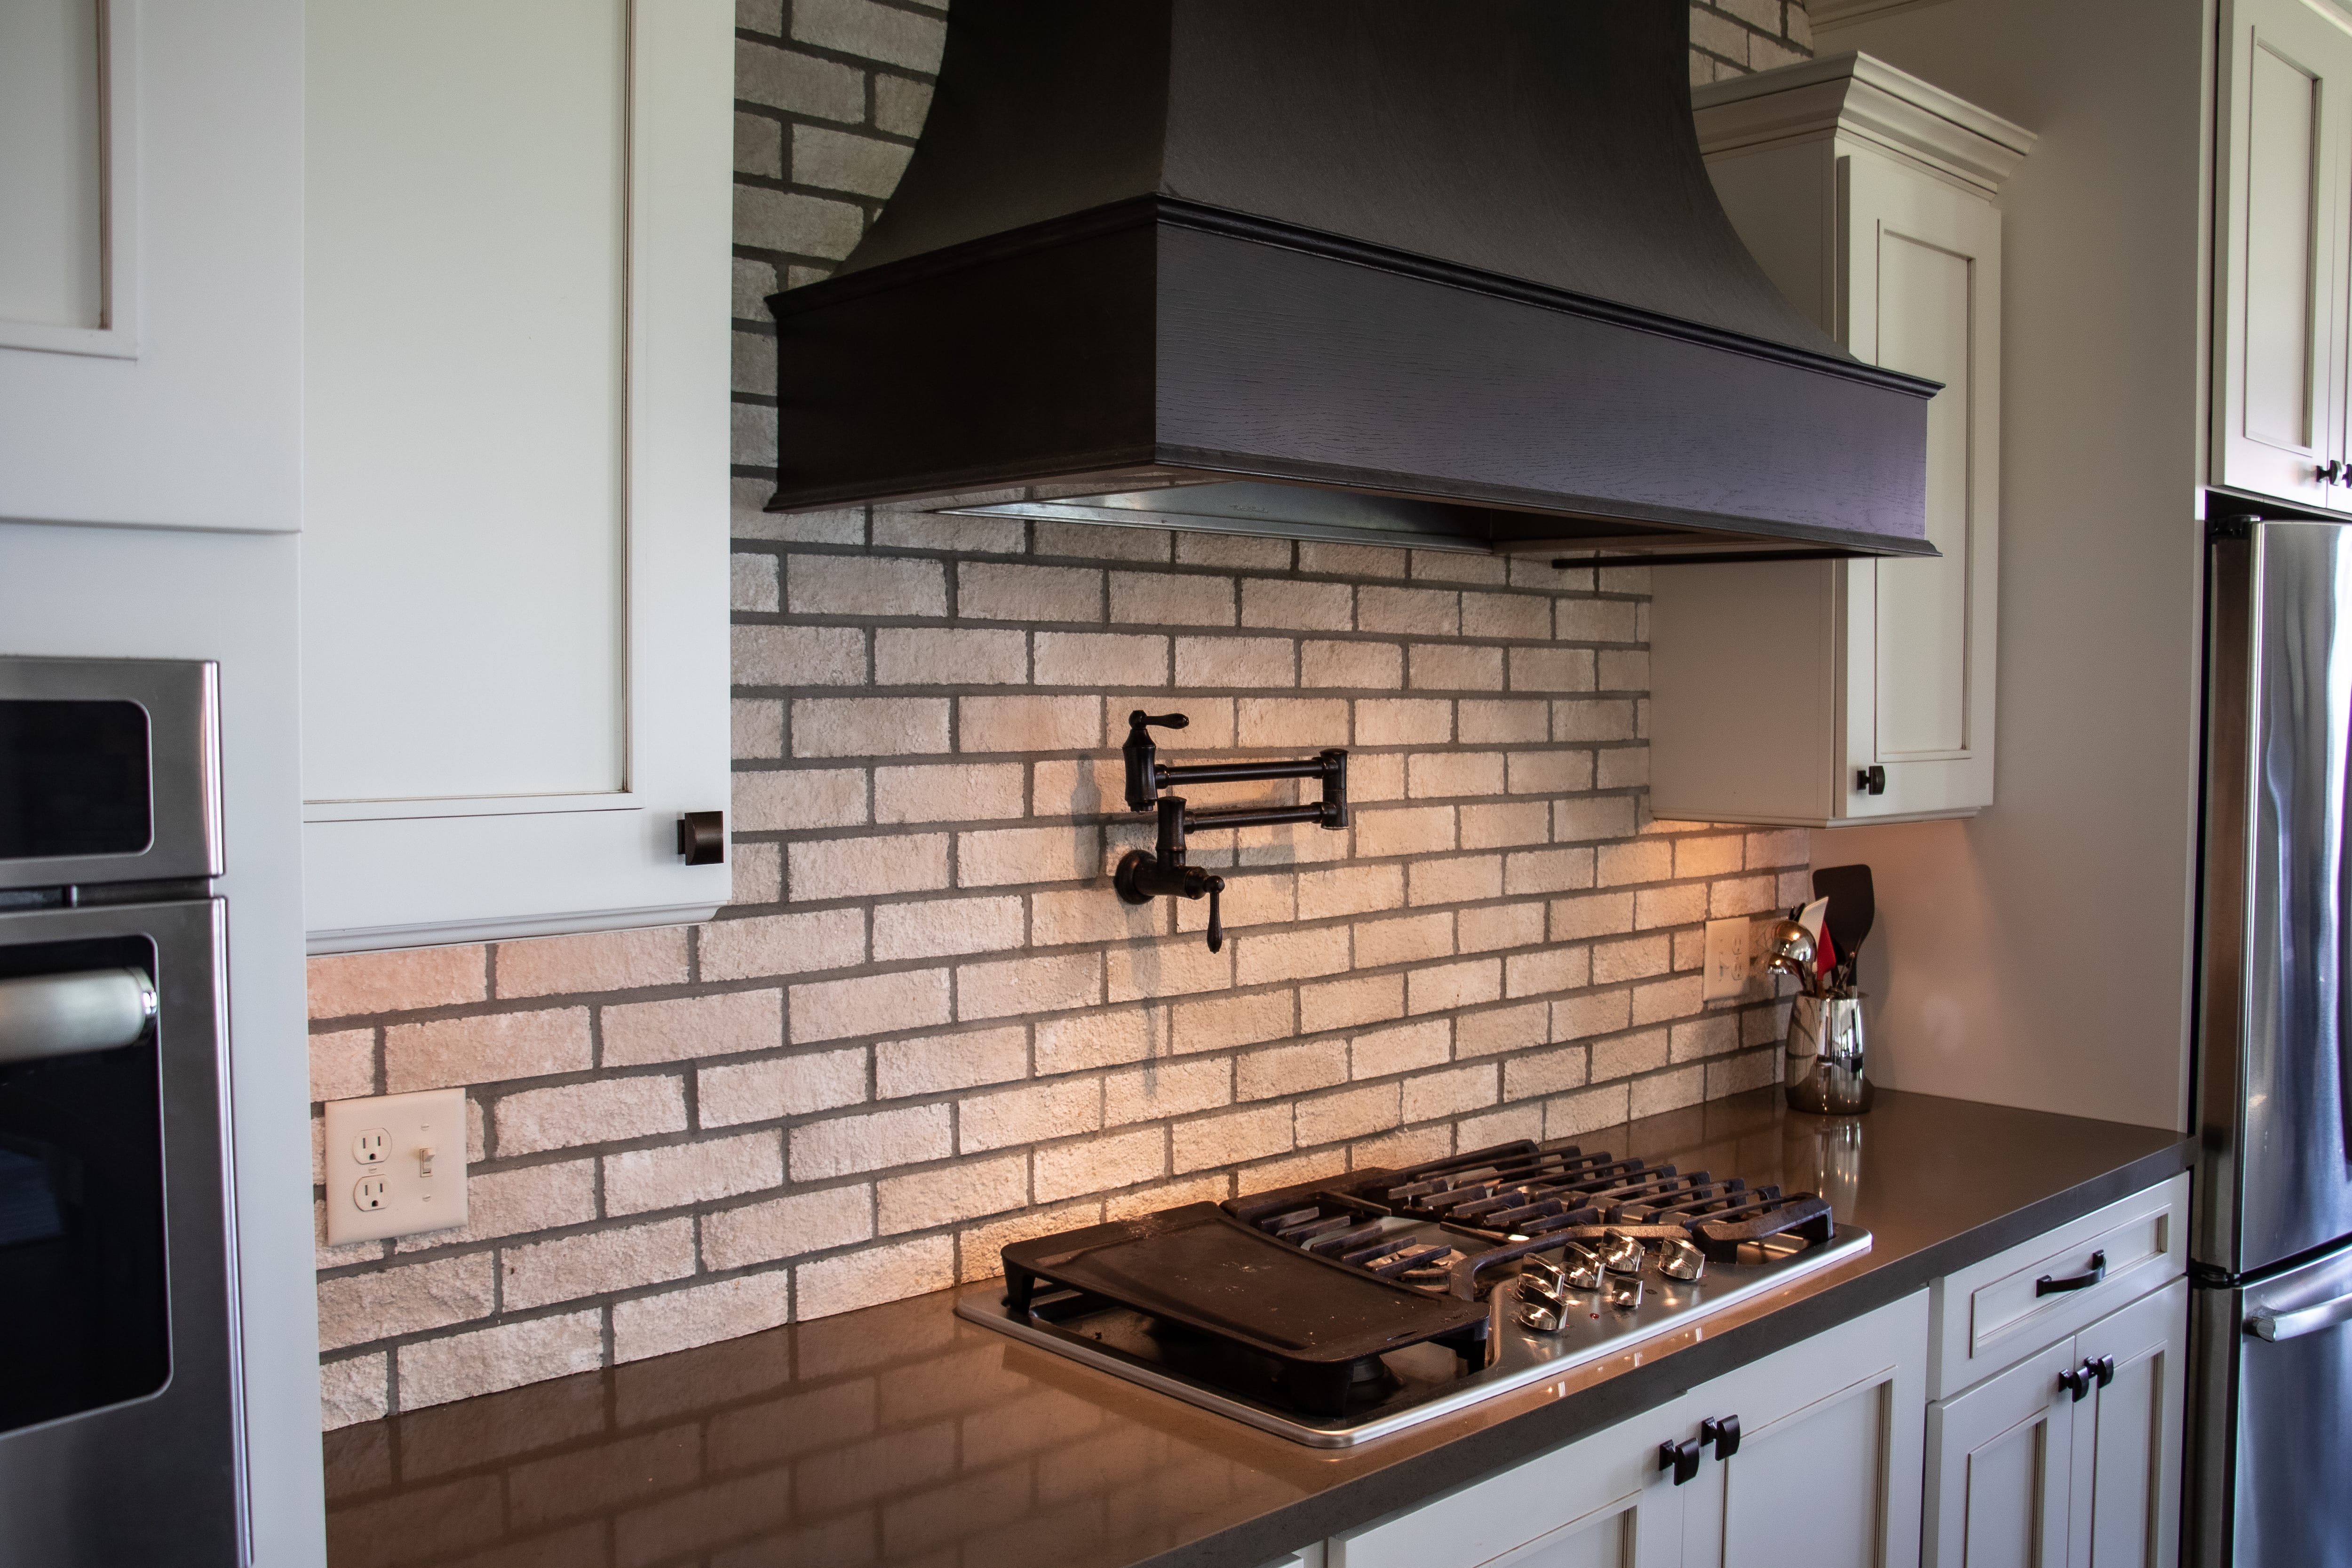
Take a look at Pinterest these days and it won’t take you long to find a picture perfect kitchen with a pot filler over the stove. This trendy addition adds a lot of functionality and style to a kitchen. The good news is you can install one on your own if you don’t want to hire a plumber near you to get the job done. Keep reading for a step-by-step guide on how to install a pot filler.
Before diving into installing a pot filler, measure the distance between the stove and the water source to ensure the right fit. When purchasing the pot filler, consider buying a kit rather than individual supplies; it often includes essential components and eliminates the guesswork in assembly. Verify the kit includes all necessary parts, such as the faucet, wall-mounting hardware, and pipes, ensuring compatibility with your kitchen setup. If opting for separate supplies, double check that there is compatibility between the faucet and the pipe size to avoid additional trips to the hardware store. You also need to understand the layout of your walls to avoid hitting electrical wires or plumbing lines when drilling.
It’s always a good idea to pause before kicking off this project to check local plumbing codes and regulations before beginning the installation.
Locate a suitable spot above your stove for the pot filler. You can use a stud finder to locate the studs in the wall to ensure a secure installation. Then you will hold the pot filler against the wall at the desired height and mark the locations for the mounting holes using a pencil. Double-check the alignment and ensure it's centered above the stove.
Drill pilot holes at the marked locations for the mounting screws. It’s important to use the appropriate wall anchors if needed for extra support.
Next, you will attach the mounting bracket to the wall using the screws or bolts provided in the kit. Make sure it's firmly secured to the wall and aligned correctly.
To connect the water supply and get your pot filler working, you will have to start by turning off the main water supply. If needed, cut the water line and solder or connect the necessary fittings to extend the pipe to the pot filler location. Use Teflon tape on threaded connections to prevent leaks.

Connect the pot filler to the mounting bracket and ensure a snug fit and tighten the screws or bolts securely.
While it may seem like it’s time to wrap up this project, be sure to test for leaks. Turn on the main water supply and test the pot filler for leaks. Then, check all connections thoroughly and address any leaks by tightening connections or reapplying Teflon tape if necessary.
To make sure you are really ready to go, adjust the pot filler arm to ensure it extends over the stove adequately. Tighten any loose joints or connections to secure the pot filler in place. One last time, run water through the pot filler to ensure proper functionality and check for any final leaks. Once everything is secure and leak-free, your pot filler installation is complete and you can start cooking in style.
While you can tackle this home improvement on your own, DIY installation of a pot filler demands moderate plumbing and carpentry skills. Not to mention, you need quite a few tools like wrenches, drills, and pipe cutters. The total cost for tools and supplies can range from $500 to $1000, depending on the quality of materials used. Cost-wise, DIY typically saves installation fees, but complexities can lead to mistakes, requiring expert fixes, and possibly increasing the total expense.
How much does it cost to install a pot filler with professional help? Hiring a plumber for precise installations ensures code compliance and avoids potential leaks, though costs vary by location, averaging $200 to $600 for labor. Consider DIY if confident in your skills. Otherwise, hiring a licensed plumber guarantees a flawlessly installed pot filler, ensuring long-term functionality and peace of mind.
Positive experience. As previously stated, the replacement/repair could not be completed (no fault of the plumbing tech) b/c misinformation was rec?d by property management maintenance. Thanks to the plumbing tech for your efforts. Appreciate you!
 The Waterworks
If you want to pay the most exorbitant prices possible for your job, this is the company for you. “By the job” pricing is a rip-off, at least how these people use it. Every job is plugged into a category and prices are set by category. You might have a job that takes half an hour or one that...
 Benjamin Franklin Plumbing
Cole has been handling plumbing and general contracting for our four properties over the past three years, and he’s always done a great job. Most recently, he installed a sink and countertop in our retail store where none existed before, and it turned out exactly how we needed. He’s...
 ANB Renovations LLC
Matt is a consummate professional. The work turned out to be far more difficult than expected and rather than turn the job down, Matt rose to the occasion and completed a near impossible task. I can not recommend Greene's Plumbing Service more highly. On a scale of 1-5 I would give Matt a...
Involved an extensive bathroom remodel, including removing tub & installing walk in shower, new drywall, custome tile work to ceiling, plumbing, etc. Overall, job was done on time and on budget. Nick & his team were very professional and had high attention to detail. Quality was great. Highly...
 Stamos Flooring and Remodeling LLC
Awesome company. Had a jacuzzi tub taken out and replaced with huge walk in shower with partial glass enclosure. Onyx to the ceiling with a decorative border, moved plumbing and installed hand held shower, new ceiling, flooring, and paint. Replaced window with glass block. Everything was done...
 Columbus Bath Design
The initial quoted price from a walk-through seemed high, but we discussed that the quote represented worst case scenario (re-wiring to two floors) and we were excited about the opportunity to have the work done in a timely manner with closing for fire safety reasons, etc. When the job was...
Initially, I called the Service People to have a leaking garbage disposal replaced. I had purchased a special deal through Angie's List: $79 for $200-worth of plumbing services. <br /> When I went to schedule the work, the earliest date I could get through Angie's List was after the upcoming...
This company did a very good job on the brick wall and it looks just amazing. The staff was always professional and was practically OCD on how the bricks were stacked and how they were laid. Although it took longer than expected, I am willing to sacrifice time over perfection anyday. The...
 My Handy Mate LLC Improvement & Remodeling
<p>I am so glad we called Rotor-Rooter. I was hesitant to call them because we usually prefer to give business to local providers. But when we had sewage back up in our basement on a Saturday evening, I had a hard time getting a hold of someone, not to mention the high weekend/evening rate...
From average costs to expert advice, get all the answers you need to get your job done.
Whether or not the cost of installing a pot filler is worth it depends on your kitchen needs. Learn why the faucet itself is often the least expensive factor.

Discover the cost to install a gas cooktop. Learn about average prices, key cost factors, and tips to save on your gas cooktop installation project.
Is installing a pot filler over the stove worth the cost? We have everything you need to know, including pros, cons, costs, and answers to your common questions.

Whether you go with a classic faucet or a modern touchless one, you have plenty of options. Here are fourteen popular types of kitchen faucets to fit any home.
Read these 9 tips for inspiration on how to reduce your toilet’s water usage

Learn how to hire a qualified outdoor mister installer. Find the right pro, ask the right questions, and get expert installation for your cooling system.