
Thinking of getting rid of that old bathtub and replacing it with a walk-in shower? This walk-in shower cost guide will help you plan your budget.
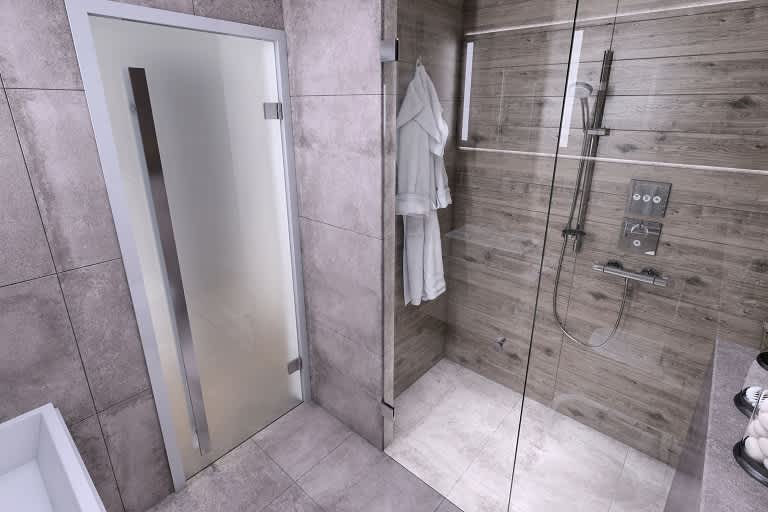
Say goodbye to your dark, cramped shower stall

Installing a bathtub liner gives your existing tub a fresh look without the full replacement cost, as long as your tub has no cracks or drainage issues.
Expect to pay $500 to $2,800 for DIY materials or around $6,400 for professional installation, while tub replacement costs $2,000 to $9,400.
You'll need to clean your tub thoroughly, remove all hardware, apply primer and adhesive, then carefully fit the liner to avoid trapping moisture underneath.
Hiring a local bathtub repair professional provides reliable help with proper sealing and adhesive application, preventing water damage and mold from improper installation.
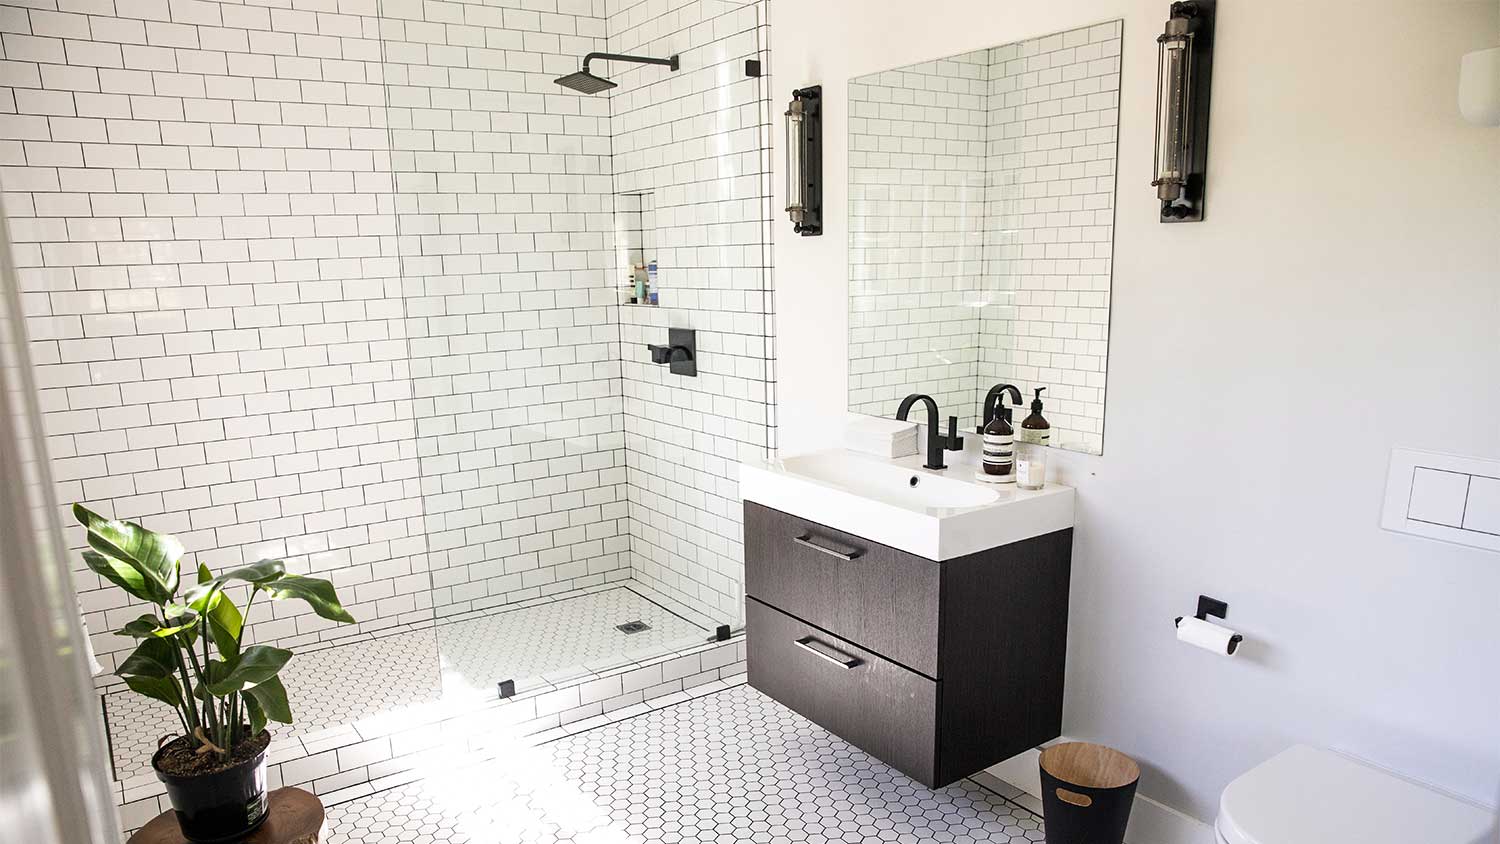
Walk-in showers are widespread in modern home designs because of their practicality and beauty. Unlike traditional enclosed shower stalls, walk-in showers create an open, roomy bathing experience. If you're considering upgrading your bathroom, these steps will help you build a walk-in shower.
Keep in mind that unless you have extensive renovation experience, we recommend hiring a local shower installer for this job. They’ll follow the steps below and pay attention to details to build you a functional and beautiful walk-in shower that you'll enjoy for years.

Work with your contractor to plan and design your walk-in shower. Consider the available space, plumbing requirements, and your desired aesthetic. Determine the ideal location, ensuring it fits seamlessly into the bathroom layout.
Prepare the space by removing existing fixtures and ensuring your bathroom is clean and debris-free. Select your materials and tools, including tiles, waterproofing materials, shower fixtures, shower pan, drain assembly, fixtures, and glass partition.
The shower pan forms the foundation for the entire structure. Here's what to do:
Preparation: Ensure the subfloor is clean, level, and structurally sound, then measure and mark the center of the shower area.
Positioning: Place the shower pan in the desired location, using a level to ensure it aligns with the drain opening.
Connect drain assembly: Following the manufacturer's instructions, apply plumber's putty or silicone sealant to create a watertight seal around the drain flange and existing plumbing.
Secure the pan: Secure the shower pan once the drain is connected by screwing it into the subfloor or using adhesive to bond it securely.
Test fit: Before proceeding, perform a test fit to ensure the shower pan is securely installed and level to prevent any issues with drainage or leaks later on.
Waterproofing is essential in building a walk-in shower to protect the underlying structure from water damage. You will need a liquid waterproof membrane and reinforcing tape, which is a sticky waterproof adhesive.
Seal joints and corners: Use reinforcing tape to strengthen joints, seams, and corners.
Apply the waterproofing membrane: Follow the manufacturer's instructions, using a paintbrush or roller to ensure complete coverage over the entire shower area, including walls, floors, and corners.
Allow drying time: Allow the waterproofing membrane to dry completely between coats before proceeding.
Testing the shower pan before installing tiles is essential to ensure the waterproofing work you did is effective.
Cover drain: Use a drain plug or waterproof tape to seal the shower drain and prevent water from escaping during the test.
Fill the shower pan: Fill the shower pan gradually with water to a level just below the threshold of the shower door or entryway.
Monitor: Observe the area for any signs of leakage, paying close attention to the corners, seams, and joints.
Inspect walls and floors: After allowing the water to sit for some time, inspect the walls and floors surrounding the shower area for any signs of moisture or water damage.
Repeat if necessary: If you detect any leaks or areas of concern during the initial test, address the issues by adding more waterproofing materials and repeat the leak test until the waterproofing is effective.
Dry the area: Once the leak test is complete and no issues are detected, drain the water from the shower pan and thoroughly dry the area before proceeding with tile installation.
The fun part is seeing your dream shower come to life with a beautiful, durable tiled surface. Consider hiring a local tile installer for a professional finish.
Plan the layout and cut tiles to size.
Mix and apply thin-set mortar: Follow the manufacturer's instructions to ensure thorough mixing and a smooth consistency. Use a notched trowel to apply an even layer of thin-set mortar to the shower area in small sections.
Install tiles and edging: Place tiles onto the thin-set mortar, pressing them firmly into place using tile spacers to maintain even spacing. Install tile edging along the edges of the shower area to create a clean and finished look.
Grouting: Once the mortar sets, remove the tile spacers, mix the grout according to the manufacturer's instructions, and then, using a grout float, apply it to the joints between tiles, pressing it into the gaps. Use a damp sponge to remove excess grout from the tile surface.
Seal grout: Allow the grout to dry completely before applying a grout sealer to protect against moisture and staining.
After tiling, you are ready to install the fixtures.
Prepare mounting areas: Use a carbide-tipped masonry drill bit to create the pilot holes for the mounting hardware. Start with the smaller bit size to prevent cracking or chipping the tiles, then gradually increase to the appropriate size for the mounting screws or anchors.
Attach fixtures: Wrap the plumber's tape around the threaded connections of the shower fixtures to create a watertight seal and prevent leaks. Once the mounting hardware is in place, attach the shower fixtures to the brackets or plates, following the manufacturer's instructions to connect the fixtures securely.
Apply silicone sealant: Using a caulking gun, apply a small bead of silicone sealant around the base of each fixture to create a watertight seal and prevent moisture from seeping behind the tiles.
Final inspection: Before testing the shower, allow the silicone sealant to cure completely according to the manufacturer's instructions. Turn on the water to test each shower fixture's functionality.
Installing a glass enclosure for a walk-in shower is optional, depending on whether your space is an open wet room.
Select the glass enclosure: Choose the type of glass enclosure that suits your preferences and fits the shower space—options include framed, semi-frameless, or frameless designs, each offering different aesthetic and functional benefits.
Install hardware: Depending on the chosen design, install U-channels or hinges along the walls and floor of the shower opening using a level.
Position the glass panels: Carefully position them into the installed U-channels or hinges, ensuring a snug fit and checking that the panels are level and aligned before securing them.
Secure the glass panels: Use silicone sealant and glass-to-glass clamps to secure the glass panels in place, remembering to apply the sealant along the edges where the glass meets the U-channels or hinges to create a watertight seal. The silicone sealant must dry and cure completely (for at least 24 hours) before you use the shower.
Seal joints and edges: Using a caulking gun, apply silicone sealant along the joints between the glass panels and where they meet the walls, floor, and door frame.
Final adjustments and cleaning: Check for leaks or gaps and reapply the sealant if necessary.

Walk-in showers are a great way to increase the aesthetics and accessibility of your bathroom, but if you’re not careful, you can make a few mistakes that can lead to bigger problems later on. Here’s what to avoid when building a walk-in shower:
Not waterproofing properly: If the walk-in shower isn’t properly waterproofed, it will spell trouble down the road when water damage occurs in potentially difficult-to-reach places.
Not installing proper ventilation: Proper ventilation draws heat and moisture out of the bathroom, but not installing proper ventilation will allow moisture to stay in the room and eventually create issues with mold and mildew.
Not sloping the floor: A sloped floor or shower pan allows water to flow into the drain. If the floor isn’t sloped correctly, water will run where you don’t want it.
Attempting to DIY it without the right experience: If you’re a skilled DIYer with plumbing experience, then this may be a good job for you. But if you’re a beginner, this is a job for the professionals. Anytime you’re dealing with plumbing and areas that have to be waterproofed, you need to make sure you do everything properly to avoid leaks later on.
Simple plumbing DIYs like unclogging a drain are perfect for homeowners, but taking on a major plumbing project has risks. An incorrect installation could lead to leaks and extensive damage to your home. With your safety and wallet in mind, consider hiring a licensed plumber to take on complex jobs.
The cost of a walk-in shower installation ranges between $6,000 and $12,000 if you hire a pro. This large cost range results from the number of options you can choose for a walk-in shower. For example, a prefabricated fiberglass insert starts around $400, and you won’t have labor costs if you install it yourself. A fully customized walk-in shower costs around $4,200 on the low end but goes up to $12,000 or more, depending on the size and materials.
If you have experience with plumbing, carpentry, and tiling, tackling the installation yourself could save money. However, installing a walk-in shower requires precise measurements, knowledge of building codes, and proficiency with specialized tools.
Hiring a shower installer or plumber in your area is the safer option. Professionals can ensure proper waterproofing, accurate tile installation, and adherence to safety standards, potentially preventing costly mistakes and future repairs.
Jason has helped me with multiple household projects, with the most recent being new door installation. He has always showed up on time and organized and has done an incredible job! Jason is very professional and he's now my go-to for anything around my house that needs to be fixed or...
Cole has been handling plumbing and general contracting for our four properties over the past three years, and he’s always done a great job. Most recently, he installed a sink and countertop in our retail store where none existed before, and it turned out exactly how we needed. He’s...
 ANB Renovations LLC
1st Choice Renew is simply the best! We hired them for a complete home renovation, and they transformed our space into something truly amazing. The team attention to detail and commitment to quality were evident throughout the project. They were easy to work with, very responsive, and always...
This company went above and beyond with their work, chimney sweeps are usually pretty messy, but the clean up was spot on.!! Josh explained every thing that he was doing, and the things that he was checking to make sure the chimney was safe for me and my family. He was very professional,...
 Supreme brick & chimney
Custom Paint Jobs LLC transformed our outdated kitchen into a modern masterpiece.
Excellent customer service and knowledge. I was recommend to him from my neighbour. My front door and window came in great and were installed beautifully perfectly, I m very satisfied with their excellent work, so decided to order one more big bow window for my living room. I cant wait for...
If I could give 10 stars for Kitchen Tune Up, I would. I cannot say enough good things about my experience with Kitchen Tune Up and the entire team involved in the process of my kitchen project. They went above and beyond as far as service and quality with my cabinets, paint, countertops, and...
It was wonderful working with Yordy and his team. They were very professional and are experts in what they do. They have completed the work on time, with better quality and with in fairly reasonable price. We just started with backsplash work , but liking his work, we went on to provide...
We were having 2”x 2” tile installed . There was a small installation error and the new additional replacement tile was from a different lot and the colors didn’t match. Joe assured us that he would rectify everything , which he did without hesitation. We decided to go with the 18” x 36” tile...
 CarifaTile
They work that 360 did on my kitchen cabinets is nothing short of amazing. I still cannot believe the difference from before and after. Jon and Jeff were both so incredibly professional throughout the whole process and their communications with me were constant and consistent. These guys...
 360 Painting Columbus
From average costs to expert advice, get all the answers you need to get your job done.
Thinking of getting rid of that old bathtub and replacing it with a walk-in shower? This walk-in shower cost guide will help you plan your budget.
Various factors affect the total tub-to-shower conversion cost, including the size of the area, type of shower, materials, and labor fees.
Curious how much a shower remodel costs? From new fixtures to full installations, we have the prices you need to know to establish a shower remodel budget.
Walk-in showers offer plenty of benefits when compared to standard bathtubs, but are they right for you? Discover the pros and cons of walk-in showers.

These walk-in shower ideas are exactly what your contractor ordered. We’ve got the inspiration for your next home improvement project.
Upgrading to a walk-in shower for a modern look? Learn the minimum dimensions for walk-in showers and how to find the right fit for your bathroom