
How much does a showerhead cost? Whether your current showerhead is broken or you want more pressure, you have many options to upgrade your showering experience. Learn the average price for various showerheads, features, and more.
Repairing a dripping shower may be easier than you think


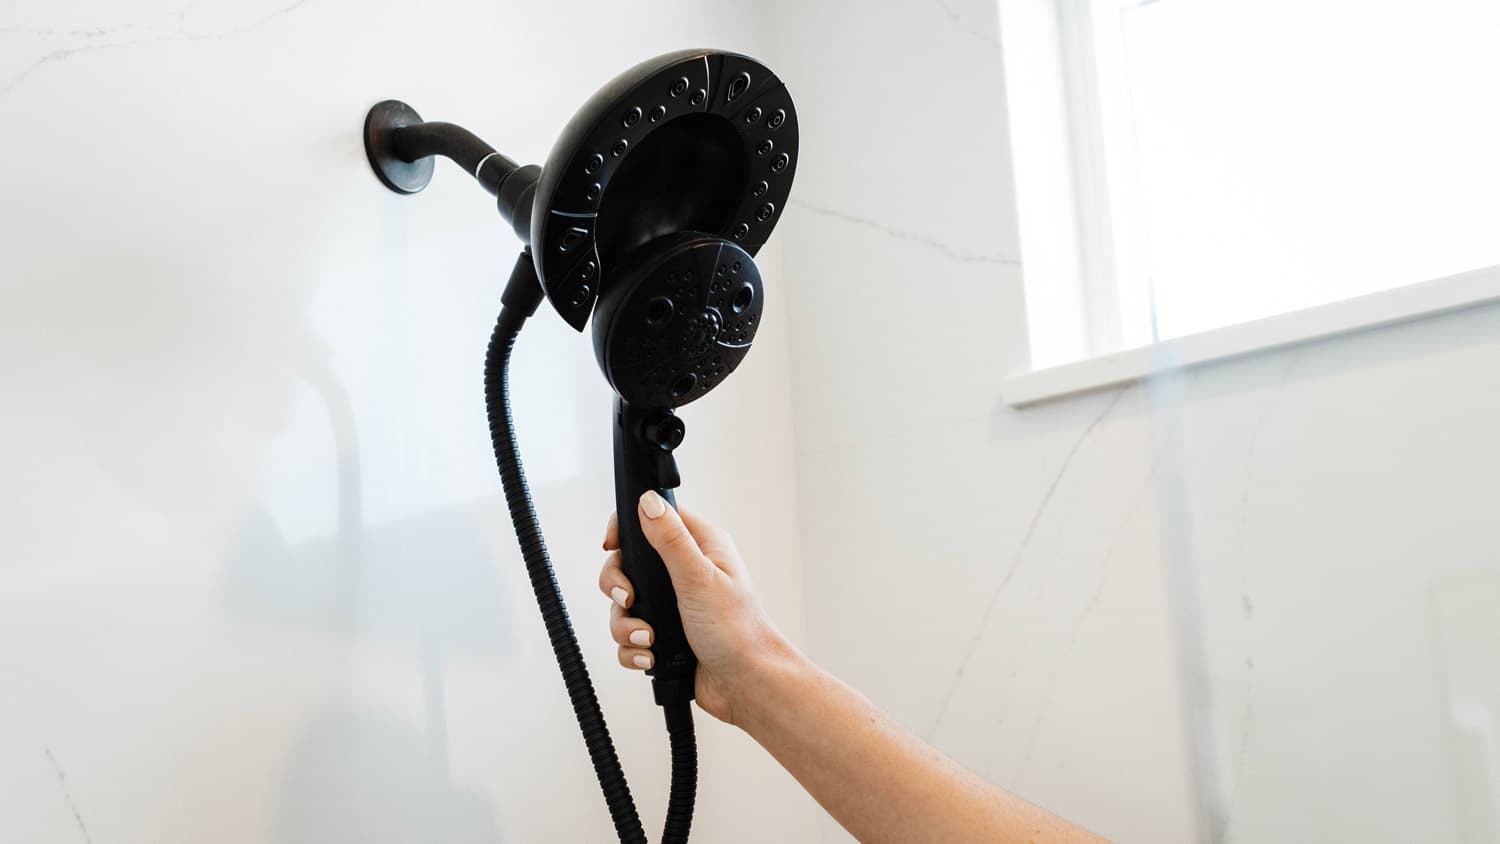
A dripping showerhead is not only an annoyance. Regardless of which type of showerhead you have, leaking showers that continue dripping well after your shower waste large amounts of water. The solution to your leaky showerhead depends on what the problem is. Here’s how to repair any trouble your showerhead throws at you—you’ll only need the tools and supplies that apply to your situation.


The first step toward repairing a malfunctioning showerhead is to identify the symptoms. Once you know what’s wrong, you can skip to the actions to fix that problem.
If your showerhead is dripping, has lower-than-normal water flow, or is spraying water in unintended directions, continue to step two to solve the problem.
Water dripping from where the showerhead meets the shower arm while the shower is on means you’ll need a new gasket. Skip to steps three and four.
If the shower is on and water drips from the showerhead swivel point, the showerhead needs replacing. Find the fix in step five.
If the showerhead is relatively new, the gasket is in good shape, and the threads have a good seal, you may need a new shower arm. Learn how to replace it in step six.
If your showerhead or tub spout drips continuously after turning off the water, see step seven to learn how to replace the components inside the shower control valve.

Mineral deposits can build up in any shower regardless of water quality or hardness level. You can unclog your showerhead yourself when needed or as part of a regular maintenance task.
Mix 3 parts white vinegar with 1 part baking soda in a plastic bag that’s large enough to fit your showerhead.
Using a rubber band, secure the bag over the showerhead to the junction with the shower arm.
Allow the submerged showerhead to soak for at least one hour. Then remove the bag.
Gently use a scouring pad to break free any deposits that didn’t dissolve, and wipe it clean with a soft cloth.
You can also remove the showerhead and soak it in the same vinegar and soda mix to achieve the same results.

A showerhead gasket is nothing more than a rubber washer with a small piece of screen. It rests between the showerhead and the shower arm to make a watertight connection and sift debris from the water. Showerhead gaskets are available at any hardware store.
It’s worth using a smooth-jaw crescent wrench, which is used on chrome, so that it doesn't chew up the finish or trim. Otherwise, a wrench with toothed jaws will destroy the trim's finishes.
Wrap a cloth around the joint where the showerhead meets the shower arm.
Using a small pipe wrench or tongue and groove pliers, twist the showerhead counterclockwise to remove it from the shower arm.
With a small screwdriver, pry the old gasket out of its seat and replace it with a new one.
Proceed to step four to reattach the showerhead.

Whenever you remove the showerhead or shower arm, seal the pipe threads with PTFE thread seal tape (PTFE stands for polytetrafluoroethylene, but you may know this product as Teflon or plumber’s tape) when you’re reinstalling them.
Clean old PTFE from the threads if applicable.
Remove any dirt or debris from the threads.
Wipe the threads dry with a cloth.
Wrap the PTFE tape clockwise or in the thread direction three times around the pipe.
Rip or cut the tape, and press it firmly around the pipe threads.
Twist the pipe threads clockwise into the fitting until it’s tight. Don’t be tempted to use pipe joint compound, a thread sealing compound, as it often winds up inside the showerhead or new screen.

You can fix most leaking or dripping problems without replacing the showerhead. However, in some cases, it’s necessary to replace a malfunctioning showerhead. You may also like to replace it for aesthetics or install a newer style to conserve water and save money.
Use a cloth and tongue and groove pliers to remove the showerhead as described in step three.
Use PTFE tape as described in step four.
Protect the new showerhead attachment fitting with a cloth.
Twist the showerhead clockwise onto the shower arm until it’s hand-tight. Then twist it with tongue and groove pliers over the cloth an additional 1/4 to 1/2 turn.

In rare cases, the shower arm threads may show signs of damage. The easiest fix is to replace it. Shower arms in almost any finish are available at hardware stores.
Remove the showerhead as described in step three.
Slide the escutcheon plate (also known as a cover plate) away from the wall on the arm.
With a small pipe wrench or tongue and groove pliers, twist the shower arm counterclockwise to remove it from the pipe fitting in the wall. Place the tool as close to the wall as possible without damaging it.
Apply PTFE tape to both ends of a new shower arm.
Install the new shower arm by twisting it clockwise into the pipe fitting in the wall. The longer side of the arm will be the side that goes into the wall.
Slide the escutcheon plate back into place and reinstall the showerhead as explained in steps four and five. The shower arm screws into a “drop ear 90” fitting. Be careful if the original installer left it loose inside the wall, as it could move, and you’ll have to get it standing back up and straight. If you detect any wobbling, proceed with caution.

If your shower or tub spout continues to drip after your shower, the problem is most likely due to a worn-out cartridge or worn valves, depending on your shower faucet.
Turn off the water to the house or the shower valve, if you have designated valves to the bath. Turning off the shower isn’t enough for this project.
Remove the handle screw with a screwdriver or Allen wrench, if you have a single-handle shower control. You may have to pry the plastic index tab from the handle to access the screw.
Repeat the above step for all three knobs for multiple-handle shower controls.
Pry the handles from the valves, and set them aside on top of a rag. If you use the sink’s edge, close the stopper so you don’t lose any screws. You might need a “handle puller” tool to remove handles with scale buildup.
Loosen and remove the trim plate or escutcheon.
Depending on what kind of valves your shower has, you’ll need to do one of the following:
Remove the retaining clip with the needle-nose pliers or a small screwdriver and slide out the valve or cartridge.
Twist the valve component counterclockwise to remove it from the valve body with a strap wrench.
Remove the valves from the stems with an adjustable wrench.
Remove the valve stem seats with a seat wrench if applicable.
Purchase a shower valve rebuild kit or replacement cartridge appropriate for your shower. However, if you haven’t identified the brand, do not attempt this step yet (unless you have a second bathroom to use). You can wind up with the water off all day while you drive from supply house to supply house.
Install the cartridge or valve components following the manufacturer’s instructions.
Reinstall the handle or handles and test for leaks.
While replacing a showerhead is a relatively easy DIY project, it’s worth knowing how to avoid some mistakes so the problem doesn't get worse. When changing your showerhead, be sure to avoid:
Overtightening: You want the showerhead to be secure, but overtightening can cause more problems, including damaging the showerhead and stripping the threads.
Not choosing a compatible showerhead: Make sure the showerhead you choose is compatible with your plumbing and desired water pressure.
Neglecting the seal: Water flows from the shower arm attached to the wall and through the showerhead, so make sure to wrap plumber’s tape around the threads to ensure a tight seal.
No matter why your showerhead is dripping, a DIY fix is mostly figuring out what the problem is and attacking it head-on. Home repair beginners will have no trouble fixing many showerhead problems, while intermediate DIYers can easily replace valve components. The fix may cost as little as $5 or up to $100, depending on what needs replacing.
Working with plumbing of any kind can be intimidating. If you’re not comfortable with taking apart an essential part of your bathroom, a local plumbing repair pro or plumbing handyperson near you can complete the job quickly for less than $300 in most cases.
Jason has helped me with multiple household projects, with the most recent being new door installation. He has always showed up on time and organized and has done an incredible job! Jason is very professional and he's now my go-to for anything around my house that needs to be fixed or...
Cole has been handling plumbing and general contracting for our four properties over the past three years, and he’s always done a great job. Most recently, he installed a sink and countertop in our retail store where none existed before, and it turned out exactly how we needed. He’s...
 ANB Renovations LLC
1st Choice Renew is simply the best! We hired them for a complete home renovation, and they transformed our space into something truly amazing. The team attention to detail and commitment to quality were evident throughout the project. They were easy to work with, very responsive, and always...
This company went above and beyond with their work, chimney sweeps are usually pretty messy, but the clean up was spot on.!! Josh explained every thing that he was doing, and the things that he was checking to make sure the chimney was safe for me and my family. He was very professional,...
 Supreme brick & chimney
Custom Paint Jobs LLC turned our outdated bathroom into a modern masterpiece.
Excellent customer service and knowledge. I was recommend to him from my neighbour. My front door and window came in great and were installed beautifully perfectly, I m very satisfied with their excellent work, so decided to order one more big bow window for my living room. I cant wait for...
If I could give 10 stars for Kitchen Tune Up, I would. I cannot say enough good things about my experience with Kitchen Tune Up and the entire team involved in the process of my kitchen project. They went above and beyond as far as service and quality with my cabinets, paint, countertops, and...
It was wonderful working with Yordy and his team. They were very professional and are experts in what they do. They have completed the work on time, with better quality and with in fairly reasonable price. We just started with backsplash work , but liking his work, we went on to provide...
We were having 2”x 2” tile installed . There was a small installation error and the new additional replacement tile was from a different lot and the colors didn’t match. Joe assured us that he would rectify everything , which he did without hesitation. We decided to go with the 18” x 36” tile...
 CarifaTile
They work that 360 did on my kitchen cabinets is nothing short of amazing. I still cannot believe the difference from before and after. Jon and Jeff were both so incredibly professional throughout the whole process and their communications with me were constant and consistent. These guys...
 360 Painting Columbus
From average costs to expert advice, get all the answers you need to get your job done.
How much does a showerhead cost? Whether your current showerhead is broken or you want more pressure, you have many options to upgrade your showering experience. Learn the average price for various showerheads, features, and more.
Shower pan replacement costs $530 to $2,700. Find out how material, shower size, labor, and more affect the final project budget.
Wondering how much shower valve replacement costs? The answer depends on type, labor, and materials—but foresight and research can save you some money.
Noticing a leak in your shower from the wall? You may have a busted or eroded cartridge. Learn how to replace a shower cartridge with these nine steps.
A new showerhead is an easy, affordable way to upgrade any bathroom. Learn how to change a showerhead, from removing the old to installing the new.
Is the water pressure in your shower lacking? Here are common solutions to increase it so you can enjoy your showers again.