
Various factors affect the total tub-to-shower conversion cost, including the size of the area, type of shower, materials, and labor fees.
Accessible bathing can still be luxurious


This project requires a lot of experience, so we don’t recommend DIYing it. Hire a pro with the special skills and tools necessary to complete the job safely.
While many of us love a good soak in the bathtub, we often don't have the time for it, making a shower the more practical choice. If your bathtub doesn't get much use, it might be a sign that it’s time to remodel your bathroom to be more functional. Here’s how to convert that tub into a walk-in shower.
First, plan your shower’s look. Most tubs are about 60 inches long and roughly 30 to 36 inches wide.
It's helpful to plan your bathroom remodel around your tub's dimensions since the drain lines and water supply are already there. If you don't stick to your bathtub's dimensions, you might need to move plumbing fixtures, which significantly increases your bathroom remodeling costs.
Ideally, your new walk-in shower should have these spacing requirements:
Floor spacing: 30-by-30 inches
Height: 80 inches
Shower and toilet spacing: At least 15 inches, or 21 inches if the shower is in front of the toilet
Don’t forget to account for extra space if your shower door swings open. The minimum dimensions for a walk-in shower are 30-by-30 inches, but consider expanding to 36-by36 inches for comfort.

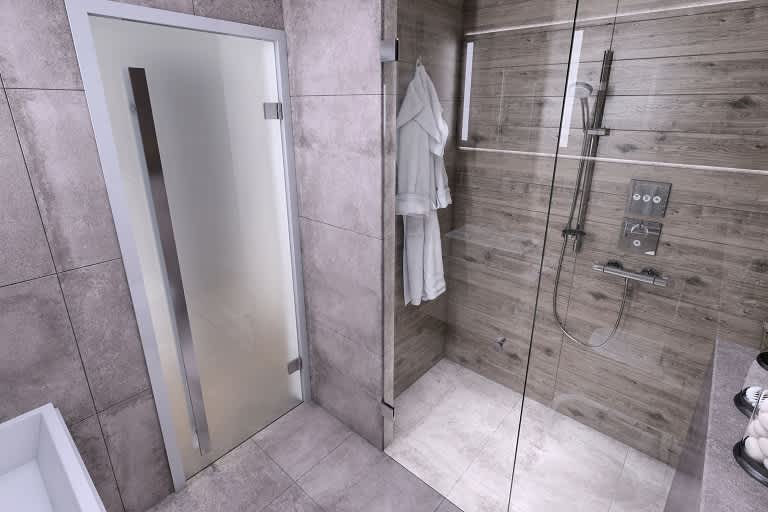
There are two main walk-in shower types: curb and curbless. Before you convert your tub, you'll want to decide which style you prefer. Curb showers feature a slightly raised barrier on the floor, aka a curb, that separates the shower from the rest of the bathroom. Curbless showers don't have that barrier. Instead, they seamlessly flow into the rest of the bathroom.
Since curbless showers don't have a barrier, you'll have to install them on a slight downward slope so water flows toward the drain rather than into the rest of your bathroom.
Before removing the tub, make sure you have the necessary permits. Most cities require plumbing permits when plumbing lines change, even for minor jobs.
Your local permit agency will have all the information you need regarding the project. Once you get a permit, you can begin working on your bathroom renovations. However, having a permit doesn’t mean you’re in the clear just yet. An inspector will need to come and review your work to make sure it follows the requirements set by the International Association of Plumbing and Mechanical Officials.

Now that permits are secured, you can begin working. First, turn off the water supply to prevent water from spraying everywhere as you remove the tub.
Look for shut-off valves for your hot and cold taps. They might be under your sink. If there aren’t any available, you’ll have to shut off the main water supply, located in a crawl space, near a water heater, or in the basement.
In the event of a plumbing emergency, it is critical to know the location of your water main shut-off valve in case you need to quickly stop water from flowing into your home. If you are unsure, a pro can help you locate the valve and show you how to operate it.
After turning off the water supply comes demolition. Before starting, wear a mask and goggles to protect your lungs and eyes from debris. Then, put plywood across the bathroom floor to protect it from damage.
The tools needed will depend on the walls around your tub. For instance, if you have an acrylic or fiberglass tub, a pry bar and oscillating multi-tools are your best bet. But if they’re ceramic tiles, you’re better off using a hammer and pry bar to remove them.
Next comes disconnecting the bathtub’s drain and faucet. You can unscrew the drain with a screwdriver, but you’ll need a wrench for the taps.
If your faucet has shut-off valves, you’ll have to remove the plumbing connected to these fixtures. It’s better to install new valves and plumbing for your shower rather than using pre-existing valves and plumbing to ensure a tight, leak-free fit. The cost of new shower plumbing is between $1,500 and $3,500.

It’s finally time to remove the tub. It’s a more straightforward job if it’s an acrylic or fiberglass tub. You’ll likely need two pairs of hands for cast-iron tub removal.
First, remove any screws or nails attaching the tub to the wall studs. Then, use a utility knife to cut any caulk connecting the tub to the floor. Next, use a pry bar to lift the tub away from the wall. Alternatively, you can use a reciprocating saw to cut the tub into pieces to make it more manageable.
Take the pieces of the tub and walls to the dumpster.
After removing the tub, clean up any debris, loose screws, and nails. You should also assess any damage to your subfloor from the tub’s removal. Water damage is likely to occur, so carpentry might be necessary to fix it.
Cut away the damaged area and lay 3/4-inch plywood subflooring, which will be your shower pan’s drain opening.
If you’re using a shower kit, follow the manufacturer’s instructions to complete your shower installation. You may need some extra tools and supplies. If you're not using a kit, the next steps involve connecting the shower drain, installing the shower pan, attaching the faucet and showerhead, and installing the shower door.
However, several of these tasks require in-depth plumbing knowledge. Without that knowledge, at most, you could attach the faucet, showerhead, and shower door. For everything else, you should hire a plumber. Bringing in a pro can help you avoid costly mistakes.
When you’re planning this bathroom remodel project, there are a few tips for converting your bathtub into a shower to keep in mind:
Make sure you have the right slope: A shower floor should have a slope of 1/4 inch for every foot to help direct water into the drain.
Think about the shower door: Your shower door will require a certain amount of clearance to meet plumbing guidelines. Ideally, you’ll be able to open every door in your bathroom (including the cabinets) without them interfering with one another. If you don’t have the space for a shower door, consider using a curtain.
Choose the shower floor carefully: Curbed shower pans are the simplest to install, but they’re not always the best option for people with mobility issues. Curbless shower pans are completely flush with the floor and ideal for those with mobility issues. They’re also a bit pricier and difficult to install.
Upgrade your glass for privacy: If you’re not installing a curtain, you may want to splurge on frosted or rain glass.
If you need to install new plumbing, consider hiring a pro: DIY plumbing can void your home insurance and cause thousands of dollars worth of water damage if done incorrectly. You can still save on the cost of an installation by hiring a plumber solely for the plumbing work while you install the rest of the shower.
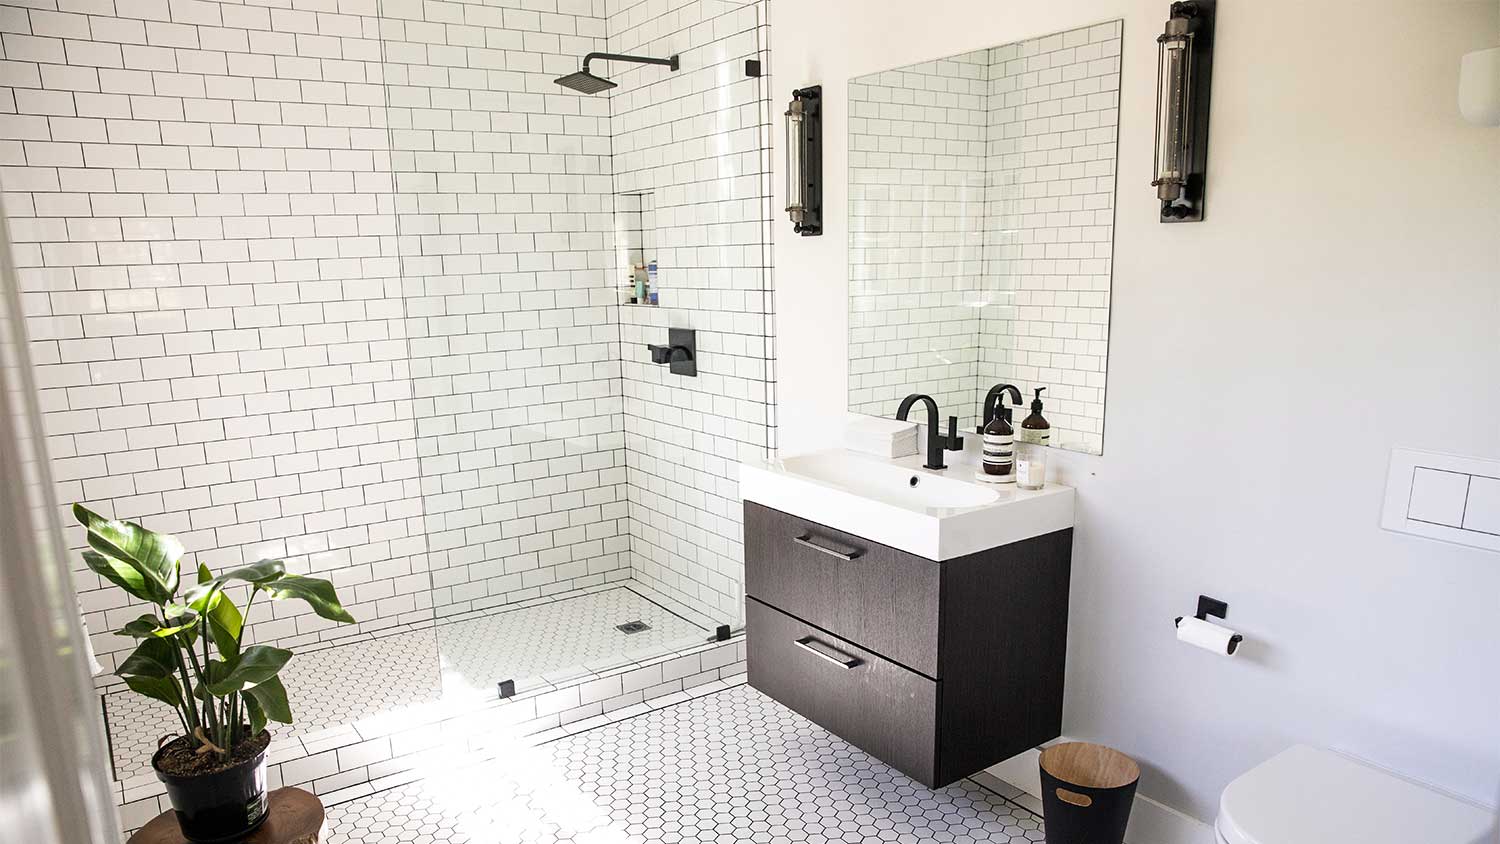
Using a prefabricated shower kit for your DIY tub-to-shower conversion can simplify this task. They’re available in one- and multi-piece units in fiberglass or acrylic. Depending on the kit you choose, they might come with a shower pan, wall panels, and shower doors.
“Be careful that the kit you purchase can fit up the stairs and through the doors,” says Joseph Wood, Angi Expert Review Board member, Master Plumber, and Founder of Boston Standard Company. “The worst thing is getting it home to find out it will not fit!”
Always check the directions that come with your kit for any additional requirements. “Many acrylic shower units require mortar beneath the unit to stabilize it,” says Wood. “Follow the manufacturer’s instructions.”
The cost to convert a tub to a shower ranges from $1,200 to $8,000, with a national average of $3,000. It depends on several factors, starting with the shower’s intended size, design, and material. As expected, large showers cost more than small ones, and materials like quartz, granite, and marble are more expensive than tile.
If you’re interested in a curbless shower, expect to pay more than you would for a standard shower stall, as the former entails removing sections of the shower floor. Other potential expenses like permits, plumbing work, and disposal of the old bathtub will also increase the price.
The DIY route can save you $1,000 or more on the cost of converting a tub to a shower. However, learning how to replace a tub with a walk-in shower is a project many homeowners don't want to take on themselves since it requires demolition, plumbing skills, and some advanced DIY experience.
We also highly recommend hiring a shower installer near you if you have one bathroom in your household since this DIY project can take a week or longer—a pro can get your bathroom up and running in less time.
Jason has helped me with multiple household projects, with the most recent being new door installation. He has always showed up on time and organized and has done an incredible job! Jason is very professional and he's now my go-to for anything around my house that needs to be fixed or...
Cole has been handling plumbing and general contracting for our four properties over the past three years, and he’s always done a great job. Most recently, he installed a sink and countertop in our retail store where none existed before, and it turned out exactly how we needed. He’s...
 ANB Renovations LLC
1st Choice Renew is simply the best! We hired them for a complete home renovation, and they transformed our space into something truly amazing. The team attention to detail and commitment to quality were evident throughout the project. They were easy to work with, very responsive, and always...
This company went above and beyond with their work, chimney sweeps are usually pretty messy, but the clean up was spot on.!! Josh explained every thing that he was doing, and the things that he was checking to make sure the chimney was safe for me and my family. He was very professional,...
 Supreme brick & chimney
Custom Paint Jobs LLC transformed our outdated kitchen into a modern masterpiece.
Excellent customer service and knowledge. I was recommend to him from my neighbour. My front door and window came in great and were installed beautifully perfectly, I m very satisfied with their excellent work, so decided to order one more big bow window for my living room. I cant wait for...
If I could give 10 stars for Kitchen Tune Up, I would. I cannot say enough good things about my experience with Kitchen Tune Up and the entire team involved in the process of my kitchen project. They went above and beyond as far as service and quality with my cabinets, paint, countertops, and...
It was wonderful working with Yordy and his team. They were very professional and are experts in what they do. They have completed the work on time, with better quality and with in fairly reasonable price. We just started with backsplash work , but liking his work, we went on to provide...
We were having 2”x 2” tile installed . There was a small installation error and the new additional replacement tile was from a different lot and the colors didn’t match. Joe assured us that he would rectify everything , which he did without hesitation. We decided to go with the 18” x 36” tile...
 CarifaTile
They work that 360 did on my kitchen cabinets is nothing short of amazing. I still cannot believe the difference from before and after. Jon and Jeff were both so incredibly professional throughout the whole process and their communications with me were constant and consistent. These guys...
 360 Painting Columbus
From average costs to expert advice, get all the answers you need to get your job done.
Various factors affect the total tub-to-shower conversion cost, including the size of the area, type of shower, materials, and labor fees.
Various factors affect the total tub-to-shower conversion cost in Atlanta, GA, including the size of the area, type of shower, materials, and labor fees.
Thinking of getting rid of that old bathtub and replacing it with a walk-in shower? This walk-in shower cost guide will help you plan your budget.

No shower in your 1950s-style bathroom? Follow these six tips to transform your old bathtub into a contemporary walk-in shower that you and your family can use every day. Here’s what DIYers and homeowners need to know about tub-to-shower conversions.
Is it worth it to convert a tub to a shower? This guide can help you determine the value of this popular bathroom renovation. Let’s dive (or walk) in.
A bathtub isn’t always necessary to create a bathroom you love. Here are some stylish tub-to-shower conversion ideas that outshine bubble baths.