

Tile varies dramatically in price, but there’s something for every budget. This guide will help you plan for tile installation costs, no matter the project.
Tackle this DIY tiling project with careful prep work and a steady hand

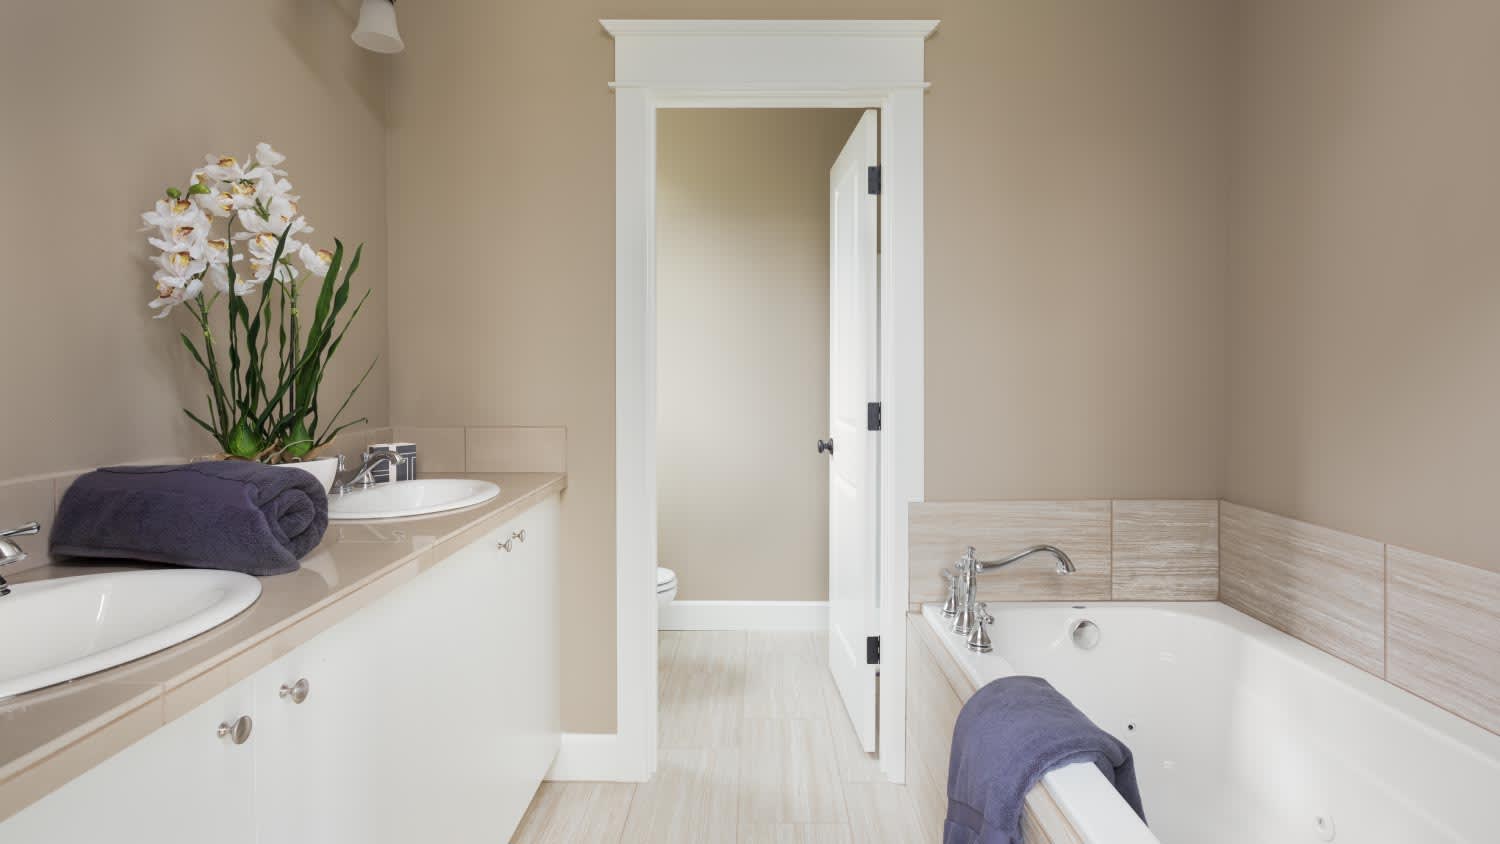
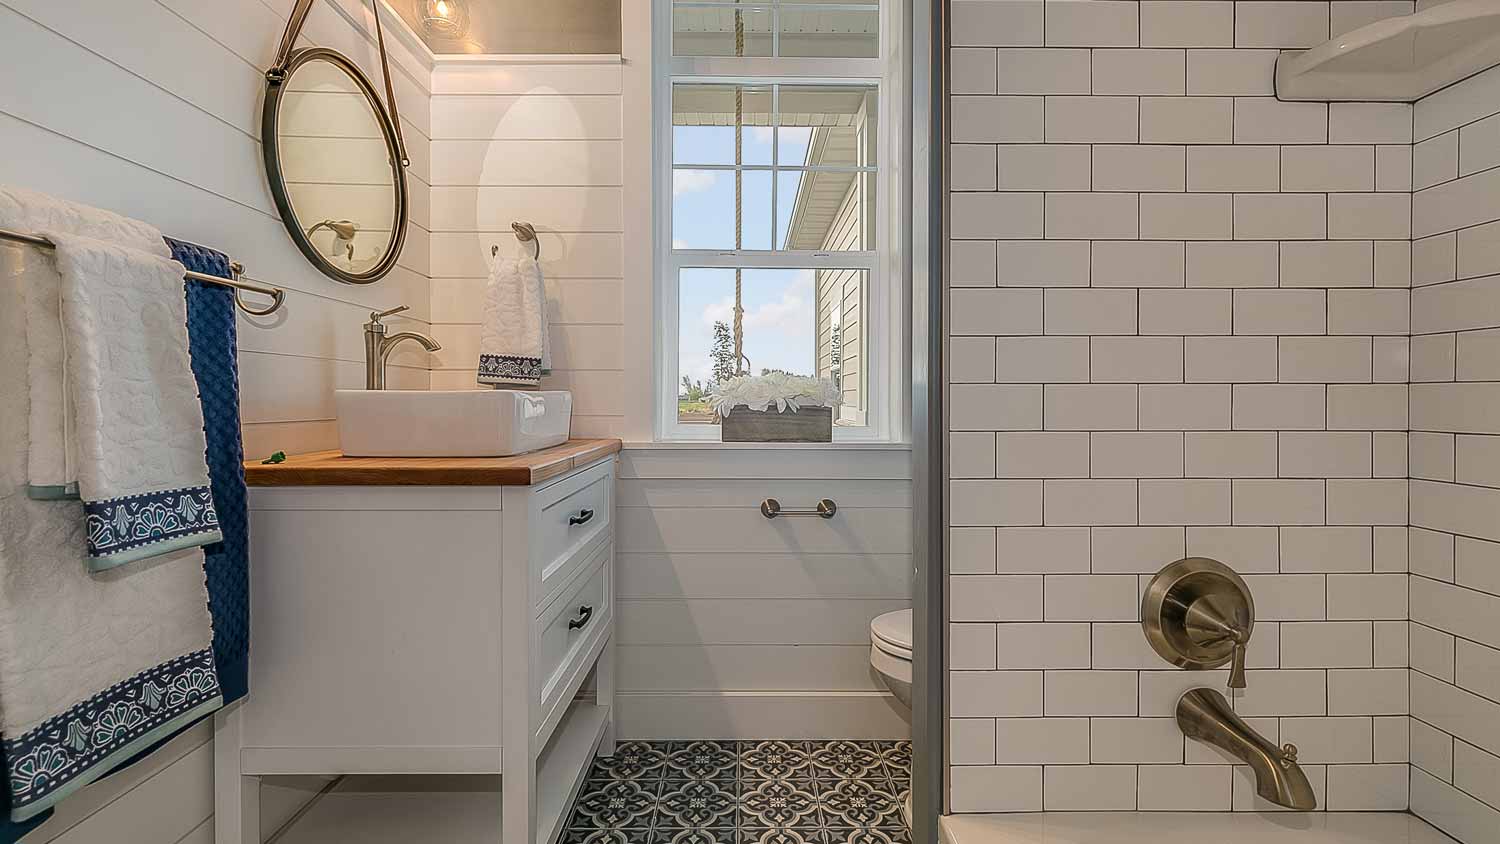
Tile is beautiful, versatile, and easy to clean, making it a stellar choice for bathrooms and kitchen walls—but any wall is fair game if inspiration strikes. Learning how to install wall tile is more involved than installing ceramic floor tiles, but it’s still a manageable DIY with the proper prep work, tiling tools, patience, and attention to detail. Here’s how to plan and nail your wall tiling project.
Before installing wall tile, you must remove light switch plates, electrical outlet covers, and any other wall hangings or accessories. Next, thoroughly examine your walls to ensure they’re structurally sound and ready for tile:
Look for signs of mold damage.
Check for cracks and other structural damage.
Test for softness or weak points by pressing the wall with your fingers, focusing on the area around the studs.
Make sure there is a cement backer board for larger areas instead of installing the tiles straight onto drywall. This water-resistant board will help prevent your new tile job from cracking or warping. However, it’s not entirely waterproof: When installing wall tiles in a tub or shower, always use a brush-on waterproof membrane over the cement backing board. Excess moisture that seeps into your walls can cause severe structural damage over time, so proper waterproofing is crucial.
As you’re researching and planning your job, pay attention to the skills you’ll need to do the work and the time it will take. If you feel that it’s out of your comfort zone or beyond your DIY abilities, call a local tile contractor near you. Hiring a professional from the start is better and more cost-efficient than hiring someone to fix mistakes.
You need your wall surface to be clean, dry, and smooth. Use a mix of vinegar and water or a commercial cleaning spray to wipe down the wall, then allow it to dry. If the wall is textured, has holes or uneven places, or isn’t completely smooth, take the time to add a layer of drywall compound so that the wall surface is as smooth as it can be. This will give your new tiles a solid surface to adhere to and help make your hard work as sturdy and long-lasting as possible.
Once your walls are ready, use a level and a tape measure to find the perfect middle point of your tiling area, vertically and horizontally. Don’t use fixtures, countertops, or other objects as a reference, as these aren’t always level. Always align the tape measure with a level to be sure you’re making a perfectly straight line.
Using a chalk line, mark the midpoint with an intersecting horizontal and vertical line (a regular piece of chalk and string will also work in a pinch). If you’re doing a DIY kitchen tile backsplash or similar project where you'll work around cabinets and other objects of varying heights, split the area into quadrants and mark the mid-lines for each.
Next, test your tile layout by taking a sample tile and marking the location of a row of tiles along the horizontal and vertical mid-lines. Be sure to include the thickness of the grout lines. If you follow some of the more complicated tile patterns in kitchen and bathroom tile trends, you may need to cut tiles to fit using a diamond wet saw or a tile cutter.
Once you’ve drawn up your rough layout, step back and check how it looks. If anything looks wonky, or if there are a lot of areas where tiles will need to be thinly sliced, adjust your starting point until you find an efficient and visually-pleasing layout.
Especially if you’re learning to install wall tile for the first time, you’ll want to use some batten to ensure your tiles stay straight. A piece of scrap lumber around 1 inch thick and running the length of the tiling area will work nicely for this step.
Place the wood batten board so its top edge aligns with the horizontal midline you created. Use your level to ensure it’s perfectly straight, then screw it to your wall studs to hold it in place. After placing your tiles against the batten, you can unscrew and remove them.
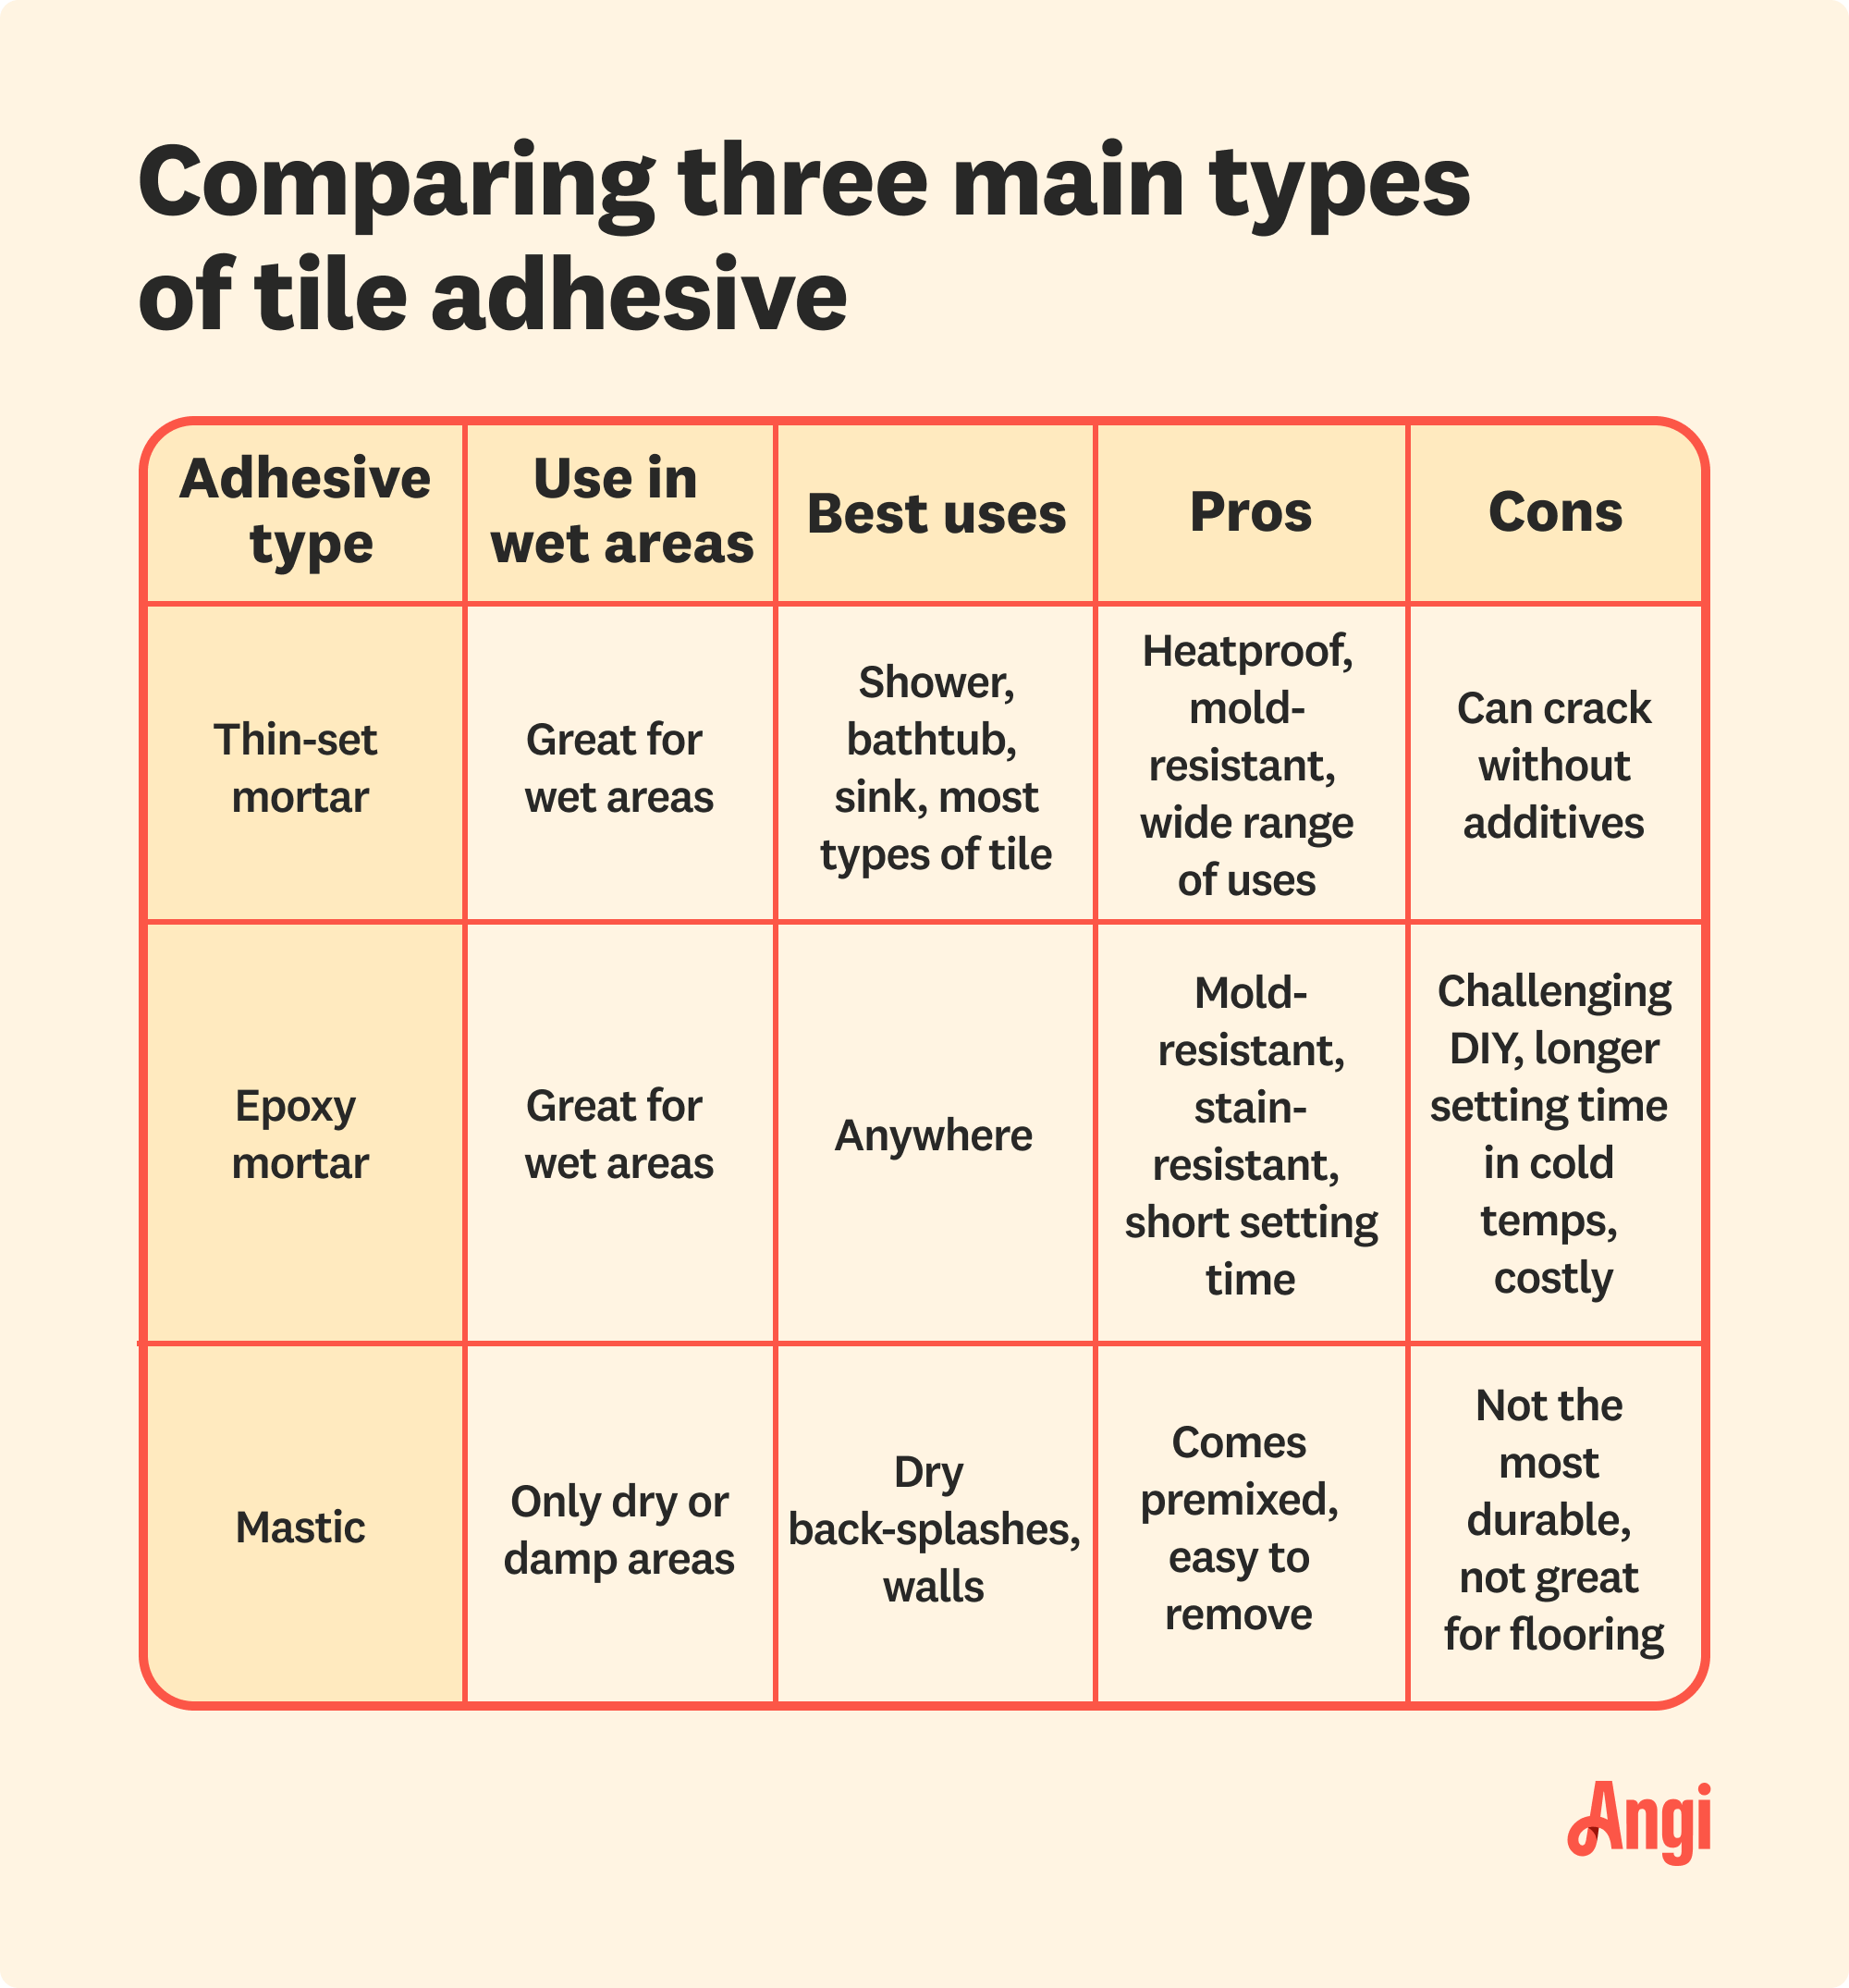
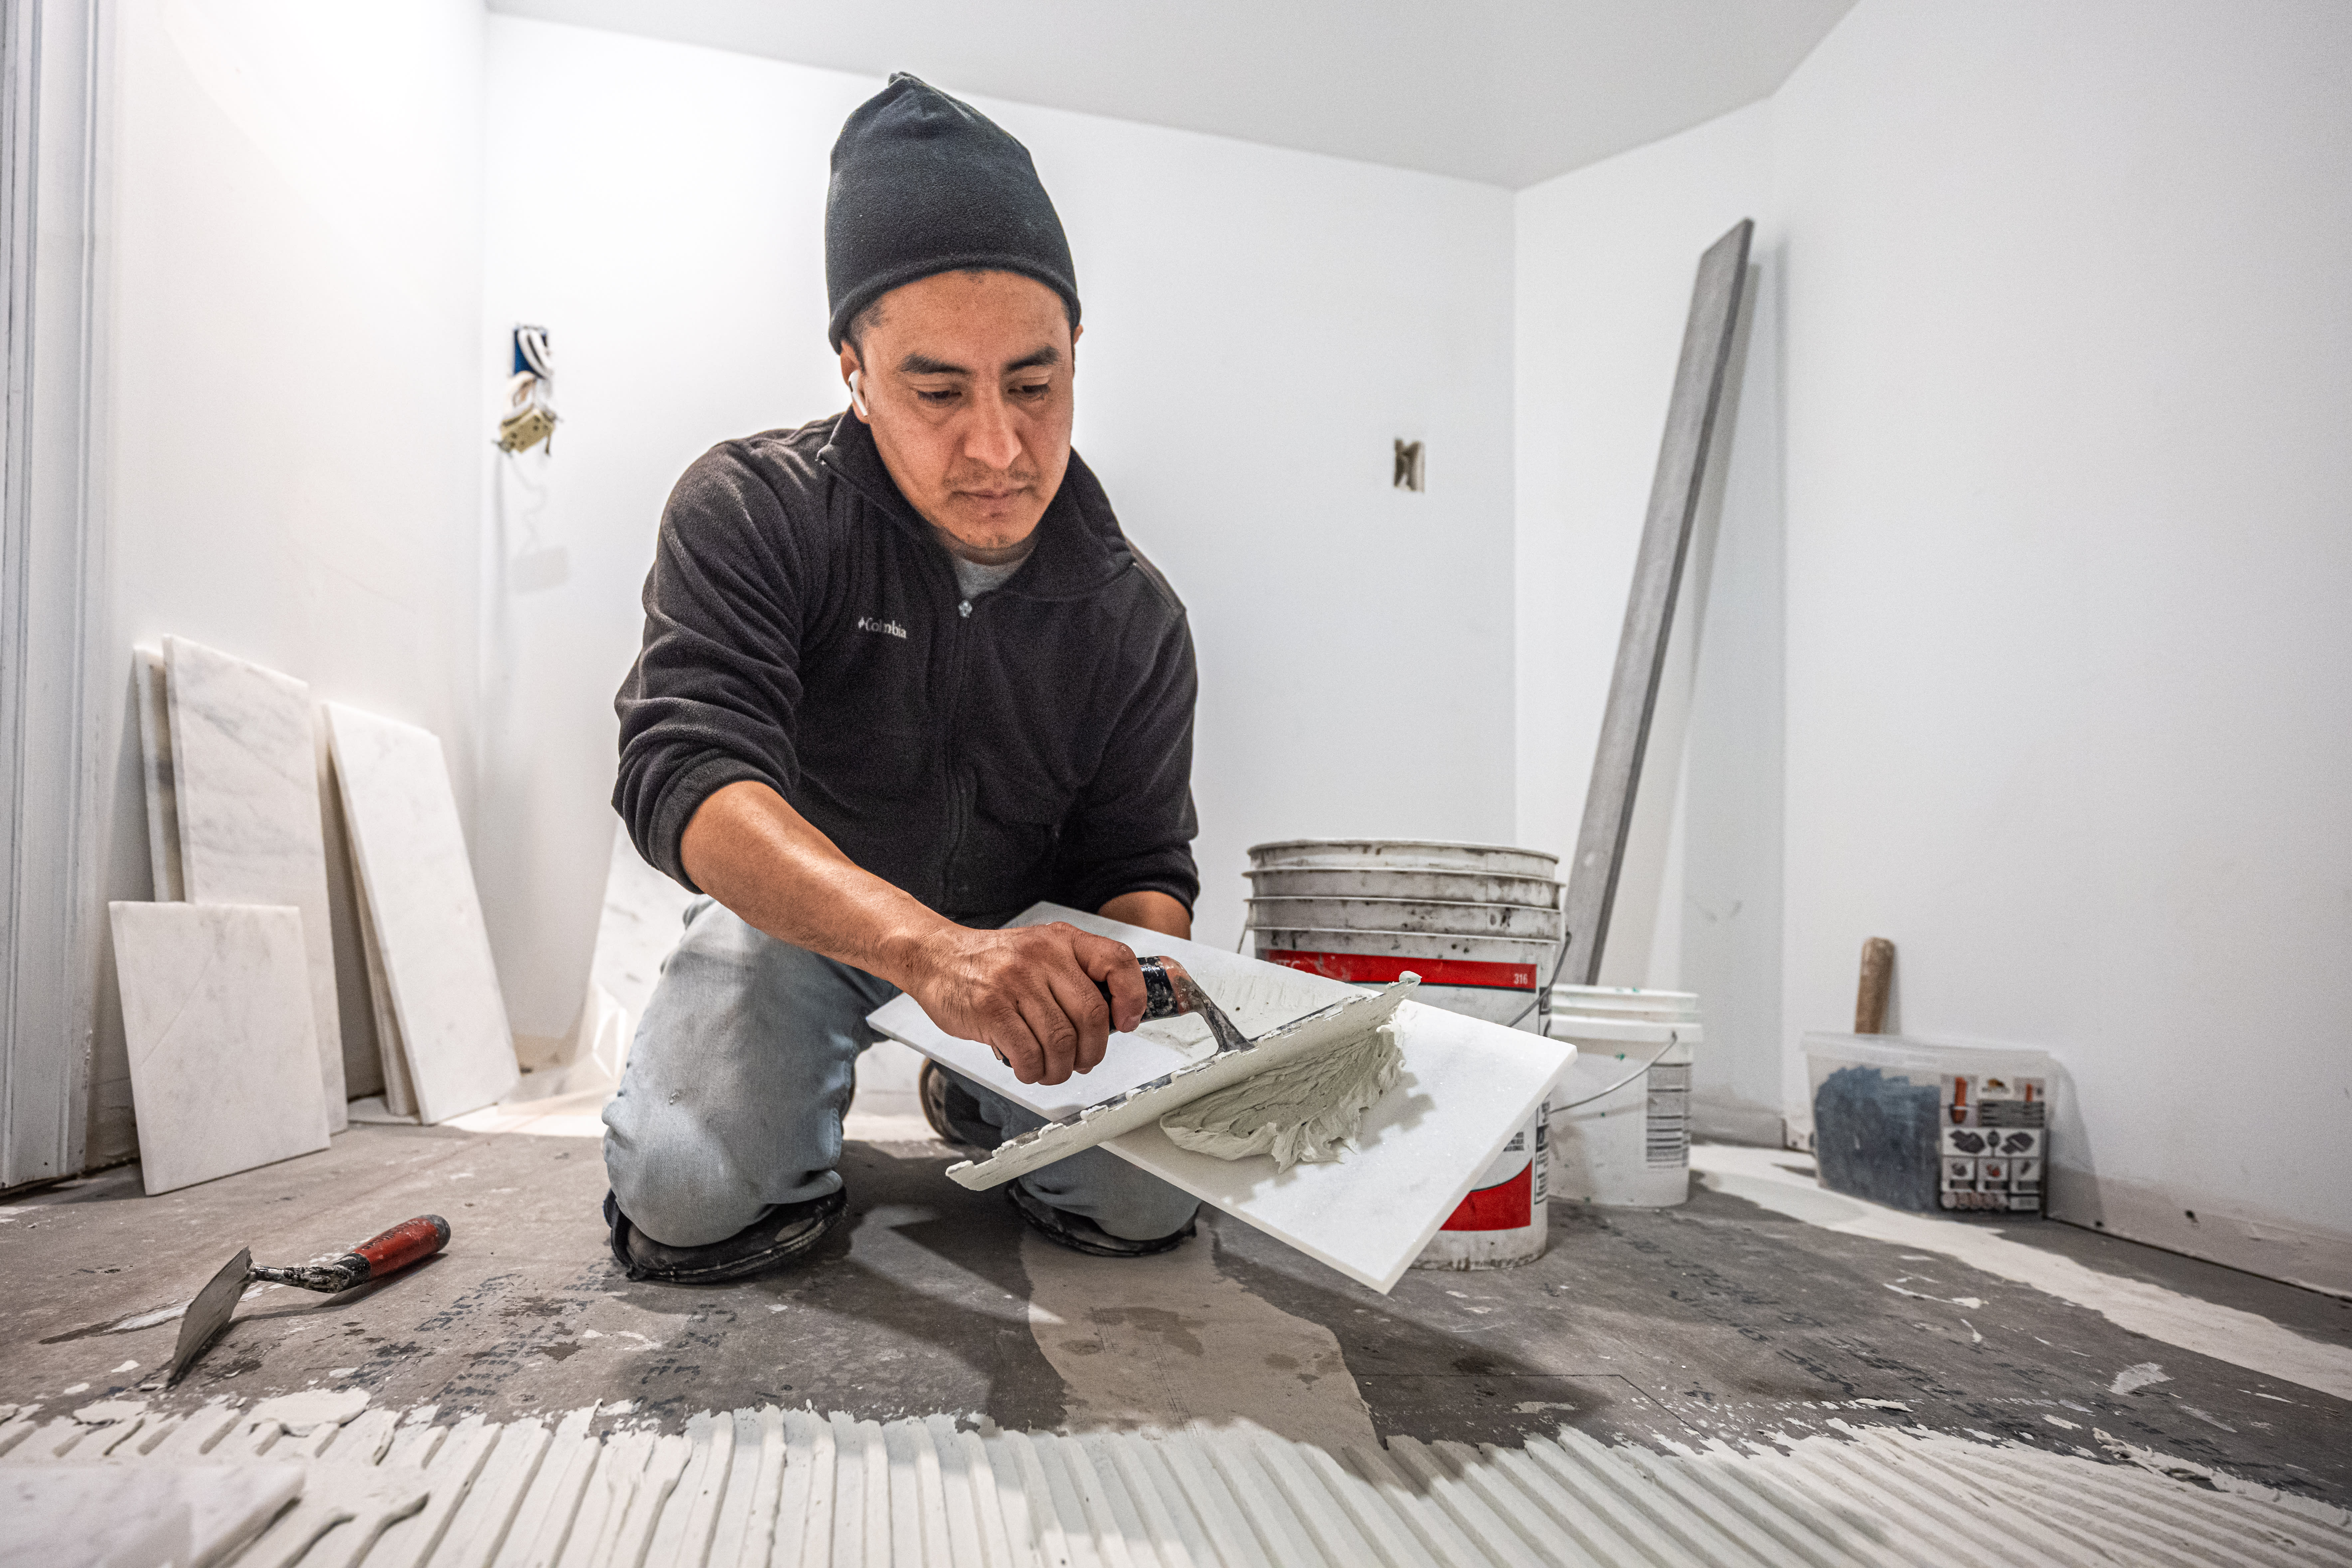
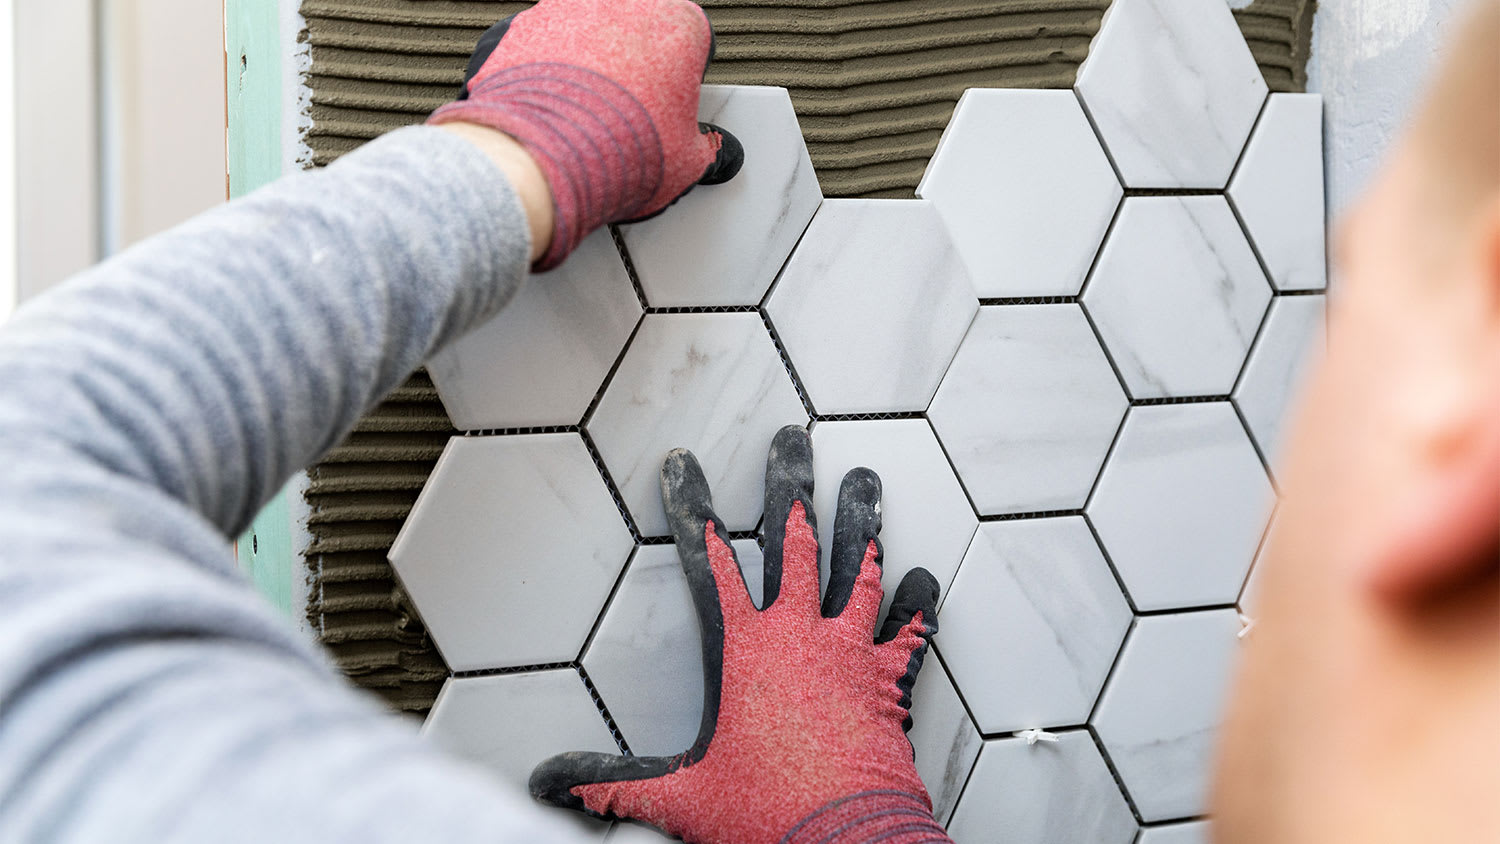
After you’ve planned your layout and placed your batten board, mix a batch of thin-set mortar according to the manufacturer’s instructions. It’s easiest to start with the powder in a bucket and slowly add water, mixing until it forms a thick paste. Once thoroughly mixed in, let it rest for about 15 minutes and stir it up again.
Next, apply the mortar to the wall using a notched tiling trowel, starting at the center point. Cover small areas around one or two rows at a time or whatever you can tackle within 30 minutes. Take care not to hide your layout lines with the adhesive.
Hold your trowel against the wall at a 45-degree angle and use a long, sweeping motion to apply a straight, even coat of mortar. Then, use the notched side of the trowel to create a pattern of ridges in the wet adhesive. Grooves can go in either direction; be sure that all of your lines stay roughly parallel.

Once you’ve applied your mortar, install your wall tile onto the prepared area, starting from the center and working along the horizontal guidelines. Use firm pressure to lay the tiles into place.
Add tile spacers between each tile as you go to ensure uniform spacing.
After laying your first row, use your level (or a laser level) to ensure the row is level. Continue this process row by row, using tile spacers to keep your layout even.
The fun begins as you see your new tiled wall take shape. Once you have your first row set and the spacers in place, you can build on that base by adding new tile rows above it. Carefully measure the tiles against the space available and use your wet tile saw or snap tile cutter to cut tiles as needed before setting any tiles. This will prevent your thinset from drying.
Work across the wall, installing one row at a time, then spacers, then the next row. Set tiles intentionally and carefully; any mistakes you make will impact every tile and row next to and above them, and errors will be hard to fix as the thinset hardens.
Double-check the directions on the mortar, verifying how much time tiles should set before you apply grout. Some mortar takes 24 hours to set; others need more time to fully cure. Most experts recommend letting freshly grouted tiles cure for at least 48 hours before grouting. This ensures that the thinset is completely hardened and tiles won’t shift as you remove spacers, apply grout over and between the tiles, and wipe off excess grout.
Be patient! Curing and waiting are as important as careful setting. If you don’t wait long enough before grouting, you risk shifting tiles and can disrupt all of your hard work. Since resetting tiles after partially cured is hard, protect your time investment by following all manufacturer directions.
When you’ve finished placing your tiles and are happy with the result, mix up your grout according to the manufacturer’s instructions. Typically, you’ll start with water in a bowl or bucket and add the grout powder until it becomes a thick paste. Don’t mix more than you can spread in a 20-minute timespan, as it could dry out before you’re finished.
You can also add any desired additives during this step, such as those for waterproofing or changing the color of the grout.
Now you can grab your grout float and start spreading the grout, working in square-shaped sections. Hold the float against the tile at a 45-degree angle and use diagonal swipes to push the grout into the gaps. Avoid swiping in horizontal or vertical lines parallel to the tiles, as this might push grout through the gaps. After applying the grout, use your grout float to pick up as much excess grout off the tiles as possible.
Wait around 20 minutes for the grout to partially cure. Then, use a clean, damp sponge to wipe the remaining grout off the tiles. Be sure to rinse your sponge frequently so you’re not re-depositing dirty grout water onto the tiles.
Next, wait around three hours for your grout to cure fully or however long the manufacturer’s instructions specify. Note that some additives take longer to cure, so read the instructions for those, too.
After your grout cures, use a rag to clean off any remaining grout and apply a grout sealer to the grout. This step will help prevent mold growth and comes in various brush-on or spray-on solutions. Again, refer to the manufacturer’s instructions to make sure you’re applying the sealer correctly.
Tile isn’t the easiest material to pry off the wall if you make a mistake, so a little extra care in the beginning can help you avoid those frustrating mishaps. Here are some common tiling mistakes to watch out for as you begin:
Using the wrong trowel: Small tiles need a thin mortar layer, while big tiles need a thicker layer. Opt for trowels with larger notches for big tiles and smaller notches for small tiles.
Not cleaning the walls: Any dirt, debris, or old adhesive will prevent the mortar from strongly adhering to the wall. This could leave you with loose tiles down the line, so don’t skip thoroughly cleaning the wall before installing tile.
Forgetting to “back butter” tiles: For big tiles, like stone or marble slabs, remember to apply mortar both to the wall and the back of the tile (known as “back buttering”) for better adhesion.
Not wiping the tiles: After grouting, you need to wipe off excess grout from the tiles. If you don’t, the grout will dry and leave a filmy look on your new tiles.
Speeding through cure times: Both mortar and grout need plenty of time to dry and fully cure. If you rush through the curing time, your mortar and grout will be at risk of shifting and cracking.
Most people only seal their grout once, but you should have a pro reseal grout and tile annually for maximum performance and longevity. Doing so also keeps out moisture and prevents staining and discoloration.
Learning how to install ceramic tile isn’t too tricky, but it’s easy to veer off-course and end with less-than-perfect results. Unfortunately, mistakes and imperfections can be noticeable when working with straight lines and uniform tiles. The last thing you want is to fixate on that slightly askew tile row rather than enjoying the results.
If you’re unsure you can get the hang of this project, there’s no shame in that—it’s tricky to master proper alignment. That’s why we recommend hiring a local tile installer who can work with you to achieve beautiful, professional-quality results.
Terrible experience. Walls/trim/floors/cabinets/doors all have drip marks, overspray, etc. Tiling at the fireplace had to be redone by another vendor due to incorrect and shoddy install by Profect. Contractor had his children in our house while he was on site without prior authorization or...
 Profect painting & exteriors
It was wonderful working with Yordy and his team. They were very professional and are experts in what they do. They have completed the work on time, with better quality and with in fairly reasonable price. We just started with backsplash work , but liking his work, we went on to provide...
We were having 2”x 2” tile installed . There was a small installation error and the new additional replacement tile was from a different lot and the colors didn’t match. Joe assured us that he would rectify everything , which he did without hesitation. We decided to go with the 18” x 36” tile...
 CarifaTile
For several months I was looking for somebody to tile a wall in my master bath and move lighting fixtures, and could not find anybody who was responsive. I contacted Rowe through Home Advisor and within days they came by to assess the job and provide an estimate. The cost was very...
It went very well! The end product was amazing and we keep getting a lot of compliments from friends! M&E were very professional and they made sure we were happy with the product before leaving. They met with us in our home and at the tile shop to make sure we were okay with our tile and...
 M&E Remodeling
Involved an extensive bathroom remodel, including removing tub & installing walk in shower, new drywall, custome tile work to ceiling, plumbing, etc. Overall, job was done on time and on budget. Nick & his team were very professional and had high attention to detail. Quality was great. Highly...
 Stamos Flooring and Remodeling LLC
Very pleased with the service and level of professionalism. Courteous and very unobtrusive in performing service. Unlike several other companies, Bradford Xteriors was willing to perform work on a three story home with a clay tile roof. <br />
 Bradford Xteriors
This company did a very good job on the brick wall and it looks just amazing. The staff was always professional and was practically OCD on how the bricks were stacked and how they were laid. Although it took longer than expected, I am willing to sacrifice time over perfection anyday. The...
 My Handy Mate LLC Improvement & Remodeling
He did the tile work and he was good at it. He used other subcontractors for the rest of the work (like putting in the cabinetry) and they were okay but not great. He was a great guy! He was easy to work with and had a good eye for the detail of his work. There were a couple of things that I...
 Brian Miller Custom Remodeling
I was very impressed with Miller Cantrell! I live in an old home in which the sewage line that runs from my home to the sewage system is a line of clay tile. These eventually collapse and need to be replaced - an expensive problem and sure to happen at the worst time. I told them that my...
From average costs to expert advice, get all the answers you need to get your job done.
Tile varies dramatically in price, but there’s something for every budget. This guide will help you plan for tile installation costs, no matter the project.
The cost to install porcelain tile depends on materials, size, and whether you DIY or hire a pro. This guide will help you choose the perfect porcelain tile for your home and budget.
Find out how much you can expect your tile floor installation to cost depending on a range of factors, including tile type.
When you're getting ready to tackle a tile installation, you need to know how to tile inside corners. Read this guide to learn how.
Learn how to hire a qualified tile installer with confidence. Find tips on vetting pros, questions to ask, and what to expect from your tile project.
Renovating your bathroom? From classic chic to contemporary cool, we’ve got the lowdown on the best tile for shower walls and the greatest shower floor tiles.