




Top-rated backsplash installation pros.

Get matched with top backsplash installation pros in Red Oak, IA

Enter your zip and get matched with up to 5 pros

Need a pro for your backsplash installation project in Red Oak, IA?

Select your specific project to find the pro for you.

TRUSTED BY RED OAK, IA HOMEOWNERS

  • Average homeowner rating star icon3.6
    Average homeowner rating
  • Verified reviews icon13
    Verified backsplash installation services reviews

Find Backsplash installation pros in Red Oak

Avatar for Top Notch Renovations  Facebook
Top Notch Renovations Facebook
4.6(
9
)

Serving Red Oak, IA and surrounding areas

In business since 2014

Free estimates

Offers commercial services

"I hired them to do a full kitchen remodel and it turned out fantastic I'm very happy with the result the towel work looks great also thanks you have a customer for life!!!"
Response time3 hrs
Response rate100%
Recommended by100%of homeowners
Avatar for A Cut Above The Rest Contractors
A Cut Above The Rest Contractors
1.3(
2
)

Serving Red Oak, IA and surrounding areas

In business since 2012

Free estimates

Emergency services offered

Welcome to A Cut Above The Rest Contractors. We are the premier professional home improvement company. We offer the highest quality and most attentive customer service. We are known to pay exquisite attention to detail, while making customer satisfaction our top priority. Whether your project involves minor repairs or a completely new replacement or installation, we are glad to be your number one choice. \n\nPlease call us today to schedule your appointment!

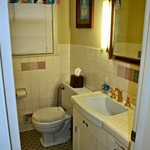
Needs Updated
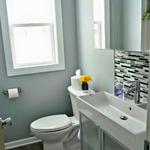
Completed Update
original 1980s bathroom
Renovated with modern ammenities
Tile Backsplash

+7

Response time4 hrs
Response rate100%
Backsplash Installation questions, answered by experts

The process takes two to four days, depending on the size of the area and your experience level. The first day involves assessing and prepping the existing tile, while the second day is for laying the new tile. This may take longer in complex areas. After letting the adhesive dry for 24 hours, grouting and sealing can be completed on day three. For larger projects or intricate tile patterns, expect the timeline to stretch a bit longer. Also, proper drying time between steps is essential for long-lasting results, which extends the project’s time.

When choosing tiles for a shower floor, avoid highly porous tile materials, like those with a water absorption rating over 7%. Don’t use non-vitreous tiles, or tiles fired at low temperatures, because they will absorb more water. If you use a highly porous tile in the shower, the tiles can wear down faster, meaning they’ll need to be replaced much sooner.

It’s best to start with tiling the shower floor before moving on to the walls for the most visually-pleasing results. When taking on any tiling project, you’ll want the wall tiles to “sit” neatly on the floor tiles rather than overlapping them. Finishing your floor tiles first will allow you to place your wall tiles without any gaps, holes, or awkward intersections.

The easiest tile size to install is large tiles, and they’re easier to install than small tiles—the job is faster and simpler when there’s less placing, adhering, and grouting to do. However, when tiles get really big, they’re more difficult to handle, cut, and fit. Standard floor tile sizes are 12-by-12 inches, 18-by-18 inches, and 12-by-24 inches.

Like glass tiles, you will not need to seal most porcelain tiles, particularly if the porcelain is already glazed. It depends on quality. Porcelain is very water resistant, but it is not 100% waterproof. To avoid staining, some homeowners use a penetrating sealer. It is also a good idea to seal your grout. Unless you use epoxy grout, grout is very porous and can harbor bacteria, mold, and mildew.

The Red Oak, IA homeowners’ guide to backsplash installation services

From average costs to expert advice, get all the answers you need to get your job done.