
Learn all the factors that influence the cost to install a heat pump water heater at your home.
If you want to keep the pressure low, call a pro

If you’re standing in your bathroom waiting for hot water, it may not be that your hot water heater isn’t heating fast enough. Remember, there are gallons of water running through the pipes between your faucet or shower and your water heater. All this cold water needs to go somewhere, and that doesn’t mean down your drain.
Looking for a proper solution? A hot water recirculation system using a pump can fix this problem, providing you with hot water seemingly on demand. If you’re a handy homeowner, you can learn how to install a recirculating pump on a water heater on your own.

A critical first step when installing a recirculating pump is making sure the water is off, the pipes are empty, and there is no power in the room where you’ll be installing the pump. Electricity and water don’t mix, so make sure the breaker is firmly off before starting any work.
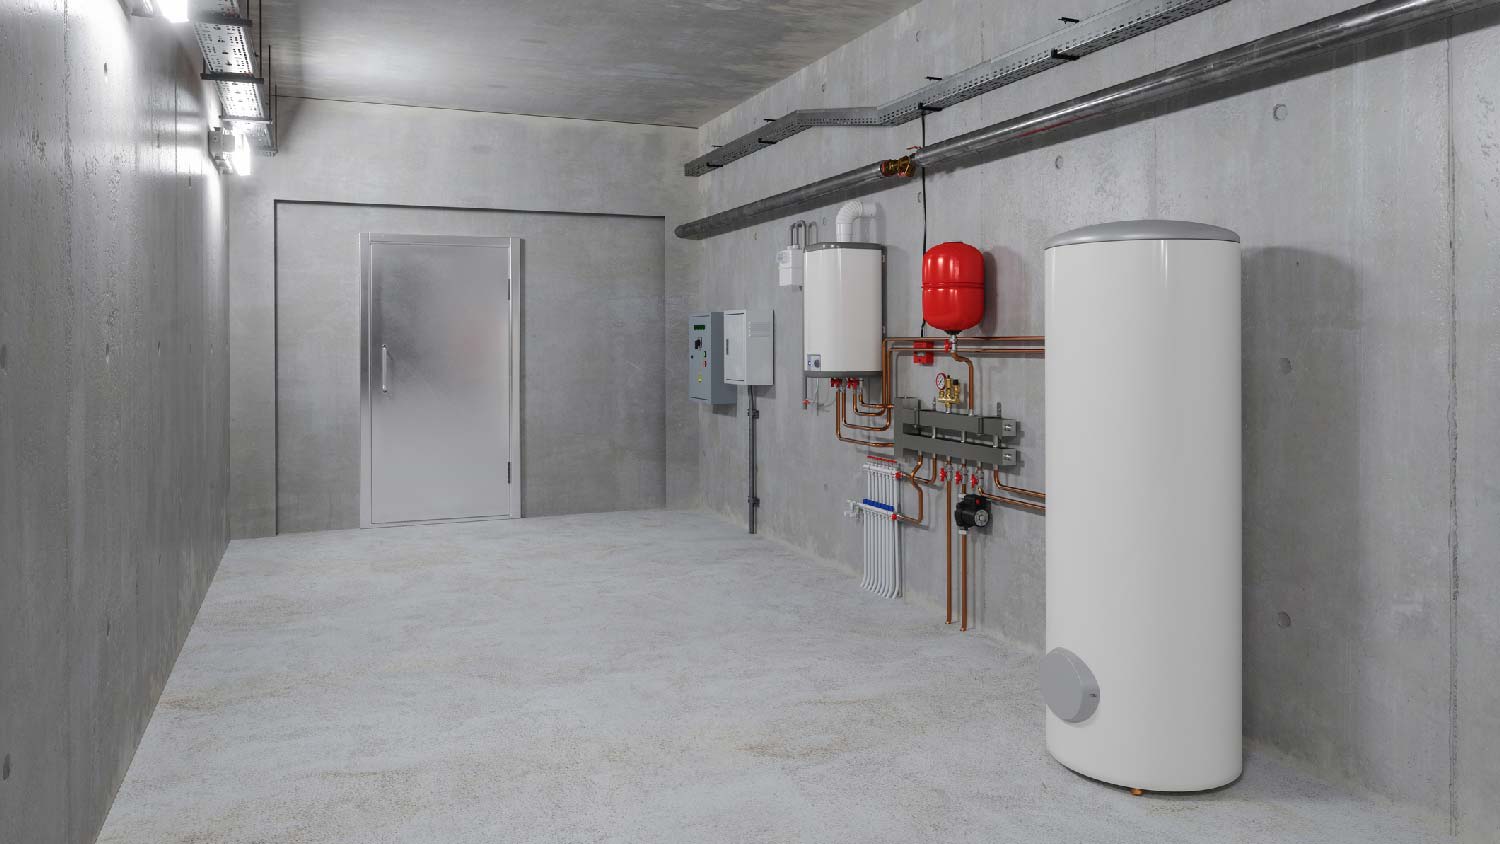
There should be two large handles near your water heater—these close the water lines. Make sure both are off. Finally, to empty the pipes, simply run a sink until it sputters out and no more water flows.
There should be a valve or faucet near the bottom of your water heater tank. You can either attach a hose and run it down a drain or use a large bucket. We recommend the first method, as water is heavy, and using a hose saves you a lot of time and elbow grease. Empty the water heater tank completely before moving to the next step.

While you can certainly just grab a pipe and determine its temperature, the good news is that they are often colored—blue is cold, and red is hot. In most water heaters, these will come out of the top of the heater.
Remember that tankless heaters shouldn’t use a recirculating pump, so if you discover you can’t find the water tank, you may not have one. If you aren’t sure which type of tank you have, call a water heater pro or the manufacturer (if you can see a make and model on the heater).
Pipes are connected at junctions and involve threaded nuts sealed with Teflon tape. They are not easy to disassemble, especially older pipes and sealants. It’s critical to double-check that your water is fully off before continuing.
You’ll need to measure the length of the pump and the valves that attach to it. These valves, called check valves, prevent backflow. Once you have that measurement—and have checked it twice—you need to locate the pipe section where you’ll install the recirculating pump. This is often on top of the tank, attached to the hot water line.
You will need to use a saw to make room for the pump and cut the existing water pipe. However, you may not need to do this if flexible hoses are installed or if space exists between pipe junctions that are close enough in size to the pump and valves that you could simply swap them.
When this step is complete, you’ll have a gap in the system. That’s where the pump goes.

Check valves, also known as backflow preventers, prevent water from flowing the wrong way in a system. You’ll need to make sure there are two installed—one on either side of the recirculating pump. Without these valves, water could flow back into the pump, rendering it useless and possibly causing damage.
Your pump goes in the empty gap between your water tank’s hot water line and the hot water line that connects to your home’s plumbing. There are a few ways to attach it, but the best way is to use flexible hoses.
There are two reasons for this: they allow movement in the system, which can help prevent burst pipes, and they are much easier to install and remove than cutting a solid pipe. Remember that every junction nut or screw requires sealing with Teflon tape.
Turn on the circuit breaker and water supply. When you flick on the power, make sure there is no standing water. The tank wasn’t heating water while you were doing the work, so it may take time for your home’s water to heat back up.
Plug in the circulator but don’t turn it on just yet. You need to prime the pump with water. Different models have different instructions—some are even automatic.
When your pump is plugged in and primed, you can turn it on. Wait an hour before testing it, but monitor it while you wait. Make sure there are no small leaks occurring anywhere in the system. Once your water has heated up, and you’re positive everything is connected correctly, go to the furthest sink or shower and test your new system.
There are a lot of steps in this project, all of which can lead to problems if not done properly. Here are some mistakes you should avoid:
Not measuring twice: You don’t want to cut a section of pipe only to realize you cut it too short and need to replace it.
Using the wrong pump: Not all homes have the same plumbing needs. Picking the pump with the appropriate power is crucial to its efficacy.
Not monitoring leaks for long enough: If you think you’re sure, make sure again. You don’t want to wake up to a flooded basement or damage to your plumbing.
Forgetting check valves: These are small but important and are a requirement that ensures your water only flows one way.
We consider this project fairly challenging for the average DIYer. Those with plumbing experience will find it manageable, but there are too many points of error, with too large of consequences, to tackle this if you’re unsure. It’s best to call a local water heater repair pro to tackle this job. The good news? It won’t take them long, so installation shouldn’t cost much more than the parts.
As usual with ECO, tech Jordan was outstanding, very professional, very knowledgeable, and very thorough with repairs made to tankless water heaters. Very highly recommend ECO!!!
 Eco Plumbers, Electricians, and HVAC Technicians
Did a great job replacing the ice maker and water regulator on my refrigerator. He was quick and thorough, very friendly and professional. If I needed a heart transplant I'd want him to do it!!!
We had a gutter blockage that was causing water to sheet down the side of the house and ultimately it started to come in at a window (need mortar people next). Called around 7:30am, and he responded by 8am. He was able to come out the same morning and do a look over and clean out. He also...
Scott checked our large crawl space for mold and water infiltration and recommended a viable solution. The crew was efficient and they cleaned up well after the job. The job was expensive but I am confident that I won't have to deal with the problem again. Highly recommend.
They were the most through inspecting the water system in my house. Even going the extra mile to get the water professionally tested for contamination.
Very well. Have already used them again to fix hot water heater
 Service Olympians
The Paul Davis team was very professional and went the extra mile to take care of my water damage. The work was very high quality and done in a timely manner. I would highly recommend their services.
 Paul Davis Restoration
Honesty is hard to find in business today. GBR met me today at a 3 story building regarding my being told that I needed to tuckpoint the brick because of water leaks. The owners took the time to evaluate the situation and advised me that I did not need their service at all. They pointed me...
 GBR Masonry Inc
They unclogged the drain and sent me a bill for more than 4 times what I paid before. I called the Water Works to ask why the bill was so high and that they should have gotten my authorization before assuming they could make expensive decisions like that on my behalf and for their benefit....
 The Waterworks
We had two outdoor fixtures swapped for motion sensing fixtures and a GFCI outlet added to the outside of the garage for the bird bath heater. <br /> He arrived at the agreed upon time and I was surprised and impressed at how quickly everything was completed. <br /> I would definitely...
 Powers Electric LLC
From average costs to expert advice, get all the answers you need to get your job done.
Learn all the factors that influence the cost to install a heat pump water heater at your home.

Wondering how much a water heater expansion tank costs? Use this cost guide to get an accurate estimate and learn how to choose the right one for your home.

Looking to replace or upgrade your water heater? Use this water heater replacement cost guide to see what the work will cost and what factors affect your total.

Instant hot water at your fingertips is closer than you think. Learn how a hot water heater recirculation system can deliver hot water quicker than ever.

For any plumbing that’s far from the water heater, a recirculating pump is a great way to get hot water quickly. Recirculating pumps get rid of cold water fast and save you serious cash in the process. Learn what to know before getting one.

Who can install a water heater for you? Look to hire a water heater installation pro or a licensed plumber for this job because of the challenges involved.