




Top-rated backsplash installation pros.

Get matched with top backsplash installation pros in Stetsonville, WI

Enter your zip and get matched with up to 5 pros

Need a pro for your backsplash installation project in Stetsonville, WI?

Select your specific project to find the pro for you.

TRUSTED BY STETSONVILLE, WI HOMEOWNERS

  • Average homeowner rating star icon4.1
    Average homeowner rating
  • Verified reviews icon12
    Verified backsplash installation services reviews

Find Backsplash installation pros in Stetsonville

Avatar for Jill Seidner Interior Design
Jill Seidner Interior Design
3.5(
89
)
Tile: Ceramic and Porcelain - InstallTile: Ceramic and Porcelain - Install - For Business

Serving Stetsonville, WI and surrounding areas

In business since 2006

Credit card accepted

"It was all right; we didn’t really get anything worthwhile out of it.  She was pleasant to work with, it is just what she advertised versus what we got was way out.  There was nothing really robust about it.  She was polite and pleasant to talk to and what not but her work wasn’t that great. "
Recommended by55%of homeowners

Showing 1-10 of 18
Backsplash Installation questions, answered by experts

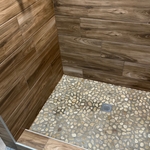
Tile—specifically smaller, mosaic-style tiles—is the best type of flooring for building a walk-in shower base. Shower pans come with a threshold and sidewalls to contain the water, but tile can be set into the shower base. This creates a walk-in shower floor that gently slopes toward the drain to keep water from getting out and into the rest of the bathroom.

On average, tiling a bathroom involves about 12 hours of labor, usually spread over two to three days to accommodate prep work and curing times. A professional tiler can often complete the installation in 6 to 8 hours, whereas a DIYer might take 10 to 16 hours. The total project time is influenced by factors like the bathroom layout, tile type, and necessary prep work, such as removing old tile. The process includes specific timelines for different areas; for example, tiling a floor takes about six hours, while a shower area can take six to ten hours. It is essential to allow for adequate curing time—typically 24 hours each—for the mortar, grout, and caulk, which is why the project extends over several days.

Tile shouldn’t be set tight against the tub. Bathtubs can expand when filled, and they can shift slightly with the weight of occupants. For this reason, it’s important to leave a slight gap between the bathtub and the first row of tile. Aim for a narrow gap of approximately 1/16 of an inch, filled with caulk, to allow for this expansion and movement while still allowing for tile shower waterproofing.

It’s best to start with tiling the shower floor before moving on to the walls for the most visually-pleasing results. When taking on any tiling project, you’ll want the wall tiles to “sit” neatly on the floor tiles rather than overlapping them. Finishing your floor tiles first will allow you to place your wall tiles without any gaps, holes, or awkward intersections.

There are several low-maintenance shower floor tiles to consider for your bathroom. Stone tiles are easy to keep clean and only need an occasional resealing to keep them looking their best. Porcelain is another low-maintenance choice, as it doesn’t stain easily. Vinyl is also suitable for easy upkeep. On the other hand, one of the highest maintenance options for bathrooms is wood tile.

The Stetsonville, WI homeowners’ guide to backsplash installation services

From average costs to expert advice, get all the answers you need to get your job done.