

Top-rated drywall pros.

Get matched with top drywall pros in Burlington, VT

Enter your zip and get matched with up to 5 pros

Need a pro for your drywall service project in Burlington, VT?

Select your specific project to find the pro for you.

TRUSTED BY BURLINGTON, VT HOMEOWNERS

  • Average homeowner rating star icon4.9
    Average homeowner rating
  • Verified reviews icon70
    Verified drywall services reviews

Find Drywall pros in Burlington

Avatar for Northern Oakes Property Management LLC
Northern Oakes Property Management LLC
4.4(
7
)
Drywall - InstallDrywall - Install - For BusinessDrywall - Repair+1 more

Serving Burlington, VT and surrounding areas

Approved

In business since 2024

Free estimates

Emergency services offered

"We have used Northern Oaks property management for several projects on our home. Dakota was knowledgeable took his time and even recommended somebody else for one project we had that he wasn’t comfortable doing. Really appreciated His knowledge and honesty would absolutely recommend Northern Oaks to any of my friends looking for stuff done around their homes."
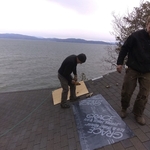
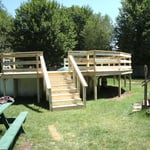
Deck/Ramp build for a local restaurant
Landscaping Project
Landscaping Project
Handyman Services Project
Deck/Ramp build for a local restaurant

+38

Response time5 days
Response rate91%
3 neighbors recently requested a quote
...
Showing 1-10 of 117
Drywall questions, answered by experts

Options include bricks, natural stone, and concrete blocks. Choose based on durability, aesthetics, and budget.

There are six levels of drywall finish, from 0 to 5, that refer to the amount of work performed during the finishing process.

Level 0: Drywall is hung with no finishing work.

Level 1: Tape is placed over the seams between drywall sheets.

Level 2: A thin layer of mud is applied over the tape and screw holes. This level is common for utility rooms or walls that will be covered.

Level 3: A full coat of mud covers the screw holes and tape, but the surface is not sanded. This is often used in garages.

Level 4: This is the most common finish for visible interior walls. It involves applying two coats of mud over seams and screw holes, with sanding between each coat, creating a smooth surface ready for flat paint.

Level 5: This is a high-end finish for luxury homes. It includes full taping, mudding, and sanding, plus a final skim coat over the entire surface before painting.

You can paint over plaster, but repair any damage to the plaster first, or the paint will crack and bubble. You should also prepare the surface of the plaster to accept paint, which gives your paint job the best chance of looking good and lasting a long time. Before applying the color you want, apply a coat or two of primer. Additionally, use latex paint, and choose a latex paint with a satin finish for areas with dampness, like bathrooms.

The short answer is yes, a sagging plaster ceiling is dangerous. Sagging plaster on a wall is something you should fix immediately, but it isn’t a major concern. If the same type of sagging occurs on a ceiling, however, you could be in danger of your ceiling falling in large chunks. When plaster sags, it loses its strength and ability to hold itself up. The bonds that hold it together are strong, though, so if a sagging area falls, it will take large pieces down with it.

Costs range from $500 to $5,000, depending on damage size, labor, and finishing requirements.

The Burlington, VT homeowners’ guide to drywall services

From average costs to expert advice, get all the answers you need to get your job done.