


Top-rated backsplash installation pros.

Get matched with top backsplash installation pros in Ireton, IA

Enter your zip and get matched with up to 5 pros

Need a pro for your backsplash installation project in Ireton, IA?

Select your specific project to find the pro for you.

TRUSTED BY IRETON, IA HOMEOWNERS

  • Average homeowner rating star icon3.7
    Average homeowner rating
  • Verified reviews icon24
    Verified backsplash installation services reviews

Find Backsplash installation pros in Ireton

Avatar for S&K REMODELING
S&K REMODELING
5.0(
6
)

Serving Ireton, IA and surrounding areas

Approved

In business since 2024

Free estimates

Credit card accepted

"Job was done when they said they were going to be done and great work very happy with the work that was done in my house will call them again"
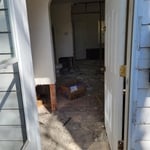
Home remodeling
Home remodeling
Home remodeling
Home remodeling
Home remodeling

+37

Response time2 hrs
Response rate100%
2 neighbors recently requested a quote
Avatar for Dave's Creative Construction LLC
Dave's Creative Construction LLC
5.0(
4
)

Serving Ireton, IA and surrounding areas

In business since 2005

Free estimates

Warranties offered

"One of the best guys in his field. He has done a lot of quality or through our property. Really appreciate his promptness and professionalism. We still continue to hire him. Thanks David!"
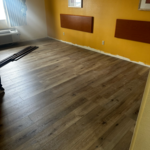
Bathroom remodel
Bathroom remodel
Bathroom remodel
Home remodel
Home remodel

+15

Response time2 days
Response rate95%
Showing 1-10 of 12
Backsplash Installation questions, answered by experts

If the hearth ends against a wall, you can use a tile cutter as you normally would. However, if the edge of your hearth ends with no surface pressing against it,you may want to look into rounded tiles. These give a smooth edge to your hearth and make sure cut edges aren’t visible. You can also see if the tile you have has pieces that have been glazed or rounded on one edge. You’d then cut the tile and place it normally, with the cut edge facing inward. 

No, when done correctly, removing the tile shouldn’t damage the subfloor. However, if there was pre-existing damage to the subfloor from standard use or lack of maintenance, the subfloor may need repairs. For example, if the contractors notice mold growth on the subfloor or an uneven surface, you may need more extensive services before installing new tile.

If you DIY tile removal, remove the tiles one step at a time, individually removing the tile, grout, and mortar to prevent unnecessarily damaging the subfloor. Depending on the age of your home, consider having a professional inspect the subfloor to ensure it’s in good enough condition to lay new tile.

If you’re handling your tile removal yourself, seal the room using painter’s tape and heavy-duty contractor bags to prevent dust and shards from escaping. Use a claw hammer or a pry bar and a mallet to get behind the tile and pry it away from the floor or wall. Once your tiles are all removed, sweep everything into contractor bags for disposal, being careful not to overfill them. Make sure you wear a dust mask, safety goggles, and work gloves to keep yourself safe from injury while you work.

When choosing tiles for a shower floor, avoid highly porous tile materials, like those with a water absorption rating over 7%. Don’t use non-vitreous tiles, or tiles fired at low temperatures, because they will absorb more water. If you use a highly porous tile in the shower, the tiles can wear down faster, meaning they’ll need to be replaced much sooner.

Solvents dissolve tile adhesive, but the right solvent for the job depends on what type of adhesive you are trying to remove. For instance, dispersion adhesive requires stronger removers, like bile soap or even paint stripper, but some adhesives, like cement-based products, can come off with water and soap or mortar remover.

The Ireton, IA homeowners’ guide to backsplash installation services

From average costs to expert advice, get all the answers you need to get your job done.