

Ceramic tile as a flooring option boasts a long list of advantages over other surfaces. However, there are also some key drawbacks worth considering. We’ve rounded up both the pros and the cons of ceramic tile into a helpful list.
This project involves a lot of downtime, but it’s worth it for the final result

Whether you’re installing the tile indoors or outdoors, doing this project yourself can help save on the cost to install a tile floor. And prepping to lay tile onto concrete will allow the actual tile installation to go much faster. The first thing you should do is gather all of the tools and supplies you need and put them in an area that is easily accessible, so you can get to them when you need them. Make sure you have your saw set up in a place where you will be able to work easily. Finally, thoroughly clear the area of obstacles.
Before you begin tiling, you’ll need to clean and prepare the concrete subfloor. To do this, sweep or vacuum the surface to remove any dust and debris then clean it with TSP (trisodium phosphate) according to the manufacturer’s directions. TSP comes in liquid or powder form. Cleaning with TSP will help remove dirt, grime, and grease from the surface.
Repair cracks in the concrete subfloor with concrete filler or mortar depending on the size of the crack and allow it to dry. Finally, prime the subfloor with concrete primer. This will also seal the concrete.
Use your level to determine if the subfloor has any low or high spots. If it does, those spots will need to be leveled before laying the tile on the concrete.
Check the primer you used to see if you should use a specific brand or type of self-leveling concrete. When the paint is dry, mix the self-leveling concrete or get out your pre-mixed product and begin applying it to the surface.
Self-leveling underlayment will spread itself out, with a little help from a broom or trowel, and fill in any low spots, holes, or pock marks, creating a level surface on which to lay tile onto concrete. Allow the concrete to cure completely before moving onto the next step.
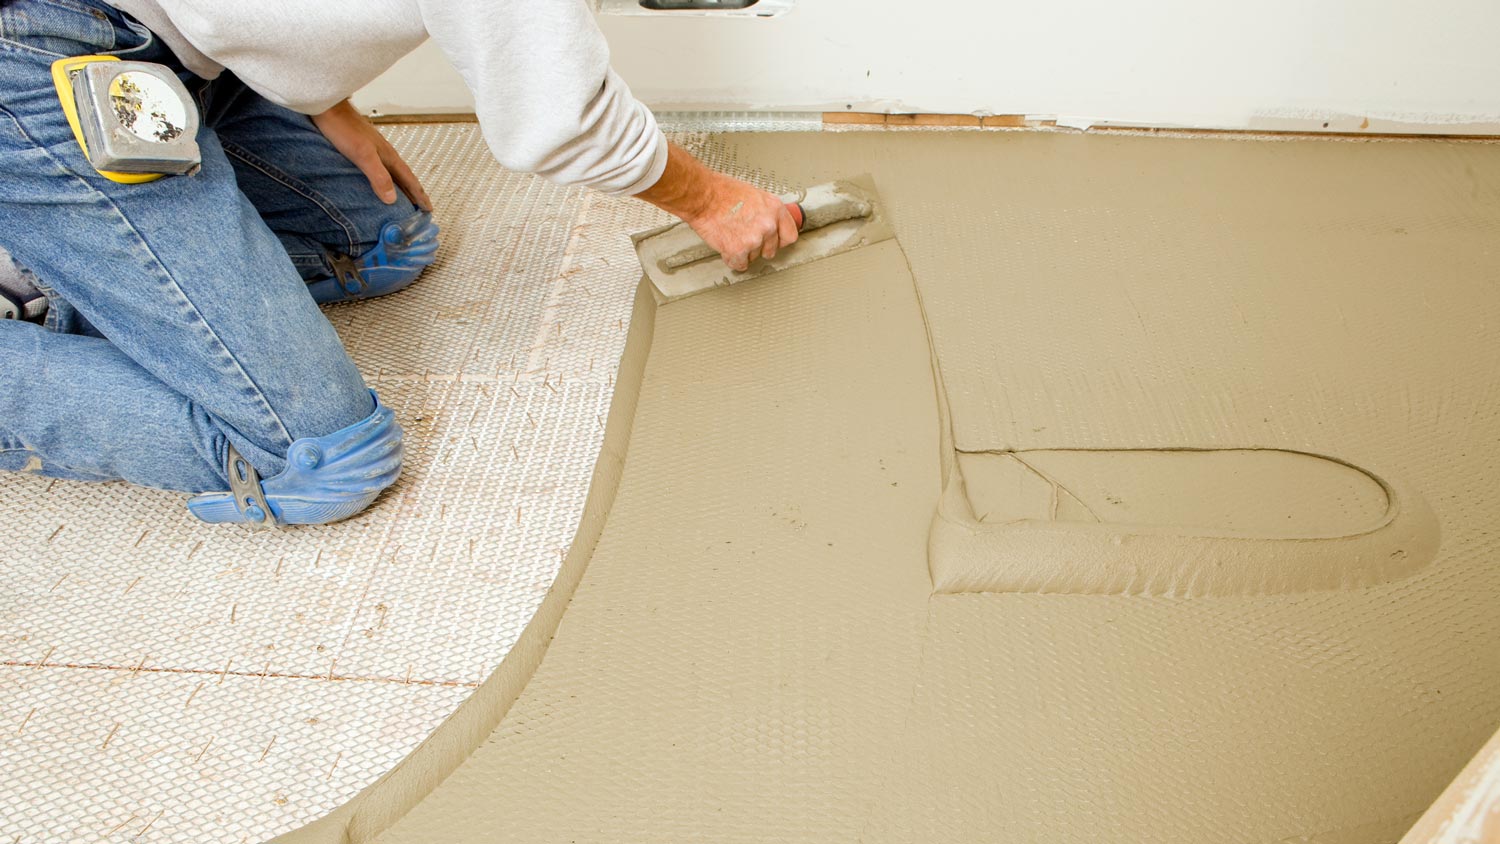
Concrete expands and contracts with fluctuations in temperatures, and tile laid over concrete will often crack as a result. Installing an anti-fracture membrane can add a layer of protection between the materials and reduce the likelihood that the tile will crack.
To install an anti-fracture membrane, you’ll have to choose between the liquid or sheet form. Wait until any crack filler or self-leveling concrete has dried completely and then if you’re using anti-fracture membrane sheets, apply thinset and lay the sheet on top, smoothing with a trowel as you go. If you’re applying liquid anti-fracture membrane, use a roller brush to paint a thick coat over the subfloor. In either scenario, wait for the anti-fracture membrane to dry completely before moving onto the next step.
With the prep work done, it’s time to move onto the fun part—seeing how your tiles will actually look on your floor. To do this, you’ll do a dry lay. All this means is that you’ll lay out all of the tiles on the floor without any adhesive to make sure you like how they look and that they fit in the space. This will also help you see where you’ll need to make cuts and how many tiles you’ll be cutting.
Start by identifying the center of each wall and snapping a chalk line across the length and the width. Where they meet is the center of the room.
Unpack all of your tiles and, beginning at the center of the room, lay them out in your desired pattern, covering the entire floor and checking for any tiles that are damaged or don’t match the rest. Adjust the layout as needed to avoid making awkward cuts or having to cut very small pieces of tile.
You can mark any tiles that will need to be cut, but hold off on cutting them until it’s time to actually install them. Once you’ve done your dry lay and marked your edge tiles, you can remove all of the tiles, stacking them neatly, so they are easy to re-lay after the mortar is spread on the surface.
After your dry lay is done and the tiles have been removed, it’s time to mix the mortar and get ready for the actual installation. Mix the mortar according to the manufacturer’s directions, making sure to only mix the amount that you need for the project.
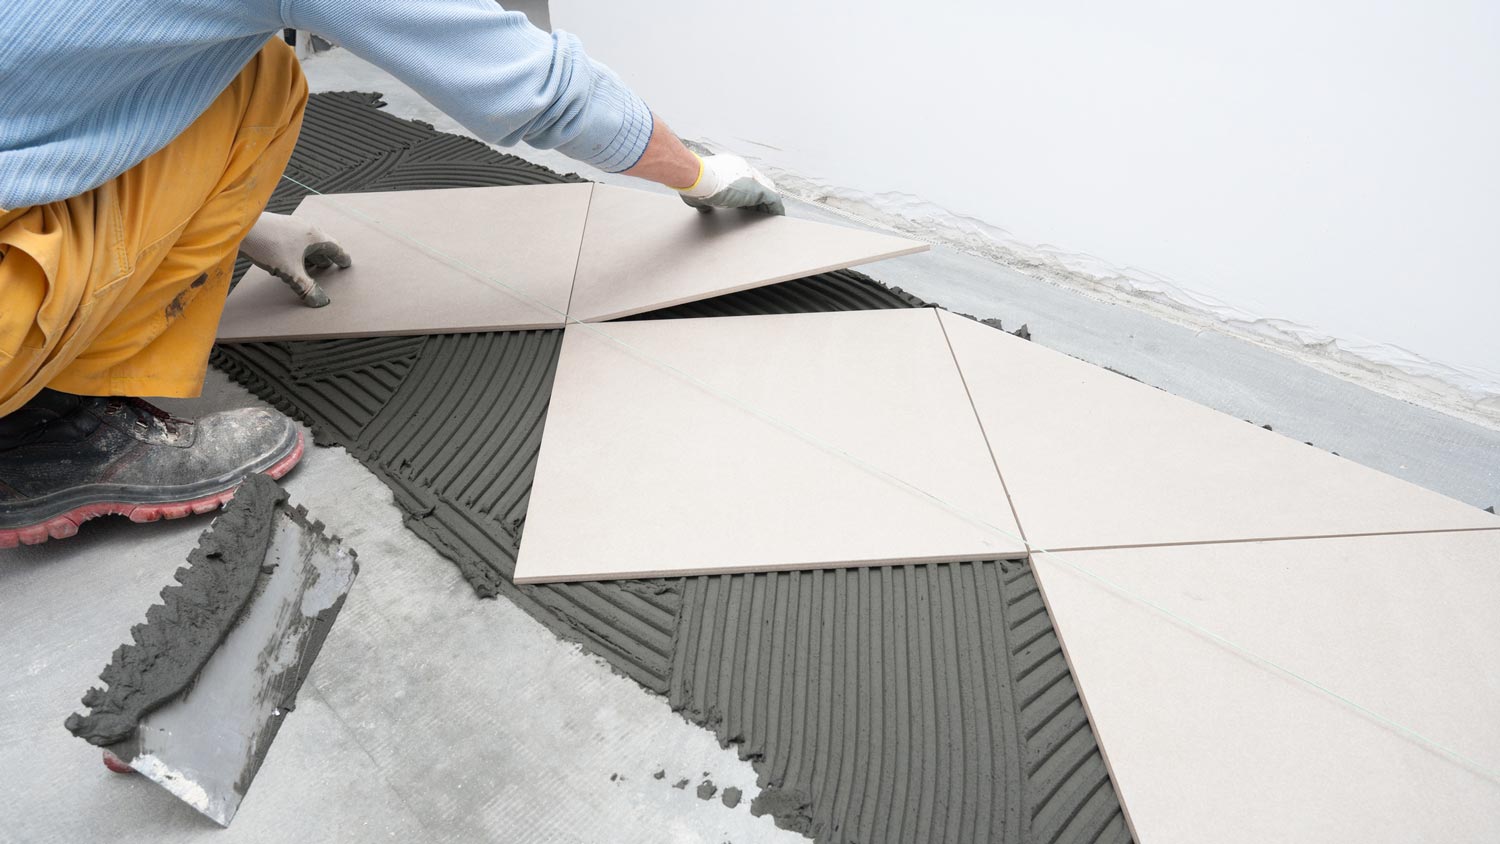
The moment has come—let’s lay some tile! Work in small sections depending on the size of your tiles. For larger tiles, you may work in larger sections, and for smaller tiles, you may work in smaller sections.
Typically, it’s a good idea to begin in the middle of the room or space and work outward, but in some smaller spaces, it may make more sense to begin in a different spot like the back wall or in a corner.
Evenly spread the thinset mortar on the subfloor with the notched trowel. When the mortar is evenly spread, begin laying your first row of tiles. Cut tiles as needed. Often, you can cut tiles with common tools depending on the type of tile.
Place spacers in between each tile to create a consistent gap that will later be grouted. Continue to lay tiles, making cuts as needed, until the entire floor is covered with tiles that are evenly spaced. Use your tile saw and tile nippers to cut the tiles to size, and use the dremel tool to cut any holes needed. Check each tile to make sure it's level with those surrounding it.
The mortar will need between 24 and 48 hours to fully dry and set. Keep people and pets off of the floor during this time to avoid causing any damage or shifting to the tiles.
Once the mortar is dry and the tiles are fully adhered to the subfloor, mix your grout according to the manufacturer’s directions. In some cases, you can purchase pre-mixed grout which will save you a step.
To grout tiles, you’ll need your grout, rubber grout float, a tiling sponge, and a bucket of water. Spread the grout over the tiles and into the gaps between the tiles until the gaps are filled. Scrape off as much excess grout as possible and then remove the rest with the tiling sponge. Repeat until the whole floor has been grouted. Let the grout dry for 48 hours before moving onto the next step.
If grout haze—a cloudy film that covers the tile—appears, you should wipe it off using a damp cloth. Removing grout haze as soon as possible after it appears will make it easier than if you wait and do it days or weeks later.
After the grout is thoroughly dry, apply your grout sealer using a small brush to brush it onto each grout line keeping as much off of the tile surface as possible. You can also use a spray sealant that can be sprayed on the entire surface and will wear off of the tile as the floor is used. Doing this will help reduce the amount of floor tile grout cleaning you’ll have to do later. Once the sealant is dry, your new tile floor is ready to go!
Gather all of your tiling tools and supplies in one area where you can leave them for the duration of the project.
Set aside enough time to account for drying time when you’ll need to steer clear of the space.
If you’re tiling over concrete in frequently-used space like a bathroom or entryway, make sure you have an alternate space to use while the layers are drying.
Make sure the underlying concrete is level prior to beginning tile installation.
Use a wet saw for installing ceramic tiles as well as porcelain, marble, or glass.
Whether you hire a pro to lay tile on concrete or decide to go it alone to keep up with bathroom tile trends, the space will be out of commission for at least a week due to the time it takes for the various layers to dry. Doing it yourself can save on tile installation costs, but it will require more active work time on your part.
Hiring a tile contractor near you can save on time, especially if you’re not experienced with installing tile, because they’ll take care of the active installation steps.
Kristin Luna contributed to this piece.
Terrible experience. Walls/trim/floors/cabinets/doors all have drip marks, overspray, etc. Tiling at the fireplace had to be redone by another vendor due to incorrect and shoddy install by Profect. Contractor had his children in our house while he was on site without prior authorization or...
 Profect painting & exteriors
It was wonderful working with Yordy and his team. They were very professional and are experts in what they do. They have completed the work on time, with better quality and with in fairly reasonable price. We just started with backsplash work , but liking his work, we went on to provide...
We were having 2”x 2” tile installed . There was a small installation error and the new additional replacement tile was from a different lot and the colors didn’t match. Joe assured us that he would rectify everything , which he did without hesitation. We decided to go with the 18” x 36” tile...
 CarifaTile
For several months I was looking for somebody to tile a wall in my master bath and move lighting fixtures, and could not find anybody who was responsive. I contacted Rowe through Home Advisor and within days they came by to assess the job and provide an estimate. The cost was very...
It went very well! The end product was amazing and we keep getting a lot of compliments from friends! M&E were very professional and they made sure we were happy with the product before leaving. They met with us in our home and at the tile shop to make sure we were okay with our tile and...
 M&E Remodeling
Involved an extensive bathroom remodel, including removing tub & installing walk in shower, new drywall, custome tile work to ceiling, plumbing, etc. Overall, job was done on time and on budget. Nick & his team were very professional and had high attention to detail. Quality was great. Highly...
 Stamos Flooring and Remodeling LLC
Very pleased with the service and level of professionalism. Courteous and very unobtrusive in performing service. Unlike several other companies, Bradford Xteriors was willing to perform work on a three story home with a clay tile roof. <br />
 Bradford Xteriors
This company did a very good job on the brick wall and it looks just amazing. The staff was always professional and was practically OCD on how the bricks were stacked and how they were laid. Although it took longer than expected, I am willing to sacrifice time over perfection anyday. The...
 My Handy Mate LLC Improvement & Remodeling
He did the tile work and he was good at it. He used other subcontractors for the rest of the work (like putting in the cabinetry) and they were okay but not great. He was a great guy! He was easy to work with and had a good eye for the detail of his work. There were a couple of things that I...
 Brian Miller Custom Remodeling
I was very impressed with Miller Cantrell! I live in an old home in which the sewage line that runs from my home to the sewage system is a line of clay tile. These eventually collapse and need to be replaced - an expensive problem and sure to happen at the worst time. I told them that my...
From average costs to expert advice, get all the answers you need to get your job done.
Ceramic tile as a flooring option boasts a long list of advantages over other surfaces. However, there are also some key drawbacks worth considering. We’ve rounded up both the pros and the cons of ceramic tile into a helpful list.
What causes tile to crack? We discuss seven reasons why your tile floors are cracking, including falling objects and installation problems, and how to stop it.
Make your tile project shine with these tips for grouting tile. Learn how to avoid common mistakes and finish strong with clean, sealed lines.

You don’t always need a pro for ceramic tile installation. Follow these seven simple steps to transform the floor of any room in your home into the perfect space.

Porcelain and ceramic tiles aren’t exactly the same. Discover the key differences between porcelain versus ceramic tile, including cost, durability, and more.
To avoid mold growth and tile damage, waterproofing is essential before tiling a shower. Learn four methods for tile shower waterproofing in this guide.