
Plaster repair costs are determined by the size and type of damage. Discover why some fixes you can DIY and why some require a pro’s help.
Get that repair looking smooth like butter with the right techniques

Plaster patches fail to blend when the lath behind your wall is loose or when you apply wet plaster over a dry surface.
Applying joint compound over plaster as your final coat creates a smooth finish, but you need at least three coats for proper blending.
Your plaster patch requires firm trowel pressure and complete drying time between coats to sit flush with the surrounding wall surface.
Hiring a local plaster repair professional provides reliable help with lath reinforcement and multi-coat application for seamless wall repairs.
Ah, the fun of older homes. Whether yours is still a diamond in the rough or you’re just polishing up a restored gem, chances are you’ll need to repair your plaster walls sooner or later. If your plaster patch is not blending properly, these eight tips will help you get a smooth, seamless finish.
Plaster is a wall material that was popular in the U.S. until the 1940s. Unlike drywall, which is the popular option today, plaster walls and ceilings were made by troweling a thick paste onto a framework of small wooden sticks called lath.
If your plaster patch isn’t blending, it could be because the plaster behind your patch has come loose from the lath, or the lath has come loose from the studs. That could cause your plaster to crack or prevent the patch from sitting flush with the rest of the wall.
Make sure all lath is tight and secure. If the wall gives when you press on it, that’s an indication your patch won’t blend well. You may need to add another piece of lath behind your patch. Use screws with plaster washes to secure it.
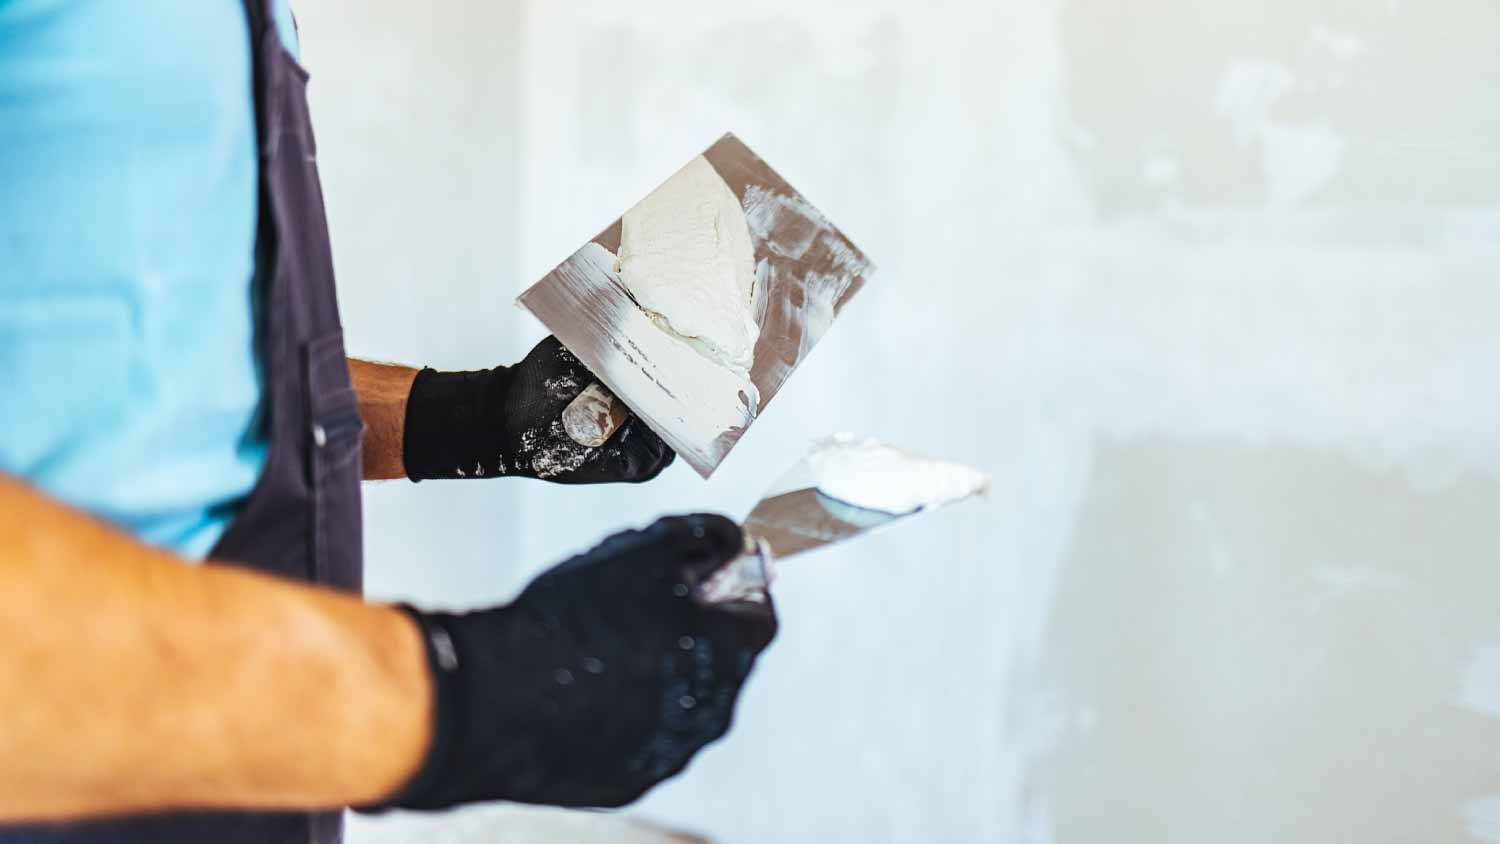
Make sure the plaster you’re using for your wall repair is the right consistency—not too wet or too dry. Either one could mean your patch won’t adhere tightly to the wall underneath. It should be the consistency of peanut butter (or pudding, depending on the type of plaster). Review the package instructions to make sure you’ve got the right ratio of water to powder.

Troweling wet plaster onto a dry surface could also affect your patch, as the moisture in the plaster could absorb into the wall. When plastering a wall or ceiling, keep a small spray bottle of water handy and use it to moisten your working surface before you add the plaster.
A common misstep when plastering a ceiling or covering holes in your wall is to use too few coats. Rarely will you be done after one coat (although that would certainly make the job go faster!). Instead, you’ll need to use three or even four coats to ensure a smooth finish. Plan on working in steps, and don’t forget to account for drying time.
If you don’t let the plaster dry (or cure) completely, your next application might pull off pieces of half-dry plaster, leaving the surface pitted and patchy instead of smooth. Follow the package directions closely, and give yourself extra hours, or even overnight, especially on rainy or humid days. You’ll get a much better result, even if it takes a little longer to get the job done.

You might feel like a light touch will lead to a better-blending patch, but the opposite is true. You’ll need to trowel the plaster firmly onto the surface to keep your patch flush with the wall. Use a small putty knife to press and scrape the wet edges of your plaster patch to blend with the wall.
And don’t try to get each coat perfectly smooth with the trowel when wet. Instead, you can let the patch dry with a rough surface, and then use the trowel to scrape down the high points after it has fully dried. Dried plaster is very tough, so you can use a little force if it’s bumpy. Just be careful to hold the trowel almost flat so you don’t gouge the surface.
If you’re looking for a very smooth type of plaster finish, use joint compound as your final coat. Make the layer very, very thin, like a skim coat. If you can see the wall underneath, all the better. Make sure the joint compound is the right consistency and allow it to dry completely. You may not even need to sand. Use a damp cloth or sponge to remove any remaining dust from the surface of your plaster patch and make sure it’s dry before moving on.
If you don’t prime before you paint over the plaster patch, it will soak up topcoat and look very different from the rest of the surface. Apply at least one coat of heavy-duty primer to prepare the patch for painting, ensuring the wall appears smooth and uniform.
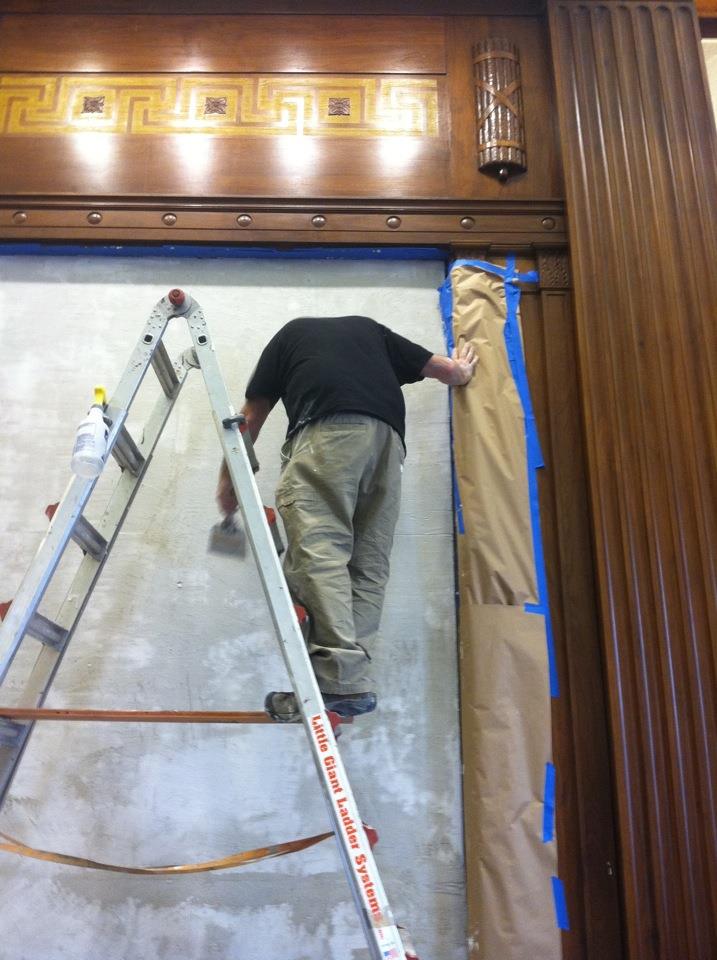
While getting a good blend between a patch and the wall is possible when you go slowly and take your time, you might prefer to call a plaster repair pro near you. They have the skills and experience to make even big bumpy patch jobs look seamless.
Positive experience. As previously stated, the replacement/repair could not be completed (no fault of the plumbing tech) b/c misinformation was rec?d by property management maintenance. Thanks to the plumbing tech for your efforts. Appreciate you!
 The Waterworks
Carpet repair done well. Scheduling was easy. Showed up on time.
I would recommend this company to anyone! He showed up on time, was friendly, completed a very difficult repair on our dryer vent cover, was responsive, and pricing was extremely fair and competitive. I would have him back to do any of our repairs or cleanings without hesitation!
Everything from initial contact to completion was absolutely top notch. We contacted the business during off hours to leave a message, and the owner still reached out to feel out the issue within minutes. We were scheduled and repaired within 48 hours. I cannot say enough about the...
 Supreme brick & chimney
Ace Fireplace Services came to the rescue for my chimney repair. They were quick to pinpoint the issue and worked their magic to fix it. My chimney is now in excellent shape, and I'm a satisfied customer.
 Ace Fireplace Services
Great experience all together. Dog friendly, courteous, great results and honest with recommendations. Will certainly be using Cardinal in the future for any carpet repairs
Description says they handle window repair including rotten hardwood - they called me back right away but didnâ t leave a voicemail. I followed up 3 days later and they said they donâ t do that kind of work.
Very good experience. He even moved things around in my bedroom to get to the wall. I would highly recommend him for plaster. I plan to have him come back.
 Peter J Grady
Great guys. Spend a lot of time repairing and prepping our walls before doing the new paint. Home looks great now.
They did an excellent job with the repair, took care of all communication with the insurance company and had car rental service also with a very reliable, quality care
 Three C Body Shop
From average costs to expert advice, get all the answers you need to get your job done.
Plaster repair costs are determined by the size and type of damage. Discover why some fixes you can DIY and why some require a pro’s help.

The cost of plastering walls and ceilings depends on the room size and ceiling height. Our tips can help you estimate an accurate cost.
Venetian plaster can add depth and texture to your aesthetic. Learn how much Venetian plaster costs based on factors like square footage and whether you hire a pro to help.

Patching plaster walls involves steps that need to be followed closely. If you’re a handy DIYer, you can follow these steps to learn how to patch plaster walls yourself.

Tired of looking at the crack down the wall? Plaster can be tricky to work with, but you can learn how to fix cracks in plaster walls with this guide.

Plaster is a sturdy wall material that has a tendency to crack. Most plaster cracks are cosmetic and don’t pose any harm, but it’s important to find out what is causing the cracks anyway. Learn why plaster cracks and how you can avoid damage.