

The cost of plastering walls and ceilings depends on the room size and ceiling height. Our tips can help you estimate an accurate cost.
Patch that pesky plaster crack with a few simple tricks

Plaster wall crack repair depends on crack width, with hairline cracks needing flexible filler while wider cracks require joint compound and drywall tape.
DIY materials cost $5 to $15 for joint compound, $3 to $10 for drywall tape, and $30 to $80 per gallon for primer and paint.
Fixing cracks in your plaster walls requires widening the crack slightly, applying joint compound in thin layers, and sanding smooth before painting for a seamless finish.
Hiring a local plaster repair professional provides reliable help with structural concerns and ensures proper joint compound application for long-lasting repairs.
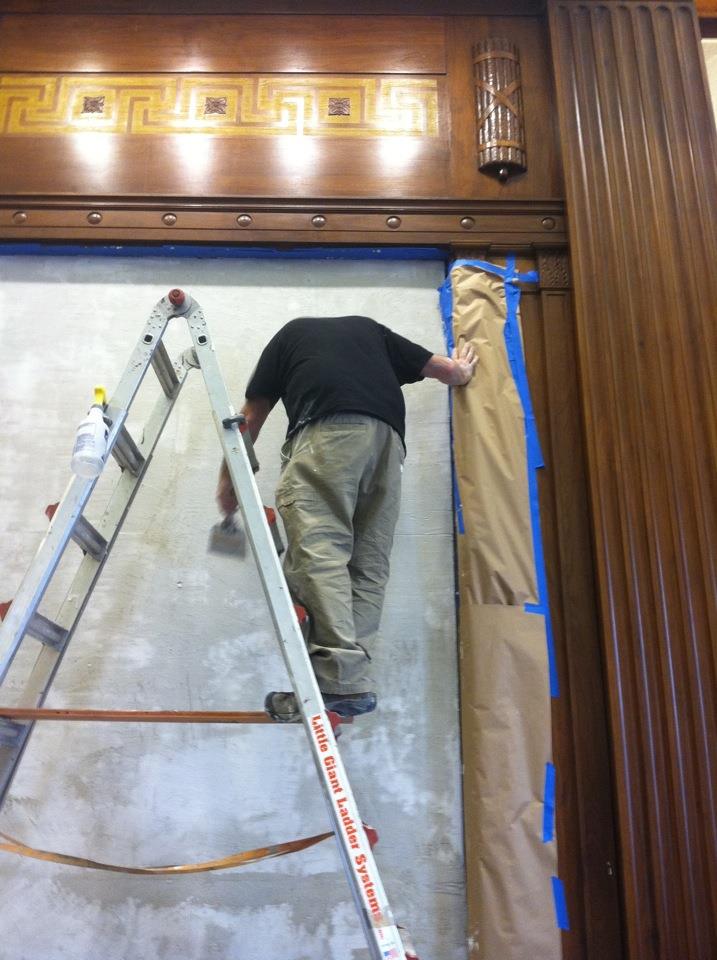
Cracked plaster can catch the eye—but not in a good way. While cracks along plaster walls aren’t always dangerous, they can seriously clash with your room’s aesthetic. To repair cracked plaster walls, you can use joint compound, drywall tape, or a store-bought flexible filler product. Here’s how to fix cracks in plaster walls in three easy ways.
Cracks that are more than 1/4-inch wide could indicate structural damage. Otherwise, cracks can form as a result of natural shifting over time, temperature changes, or normal shrinkage during the drying process. Small cracks are rarely cause for concern, but reach out to a local structural engineer if your cracks are constantly getting wider or longer out of nowhere.
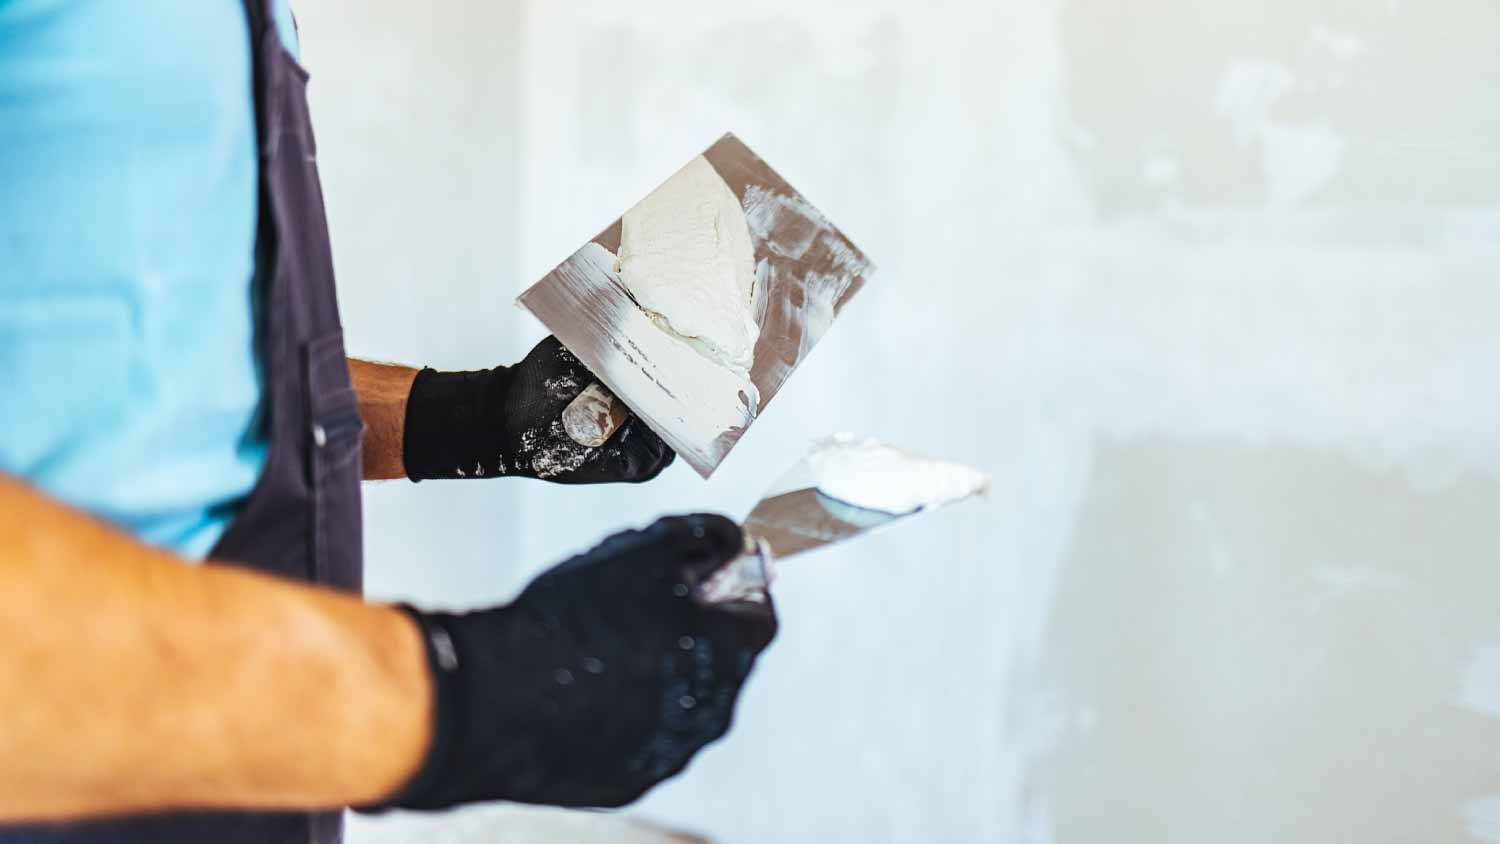
The most common way to repair cracks in plaster walls is to use joint compound. This “mud” will help fill in the crack and any other imperfections, creating a smooth surface that you can paint on top of later. To fix cracks in plaster walls with joint compound, you need to:
Slightly widen the crack with a utility knife and dust off any loose pieces.
Spread the joint compound with a putty knife or drywall knife.
Let the joint compound dry for 24 hours.
Apply another layer and let it dry for another 24 hours.
Sand down the surface to prepare for paint.

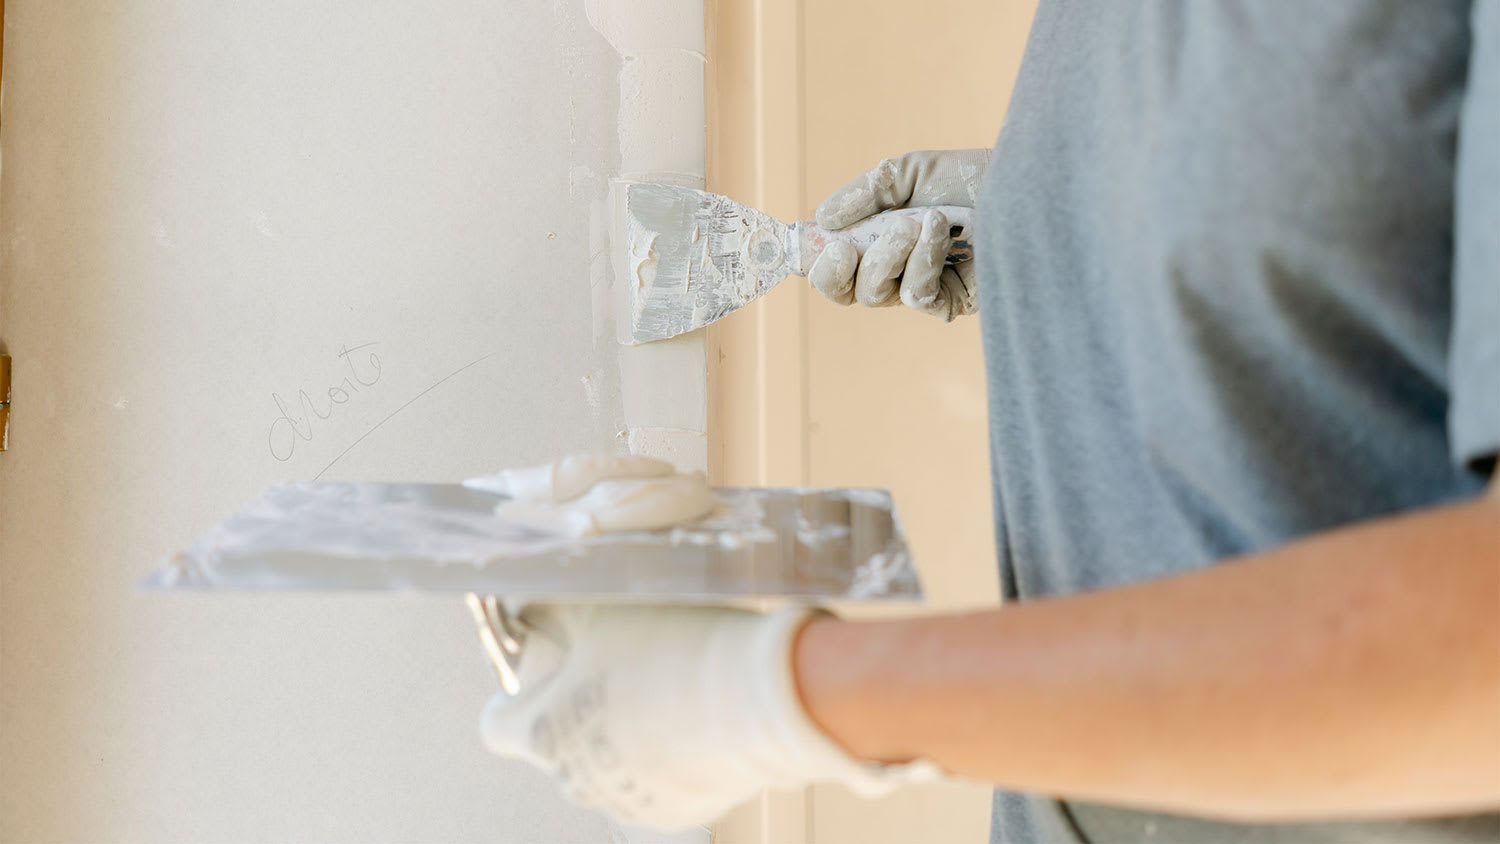
If the crack is a bit wider than a hairline crack but not as wide as 1/4 inch, you’ll want to add drywall tape to patch the crack in the plaster before using joint compound. This helps fully cover the crack, so it will be completely disguised after you repair the wall.
Cut a strip of drywall tape that extends slightly past the length of the crack. You may need multiple pieces of tape if the crack splinters along the wall. Afterward, you can follow the process of applying joint compound over the tape to smooth out the wall.
If the thinnest plaster cracks bother you, you can fill them in using a commercial flexible filler. This product is similar to caulk and helps fill the crack while still offering some flexibility since plaster can naturally shift and settle over time.
Use flexible filler and a caulk gun to fill the hairline crack according to the label’s instructions. Use a putty knife or filler knife to smooth the filler into the crack, then let it dry. Then, you can paint over the crack to finish the repair.

Learning how to fix cracks in plaster walls is an easy process, even for beginner DIYers. However, there are some common mistakes to watch out for when you’re getting started.
Filling cracks that are too large: Cracks wider than 1/4 inch can be a sign of structural damage or other issues. Call a pro to inspect before just filling in the crack.
Painting over cracks: Just painting over damaged plaster won’t do much to disguise the crack. The crack will show through the paint within a few months.
Not waiting for joint compound to dry: Joint compound needs at least 24 hours to dry, and it will need even more if your home is humid. If you sand or paint prematurely, the joint compound won’t be smooth, and the paint will bubble or peel.
Not cleaning and widening the crack: It seems weird to widen the crack before applying joint compound, but it’s a necessary step for the joint compound to fill and adhere to the opening.
Applying joint compound in thick layers: It’s best to be patient and apply one thin layer of joint compound at a time rather than applying a thick layer. Thick layers can cause an uneven wall surface or even lead to more cracks.
Skipping the sanding: You may be in a rush to paint, but make sure that you sand the joint compound down to disguise the repaired crack and create the smoothest possible surface for painting.
If you’re worried about making a mistake or simply don’t want to spend a weekend watching mud dry, consider hiring a plaster repair pro near you.
If you do decide to cover up smaller cracks in the plaster, it’s important to do so when the weather is not too humid or too dry and when the temperature isn’t too hot or cold. Keep the humidity in the room at 60% to 70% using a humidifier or dehumidifier, depending on your local climate. Make sure the room temperature is around 64 to 77 degrees Fahrenheit.
Plaster tends to crack from temperature and humidity fluctuations, so choosing optimal temperature and humidity levels when repairing plaster is important to prevent more cracking or an uneven finish.
Plaster can be expensive to repair. Since drywall is less costly, takes less time to dry, and looks exactly like plaster when repairs are done properly, companies often use drywall to repair plaster to help homeowners save money.
DIY plaster crack repairs cost $5 to $15 for about 1.75 pints to 1 gallon of joint compound, $3 to $10 for a roll of drywall tape, and $3 to $10 for sandpaper. You’ll also spend $30 to $80 per gallon for primer and paint to finish concealing the crack (unless you have paint left over from your last project).
By comparison, pro plaster repair costs for fixing a crack are around $90 to $180, depending on the length of the crack. For any cracks wider than 1/4 inch, always hire a pro. These could be signs of structural issues that need expert attention.
Positive experience. As previously stated, the replacement/repair could not be completed (no fault of the plumbing tech) b/c misinformation was rec?d by property management maintenance. Thanks to the plumbing tech for your efforts. Appreciate you!
 The Waterworks
Carpet repair done well. Scheduling was easy. Showed up on time.
I would recommend this company to anyone! He showed up on time, was friendly, completed a very difficult repair on our dryer vent cover, was responsive, and pricing was extremely fair and competitive. I would have him back to do any of our repairs or cleanings without hesitation!
Everything from initial contact to completion was absolutely top notch. We contacted the business during off hours to leave a message, and the owner still reached out to feel out the issue within minutes. We were scheduled and repaired within 48 hours. I cannot say enough about the...
 Supreme brick & chimney
Ace Fireplace Services came to the rescue for my chimney repair. They were quick to pinpoint the issue and worked their magic to fix it. My chimney is now in excellent shape, and I'm a satisfied customer.
 Ace Fireplace Services
Great experience all together. Dog friendly, courteous, great results and honest with recommendations. Will certainly be using Cardinal in the future for any carpet repairs
Description says they handle window repair including rotten hardwood - they called me back right away but didnâ t leave a voicemail. I followed up 3 days later and they said they donâ t do that kind of work.
Very good experience. He even moved things around in my bedroom to get to the wall. I would highly recommend him for plaster. I plan to have him come back.
 Peter J Grady
Great guys. Spend a lot of time repairing and prepping our walls before doing the new paint. Home looks great now.
They did an excellent job with the repair, took care of all communication with the insurance company and had car rental service also with a very reliable, quality care
 Three C Body Shop
From average costs to expert advice, get all the answers you need to get your job done.
The cost of plastering walls and ceilings depends on the room size and ceiling height. Our tips can help you estimate an accurate cost.
Plaster repair costs are determined by the size and type of damage. Discover why some fixes you can DIY and why some require a pro’s help.
Venetian plaster can add depth and texture to your aesthetic. Learn how much Venetian plaster costs based on factors like square footage and whether you hire a pro to help.

Plaster is a sturdy wall material that has a tendency to crack. Most plaster cracks are cosmetic and don’t pose any harm, but it’s important to find out what is causing the cracks anyway. Learn why plaster cracks and how you can avoid damage.

You can find plaster walls in a lot of older homes. What’s behind these walls—whether that’s lath or calcimine—can have an impact on how long they last. Finding out the age of your house can help you determine what you’re dealing with.
Finding a qualified plaster repair pro? Learn how to hire the right specialist, what questions to ask, and what to expect for your project.