The wrong curtain measurements can make a room look smaller while the right ones can make a room look larger. Learn how to hang curtains like a pro with this guide.
This easy DIY can really open up your space

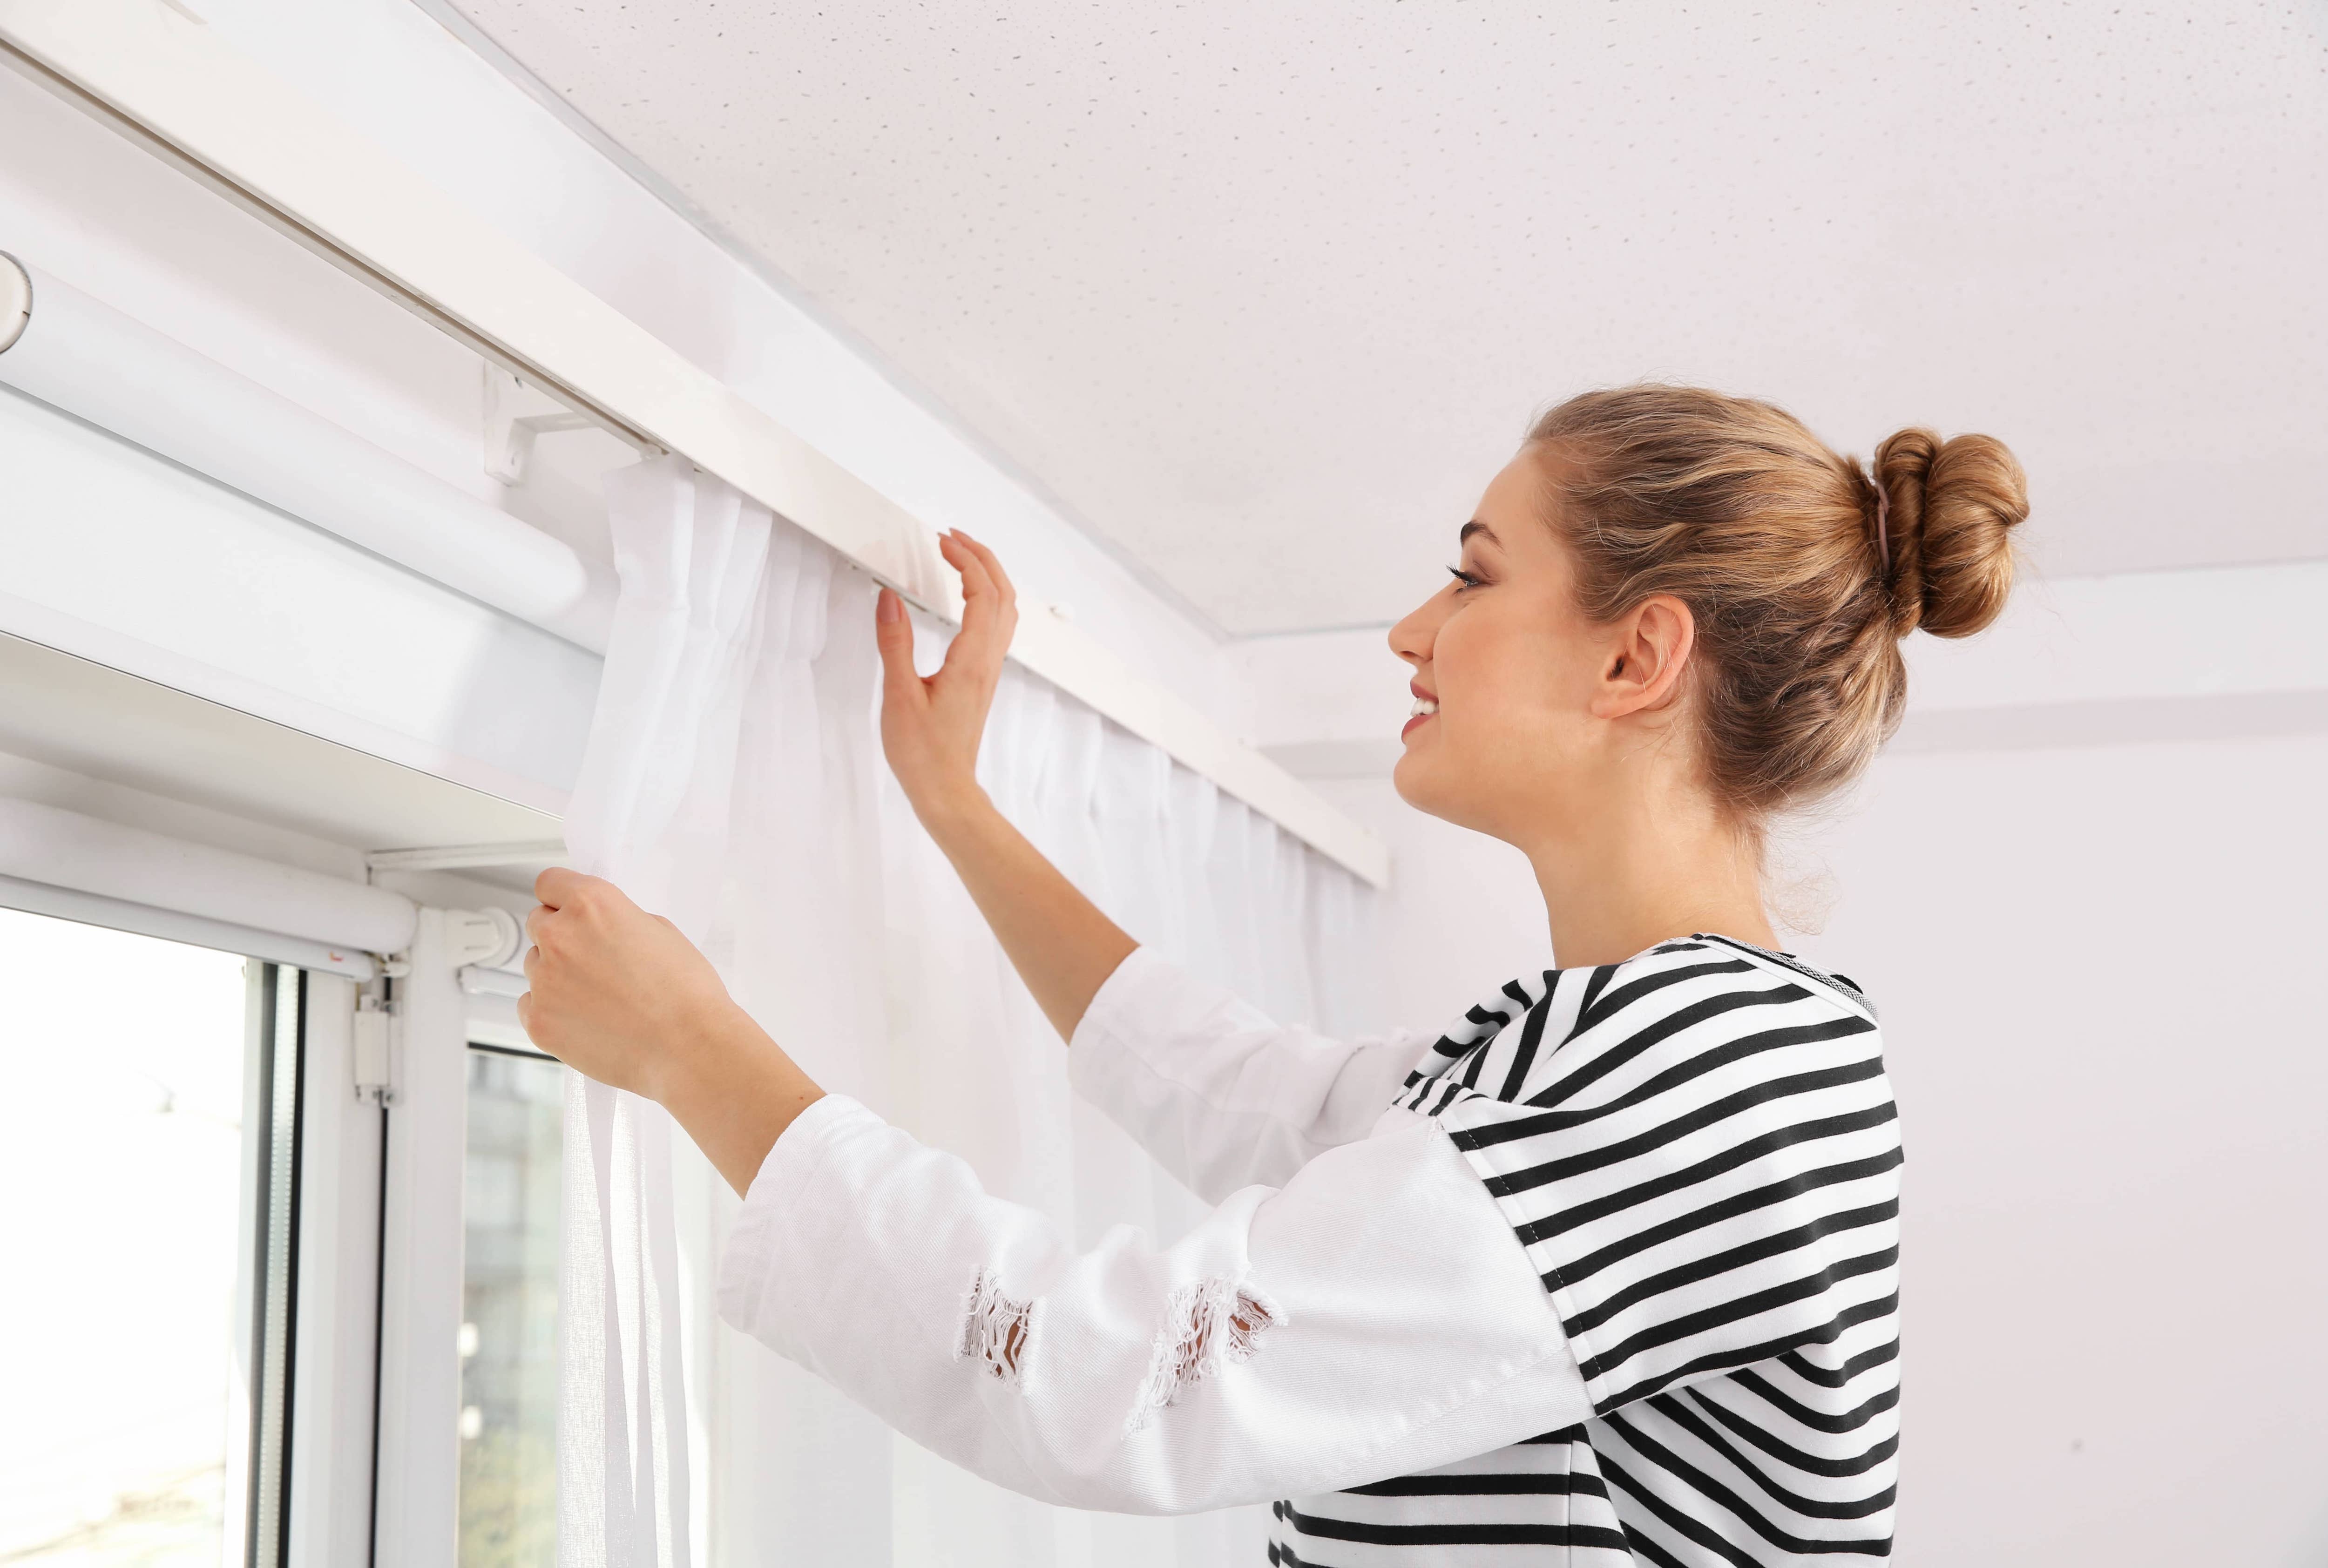
Hanging curtains from the ceiling is a great way to boost your interiors while adding privacy. But you want to do this DIY properly to avoid a skewed look, or worse, curtains that fall down. This guide walks you through the process from start to finish so your ceiling-mounted curtains look neat, hang straight, and stay put.
Before you start, make sure you’re using curtain hardware designed specifically for ceiling installations. Standard wall-mounted rods won’t work. You’ll need ceiling-mount brackets or a ceiling track system. Rods with ceiling-mounting kits are best for traditional drapes, while ceiling tracks work well for things like room dividers, blackout curtains, or a setup that requires smooth gliding.
Check the weight limit of the hardware to make sure it can support your curtains. Heavier drapes may need additional brackets or reinforced ceiling anchors.
Clear the area where you’ll be working to give yourself plenty of space to work. Move any furniture away from the installation zone and lay down a drop cloth or old sheet to catch dust from drilling. Next, get a step ladder tall enough to comfortably reach the ceiling without overextending your arms. Make sure it’s stable and positioned on a level surface.
Use a tape measure to figure out where you want to install the curtain rod or track. Most ceiling-mounted curtains are placed 2 to 4 inches out from the wall, but the right distance depends on your curtain style and how much coverage you want. Once you decide on the proper placement, measure where the curtains will hang and mark the start and end points on the ceiling with a pencil.
Then use a level to make sure your markings are straight and draw a light guide line. If you’re installing multiple curtain panels, mark where each bracket or track support will go. There’s typically one at each end and at least one in the center for longer panels.
Use a stud finder to locate joists in the ceiling, which are the horizontal support beams that hold up the ceiling and provide a secure base for mounting hardware. If your curtain hardware lines up with a joist, mark the spot.
If your joists aren’t in a good spot for your curtains, you can use heavy-duty drywall anchors instead. Just make sure they can handle the weight of your curtains. Toggle bolts or metal anchors are best for heavier drapes, while plastic anchors may suffice for lightweight curtains.

Use a power drill to make small starter holes where your brackets or track will go. For most curtain hardware, a standard 1/8-inch drill bit works well. But if you’re using anchors, check the anchor packaging to see what size bit it recommends. Then wear eye protection to protect against falling dust or debris and drill straight up into the ceiling, keeping your hand steady.
Line up each bracket or track mount with the pilot holes you just drilled and secure them using the screws that came with the curtain hardware package. If you’re using anchors, insert them first, then screw the hardware into place. Use a screwdriver or drill to tighten the screws until the bracket feels firmly secured and doesn’t wiggle.
Double-check that each bracket is aligned with the others and sits flush against the ceiling. If you're installing a curtain track, make sure each segment connects cleanly to the next so that your curtains will open and close smoothly.

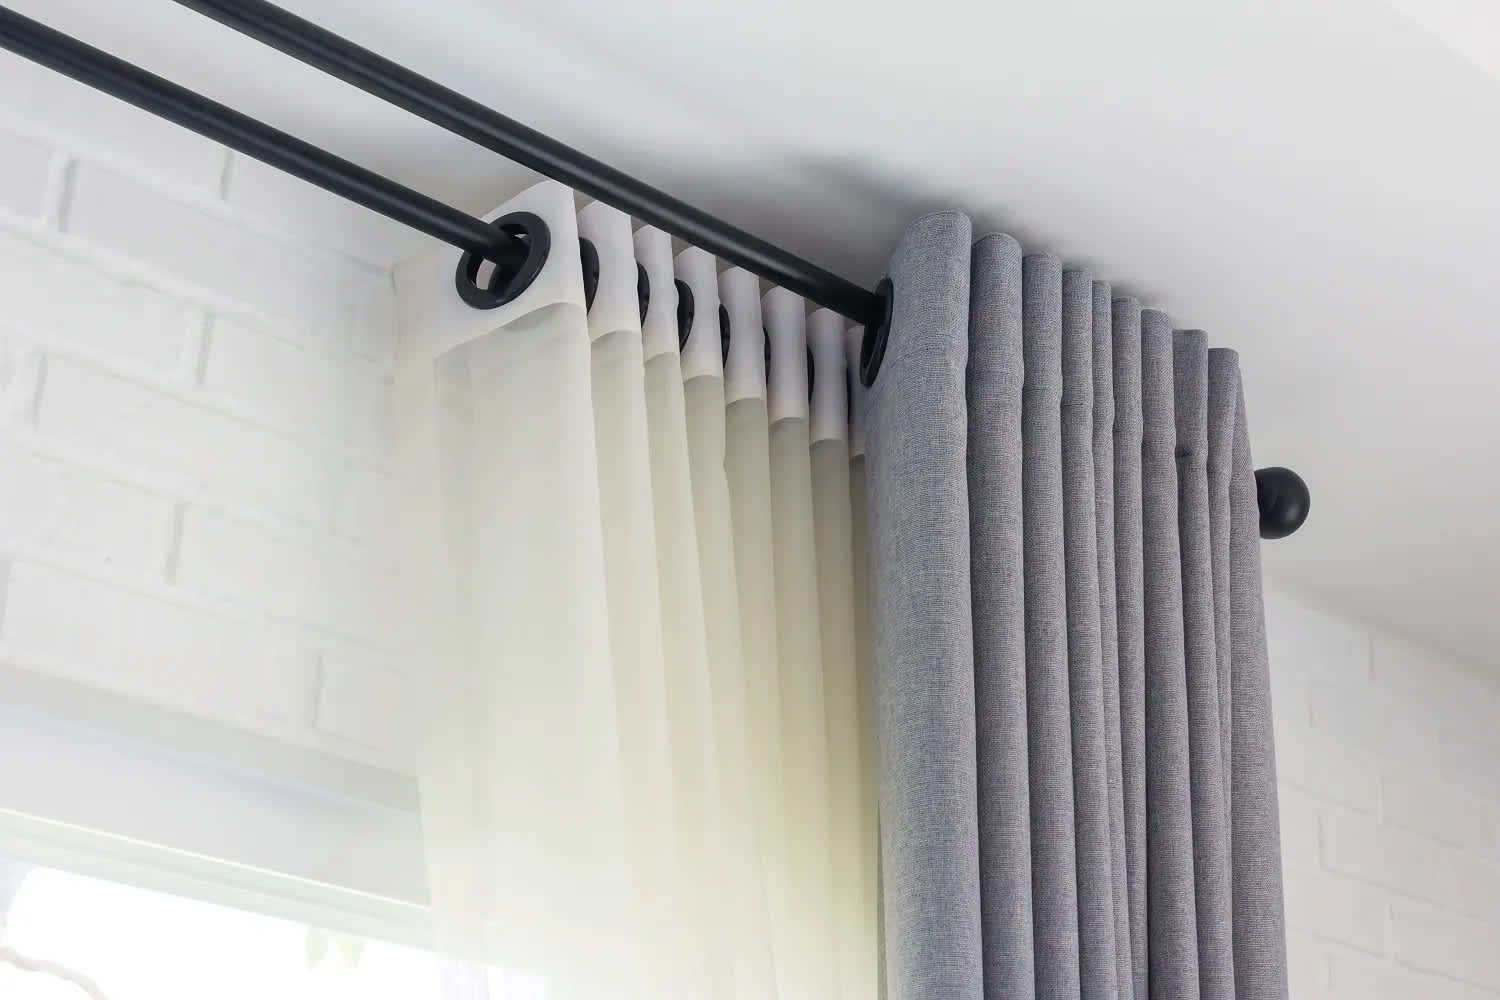
Slide your curtains onto the rod or clip them onto the track, depending on your setup. If you're using curtain rings or clips, make sure they’re spaced evenly for a clean, uniform look.
Then, carefully lift the rod into the mounted brackets or snap the curtain track into place, following the instructions that came with the hardware. Once it's secure, test the setup by gently pulling the curtains open and closed to make sure everything moves smoothly and stays level.
Straighten the curtains so they hang evenly on both sides and make any final adjustments to spacing or alignment. If the fabric is wrinkled, you can often use a handheld steamer. Or take them down and iron to get rid of creases. Follow the care instructions for your curtain material. Once everything looks right, you’re all done, and all you have left to do is clean up.
Hanging curtains from the ceiling might seem simple, but small missteps can lead to crooked lines, falling rods, or damage to your ceiling. So before you get started, make note of the following common mistakes so you can avoid them during your installation.
Using the wrong anchors: Not all drywall anchors are strong enough for ceiling installations. Make sure to use high-strength options like toggle bolts or metal anchors that expand behind the drywall to hold the weight of your curtains. Unless your curtains are exceptionally light, avoid lightweight plastic anchors, which can pull out over time.
Skipping the level: Even a slight tilt is noticeable when your curtains are fully extended, so you should always use a level when marking your placements.
Measuring only once: One wrong measurement can throw off the entire install, so measure twice before marking or drilling to avoid misaligned curtains.
Overtightening screws: Overtightening can crack drywall or strip the holes, especially if you're installing near the edge of a ceiling panel. Tighten the screws until they’re secure but no more than that.
Installing ceiling-mounted curtains yourself is a great way to save money on the installation, provided you have the right tools and feel confident with tasks like measuring, drilling into ceilings, and using anchors. Basic materials, such as curtain rods or tracks, anchors, and brackets, often cost between $25 and $100, depending on the quality and style. If you already own tools like a drill, ladder, and level, your out-of-pocket expenses are minimal.
However, hiring a professional handyperson can save you time while ensuring precise installation, especially when it comes to installing curtains in tricky scenarios, like on textured ceilings, high ceilings, or even heavy drapes. The cost to hire a handyperson usually ranges from $50 to $150 per hour.
Positive experience. As previously stated, the replacement/repair could not be completed (no fault of the plumbing tech) b/c misinformation was rec?d by property management maintenance. Thanks to the plumbing tech for your efforts. Appreciate you!
 The Waterworks
Carpet repair done well. Scheduling was easy. Showed up on time.
I would recommend this company to anyone! He showed up on time, was friendly, completed a very difficult repair on our dryer vent cover, was responsive, and pricing was extremely fair and competitive. I would have him back to do any of our repairs or cleanings without hesitation!
Everything from initial contact to completion was absolutely top notch. We contacted the business during off hours to leave a message, and the owner still reached out to feel out the issue within minutes. We were scheduled and repaired within 48 hours. I cannot say enough about the...
 Supreme brick & chimney
Ace Fireplace Services came to the rescue for my chimney repair. They were quick to pinpoint the issue and worked their magic to fix it. My chimney is now in excellent shape, and I'm a satisfied customer.
 Ace Fireplace Services
Great experience all together. Dog friendly, courteous, great results and honest with recommendations. Will certainly be using Cardinal in the future for any carpet repairs
Description says they handle window repair including rotten hardwood - they called me back right away but didnâ t leave a voicemail. I followed up 3 days later and they said they donâ t do that kind of work.
Very good experience. He even moved things around in my bedroom to get to the wall. I would highly recommend him for plaster. I plan to have him come back.
 Peter J Grady
Great guys. Spend a lot of time repairing and prepping our walls before doing the new paint. Home looks great now.
They did an excellent job with the repair, took care of all communication with the insurance company and had car rental service also with a very reliable, quality care
 Three C Body Shop
From average costs to expert advice, get all the answers you need to get your job done.
The wrong curtain measurements can make a room look smaller while the right ones can make a room look larger. Learn how to hang curtains like a pro with this guide.

You can make short windows look bigger by hanging long curtains. Read on for simple tips for hanging long curtains on small windows to open up your space.
Many homeowners are now using old pipes to hang their curtains. Add rustic vibes to your home with this guide for building your own DIY pipe curtain rod.

Knowing how to find a ceiling joist is necessary for homeowners looking to install fixtures or hang heavy objects from the ceiling.

Measuring your windows for curtains may seem like an easy-to-botch DIY, but it's actually simple and only takes minutes. Here’s how to measure for curtains.

No mantel? That doesn’t mean you have to skip the tradition of Christmas stockings. Here are nine ideas for hanging Christmas stockings around your home.