





Top-rated backsplash installation pros.

Get matched with top backsplash installation pros in Roslyn, WA

Enter your zip and get matched with up to 5 pros

Need a pro for your backsplash installation project in Roslyn, WA?

Select your specific project to find the pro for you.

TRUSTED BY ROSLYN, WA HOMEOWNERS

  • Average homeowner rating star icon4.8
    Average homeowner rating
  • Verified reviews icon34
    Verified backsplash installation services reviews

Find Backsplash installation pros in Roslyn

The Final Cut General Contracting, LLC
4.4(
8
)

Serving Roslyn, WA and surrounding areas

Approved

In business since 2016

Customers say: Quick response

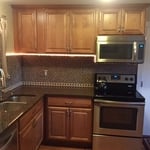
"Awesome finish work to our tiny remote cabin! Ryan and crew installed our LVP flooring in just a few hours. He kept us up to date on the project with text and pictures, super helpful since we live in Seattle and had to work. His crew kept the construction site clean and the vendor he used for our cedar interior work was meticulous. Thanks Ryan!"
hendricks
hendricks
Cle Elum
Cle Elum
Cle Elum done

+5

Response time3 days
2 neighbors recently requested a quote
Recommended by100%of homeowners
Perfection
5.0(
5
)

Serving Roslyn, WA and surrounding areas

In business since 2017

Free estimates

"Jose was very professional and did an excellent job. We had 2 exterior doors installed plus a security screen door and molding put on the doors plus a 3rd inside door molding and threshold. The only thing I would say he was delayed and forgot to let us know. But it turned out great and we love our doors! Will hire him again! Thanks Jose!"
Response time3 hrs
Response rate95%
Recommended by100%of homeowners
Avatar for Jill Seidner Interior Design
Jill Seidner Interior Design
3.5(
89
)

Serving Roslyn, WA and surrounding areas

In business since 2006

Credit card accepted

"Once I sent her all the measurements, it took her a little while to get the options back to me.  Overall, they're good designs.  However, they're very simplistic and give general ideas for space planning.  I was hoping to have a better idea for sizes of furniture for the space and some variations on staging.  
Jill was very responsive when I did have a question.  I'm not sure how helpful it is to have a virtual design done.  If we lived in similar cities, I'd probably use her again for help with additional designs.
"
Recommended by55%of homeowners
Avatar for JBC Group Solutions Inc
JBC Group Solutions Inc
4.0(
4
)

Serving Roslyn, WA and surrounding areas

In business since 2007

Emergency services offered

"I have been using them for 3 years for multiple projects and would not go to somebody else. They also built a cabin in the woods. It was built 10 miles from the road so it was like carrying all the stuff up the path. They also did the garage and remodeling of the house, mostly kitchen and a little bit of plumbing work in the bathroom. I am still using them and I would be using them for the next thing that will be coming up too."
Custom Staircases
Custom Exterior Restoration
Custom Bathrooms
Recommended by75%of homeowners
Showing 1-10 of 30
Backsplash Installation questions, answered by experts

Glass tiles are among the most difficult to install. This is because their transparency makes the adhesive visible, and any imperfections on the opposite side are also likely to be visible. Glass tiles also must be handled carefully during installation, as they are prone to scratching. For these reasons, glass tiles often require professional installation to get the most out of their beauty and unique look.

The easiest tile size to install is large tiles, and they’re easier to install than small tiles—the job is faster and simpler when there’s less placing, adhering, and grouting to do. However, when tiles get really big, they’re more difficult to handle, cut, and fit. Standard floor tile sizes are 12-by-12 inches, 18-by-18 inches, and 12-by-24 inches.

While you shouldn’t use thinset mortar on its own as a floor leveler, it can work alongside other products to help level floors. For instance, you could start with a self-leveling compound, let that dry, then apply backer board with thinset mortar to help fully even out the floors ahead of laying tile.

The process takes two to four days, depending on the size of the area and your experience level. The first day involves assessing and prepping the existing tile, while the second day is for laying the new tile. This may take longer in complex areas. After letting the adhesive dry for 24 hours, grouting and sealing can be completed on day three. For larger projects or intricate tile patterns, expect the timeline to stretch a bit longer. Also, proper drying time between steps is essential for long-lasting results, which extends the project’s time.

You can lay tile directly on a plywood countertop, but if it’s a high-traffic surface in a kitchen, it’s better to add a moisture-resistant base. Plywood is susceptible to moisture, so if dampness seeps through from the surface around the sink or where you prep food, it can cause the plywood to warp, leading to grout damage, cracked tiles, or mold growth under the surface. 

The Roslyn, WA homeowners’ guide to backsplash installation services

From average costs to expert advice, get all the answers you need to get your job done.