






Top-rated backsplash installation pros.

Get matched with top backsplash installation pros in Loganton, PA

Enter your zip and get matched with up to 5 pros

Need a pro for your backsplash installation project in Loganton, PA?

Select your specific project to find the pro for you.

TRUSTED BY LOGANTON, PA HOMEOWNERS

  • Average homeowner rating star icon4.5
    Average homeowner rating
  • Verified reviews icon26
    Verified backsplash installation services reviews

Find Backsplash installation pros in Loganton

Avatar for Rock-A-Fellas Co Inc
Rock-A-Fellas Co Inc
4.5(
23
)
Tile: Ceramic and Porcelain - InstallTile: Ceramic and Porcelain - Install - For Business

Serving Loganton, PA and surrounding areas

In business since 2003

Credit card accepted

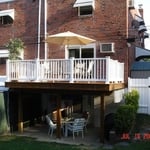
"Found Rock-A-Fellas on Angies List and I'm glad I did.  Bob examined thoroughly and patiently explained the construction flaws in the carport built in the rear of my home by another contractor back in 2009.  Because the original contactor did not follow standard building codes and use proper construction techniques and materials, I was cited by the City of Philadelphia.  Bob spoke to the Licenses and Inspections Inspector and tried very hard to figure a way to save the carport.  Unfortunately, due to the poor prior construction, demolition was the only option left to me. 

Bob and his three man crew arrived 30 minutes early and for the next three and a half hours methodically and carefully removed the carport, which included a roof and sides.   I was very impressed with their attention to detail such as avoiding damaging the power and cable lines, reassembling the downspout, tying back the power lines after the demolition was over/ 

After the demolition was over, you couldn't tell there was ever a structure.  

I hired Rock-A-Fellas to  remodel/reconstruct my nephew's bedroom, which had termite and moisture damage.  I'm also considering having Bob and his crew do a complete remodel of my kitchen, basement, and a new carport. 


This was my best experience with a contractor.  I give Rock-A-Fellas an A+++++ rating.
"
Additional Photos
Additional Photos
Additional Photos
Additional Photos
Additional Photos

+14

Recommended by100%of homeowners
Showing 1-10 of 34
Backsplash Installation questions, answered by experts

To make a small bathroom look bigger, choose light-colored tiles in a medium- to large-format size. Lighter colors like white, cream, or light gray help open up a room, making it feel larger and more airy. While it may seem counterintuitive, small tiles can actually make a bathroom look smaller because the increased number of grout lines creates a busy pattern that visually shrinks the space. Instead, opt for medium- or large-format tiles for a more seamless, expansive appearance. For the best effect, pair your tiles with a matching or similarly colored grout to create a continuous surface that enhances the illusion of a larger area. Avoid dark colors, heavy patterns, and contrasting grout, as these can make the space feel more confined.

You can use sanded or unsanded grout for a shower pan, but sanded grout isn’t the best option for shower walls. For those areas, you’ll want to use unsanded grout, which works well on vertical surfaces and is less likely to slump than sanded grout. Alternatively, you can use epoxy grout for shower walls.

Penny tile should be sealed to protect the grout from moisture and keep stains from damaging the look of the tile. If penny tile is in a humid or high-traffic area, like a bathroom, kitchen, or entryway, it needs sealant. Any type of tile and grout is best maintained with a sealant reapplied by a pro every one to two years.

If you’re handling your tile removal yourself, seal the room using painter’s tape and heavy-duty contractor bags to prevent dust and shards from escaping. Use a claw hammer or a pry bar and a mallet to get behind the tile and pry it away from the floor or wall. Once your tiles are all removed, sweep everything into contractor bags for disposal, being careful not to overfill them. Make sure you wear a dust mask, safety goggles, and work gloves to keep yourself safe from injury while you work.

The process takes two to four days, depending on the size of the area and your experience level. The first day involves assessing and prepping the existing tile, while the second day is for laying the new tile. This may take longer in complex areas. After letting the adhesive dry for 24 hours, grouting and sealing can be completed on day three. For larger projects or intricate tile patterns, expect the timeline to stretch a bit longer. Also, proper drying time between steps is essential for long-lasting results, which extends the project’s time.

The Loganton, PA homeowners’ guide to backsplash installation services

From average costs to expert advice, get all the answers you need to get your job done.