





Top-rated drywall pros.

Get matched with top drywall pros in Kearney, MO

Enter your zip and get matched with up to 5 pros

Need a pro for your drywall service project in Kearney, MO?

Select your specific project to find the pro for you.

TRUSTED BY KEARNEY, MO HOMEOWNERS

  • Average homeowner rating star icon4.5
    Average homeowner rating
  • Verified reviews icon120
    Verified drywall services reviews

Find Drywall pros in Kearney

Avatar for JGS Home Improvements
JGS Home Improvements
5.0(
25
)
Drywall - InstallDrywall - RepairDrywall - Repair - For Business

Serving Kearney, MO and surrounding areas

Approved

Super Service Award Winner

In business since 2024

Free estimates

Customers say: True professional

"Juan and his team did incredible work and fixed up a lot of things in my house. Some large, some small. - Fixed and painted 2 walls that had been damaged by previous contractors - Repaired a 6x6 post in the deck - Updated all of the power outlets in the kitchen - Power-washed the entire exterior of the house - Fixed and cleaned the large fountain in front of the house - Painted areas of drywall that were exposed after replacing thermostats The team was very accommodating and professional the whole way. They really took care of my house. Not only that, but unlike a lot of contractors that only show up to sell to you and collect payment with the work subcontracted out, the owner if the company is out there doing the work with the team. I will absolutely hire this crew again."
House Painting
House Painting
House Painting
House Painting
House Painting

+3

Response time3 days
4 neighbors recently requested a quote
Recommended by30%of homeowners
Avatar for Lapuc Renovations, LLC
Lapuc Renovations, LLC
5.0(
13
)
Drywall - Repair

Serving Kearney, MO and surrounding areas

Approved

In business since 2016

Free estimates

Small jobs welcome

"Cesar did an amazing job on our painting project. He painted our living room, kitchen/dining room, and entryway. He was attentive to detail, neat, and got the job done in a timely manner. Not only is he an excellent painter but he?s also an outstanding person- friendly, courteous, and trustworthy. We would hire him again in a heartbeat! Note: The drop down menu gave me only one option for work done which was drywall repair but ours was a painting project."
OUR WORK
OUR WORK
OUR WORK
OUR WORK
OUR WORK

+41

Response time5 hrs
2 neighbors recently requested a quote
Recommended by61%of homeowners
Shane's Interior and Exterior Painting
5.0(
10
)
Drywall - Repair

Serving Kearney, MO and surrounding areas

Approved

In business since 2008

Free estimates

Warranties offered

"Shane is detailed and has a strong work ethic. He communicates very well to ensure he has a clear understanding of the job expectations. He is also well organized and keeps the work area clean and tidy at all times. In addition, his bid was reasonable and he touched bases with me frequently to ensure that we stayed within my budget. I'm very pleased with the results and could not be happier. Would GLADLY do business with him again!"
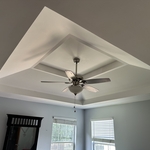
Living room ceiling
Living room ceiling
Living room ceiling
Living room ceiling
Recommended by100%of homeowners
...
Showing 1-10 of 202
Drywall questions, answered by experts

It is more difficult to drywall a ceiling than it is to drywall a wall, but not so hard that DIYers can’t tackle it. One of the main issues with hanging drywall on your ceiling is getting it into place. Drywall isn’t light so, if you are hanging full drywall panels, you will need at least two (it’s better with more) people to hold the panel while you drill it into the ceiling as a single piece can weigh between 40 and 60 pounds and will need to be held in place for up to 10 minutes.

You should wait at least 24 hours for drywall mud to dry before sanding or applying another coat. However, the exact drying time depends on several factors, including the thickness of the application, room temperature, humidity, and the type of compound used. Thicker layers, or projects in high humidity, may require 48 hours or more. Lightweight compounds tend to dry faster than heavier, all-purpose ones. You'll know the mud is ready when it feels completely dry and firm to the touch and has changed to a consistent light color. Sanding too early can cause smudging or gouges, so patience is essential for a smooth finish.

While every home has its own unique needs, ceiling drywall installation typically follows a staggered or stepped pattern to enhance structural integrity and reduce the visibility of seams. Starting from one corner, sheets are placed perpendicular to the ceiling joists, with the ends of adjacent sheets meeting along the center of the joist. The next row begins with a half sheet, ensuring joints don't align vertically. This alternating pattern, combined with proper taping and mudding, creates a seamless appearance and strengthens the ceiling structure, minimizing the risk of cracks over time.

This depends on how much plaster is applied and in how many layers, but a decent estimate is around 150 square feet. If you are applying only two coats on a small wall, there is a chance you may only need one or two gallons for the entire project. If you are plastering a large living room wall with high ceilings, using one of the more involved techniques–like Scagliola–that requires several coats, expect the project materials costs to add up quickly. 
Choose a drill bit that is the size of the screws of the anchors you will use. You aren’t drilling through metal or concrete—hopefully—so any standard twist, wooden or all-purpose drill bit will work fine. It’s also important to have a screwdriver capable of drilling through the drywall and into the stud. The good news is most available drills, even the older ones, can do this with no issue.

The Kearney, MO homeowners’ guide to drywall services

From average costs to expert advice, get all the answers you need to get your job done.