



Top-rated backsplash installation pros.

Get matched with top backsplash installation pros in Hopland, CA

Enter your zip and get matched with up to 5 pros

Need a pro for your backsplash installation project in Hopland, CA?

Select your specific project to find the pro for you.

TRUSTED BY HOPLAND, CA HOMEOWNERS

  • Average homeowner rating star icon4.1
    Average homeowner rating
  • Verified reviews icon48
    Verified backsplash installation services reviews

Find Backsplash installation pros in Hopland

Avatar for Mike's Home Improvement
Mike's Home Improvement
5.0(
14
)
Tile: Ceramic and Porcelain - InstallTile: Ceramic and Porcelain - Install - For Business

Serving Hopland, CA and surrounding areas

Credit card accepted

"Mike’s Home Improvement transformed my seen better days 1930’s fixer upper cabin into a beautiful, cozy, insulated and functional home. The work they did included a new roof and siding, windows, plumbing… a complete bathroom overhaul… and more. They worked quickly, did a great job, I absolutely recommend them!"
Response time8 hrs
Recommended by85%of homeowners
Robert's Flooring
5.0(
5
)
Tile: Ceramic and Porcelain - InstallTile: Ceramic and Porcelain - Install - For BusinessTile: Natural Stone (Granite, Marble, Slate, Quartz, etc) - Install+1 more

Serving Hopland, CA and surrounding areas

In business since 2010

Free estimates

Emergency services offered

"Robert and his crew did a thorough and excellent job in prepping, and refinishing our floor. He also helped us move our refrigerator and heavier furniture back in. A pleasure to work with!"
Response time1 day
Recommended by100%of homeowners
Robert's Flooring
5.0(
5
)
Tile: Natural Stone (Granite, Marble, Slate, Quartz, etc) - InstallTile: Natural Stone (Granite, Marble, Slate, Quartz, etc) - Install - For Business

Serving Hopland, CA and surrounding areas

In business since 2010

Credit card accepted

"Robert and his crew did a thorough and excellent job in prepping, and refinishing our floor. He also helped us move our refrigerator and heavier furniture back in. A pleasure to work with!"
Response time1 day
Recommended by100%of homeowners
Mike Home Improvements
4.0(
22
)
Tile: Ceramic and Porcelain - Install

Serving Hopland, CA and surrounding areas

In business since 2020

Free estimates

Credit card accepted

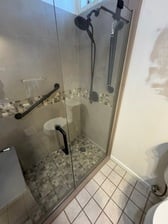
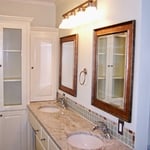
"Mike and his crew gutted a bathroom built in the 70s. The results are beautiful. Tile step in shower. Moved the drain and water from the left to the right. Installed decorative grab bars. New vanity, mirror and vanity lighting. The job was finished in a timely manner along with paying to have a cleaning service come in. So much dust. I will definitely recommend and higher again."
Response time5 hrs
Recommended by83%of homeowners

Avatar for Jill Seidner Interior Design
Jill Seidner Interior Design
3.5(
89
)
Tile: Ceramic and Porcelain - InstallTile: Ceramic and Porcelain - Install - For Business

Serving Hopland, CA and surrounding areas

In business since 2006

Credit card accepted

"We discussed designs for our family room. She was easy to work with and everything was done through email. We sent Jill details about the room and photos. She understood things well, sent us back ideas and a few room plans. We didn’t use her ideas but they were valuable for us for other perspectives. The deal was exactly what we expected."
Recommended by55%of homeowners

Showing 1-10 of 21
Backsplash Installation questions, answered by experts

Per the International Code Council, walk-in shower floors should have a minimum slope of 1/4-inch per foot (or a 2% slope) towards the drain. The slope should be no steeper than 1/2-inch per foot (or a 4% slope). This helps safely direct water into the drain rather than all over your bathroom.

You can attach tiles to a wall using thin-set mortar. You’ll also need a notched trowel to create grooves within the adhesive so it flattens completely when pressed in and securely holds the wall tiles. Finally, you’ll need grout to smooth the gaps between the tiles and, ideally, a grout sealer to prevent mold. While it sounds simple enough, proper planning and execution are crucial, so carefully review the steps in this guide or hire a pro tile installer to complete this project.

Mortar and thinset both serve the same purpose—tile adhesion—but have different compositions and use-cases. Thinset is heatproof and presents a wide range of possibilities due to the added polymers. Mortar is typically used for bonding stones and brick. Thinset is rarely used outside, while mortar is rarely used inside.

You should always use caulk instead of grout where the tile meets the wall. This will help your tile installation look great and last a long time. When you accidentally use grout for the corner seams, you end up making the tiles too rigid. So as the wall shifts over time, your tiles have no wiggle room. This can lead to tile damage, which will eventually require you to do at least a partial reinstallation.

The rule tells you how to cut tile to install it in a corner. The 3/4/5 rule recommends that you should have 3 feet across on one straight line, four feet on the other perpendicular line, and 5 feet of length from the end of one of the lines to the other. You’re making a right triangle with the tile, and the hypotenuse (the line across from where the 3-foot lie and 4-foot line meet) should be 5 feet long.

The Hopland, CA homeowners’ guide to backsplash installation services

From average costs to expert advice, get all the answers you need to get your job done.