
The cost of converting a cesspool to a septic system depends on factors like labor, complexity, and materials. Use our guide to estimate your budget.
Cover the mess without the stress

Your cesspool can leak harmful waste into groundwater and release dangerous gases, creating serious health and environmental risks that need immediate attention.
Professional cesspool filling costs range from $3,000 to $10,000, and addressing the project now helps you avoid future collapse risks and contamination issues.
You'll need to clear debris, add fill material in layers, compact each layer thoroughly, and finish by leveling the surface before adding topsoil or landscaping.
Hiring a local septic tank repair professional takes care of heavy excavation, waste disposal, and regulatory compliance, keeping your property safe and the job stress-free.
Are you ready to tackle that old cesspool head-on? The good news is you can do it on your own. Read on to learn what safety gear and tools you’ll need as well as the local rules around filing in cesspools. From digging it out to managing the waste, we've got you covered whether you're in it for the eco-friendly vibe or just reclaiming your backyard.
Filling in that old cesspool is about more than tidying up. For starters, forgotten cesspools are like ticking environmental time bombs. They can leak nasty stuff into the groundwater, affecting water quality and health.
Have you ever thought about the gasses neglected cesspools can belch out? It's not great for the air you breathe. Plus, they're accidents waiting to happen. Imagine a collapse or someone taking an unexpected dive down the cesspool hole!
By giving old cesspools a proper send-off, you’re not just cleaning up but also looking out for your health, safety, and the planet.
Filling in an old cesspool is a very smart move—as we may have mentioned above—and doing some straightforward prep can make the DIY process a bit easier. With safety, compliance, and the right tools, you'll be on your way to a successful project.
Gather safety tools: Gloves, boots, and eye protection are a must. If gasses are present, a gas monitor is also necessary for a safe working environment.
Gather your tools and equipment beforehand: This will streamline the excavation and filling tasks and minimize the risk of delays and complications.
Get some clean fill material: Gravel or soil are great as filling for the cesspool.
Confirm local regulations: Permits may be required for cesspool filling compliance.
Plan for disposal of waste materials: Some may be recyclable, while others require professional disposal.
Identify and mark underground utilities: Avoid accidental damage during excavation by knowing where your utilities are located.

Whether you're motivated by environmental concerns or regulatory compliance or just want to reclaim your space, careful planning is required if you’re planning on filling in your cesspool on your own. Follow the five steps below to address each phase of a cesspool closure so you can easily navigate the process.
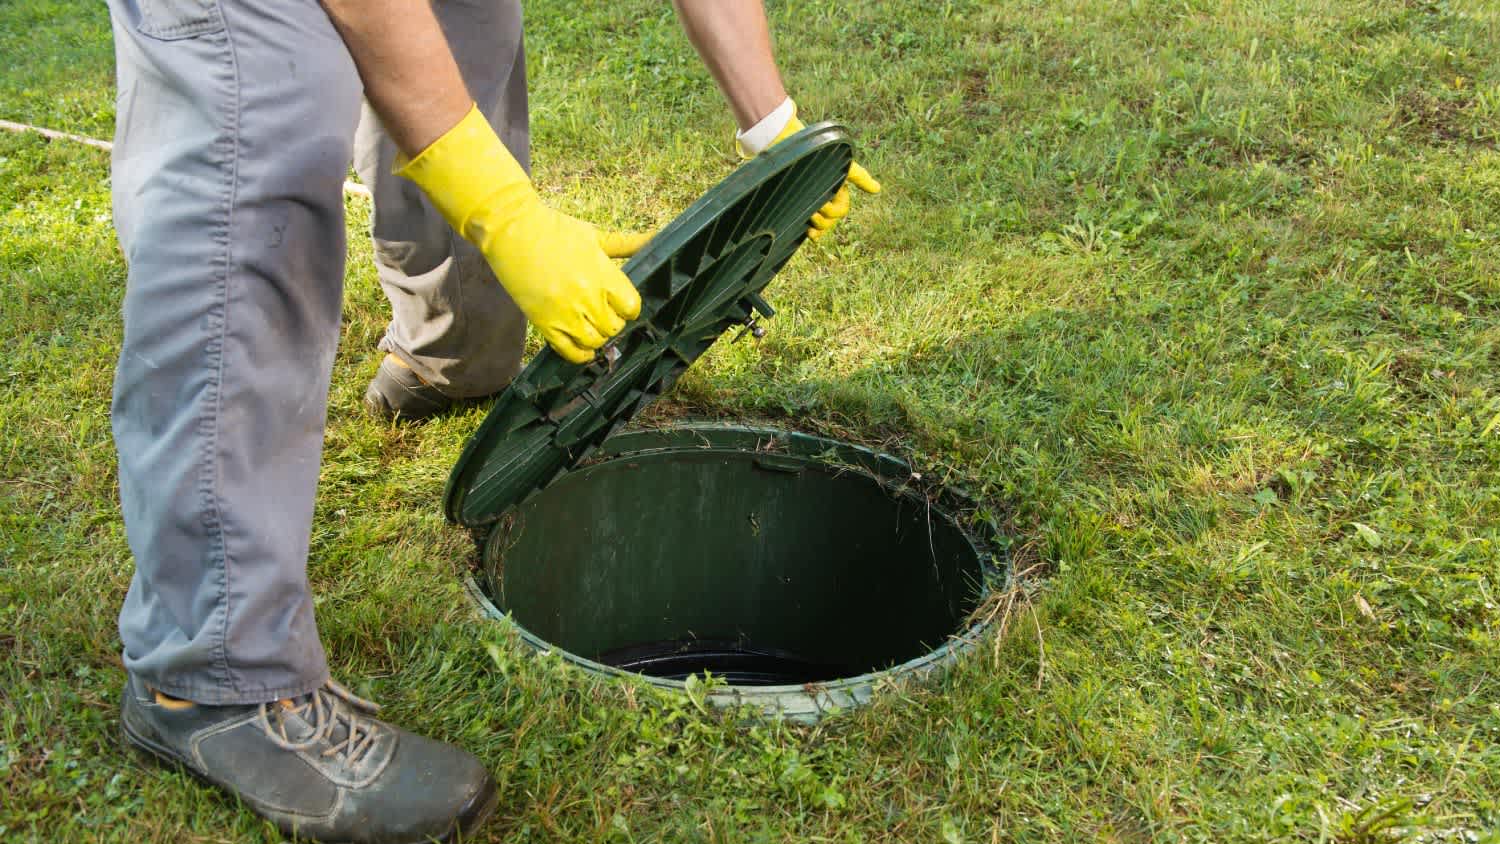
Begin the cesspool filling process by meticulously clearing out any debris and excavating the designated area.
Use tools such as a pickaxe and shovel to break down and remove solid materials.
Then, transport the debris away using a wheelbarrow for a clutter-free and safe work environment.
With the cesspool prepped and cleared, add the chosen fill material—gravel, soil or a combination—deliberately and gradually. The key is to layer the fill material, compacting each layer with precision using a compactor. This slow approach minimizes the risk of future settling issues, establishing a robust foundation for the filled area.

Compaction should be done with extra care to ensure a solid and stable result. Use the compactor after each layer of fill is added.
The goal is not only to prevent settling but also to create a level surface. This step is critical for the filled area's stability and long-term resilience.
Level each filled area using tools such as a rake. Pay attention to any variations and make adjustments so there isn’t any sloping.
Once the cesspool is adequately filled and leveled, turn your attention to the finishing touches.
Cover the filled area with topsoil or an appropriate material and level it one more time.
Consider incorporating landscaping elements, such as planting grass or other vegetation, to reclaim the space and contribute to environmental sustainability.
Filling in a cesspool can be a DIY job, but the process can involve tricky stuff like digging, waste management, and navigating regulations.
Opting for a professional contractor when filling in your cesspool also makes a lot of sense. Pros have the right gear to get jobs like this done quickly, reducing the chance of hiccups. It's like outsourcing the headache so you can kick back and relax, knowing your cesspool is in capable hands. Hiring a septic contractor near you guarantees a hassle-free job.
I recently moved to another state and chose United Trust Van Lines after comparing several companies. Their team was punctual, professional, and extremely careful with my belongings. I was especially impressed with how they handled my home office setup and fragile items. Everything arrived on...
Positive experience. As previously stated, the replacement/repair could not be completed (no fault of the plumbing tech) b/c misinformation was rec?d by property management maintenance. Thanks to the plumbing tech for your efforts. Appreciate you!
 The Waterworks
As usual with ECO, tech Jordan was outstanding, very professional, very knowledgeable, and very thorough with repairs made to tankless water heaters. Very highly recommend ECO!!!
 Eco Plumbers, Electricians, and HVAC Technicians
I would recommend this company to anyone! He showed up on time, was friendly, completed a very difficult repair on our dryer vent cover, was responsive, and pricing was extremely fair and competitive. I would have him back to do any of our repairs or cleanings without hesitation!
Best cleaning I've had at my property
I'm a repeat customer of All Star Paving & Sealing and I appreciate the service that all start paving has done for me in the past. I just recently had them out for an estimate and things couldn't have gone better. The staff that they send out to do the estimates are very knowledgeable. The...
 All Star Paving and Sealing
Supreme Brick & Chimney is one of the best service providers I’ve interacted with. Extremely efficient, knowledgeable, and thorough. They took the time to walk me through their detailed full-service inspection and were extremely professional. Not to mention their turnaround time was...
 Supreme brick & chimney
Storms Mobile Welding was great to work with. They were prompt, professional and did an overall excellent job on the project. I highly recommend.
Great experience all together. Dog friendly, courteous, great results and honest with recommendations. Will certainly be using Cardinal in the future for any carpet repairs
Did a great job replacing the ice maker and water regulator on my refrigerator. He was quick and thorough, very friendly and professional. If I needed a heart transplant I'd want him to do it!!!
From average costs to expert advice, get all the answers you need to get your job done.
The cost of converting a cesspool to a septic system depends on factors like labor, complexity, and materials. Use our guide to estimate your budget.

Are you thinking about filling your pool? The cost to fill a pool depends on the type of fill used and the size of your pool.

How much does it cost to fill a pool with water? It depends on the size of your pool and where you’re getting the water. This guide can help you budget.
Not all cesspool messes need a total clean-out. Learn how to clean a cesspool so you know whether you can tackle it yourself and when to call in a pro.
Follow this guide to learn how to get rid of a cesspool to save some money and transform your home into a more eco-friendly space.
Know the signs of cesspool problems so you can avoid costly repairs, prevent contamination, and be ready to take action if you suspect an issue.