





Top-rated drywall pros.

Get matched with top drywall pros in Stoneville, NC

Enter your zip and get matched with up to 5 pros

Need a pro for your drywall service project in Stoneville, NC?

Select your specific project to find the pro for you.

Find Drywall pros in Stoneville

Avatar for All Around Lawn Care
All Around Lawn Care
4.7(
100
)
Drywall - InstallDrywall - Install - For BusinessDrywall - Repair+1 more

Serving Stoneville, NC and surrounding areas

Approved

In business since 2016

Free estimates

Credit card accepted

All Around Lawn Care with over 18 years of experience in the lawn maintenance and landscaping industry, we are the experts you need to take care of your home or business. We handle everything from landscape installations to recurring lawn maintenance. We will treat your home as we would treat our own. Give All Around Lawn Care a call today, we look forward to working with you!

Maintenance
Maintenance
Maintenance
Maintenance
Maintenance

+17

10 neighbors recently requested a quote
Recommended by90%of homeowners
Avatar for RnB Painting LLC
RnB Painting LLC
5.0(
1
)
Drywall - Repair

Serving Stoneville, NC and surrounding areas

Approved

In business since 2020

Free estimates

Offers commercial services

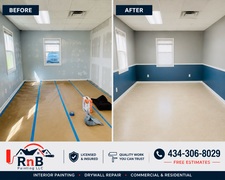
At RnB Painting LLC, we take pride in delivering high-quality workmanship, honest communication, and dependable service. We specialize in interior and exterior painting, drywall installation and repair, flooring, trim work, framing, and general remodeling. Our team is fully insured and committed to completing every project with attention to detail and customer satisfaction. Whether you need a small repair or a full renovation, we work hard to provide professional results at a fair price. We look forward to earning your business.

1 neighbors recently requested a quote
colton price
New to Angi
Drywall - Repair

Serving Stoneville, NC and surrounding areas

Approved

Free estimates

Emergency services offered

Warranties offered

Im a hardworking and dependable worker based in Virginia with experience in Commercial & residential construction, hauling, equipment operation, property maintenance, and outdoor labor. I take pride in doing quality work, showing up on time, and treating every job like it’s my own property.\n\nI’m available for jobs throughout the surrounding areas and willing to travel for the right project. My skills include general labor, demolition, hauling, light carpentry, land clearing, drywall work, concrete prep, equipment operation, and property cleanup.\n\nCustomers hire me because I communicate well, work efficiently, and focus on getting the job done right the first time. I’m always willing to take on new challenges and provide reliable service at a fair price.\n

...
Showing 1-10 of 118
Drywall questions, answered by experts

While every home has its own unique needs, ceiling drywall installation typically follows a staggered or stepped pattern to enhance structural integrity and reduce the visibility of seams. Starting from one corner, sheets are placed perpendicular to the ceiling joists, with the ends of adjacent sheets meeting along the center of the joist. The next row begins with a half sheet, ensuring joints don't align vertically. This alternating pattern, combined with proper taping and mudding, creates a seamless appearance and strengthens the ceiling structure, minimizing the risk of cracks over time.

In framing, studs are placed at 16-inch intervals to coincide with the typical spacing of wall materials such as drywall or plywood. This spacing is called "on-center" and is necessary for maintaining structural stability and efficient use of materials. The 16-inch spacing also helps to distribute the weight evenly across the building's structure. For those looking to cut material costs and improve energy efficiency, 24-inch stud spacing can be employed through a method called "advanced framing". This requires careful planning and adherence to local building codes to ensure structural integrity.

While it’s most common to sand plaster dry, it is possible to wet-sand plaster, too. Doing so can reduce the amount of plaster dust released into the air and make it easier to work in smaller, more delicate areas (such as around wall trim). However, some people find that wet sanding leads to more imperfections, which is why larger walls are more often dry sanded to ensure an even finish.

Plaster can be a difficult DIY to master, especially if you plan to plaster an entire room, rather than patch a small area. Before you begin a plaster DIY project, you need to know which tools and type of plaster to use. It's also important to know how to prepare the surface and apply the plaster for a smooth finish. If that all sounds like a lot of work, you may prefer hiring a local plaster repair contractor to do the job.

Plastering and skimming are two different techniques for finishing walls. Plastering involves applying a thick layer of a plaster mixture—typically containing gypsum, lime, cement, sand, and water—to create a new surface. This process often requires multiple coats and is used for repairing significant damage or creating decorative textures. Skimming, on the other hand, is a technique that involves applying a thin layer of drywall compound or joint compound over an existing surface to smooth it out, covering minor imperfections, small cracks, or uneven textures for a polished look. Plastering is generally more costly and labor-intensive than skimming. Although some people use the terms interchangeably, they refer to different processes and materials.

The Stoneville, NC homeowners’ guide to drywall services

From average costs to expert advice, get all the answers you need to get your job done.