




Top-rated backsplash installation pros.

Get matched with top backsplash installation pros in Stanberry, MO

Enter your zip and get matched with up to 5 pros

Need a pro for your backsplash installation project in Stanberry, MO?

Select your specific project to find the pro for you.

Find Backsplash installation pros in Stanberry

Avatar for Granite Transformations
Granite Transformations
4.1(
53
)
Tile: Natural Stone (Granite, Marble, Slate, Quartz, etc) - InstallTile: Natural Stone (Granite, Marble, Slate, Quartz, etc) - Install - For Business

Serving Stanberry, MO and surrounding areas

Approved

In business since 2024

Free estimates

Warranties offered

"This experience from start to finish of our remodel of our master shower changing from a standard shower to a handicap setup with classy completion has been great. Josh Howard and Nathan Smith were great to work with getting the project setup and designed. They are very caring young men and the installer was very professional, pleasant, quick and cleaned up fantastically afterwards. I have enjoyed having a new and improved shower that is much safer now."
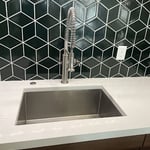
Backsplash Installation
Cabinet Refacing
Countertop Installation
Response time2 days
Response rate100%
22 neighbors recently requested a quote

Avatar for Re-Bath
Re-Bath
4.2(
38
)
Tile: Ceramic and Porcelain - InstallTile: Ceramic and Porcelain - Install - For BusinessTile: Natural Stone (Granite, Marble, Slate, Quartz, etc) - Install+1 more

Serving Stanberry, MO and surrounding areas

In business since 1979

Free estimates

Credit card accepted

"Discouraged in my search for someone to remodel my bathroom, I stopped by the Re-bath facility in Fenton to ask questions. Angie met me at the door and was very pleasant while she explained the process and the product - no high pressure at all. Impressed by what I saw and heard, I scheduled an appointment for an in-home estimate. Linda was my design consultant. She showed up on time and brought all of her samples with her. We had a great time picking out my products (shower/bath, vanity, countertop, flooring, hardware). Linda had fantastic ideas for my space, and measured accurately. A few days later my product was ordered and approximately 4 to 6 weeks later Angie called with an install date. Brendan was my installer. He showed up on time, was very friendly, organized, detailed and neat. He completed the project in 2 1/2 days. He explained the process as he went and made sure I understood how to properly care for my product. He also communicated very well the timeframe of the process as he proceeded. The finished product exceeded my expectations and as a result, I scheduled an appointment with Linda for my second bathroom remodel. Linda did a great job of coordinating the two bathrooms. We selected the same products, but with a variation of colors. Again, Brendan was my installer and did an amazing job. And mind you he had to carry my product up three flights of stairs! If you are considering a bathroom remodel, I encourage you to consider Re-bath. They are professionals that are comparably priced and offer long-term warranties."
Additional Photos
Additional Photos
Additional Photos
Additional Photos
Additional Photos

+8

Recommended by70%of homeowners
Showing 1-10 of 22
Backsplash Installation questions, answered by experts

When considering the types of grout for your project, unsanded grout is the best choice for penny tile. Unsanded grout can fit better into narrow spaces, like those between the small penny tiles, and it’s easier to smooth out for a seamless finish. However, if you’re unsure, check with a tile installation pro to determine which grout is best for your specific project.

If you’re out of spacers for your tile installation, you can use pennies. Each time you place a tile, stick the pennies around the edges (on the sides and the corners). Like working with spacers, you’ll want the same amount of space around each tile before they set.

You can attach tiles to a wall using thin-set mortar. You’ll also need a notched trowel to create grooves within the adhesive so it flattens completely when pressed in and securely holds the wall tiles. Finally, you’ll need grout to smooth the gaps between the tiles and, ideally, a grout sealer to prevent mold. While it sounds simple enough, proper planning and execution are crucial, so carefully review the steps in this guide or hire a pro tile installer to complete this project.

If you’re handling your tile removal yourself, seal the room using painter’s tape and heavy-duty contractor bags to prevent dust and shards from escaping. Use a claw hammer or a pry bar and a mallet to get behind the tile and pry it away from the floor or wall. Once your tiles are all removed, sweep everything into contractor bags for disposal, being careful not to overfill them. Make sure you wear a dust mask, safety goggles, and work gloves to keep yourself safe from injury while you work.

How long painted tiles last ultimately comes down to the quality of the paint job and how much wear and tear the tiles get. It’s possible the paint job will only last about six months if the tiles are in a high-traffic area and they weren’t properly cleaned, sanded, and primed prior to painting and sealing. Well-painted tiles in a low-traffic area should last at least a year.

The Stanberry, MO homeowners’ guide to backsplash installation services

From average costs to expert advice, get all the answers you need to get your job done.