



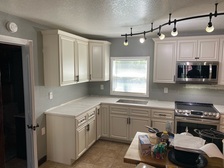



Top-rated backsplash installation pros.

Get matched with top backsplash installation pros in Kimberling City, MO

Enter your zip and get matched with up to 5 pros

Need a pro for your backsplash installation project in Kimberling City, MO?

Select your specific project to find the pro for you.

TRUSTED BY KIMBERLING CITY, MO HOMEOWNERS

  • Average homeowner rating star icon4.5
    Average homeowner rating
  • Verified reviews icon139
    Verified backsplash installation services reviews

Find Backsplash installation pros in Kimberling City

Avatar for Webster Construction
Webster Construction
New to Angi
Tile: Ceramic and Porcelain - InstallTile: Natural Stone (Granite, Marble, Slate, Quartz, etc) - Install

Serving Kimberling City, MO and surrounding areas

Approved

Small jobs welcome

I’m a young outgoing individual, I’ve had a full time job since I was 14 trying every trade you can think of I have several years of plumbing under my belt, I’m a skilled framer, I’ve done electric for several years and even done mechanical work, I found a love and passion for handyman work and decided I was ready to take the leap on my own! If you need anything done no job is to big or small don’t be afraid to reach out I’d love to come check it out for you!!

Avatar for Master Handyman LLC -
Master Handyman LLC -
5.0(
17
)
Tile: Ceramic and Porcelain - InstallTile: Ceramic and Porcelain - Install - For Business

Serving Kimberling City, MO and surrounding areas

In business since 2008

Free estimates

Emergency services offered

"I appreciated the ability to communicate with Tom on line, I have a long shift and am not available during the day. Project began a day late, but I am extremely happy with the finished product. Tom was pleasant and professional, did not need much direction, and fence was completed within the expected time span."
Vanities
Crown Molding
Retaining Wall
Cedar deck
Wood floor install

+10

Recommended by100%of homeowners

Ahmed Construction LLC.
5.0(
6
)
Tile: Natural Stone (Granite, Marble, Slate, Quartz, etc) - InstallTile: Natural Stone (Granite, Marble, Slate, Quartz, etc) - Install - For Business

Serving Kimberling City, MO and surrounding areas

In business since 2021

Free estimates

Credit card accepted

"First of all these men are extremely friendly! One of the most efficient crews I’ve ever witnessed! I’ll be hiring these guys for every job for here on out. All around good people and excellent work! I’m so happy with the work they’ve done. A true home improvement!"
Builders - Garages/Barns/Sheds Project
Recommended by100%of homeowners

...
Showing 1-10 of 73
Backsplash Installation questions, answered by experts

The best trowel for penny tile is a 3/16-inch-by-5/32-inch V-notch trowel. Because of the small size of the penny tile, you want a trowel with small notches that can lay a thin layer of mortar on the surface you’re tiling. If the notches are too wide, you risk applying too thick of a layer of mortar, and it can squeeze out between the penny tiles.

On average, tiling a bathroom involves about 12 hours of labor, usually spread over two to three days to accommodate prep work and curing times. A professional tiler can often complete the installation in 6 to 8 hours, whereas a DIYer might take 10 to 16 hours. The total project time is influenced by factors like the bathroom layout, tile type, and necessary prep work, such as removing old tile. The process includes specific timelines for different areas; for example, tiling a floor takes about six hours, while a shower area can take six to ten hours. It is essential to allow for adequate curing time—typically 24 hours each—for the mortar, grout, and caulk, which is why the project extends over several days.

Generally speaking, it is better to cut tile wet when using a fast-moving wet saw to reduce dust and chipping. However, tile can be cut dry when using just about any cutting tool. Dry cutting will result in a bigger mess and may increase the risk of chipping or cracking, but if you’re just making small cuts, dry cutting is a safe and viable option. Cutting dry also means you can apply tile grout sooner, so it’s better for rushed projects.

If the hearth ends against a wall, you can use a tile cutter as you normally would. However, if the edge of your hearth ends with no surface pressing against it,you may want to look into rounded tiles. These give a smooth edge to your hearth and make sure cut edges aren’t visible. You can also see if the tile you have has pieces that have been glazed or rounded on one edge. You’d then cut the tile and place it normally, with the cut edge facing inward. 

Larger tiles can be difficult to install because they’re heavier and bulkier than their smaller counterparts, which makes them harder to haul around and put in place. Plus, if you don’t install the tiles correctly, they could crack or break. For these reasons, it’s best to hire a professional for large-format tile installation.

The Kimberling City, MO homeowners’ guide to backsplash installation services

From average costs to expert advice, get all the answers you need to get your job done.