








Top-rated sink installation pros.

Get matched with top sink installation pros in Hilmar, CA

Enter your zip and get matched with up to 5 pros

Need a pro for your sink installation project in Hilmar, CA?

Select your specific project to find the pro for you.

TRUSTED BY HILMAR, CA HOMEOWNERS

  • Average homeowner rating star icon4.5
    Average homeowner rating
  • Verified reviews icon450
    Verified sink installation services reviews

Find Sink installation pros in Hilmar

Avatar for Mega Power Electric, Inc
Mega Power Electric, Inc
5.0(
191
)

Serving Hilmar, CA and surrounding areas

In business since 2000

Free estimates

Emergency services offered

"Excellent Service from planning through Execution and installation to final fine tuning. The folks communicated well and explained every detail of the step. Got permit and inspection done. It was seamless. Thanks. R."
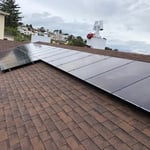
Additional Photos
Additional Photos
Additional Photos
Additional Photos
Additional Photos

+32

Recommended by100%of homeowners

Avatar for Joe Bryson Plumbing Heating and AC
Joe Bryson Plumbing Heating and AC
4.9(
19
)

Serving Hilmar, CA and surrounding areas

In business since 1973

Free estimates

Emergency services offered

"Bryson Heating and Air showed up on time! Gave me a reasonable bid. Installed a new unit! Cleaned out my old ductwork and took time after to show me how to clean my unit. Since I live in the country, “we got dirt!”! Joe himself over saw the whole process. Highly recommend! PS Joe also sold me a 25 Kilo Volt Solar panel grid. Saves me over $1000 am month. Solar is the way to go! Anything to save money right now."
Recommended by100%of homeowners

Avatar for E Mays plumbing
E Mays plumbing
4.6(
18
)

Serving Hilmar, CA and surrounding areas

In business since 2020

Emergency services offered

Credit card accepted

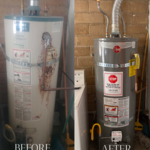
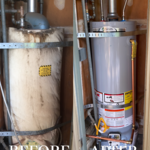
"I was very fortunate to find E Mays Plumbing. I had a terrible water heater and Eric was the only plumber that gave me a easy to find list of materials at home depot along staying in communication with me leading up to the project. When the job was finished my new installed water heater worked perfectly and there was no mess to clean. Eric also pointed out a issue I had with my washer water outlet box which was leaking and beginning to deteriorate which is likely to save me money down the road."
Before and after
Water heater
Plumbing Project
Remodel
After

+35

Recommended by93%of homeowners
Avatar for Preferred Construction Group Inc
Preferred Construction Group Inc
4.9(
12
)

Serving Hilmar, CA and surrounding areas

In business since 2011

Free estimates

Credit card accepted

"All work was done except installing the new vanity. I verbally told him I would keep the last $1000 until He came back and installed the vanity. He said he would come right over and install it when I got it in, that he needed to pay his guys for the work that has already been done. Because he said he would come right over in two or three days to install the vanity after I got it, I believed him and I paid the last $1000."
Recommended by91%of homeowners
Avatar for Living Water Plumbing
Living Water Plumbing
5.0(
2
)

Serving Hilmar, CA and surrounding areas

In business since 2022

Free estimates

Credit card accepted

Living Waters Home Improvements and Plumbing is a locally owned and operated business. It is our belief that if honesty, integrity, hard work, and good plumbing come first, customer satisfaction is a guarantee. We specialize in water heating and purification, but we have the knowledge to perform all plumbing and other home improvements.

Tankless Water Heater
Recommended by100%of homeowners

Avatar for Magnolia Lawn Care LLC
Magnolia Lawn Care LLC
5.0(
7
)

Serving Hilmar, CA and surrounding areas

In business since 2010

Free estimates

Emergency services offered

"They did such an exceptional job putting my fence up, I decided to hire them for my doggie door. Tony was fast, efficient and leaves my house in great shape. Also the installation looks great!"
Recommended by100%of homeowners

Avatar for Daisyslandscaping
Daisyslandscaping
4.2(
16
)

Serving Hilmar, CA and surrounding areas

Free estimates

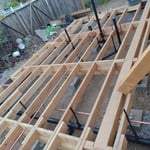
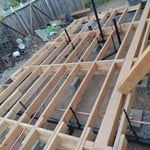
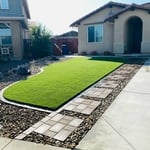
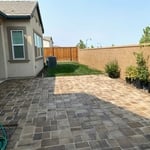
"Backyard – Deck extension, pavers, artificial grass, fenced area --- removing/flattening raised beds, levelling dirt areas Front yard – Flagstone, extend pavers, artificial grass --- removing gravel fields, levelling ground/preserving outlets, removing excess concrete and asphalt, removing landscape features (posts) Getting to the point, Daisy Landscaping transformed our front and back yards into beautiful useable spaces. Their quality of workmanship is A+, and their attention to detail is spot on. Their prices are competitive with others, but the value of what you get is extremely high compared to price. We had a 21’ x 14’ deck in our backyard that we wanted extended to 21’ x 33’ to our back wall. In the middle of the deck, we wanted a huge Mulberry tree preserved with a cutout in the deck. To the right of the deck, we wanted approximately 200’sq pavers installed. Jaime (owner/operator) examined the areas and asked specific questions where he foresaw there might be issues. We hadn’t considered the issues, so we were grateful that he brought them to our attention. In the front yard, we wanted a gravel area of approximately 1175’sq transformed into a useable flagstone field, trimmed with real grass between the stones. Again, Jaime asked specifics and told us where we might have problems (we have a septic outlet, a water outlet, and plumbing cleanouts in the field). He set our minds at ease that the project was doable with only a few modifications. He sent the bid for the backyard two days later, and the bid for the front yard two days after that. Compared to other contractors, he was slightly cheaper on the backyard, and slightly higher on the front yard. But Jaime had really thought about the projects and set our minds at ease. We chose him to tackle both projects. He started the backyard first. The backyard had raised beds that were bordered with octagonal pavers and cinder blocks. In each of the beds were groundcover plants and mature trees. To build over them, everything would have to be lowered and/or removed. As they started to take out blocks and other features, they noticed the Mulberry root system was more complicated than he had imagined. So, they literally had to re-plan how the posts would be configured and for the deck to keep its integrity. Their solution was to add MORE support near the tree, without altering the original configuration! It worked beautifully. As they were prepping for attaching the new deck to the old, there was a problem with the old deck being uneven compared to the perfectly level new deck. When the guys went in to adjust the levels, they showed us the vast rotting under our original deck. When I merely pressed on the wood it caused supports to splinter and crumble. Jaime suggested that we get the old deck replaced before it was not useable and gave it less than a year to deteriorate. We asked if he was available to currently repair the old deck and he was. Again, they laid out the new framework meticulously as they did the first, and the final result made everything look so great. As for the pavers, as they started to prep the area and having removed the raised beds, it became apparent that the back wall was warped inwards, and the shed opposite the wall was warped outwards. In other words, there was no way to square the pavers with the deck, the back wall, and the shed wall. So, Jaime made the base line off of a small fence that separated a small area from the rest of the yard, and laid the pavers along that line because the eye would naturally be drawn to that spot. The effect was incredible! The pavers just sort of ‘slide’ under the deck at an angle of about 15-20* and it creates this beautiful architectural effect that draws attention to the various angles around the paver area, while keeping the deck obviously parallel to the house. To me, this was the ultimate in problem-solving on the job. The job took longer than expected, but now I’m glad it did. The effect is totally worth it. Finally, artificial grass was installed in areas that were mostly dirt and weeds. It took time to level the areas, but the installation was relatively fast. The grass looks great, and of course, it doesn’t need to be watered or mowed. Best of all, it drains beautifully. The grass only comes in one width (15’?), but in any length you want. I would recommend that if you get artificial grass installed, keep the width in mind if you don’t want any seams. We took the seams and saved a whole lot of $. It still looks great. The front yard had a field of gravel that we wanted turned into flagstone. Under the gravel (is) a septic system. So, the job would entail excavation of the gravel and excess dirt, putting down a sand base and setting stones all around the outlets and cleanouts that go with the septic system. We also wanted grass between the stones. Jaime researched and said that it would take months for real grass to get established so that the stones would be less apt to shift. So, we agreed to artificial grass between the stones. After further figuring out that there would be multiple seams in the grass UNLESS we cut out areas for the flagstones, we decided to have a straight field of flagstones that had artificial grass in the front and the back of the flagstone area. I thought there were three outlets for the septic, but Jaime could only find one. His crew searched for three days for the mysterious second big outlet and third small outlet but with no luck. I knew that I saw the outlets when we moved in over two years ago and they were repairing the system. Jaime asked some other contractors what the problem might be, and they told him that when old systems are cleaned and replaced, they only use one outlet and seal all the others. So, I cost myself (his crew) three days of searching. But once we had established the situation, the stones got laid down in about 7 days, and the grass in about 3 days (We actually added more stone and grass work to the job as it progressed). The final project looks glorious! He even took a giant Bird of Paradise plant we had on the property, split it into two parts in oak wine barrels and placed them on the grass at the back of the flagstone area. It looks so classy I can’t even believe it! For landscaping projects, I will only use Daisy Landscaping in the future. Jaime and the crew are just a great bunch of guys. Jaime is honest to a fault, and there are no surprises in his work or the materials. Problems are well-thought out, discussed, and handled beautifully. But the best part is that the quality of the work is world class for the dollars spent. Reminder/Request: Please keep cold, fresh water on hand for any crew that does work on your property. Even temps in the low 90s can cause workers to become ill from heat stroke. Also, if possible, have a seating and resting area that is shaded for workers to escape the heat and direct sunlight for a few minutes as needed."
Landscaping Project
Landscaping - Hardscaping & Pavers Project
Landscaping Project
Landscaping Project
Landscaping - Hardscaping & Pavers Project

+57

Recommended by86%of homeowners
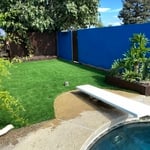
Showing 1-10 of 24
Sink Installation questions, answered by experts

Yes, it is often possible to replace an undermount sink without removing the countertop, but success can depend on the countertop material. For materials like granite, the process is relatively straightforward. However, laminate or uniquely shaped countertops might need to be removed or modified.

The process typically involves shutting off the water supply, disconnecting the drain and plumbing pipes, cutting through the old silicone seal, and carefully lowering the sink from below. This requires a good understanding of plumbing and the right tools. If you are not confident in performing the replacement yourself, it is recommended to hire a countertop specialist or a plumber to handle the task.

Yes, you can fit a vanity unit to an existing sink, especially if you plan to custom-build the vanity. With a prefabricated vanity, you’ll likely need to make a few adjustments. It depends on the type of sink, the size of the sink, and the existing plumbing. If you plan to retrofit a sink into a prefabricated vanity, make sure you take precise measurements and that your sink is compatible with the vanity you select. Prefabricated units have a precut sink hole, so you’ll need the size to match your sink.

The best place for a kitchen sink drain is the middle of the sink. Most people prefer center drains because they allow for better water and waste drainage, and the center location limits splashing because water flows straight down the drain hole. If the sink drain is too close to the edge of the sink, water can collect and drain too slowly. It can also be easier to clean sinks when the drain is closer to the center since debris is easier to wash down and doesn’t collect along the sides as easily.

DIY is not recommended for commercial settings due to safety and code compliance. Hire licensed professionals.

There’s no definitive answer regarding whether equipping your kitchen island with a stove or sink is better. The right option depends on each homeowner's lifestyle, cooking style, and kitchen layout. If you cook with guests over, having a stove that faces outward can facilitate socialization while you prepare dinner. On the other hand, if you use a lot of produce, having your sink by your prep area makes it easier to clean veggies while cooking. A sink also makes cleanup easier by allowing you to wipe down your prep area and place your dirty dishes in the sink.

The Hilmar, CA homeowners’ guide to sink installation services

From average costs to expert advice, get all the answers you need to get your job done.