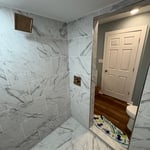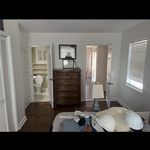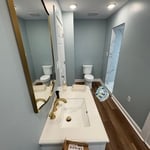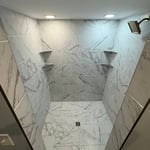
Top-rated drywall pros.

Best drywall pros near Irvington, AL

Enter your zip and get matched with up to 5 pros

Need a pro for your drywall service project in Irvington, AL?

Select your specific project to find the pro for you.

TRUSTED BY IRVINGTON, AL HOMEOWNERS

  • Average homeowner rating star icon4.5
    Average homeowner rating
  • Verified reviews icon61
    Verified drywall services reviews

Top-Rated Drywall pros in Irvington - Updated Nov 2026

Excellence Renovation LLC
New to Angi
Drywall - InstallDrywall - Install - For BusinessDrywall - Repair+1 more

Serving Irvington, AL and surrounding areas

Approved

Hi this is Esteban Acosta owner of Excellence Renovation LLC been in business for about 5 years we can handle several trades like painting ,drywall,trim work,siding , flooring ,tile showers and much more ...im a very easy guy to work with ..very flexible and can always work with you on your budget ..i would be happy to work on your project and do whatever it takes to make you happy and bring your project to completion.. see you soon

WH Construction Now Inc
3.0(
1
)
Drywall - InstallDrywall - Repair

Serving Irvington, AL and surrounding areas

Approved

In business since 2003

Free estimates

W/H Construction Now has been serving the Gulf Coast with 28 years experience and carry the longest warranty on roofs in Mobile and Baldwin county. We do it all from floors to roofs. We are licenses, bonded and insured. Give me a call for a free estimates! We believe in a job done right with quality craftsmanship. BBB Accredited

4 neighbors recently requested a quote
Yellowhammer contractors of Alabama
New to Angi
Drywall - InstallDrywall - Repair

Serving Irvington, AL and surrounding areas

Approved

Yellowhammer Contractors of Alabama is a locally owned and operated residential construction company serving Baldwin County and surrounding areas. We specialize in home additions, major renovations and remodeling, and new home construction. Whether you’re adding much-needed living space, completely renovating an existing home, or building from the ground up, we can manage the project from start to finish. With more than 20 years of hands-on construction experience, we understand that quality work starts with proper planning, clear communication, dependable subcontractors, and attention to the details that matter. Our goal is simple: provide honest pricing, quality craftsmanship, and a straightforward construction experience while treating your home and investment like we would our own. If you’re considering an addition, major remodel, renovation, or new construction project, we’d be glad to discuss your plans and provide an estimate.

...
Showing 1-10 of 195
Drywall FAQs, answered by experts

Yes, even if you’re being careful, removing tile can damage your drywall to some degree. However, you can minimize the damage done to it by eliminating a majority of the grout and taking your time prying each tile off. Also, it's worth noting that you might have more drywall damages to deal with if your tile is set into the mortar.

Whether you need a drywall anchor depends on the specifics of your project, particularly what you're hanging and where. You do not need a drywall anchor if you can screw or nail the object directly into a wooden stud, as the wood provides sufficient support and stability. However, if there are no studs in the location where you plan to hang the item, you should use drywall anchors to ensure it is securely supported. For very lightweight objects, like small pictures, adhesive picture hanging strips can be a suitable alternative to anchors.

Drying alone can take 1 to 4 hours to dry to the touch per plaster layer, but some types of plaster take several hours longer to dry. However, this doesn’t mean the job is done because plaster doesn’t fully harden until it cures, which can take a few days to a couple of weeks. It may take even longer if you’re building a new, pretty thick plaster wall. Allow the plaster to cure before painting it.

Yes, it matters which side of drywall you use. One side is smooth, and the other is rough. The smooth side should be facing outward, toward the room, while the rough side should be hidden and facing the studs and framing of the house. The smooth side will be easier to apply tape, joint compound, and, later, paint to.

Whether you apply the drywall mesh before or after drywall mud depends on the type of patch it is. For self-adhesive patches, you’ll put the patch down first and then coat it with mud. Mesh patches that are not self-adhesive will require you to put mud down first and then press the mesh into it, followed by additional coats of mud.

The Irvington, AL homeowners’ guide to drywall services

From average costs to expert advice, get all the answers you need to get your job done.