Depending on repair needs and machine age and type, the cost to replace a heating element in a dryer can vary. Learn the average repair costs.
Plug in the possibilities


Hire a local dryer repair pro if you need to convert your dryer cord or outlet to fit a certain setup.
Four-prong outlets are preferred for their increased safety and efficiency, but upgrading to them can be expensive.
Three-prong outlets are common in homes built before the 1990s, but today they’re only practical if you own a gas dryer.
You can upgrade to a 4-prong plug by converting your dryer cord, which is the cheapest and easiest method, or by rewiring your dryer outlet.
Powering up your dryer should be simple, whether you're moving into a new home or upgrading your appliance. But if you're unsure of the type of plug your home has for your dryer, you may be in for a challenge. Learn about the different types of dryer plugs and which one you should use in your home.

In addition to looking different, the primary difference between a 3-prong and 4-prong dryer plug is that the 3-prong is more common on older (and even outdated) appliances. You’ll likely not find any new dryers with a 3-prong plug, but if you live in an older home your outlets may still be built for them.
3-prong plug outlets pose potential safety concerns, so talk to a local electrician if you’re considering upgrading your dryer plug outlet.

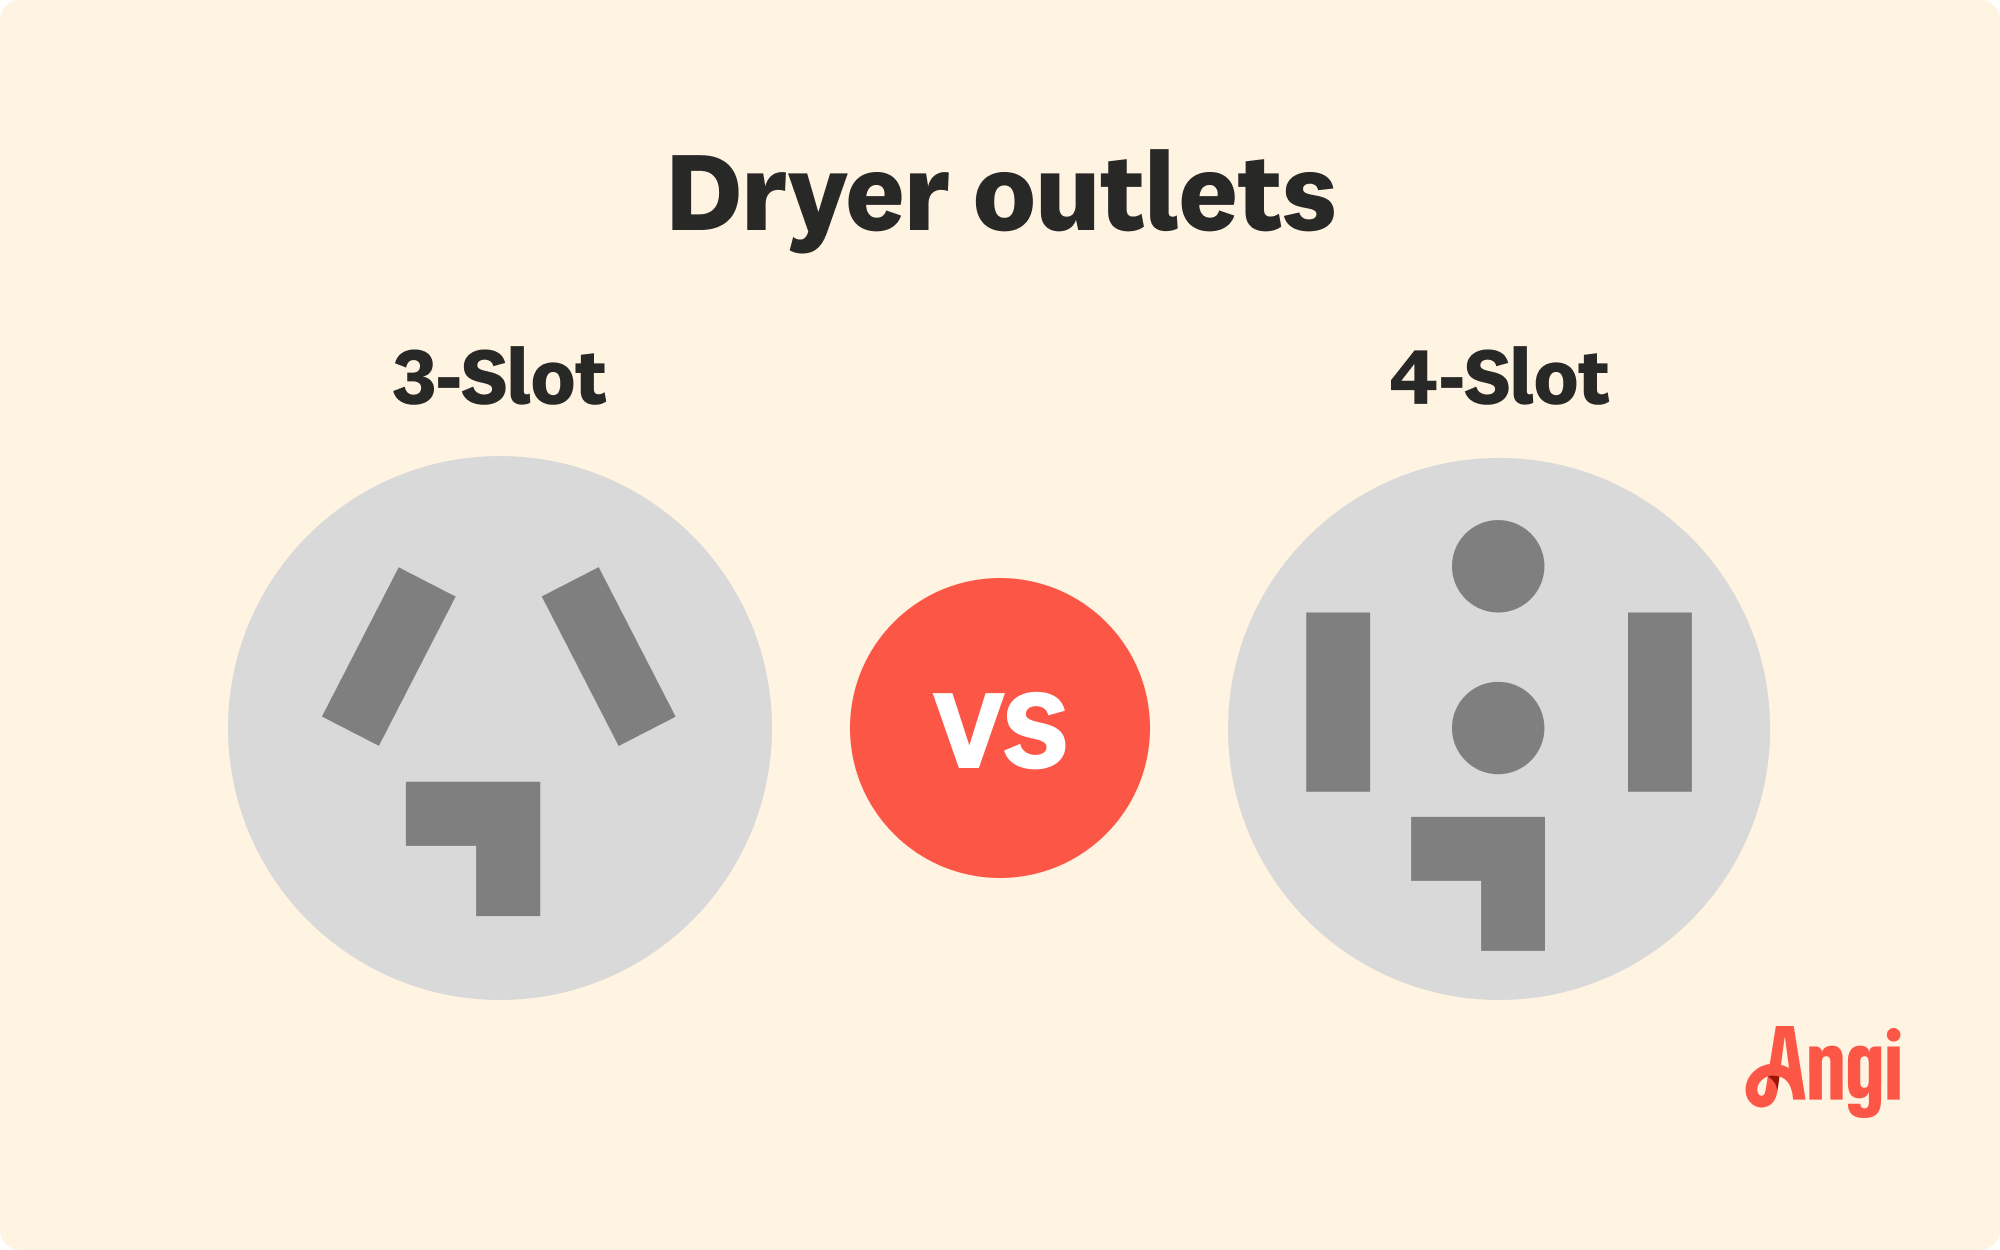
A 3-prong dryer plug features two flat prongs and one round or U-shaped prong. The two flat prongs are for the hot wires, each providing 120 volts to supply the 240 volts needed for the dryer to run. The third prong is a ground prong to safely direct any stray electricity into the ground. In older installations, this prong often served a dual purpose, acting as both the ground and neutral wire.
Three-prong dryer plugs were the standard until the late 1990s when the National Electrical Code (NEC) was updated to require 4-prong plugs for new installations. This change aimed to improve safety by providing a separate path for the ground and neutral wires. Many older homes still have 3-prong dryer outlets. Adapters or rewiring would be necessary if you want to install new dryers with 4-prong cords in this type of house.
| Pros | Cons |
|---|---|
| Compatible with older homes | Outdated |
| Replacing costs less than rewiring | Safety concerns |
| Simple installation and troubleshooting | Requires rewiring if you want to update to 4-prong |
Best for: Homes built before the late 1990s that have existing 3-prong dryer outlets.

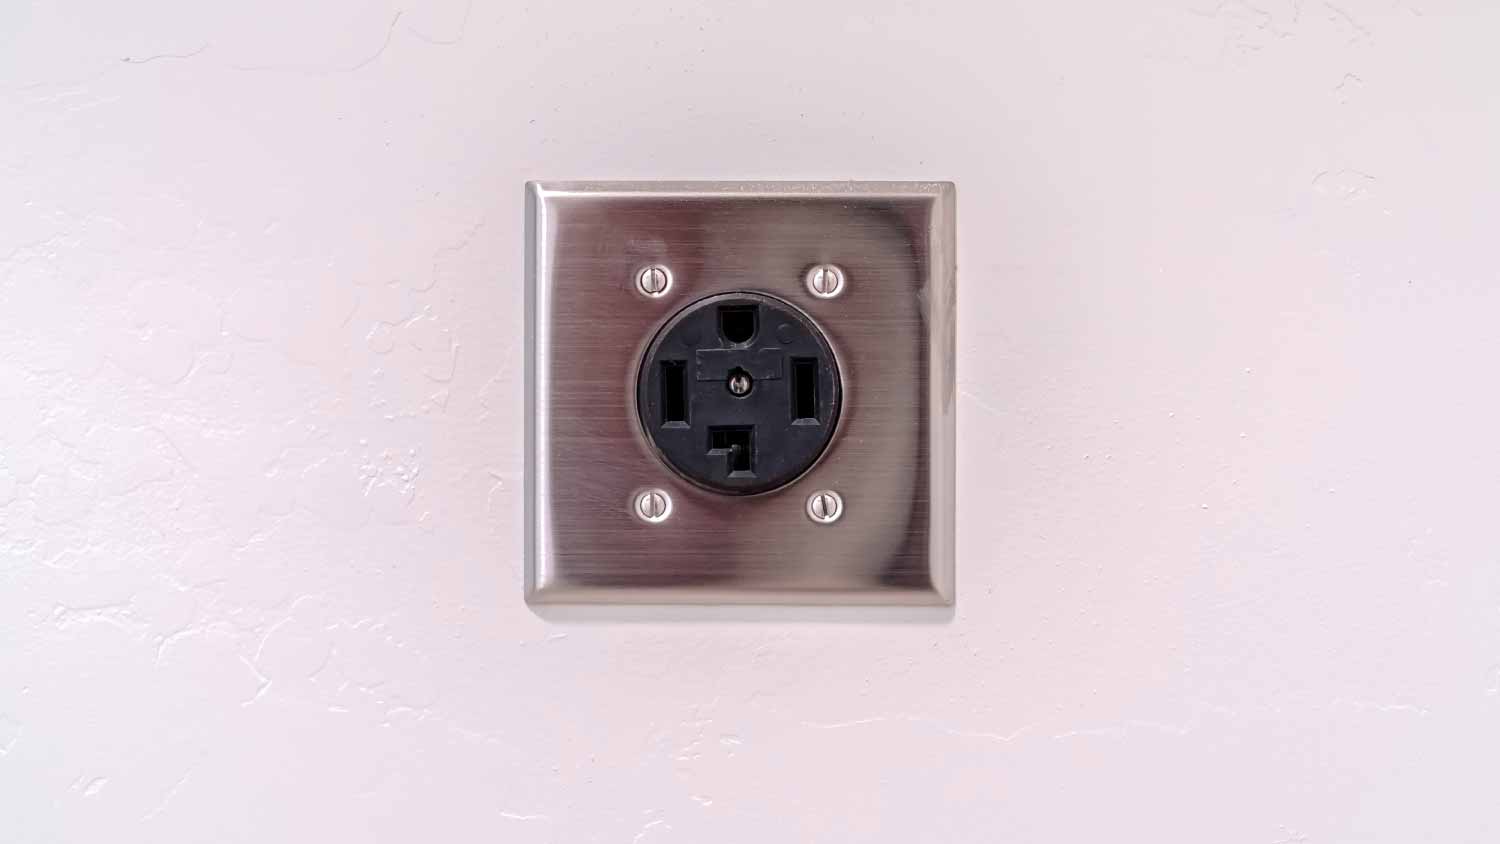
Four-prong dryer plugs are the modern standard for electric dryer connections. They include two hot wires, one neutral wire, and one ground wire. Similar to the 3-prong, the two hot wires each supply 120 volts to provide 240 volts for the dryer's operation. The separate neutral and ground wires improve safety by ensuring that any stray electrical current is safely directed away from the appliance.
For the sake of safety, the 4-prong setup is mandatory for all new dryer installations. Keeping the ground wire away from the neutral wire reduces the risk of electrical shock or fire.
| Pros | Cons |
|---|---|
| Increased safety | Incompatible with older homes |
| Complies with modern standards | Pricey to upgrade |
| Better electrical performance | Potential adaption issues |
Best for: Homes constructed or renovated after the 1990s.
The age of your home and its electrical system are the two most important aspects when choosing between a 3-prong and a 4-prong dryer plug. Three-prong outlets are common for homes built before the late 1990s and using this plug is more straightforward and cost-effective. Otherwise, it requires extensive rewiring. However, 3-prong plugs have safety concerns due to the combined ground and neutral wire.
In homes built or renovated in the 1990s or later, 4-prong dryer plugs are required because they’re safer. For homes undergoing renovations or when installing a new dryer, upgrading to a 4-prong outlet is a great idea.
Choosing between 3-prong or 4-prong dryer plugs is mainly relevant for electric dryers, as their power requirements are higher than those of gas dryers. Gas dryers primarily use natural gas or propane for heating and only require electricity to power the drum, controls, and other components.
These types of dyers use a standard 120-volt outlet with a simple 3-prong plug, not the specialized 240-volt plugs used for electric dryers. For gas dryers, ensuring the correct connection to a standard grounded outlet is sufficient, making the decision between 3-prong and 4-prong plugs unnecessary. However, you can convert a gas dryer to electric, which will require rewiring.
Converting the dryer cord or outlet to a 4-prong setup reduces the risk of electrical shocks and fires. A 4-prong system also keeps you compliant with modern electrical codes, which is crucial for passing inspections, maintaining insurance coverage, and potentially increasing the home's value.
If you're living in an older home with a 3-prong dryer outlet and have safety concerns, you have a few choices.
One conversion method is to replace the existing 3-prong plug cord with a 4-prong plug cord. This method is simple enough for an intermediate DIY homeowner to handle. The primary safety concern is ensuring the neutral and ground wires are properly separated.
To convert a dryer cord from a 3-prong to a 4-prong, you would remove the existing cord, and connect the two hot wires and the neutral wire to their respective terminals. Then, attach the ground wire to the ground terminal, ensuring proper disconnection or modification of any internal grounding strap.
The other option for homeowners is converting the 3-prong outlet to a 4-prong one. To do this, the outlet would be rewired to handle a 4-prong dryer plug. However, this process requires extensive electrical experience. Your best bet is to hire a local electrician or a dryer repair technician near you to do the work.
I had a great experience with Wizard Appliance Repair LLC. They were prompt, professional, and quickly identified and fixed the issue. The technician explained everything clearly, and the price was fair. I would definitely recommend them for any appliance repair needs.
Singh was prompt, communicated effectively in advance of the appointment, and completed the repair efficiently. I would recommend him for appliance repairs.
Always on time, very knowledgeable about his craft,cleans up after themselves, reasonable pricing. Would highly recommend them to paint my house again.
KAS installed all new Andersen windows, replaced entry doors and repaired the roof. Excellent work, timely and efficient. A pleasure to work with them.
Hamdi and DARs Appliance did an excellent job on my refrigerator/freezer repairs and I saved a lot compared to other estimates. Would definitely use again and recommend.
A very good company to work with: professional, reasonably priced, and willing to go above and beyond to satisfy the customer. We had rotted wood and new aluminum roof trim installed, and the result is perfect and done on time. I definitely recommend them and will certainly use them for...
Productos e instalation exelentes, las relaciones personales con los supervisores y trabajadores fue muy buena, recomendados al 100%...
The service was excellent! Norwin's trap caught the dangerous bob cat in short order. I am very thankful!
Brandon Burnette did such a great job. I'm so happy I had him as my worker today. Very nice and friendly young man. 10 star in my book.
We had LHR install a new roof and gutter system. While they were not the cheapest, they were considered the most reliable and fetish for using only high-value products that would last for many years. Additionally, they were highly professional and never tried to push their services or any...
From average costs to expert advice, get all the answers you need to get your job done.

Depending on repair needs and machine age and type, the cost to replace a heating element in a dryer can vary. Learn the average repair costs.

Installing a gas dryer can help you save on your monthly energy bills. Depending on whether you need a new gas line, gas dryer installation costs will vary greatly.

Discover the average washing machine repair cost, key price factors, and expert tips to help you budget and save on repairs for your home.

It may seem like there are a zillion types of wood stoves—but there are really two main categories (and other decisions to make from there). Learn more here.

Ready to upgrade your kitchen with a new stove? Review the pros and cons of these common types of stoves to find the right one for your cooking needs.

Learning how to remove an oven door makes it easier to clean or repair it. Follow these steps to remove your oven door without damaging it.