

Installing drywall is the most common way to finish your home’s interior. Use this drywall installation cost guide to see what your project is likely to cost.
There’ll be no ridges, lumps, valleys, or bumps in your drywalled corners

This project can take a long time to complete if you’re doing it in your off-time. Hiring a pro ensures a job done well and a quicker turnaround—plus you get your weekends back.
Your living room upgrade is moving along, with most of the drywall up and nearly ready for paint. But it’s time to install and finish the drywall along the corners of the room. Corners can be especially tricky to finish because it’s easy to drag or dent the joint compound and leave behind an uneven finish. Here’s how to drywall corners for a smoother look.

The old saying to measure twice, cut once is especially true when it comes to installing drywall. Be sure to measure the amount of space in the corners you have left, and measure for any outlets, doors, or other openings you’ll need to leave in the drywall sheets. Mark where you’ll cut on the drywall sheets using pencil.
With the measurements confirmed, you can cut the drywall to the appropriate size using a sharp, new utility knife to score and cut each sheet. You can also use a drywall saw or oscillating saw to cut the drywall sheets.
If you want to install plastic behind moisture-resistant drywall or another vapor barrier, do that now before installing the drywall.

A sheet of drywall weighs around 50 pounds, so be sure to recruit a buddy for help with this next step.
Many homes have extra framing in the corners, called “California corners,” where you can use a drill and drywall screws to secure the drywall in place. If your home doesn’t have this framing, attach the drywall to the studs. Be sure to leave up to a 1/8-inch gap between the end of the drywall sheet and the corner, which you can later cover with joint compound.
Drywall tape has a center crease for corners that you need to fold along before applying if you want each half of the tape to adhere to the drywall on each side of the corner. Cut the length of tape you need for the project, then fold along the crease. Set this length of tape aside for now.

For corners, you want to thin out the joint compound for a smoother finish. Thicker compound doesn’t work well in corners and makes it harder to achieve that clean look. Add 1 cup of water at a time to the joint compound until it’s the consistency of yogurt or pancake batter.
Use a drywall or mud knife to apply the thinned-out joint compound into the corner seam, carefully spreading it out slightly to each side of the corner. Spread it thinly: 1/8-inch thick or up to 1/4-inch thick. Be sure to apply this thin layer of joint compound over any other drill holes as well.
Pro tip: Always angle the mud knife away from the corner opposite the one you’re working on, or you could leave dents in the joint compound that will be harder to smooth out later.
With the mud compound in place, pick up the creased tape and place it in the corner, with the crease tightly fitting into the corner. Use the mud knife to adhere the tape to the drywall and smooth out any air bubbles or wrinkles.

The drywall tape over the joint compound, or mud tape, needs time to fully dry before you start applying joint compound all over the wall. Otherwise, you risk dragging the mud knife through pliable joint compound, leaving behind dings and ripples. The joint compound needs to dry for at least 24 hours.
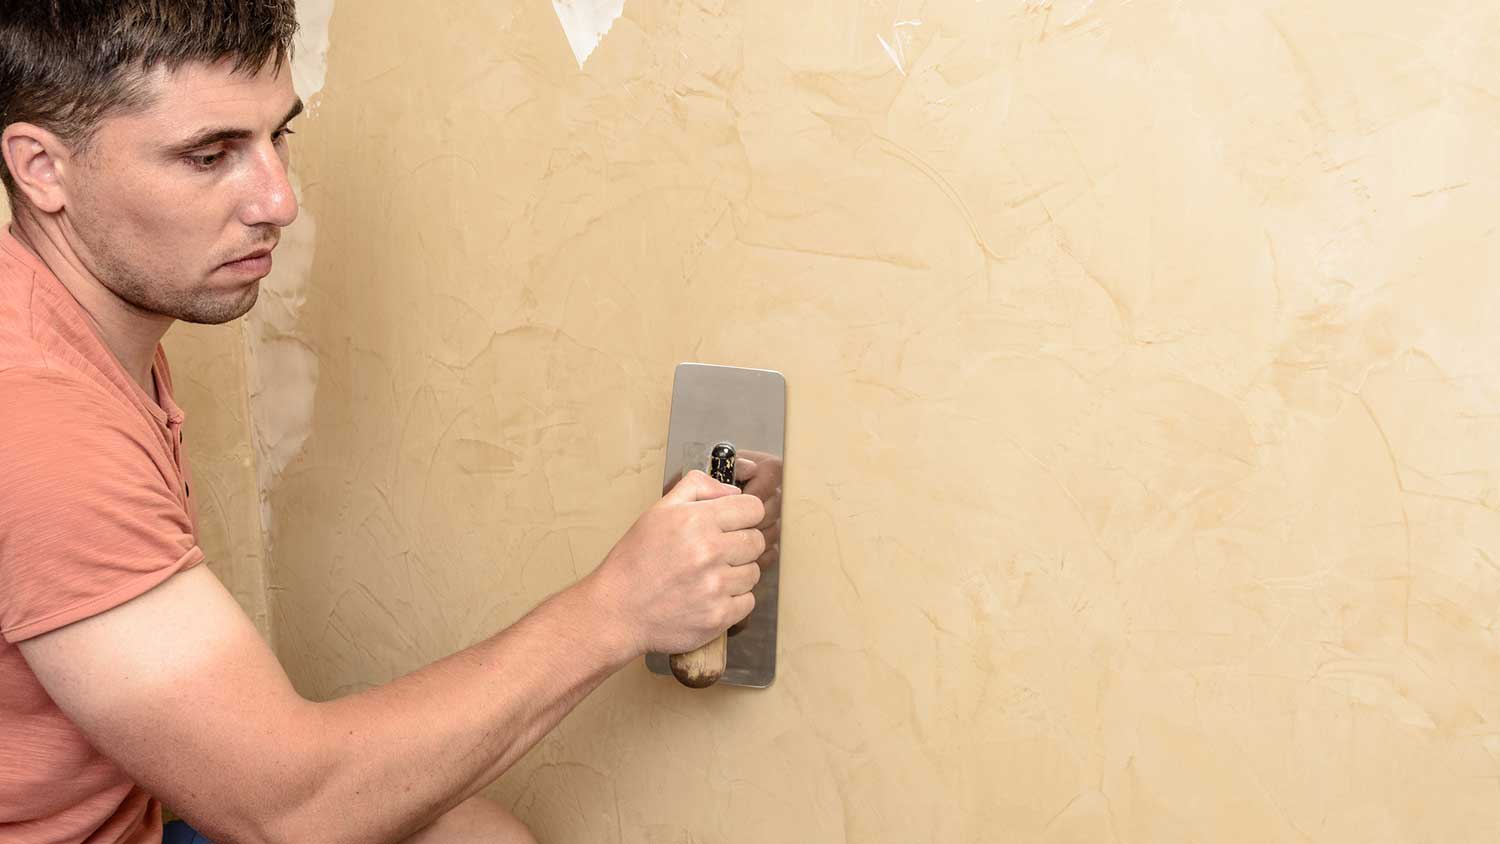
After at least a full day of drying time, you’re ready to start tackling the full joint compound application. Start on one wall on one side of the corner. Using a mud knife, smooth joint compound over the drywall.
While running the mud knife along the wall, angle it parallel to the opposite corner. Starting from the corner, move it away from the opposite wall for the smoothest finish, and feather the edges along the wall for a seamless look.
Again, let the joint compound dry for at least 24 hours before you begin applying mud to the opposite wall. If you live in a humid climate, you should set up a dehumidifier in the room to make sure the joint compound dries fully before you move forward.

Using the same technique as before, apply joint compound to the other side of the corner. Start in the corner and work your way outward along the drywall until you completely cover the corner drywall in joint compound.
Finally, let the mud dry for another 24 hours or longer before moving to the next step.
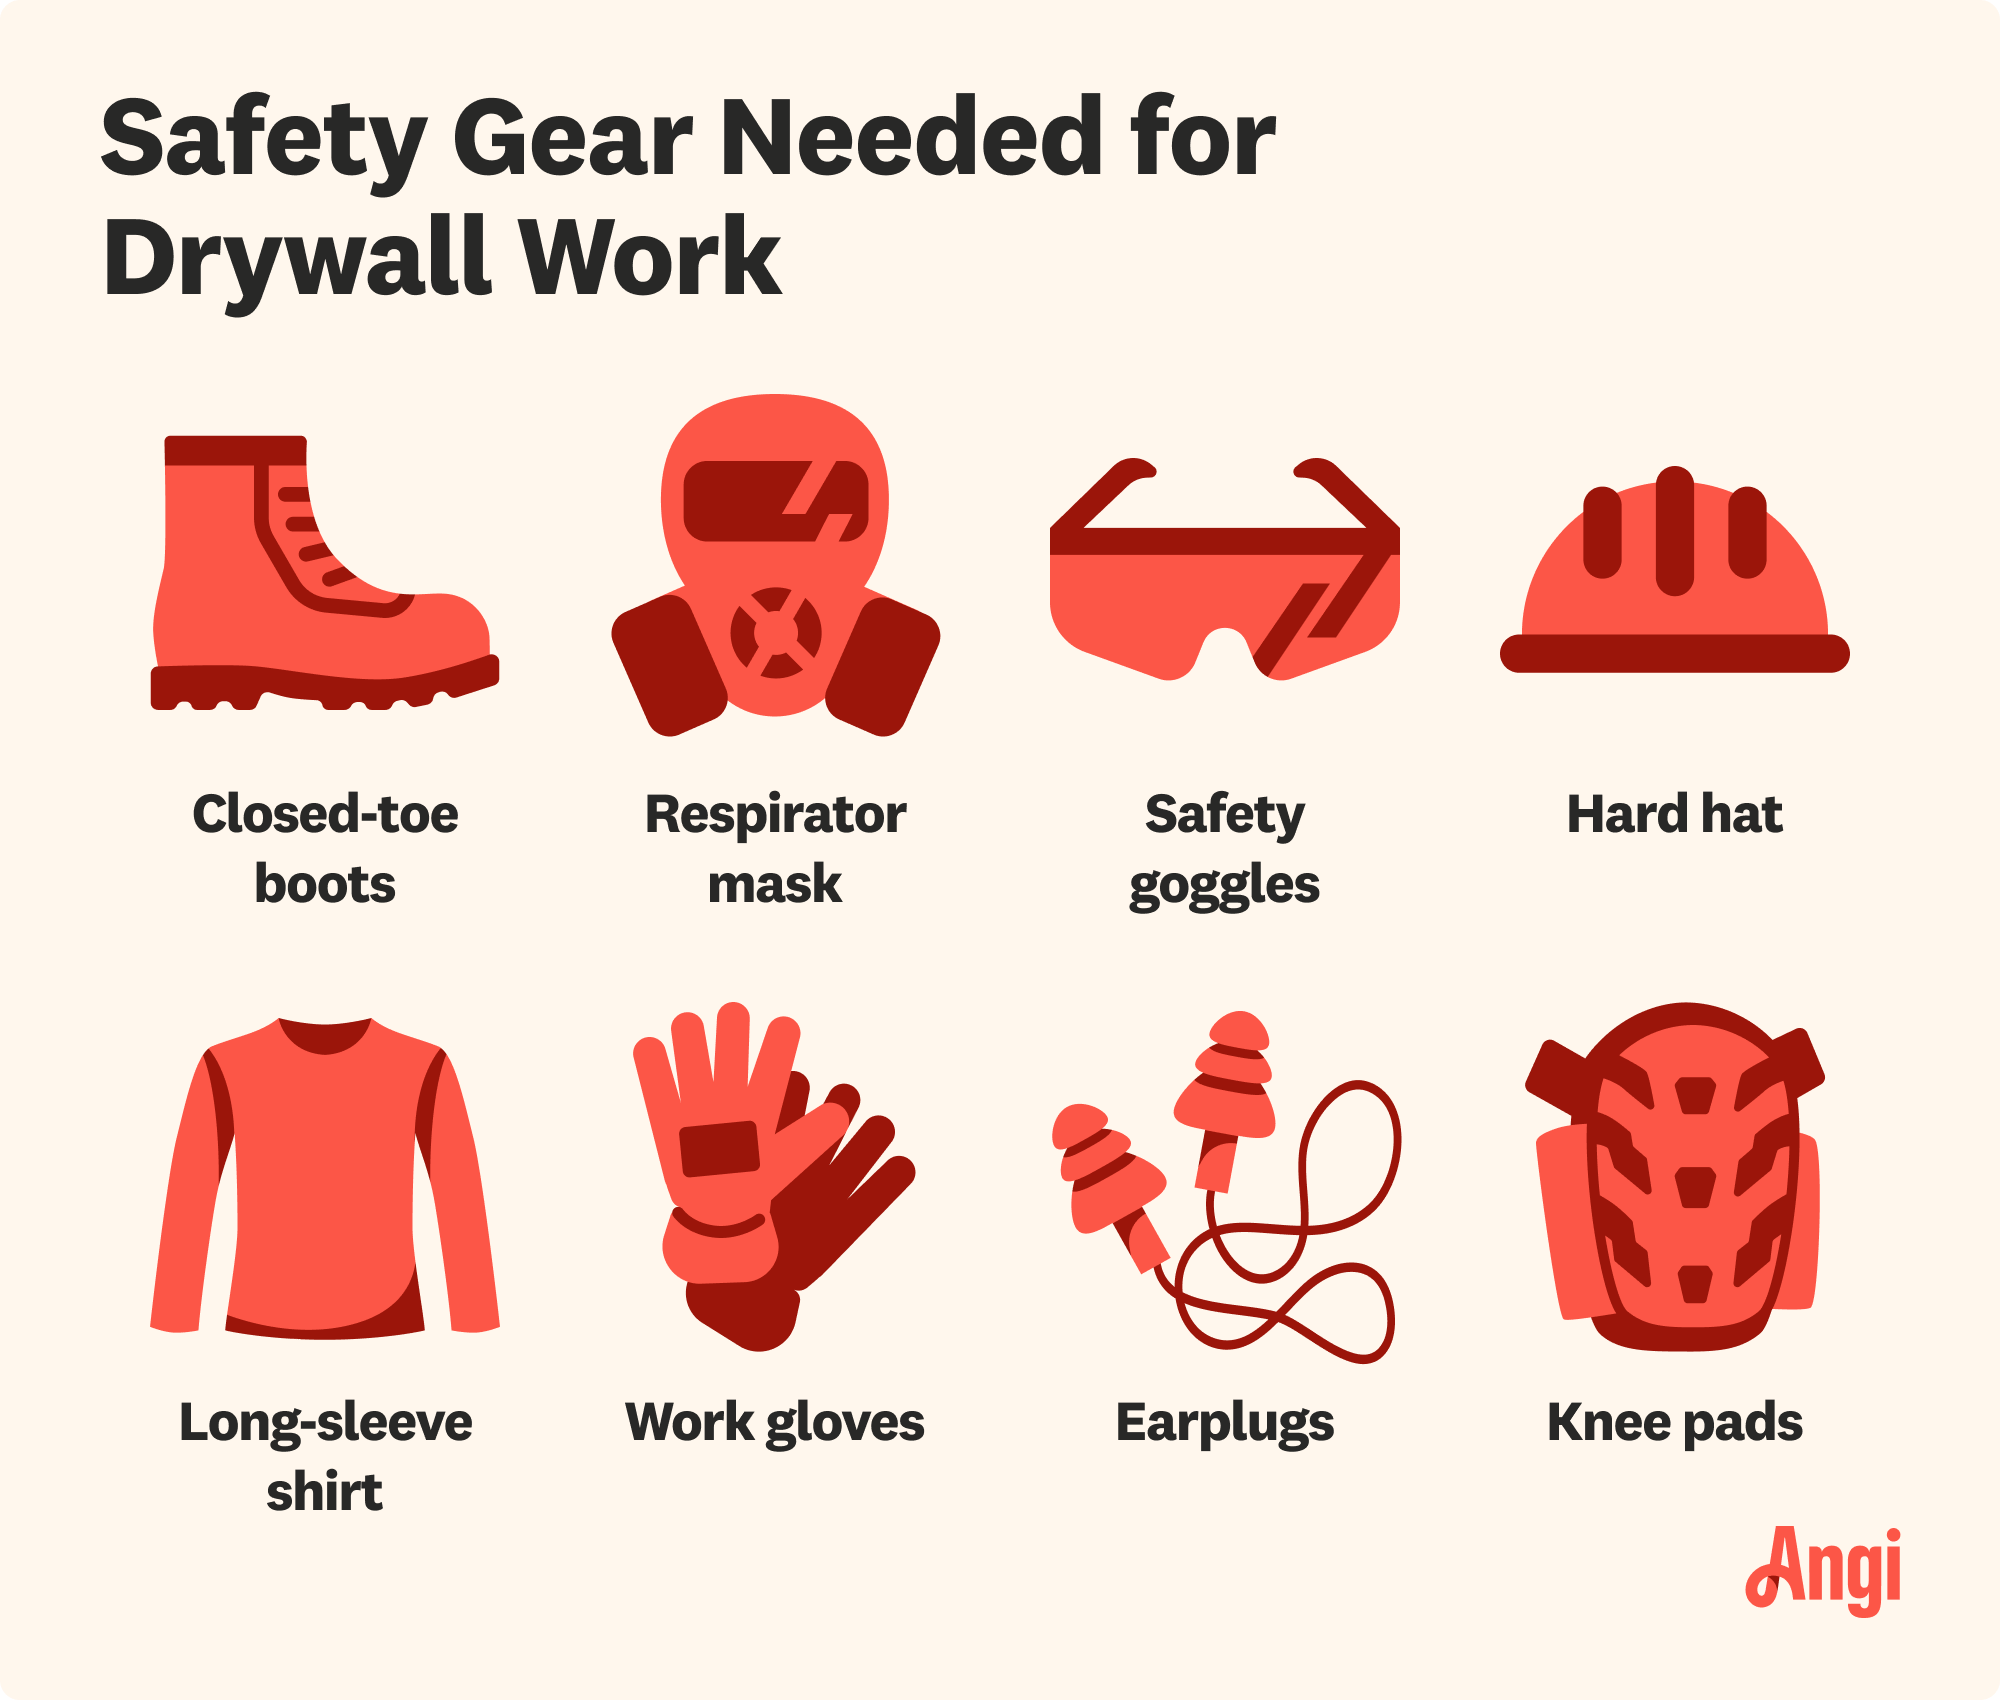
Suit up in an N95, P100, or other respirator mask and a pair of work goggles to protect yourself from fine particle dust. Then, you can use either a sanding block or a sanding screen on a drywall sander to sand out the drywall to smooth out any bumps or other imperfections.
A sanding block will take more time to sand the wall, but it costs less than buying or renting a drywall sander. After sanding, your freshly drywalled corner is ready for primer and paint.
Finishing corners with drywall yourself costs up to $450 or more, depending on how many drywall sheets and how much joint compound you need, plus the cost of drywall tape, screws, and a sanding block. If you don’t have a mud pan or drywall knife on hand, the cost will increase by another $15 to $30. If you want a drywall sander to make the final sanding process easier, expect to spend an additional $100 to $150.
If you want a good finish on your wall, it's absolutely worth it to pay for professional taping and mudding. Many DIYers are tempted to pay someone to hang the drywall and do the rest themselves, but this is one area where a skilled contractor can make a huge difference.
By comparison, hiring a pro for drywall installation costs $990 to $3,200, which includes the cost of materials and labor to drywall an entire room, corners and all. You could save your long weekend for barbecuing and family fun rather than watching joint compound dry. Plus, the corners will have that seamless finish without the hassle. It’s worth the investment to leave this job to a local drywall installer.
Cancelled appointment two hours after they were supposed to come for drywall work.
I would recommend this company to anyone! He showed up on time, was friendly, completed a very difficult repair on our dryer vent cover, was responsive, and pricing was extremely fair and competitive. I would have him back to do any of our repairs or cleanings without hesitation!
I cant stop admiring my newly painted walls. Custom Paint Jobs LLC made my house feel brand new.
Excellent experience with hiring Tether House to Mount our 77’ Samsung TV in our bedroom. Fast, friendly, and knowledgeable. Highly recommend.
Excellent customer service and knowledge. I was recommend to him from my neighbour. My front door and window came in great and were installed beautifully perfectly, I m very satisfied with their excellent work, so decided to order one more big bow window for my living room. I cant wait for...
Manuel Calvillo is the best option in the area for roofing and you won't be disappointed.
Would hire again. Wall looks great. Happy with job.
 Central Paving
Involved an extensive bathroom remodel, including removing tub & installing walk in shower, new drywall, custome tile work to ceiling, plumbing, etc. Overall, job was done on time and on budget. Nick & his team were very professional and had high attention to detail. Quality was great. Highly...
 Stamos Flooring and Remodeling LLC
We have had a great experience with Rising Height for the past five years on a number of miscellaneous renovation projects. They laid flooring for us and had a very good sub do the finish. Installed drywall for a vaulted ceiling, finished an attic/loft with new subfloor, framing and drywall,...
 Rising Height Unlimited
Mr. Lopez was super nice and professional. He repaired our drywall just as he described during the estimate phase. Our dining room wall looks great again! Thanks Mr. Lopez!
From average costs to expert advice, get all the answers you need to get your job done.
Installing drywall is the most common way to finish your home’s interior. Use this drywall installation cost guide to see what your project is likely to cost.
Drywall texture can create an attractive finish and add dimension to your home’s walls. This guide breaks down the factors that influence the cost to texture drywall.
Rounded vs square drywall corners—which one should you choose? Use this guide to understand the key differences, and decide which one is right for your project.

Ready to tackle that drywall project? Use this handy guide to make sure you have all the right tools for drywall perfection before you get started.

Finishing drywall can be a tricky part of DIYing your home. Our handy guide teaches you how to tape and mud drywall like a pro.
Master the art of how to install drywall corner bead following these five easy steps. Read on to learn how adding this corner element can protect and beautify your wall.