
Sprinkler systems offer lots of variety in sprinkler heads. Learn the differences between sprinkler head types to find the best one for your watering needs.
H2O? More like H2-no!

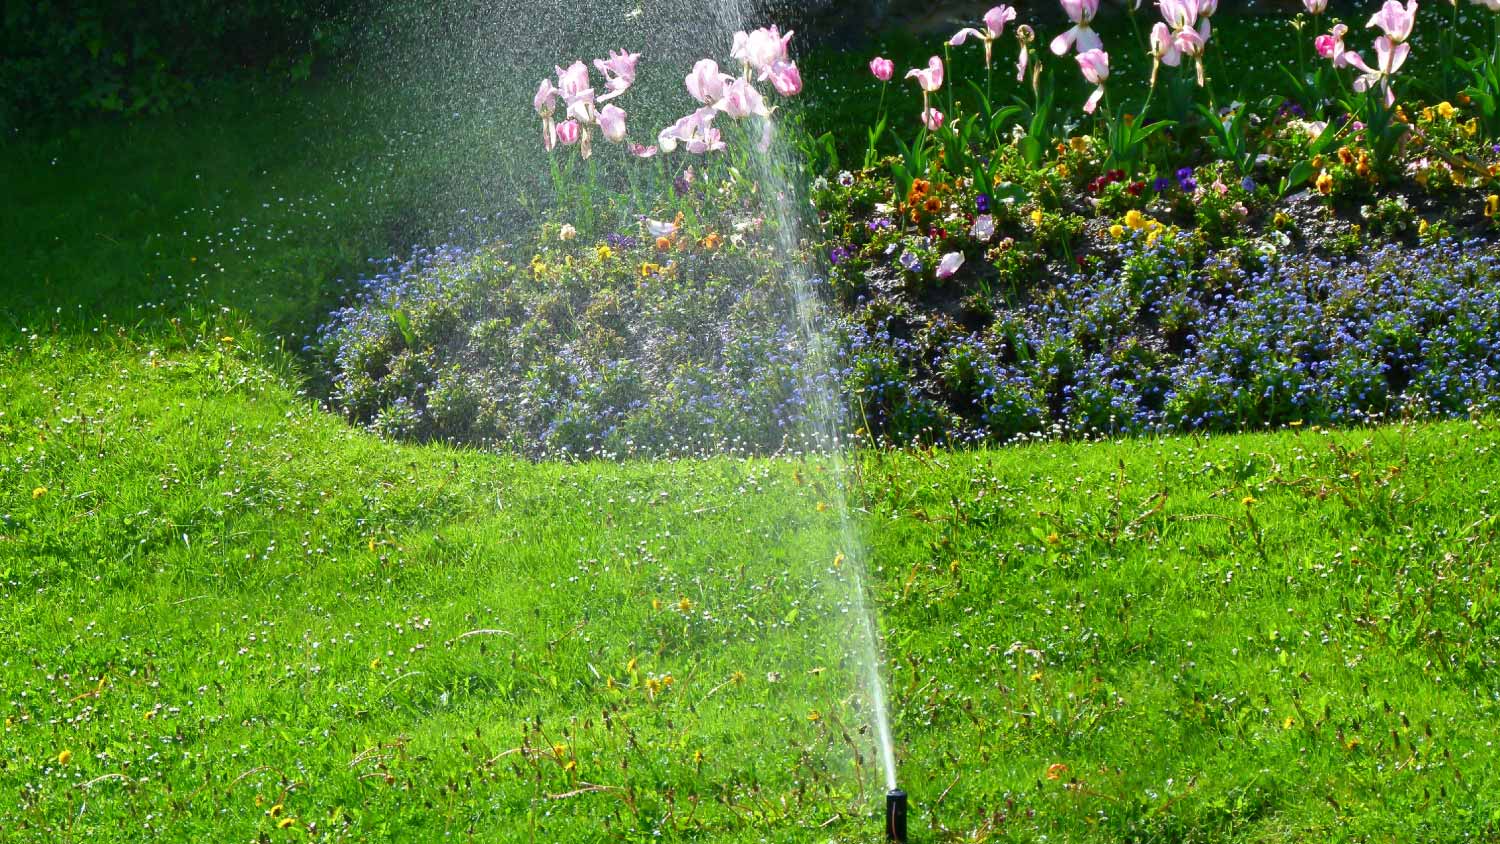
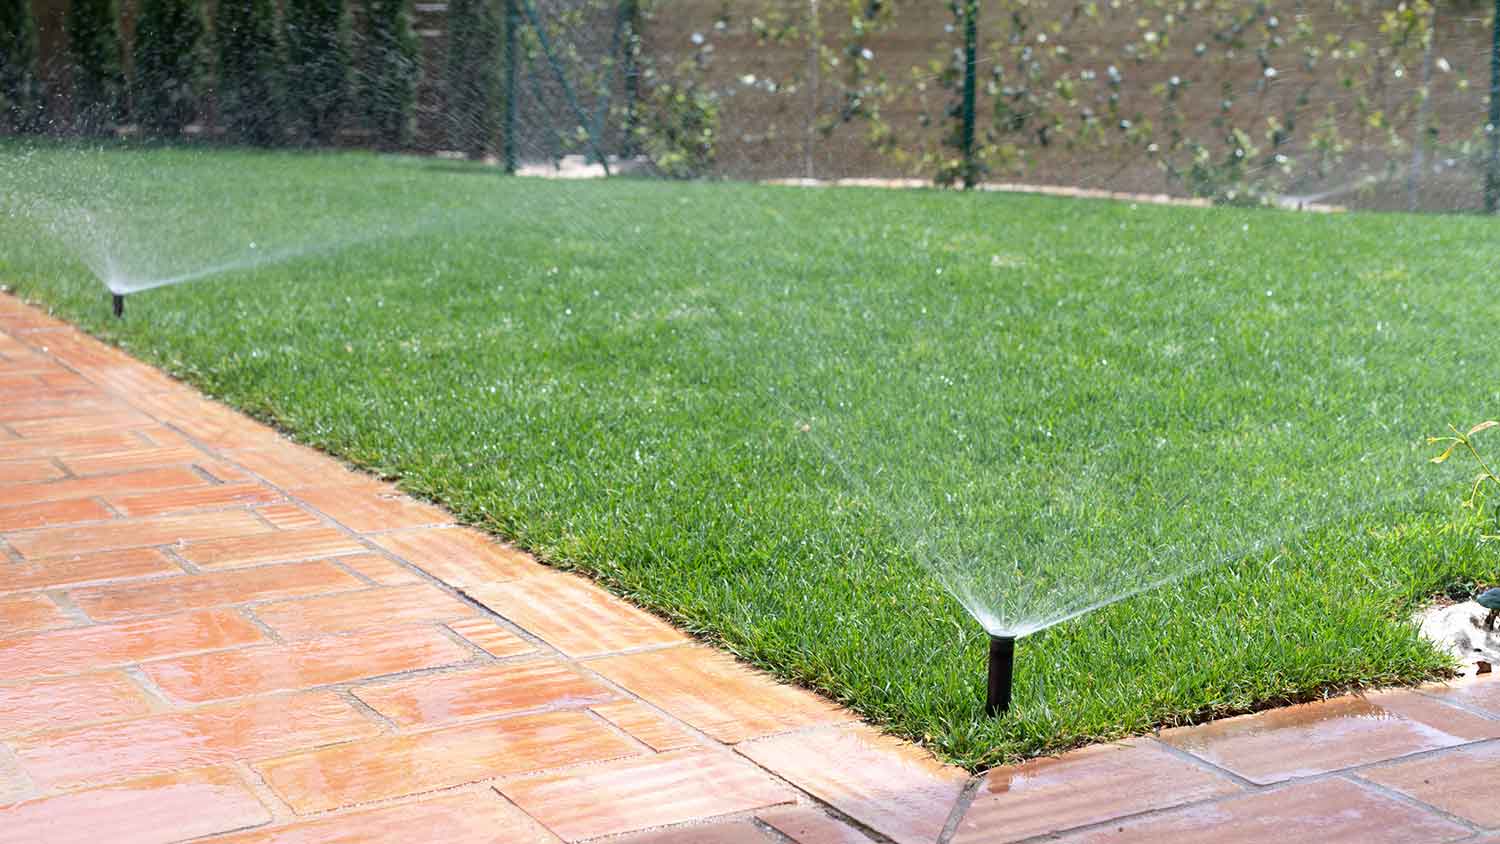
Is your sprinkler system overwatering parts of your yard? One easy solution is to learn how to cap a sprinkler head. In a few minutes, you’ll adjust the flow of water to your entire yard and restore balance to your watering system. Here’s how to cap a sprinkler head in six steps.
Before you get started, it’s important to ensure your sprinkler system is off, and the water going to the sprinklers is also off. It wouldn’t be pleasant to pull out the sprinkler head only to have the timer click on and spray water in your face.
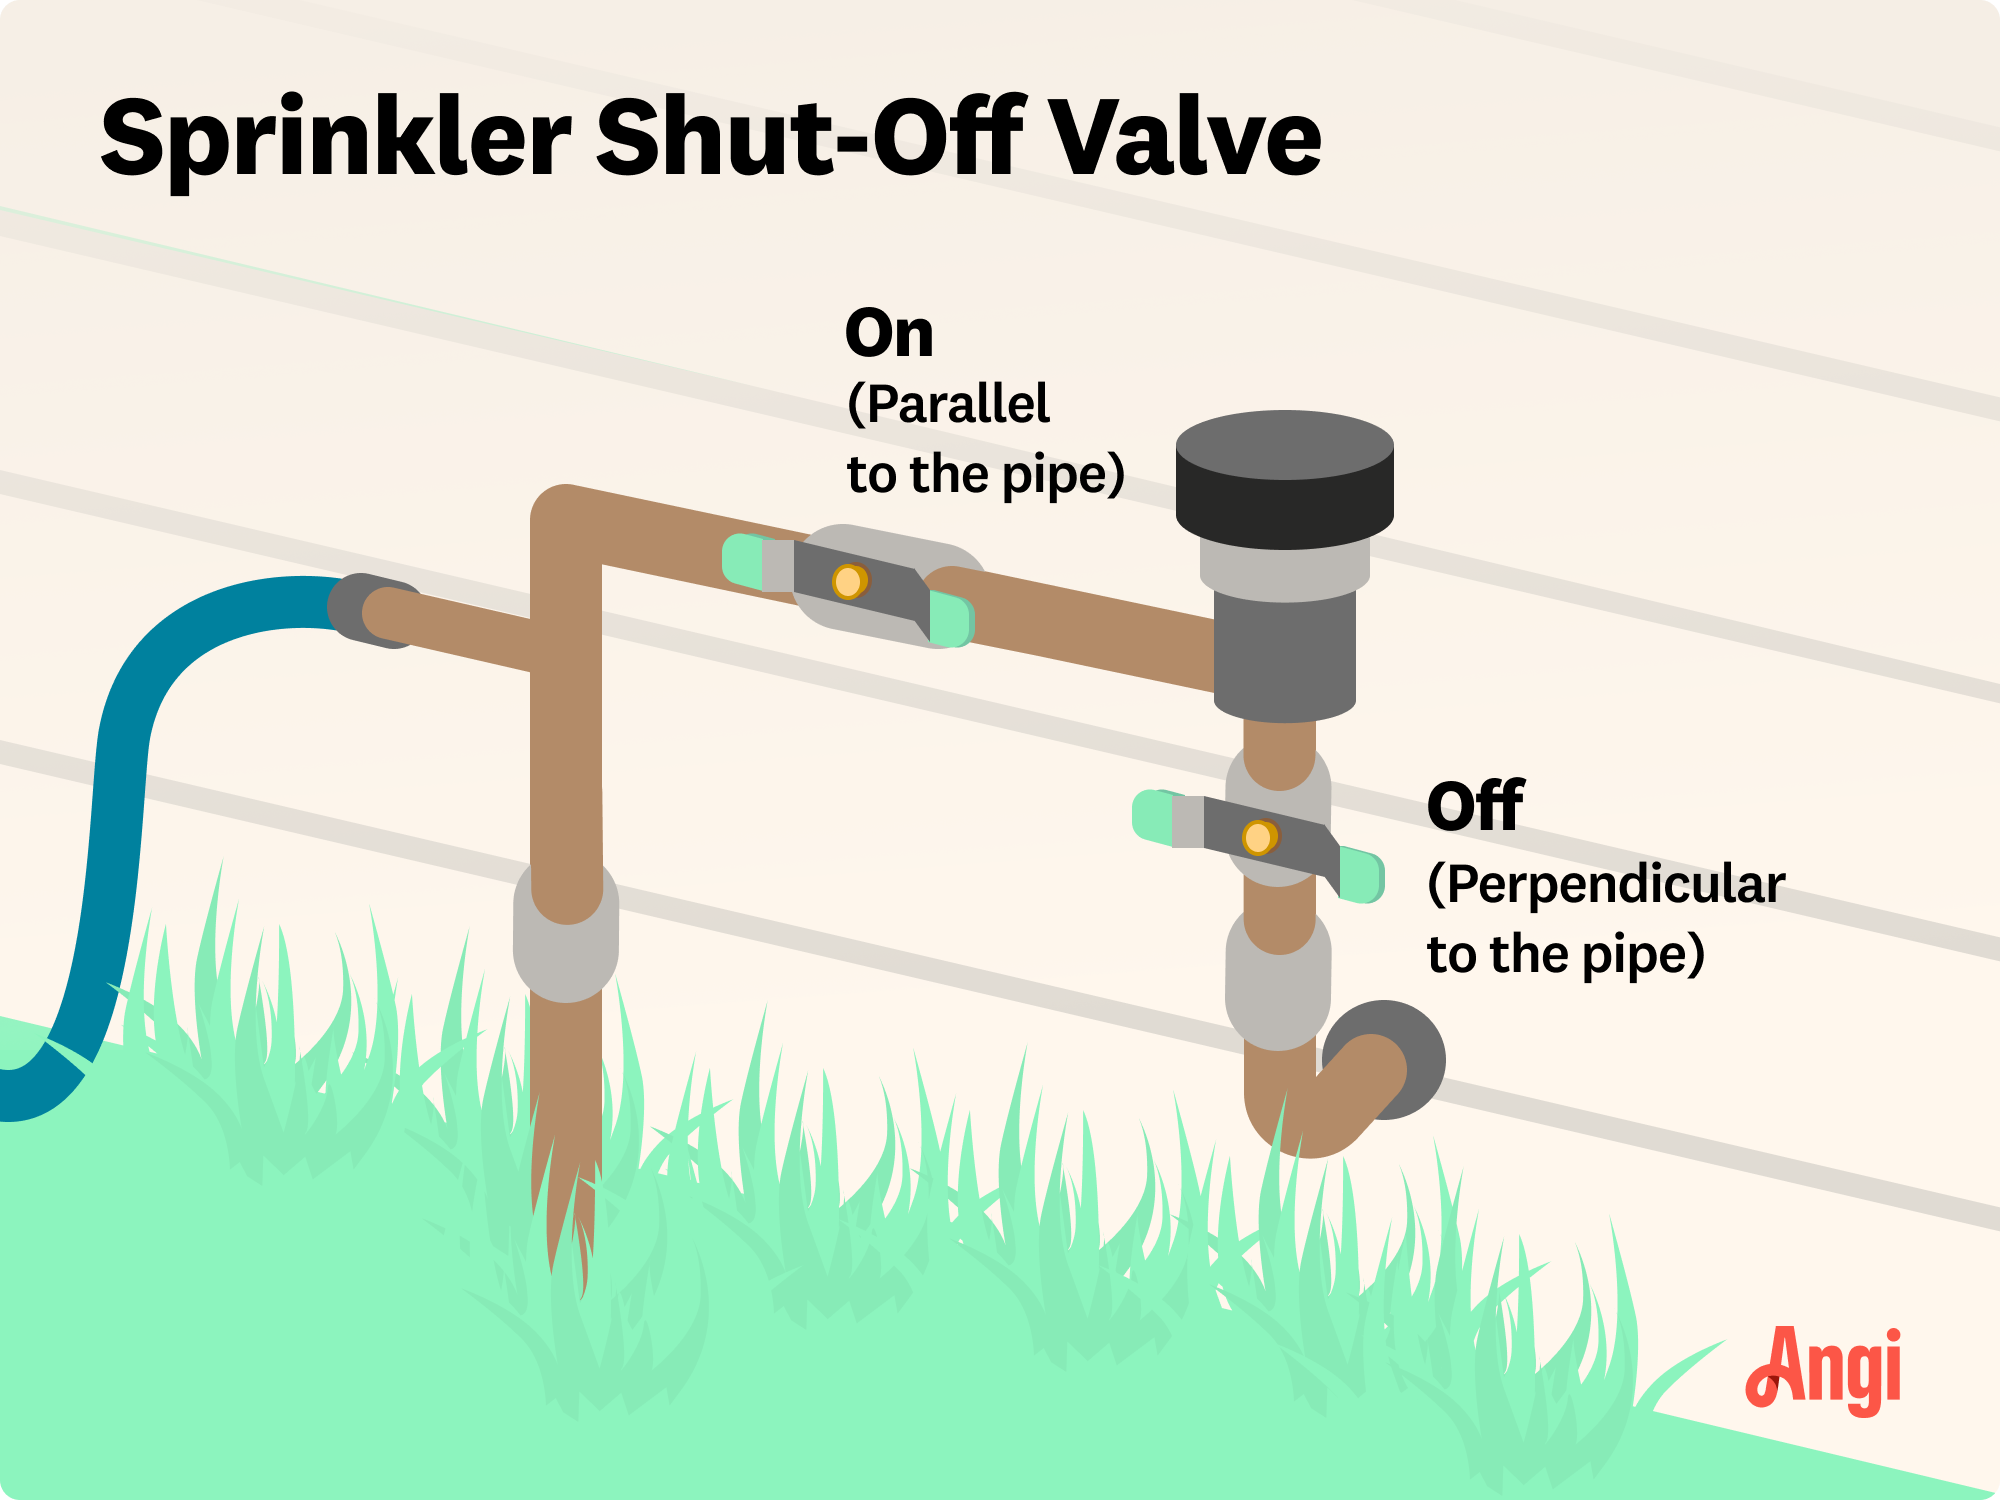
Ensure the sprinkler system is shut off, and head to the valve that supplies water to your sprinklers. This valve is usually located on the side of the house. Make sure the handle is perpendicular to the pipe to ensure the water flow is off.
Using a small shovel, dig carefully around the sprinkler head you want to cap. You’ll need to remove the dirt until you reach the riser or where the sprinkler head and assembly connect to the lateral pipes supplying it with water. That way, you can easily access the entire sprinkler head. This process will involve digging about 1 to 2 inches around the sprinkler head and about 6 inches deep.
Now that the sprinkler head is uncovered and you have enough room to reach down toward the sprinkler riser, grab the sprinkler head, which includes the sprinkler cap and its assembly, and turn it left or counterclockwise. Below, you’ll now see the exposed riser in the ground.
The existing sprinkler cap has a small opening and screw on top to release and spray out the water, but you’ll want to replace this with a flat cap that stops the water. Remove the existing cap, including the interior assembly, from the sprinkler head and set it aside. You’ll want to store it in a garden shed or garage, where you can easily reaccess it if you decide to uncap this sprinkler head.
Tighten the flat cap that is compatible with your sprinkler system onto the sprinkler head. This provides a temporary option for capping a sprinkler head, which can be helpful when winterizing your sprinkler system or allowing newly planted flowers to acclimate to your garden.
However, if you know it’ll be a long time before you uncap this sprinkler head, you may want to consider capping it with a threaded PVC cap. The process is similar, but instead of capping the sprinkler head and attaching it back to its riser, you’ll simply screw the PVC cap directly onto the sprinkler riser.
If you use a threaded PVC cap to cap the sprinkler head permanently, you can skip this final step. If you screwed on a flat cap to the sprinkler head, now screw the entire sprinkler head back onto its riser, being careful not to overtighten.
You can now fill the hole with dirt and turn the water and sprinklers back on.
There’s another reason to cap sprinklers—winterization to preserve your sprinkler system during the coldest months. Sprinkler systems in regions that experience freezing temperatures are “blown out” so freezing won’t cause problems.
You cannot directly cap a sprinkler head in areas with cold winters because that prevents water in that end of the irrigation pipe from getting blown out. It lingers and can freeze when temperatures drop, potentially damaging irrigation pipes. It’s usually better to cap permanently or not cap so sprinklers can be blown out effectively. Instead, the capping process works like this:
Find the sprinkler head that you want to permanently cap. Locate the closest upstream sprinkler (the next sprinkler the irrigation water would reach before the head).
Carefully dig up the irrigation pipe, from the final sprinkler you want to cap to the next sprinkler in line, fully exposing the pipe.
Cut the pipe horizontally at the T section as the irrigation pipe passes the upstream sprinkler head. You’ll want to leave 1 or 2 inches to fully cap it, but otherwise cut it as close to the T branch as possible.
Cap the horizontal pipe as you would with a sprinkler head, making sure the pipe stays dirt-free during the process.
Remove the section of irrigation pipe and end the sprinkler entirely. You can disconnect the sprinkler and store it for spare parts.
Use this method to cap a sprinkler line in the middle. You’ll have to repeat the process for two sprinklers on either side instead of one, and make sure both lines have a connection back to the irrigation pump.
Capping a sprinkler is an easy DIY project for any homeowner. If you already have some gardening or work gloves and a small shovel, you’ll just need to buy a sprinkler cap, which typically costs less than $5.
Hiring a pro to inspect a sprinkler costs about $115 on average, but this process involves more than just capping a single sprinkler head. The pros can inspect the entire system for any problems that could be wasting water and costing you money. They can also help you determine which sprinklers to cap for best yard results.
If you’re uncomfortable capping the sprinkler head or want a comprehensive inspection of your system, hire a sprinkler installation professional near you to help.
Cody did a great job!
Wonderful. I am going to have them remove and replace my driveway in the spring.
 All Star Paving and Sealing
We had a 20+ year old landscape lighting system that needed replacement. Midwest Lightscapes worked with us to design a much improved lighting system, lighting the exterior of the house and the back yard. Installation of the 45 light system took one and one-half days, and went very smoothly....
 Midwest Lightscapes
Did an amazing job transforming my yard. Also installed sod in places, would recommend to everyone.
Always been satisfied with the service work and how they have taken care of my pool.
Bill Gerhardt sold the company to his employees at the end of 2019, apparently without a workable succession plan and without notifying prospective customers of this fact. Most aspects of the maintenance contract have not been fulfilled: no installation of anual plantings per contract, no...
They show up and they did take us on as a client which seems to be a problem with other lawn care providers. We have multiple properties and this one was located close to downtown and no one really wants to mess with it.
I was very happy with the service provided by AK Irrigation. They responded quickly to my email, and the woman I spoke with was polite and professional. I was able to get an appointment that same week. <br /> The technician (Tyler) arrived on time. He was very knowledgeable, and worked...
 AK Irrigation
The worker came out when he was supposed to come. He informed me he would honor the Angie's List deal, but would not do any more work for me since my son in law owns lawn care company as well, even though they do not do the same type of work. He said he did not feel comfortable giving me...
 Bello Giardino LLC
E & L Lawn Care was super. They were very responsive before and after service. They were efficient and were able to complete the job within 1 day. I have had concern about one section of sod - the owner was pro-active and did a visit to evaluate. I have no doubt they will stand behind...
 E&L lawn care
From average costs to expert advice, get all the answers you need to get your job done.
Sprinkler systems offer lots of variety in sprinkler heads. Learn the differences between sprinkler head types to find the best one for your watering needs.

Learn how to adjust Rain Bird sprinkler heads, no matter the type. Fine-tuning your sprinklers ensures optimal water usage and reach.
If your sprinkler head is popping up but not spraying, you could have a clog. Learn the main causes of this problem and how to fix them.
Is your sprinkler head leaking? We explore various reasons this leak may be occurring and common fixes for the problems so you can keep your lawn pristine.
Is your sprinkler system on the fritz? Discover our troubleshooting tips and steps for how to fix a sprinkler system so your lawn can stay lush and healthy.
When your sprinkler head is not rotating, the common culprits are debris, dirt, or low water pressure. Read on to learn how to solve a sprinkler head problem.