

Dry wells are handy for anyone who’s experiencing drainage problems. But dry well installation costs can vary depending on its size, location, and volume.
It really is putty in your hands

Plumber's putty drying time is immediate in most conditions, though you should wait 10 minutes in cold or humid spaces to let the seal form.
Your plumber's putty stays soft and malleable after application, making it easy to remove for repairs compared to silicone caulk that hardens permanently.
You need to clean your work surface thoroughly, roll the putty into a snake shape, wrap it around your fixture, and test for leaks.
Hiring a local plumbing repair professional provides reliable support with sink drain sealing and faucet repairs when putty alone won't solve your problem.
If you’ve got a leaky drain or pipe on your hands, you’re probably wondering, can I fix it with plumber’s putty? Water damage happens swiftly when leaks occur, which is why it’s so important to know which materials will stop your problem before it has a chance to soak your house. Keep reading to find out what plumber’s putty is, why it’s a professional favorite, how it varies from other sealing agents, and how long it takes to dry.
Plumber’s putty is a sealing compound made from linseed and clay. These two ingredients create a soft, malleable texture that’s easy to apply and remove from pipes, drains, and other plumbing fixtures. Licensed plumbers prefer it to other sealing options because it’s just as watertight and durable as alternatives like caulk but easier to strip off and replace when repairs like unclogging a drain are necessary.

Plumber’s putty isn’t the best option for every plumbing project. Don’t use it where it’s easily visible or will undergo a lot of direct contact. And avoid applying it to any surfaces that it could damage or stain, like porous stone or plastic. Projects like sealing sink drains and fixing leaking faucets are the best uses of plumber’s putty. Finally, if plumber’s putty (and even caulk) won’t be enough to solve your problem, hire a plumbing repair service near you to take the work off your hands.
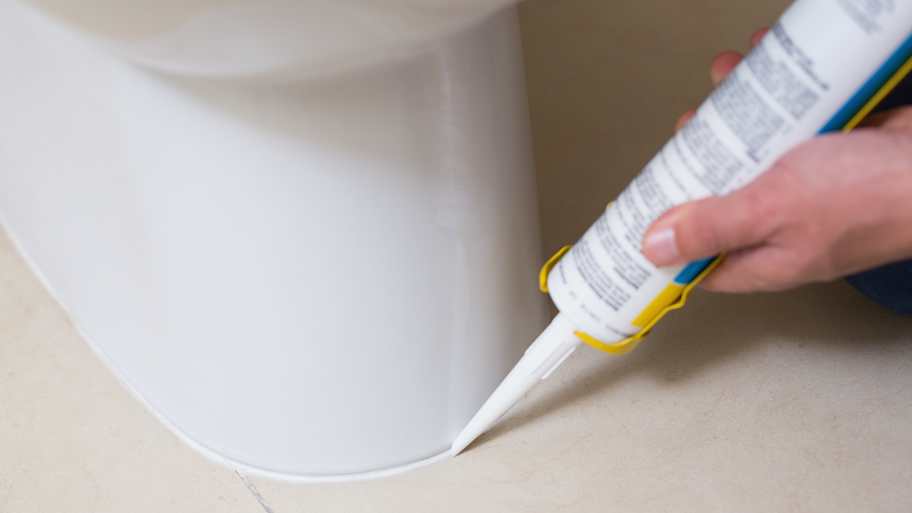
Because plumber’s putty is a petroleum-based substance, using it on porous surfaces like granite countertops or plastic fixtures can result in staining. It’s also not adhesive like silicone caulk and can’t be used to patch cracks or seal a toilet to the floor. Plumber’s putty has no insulating properties, so it’s not the right choice for sealing windows or doors.
Plumber’s putty should never feel dry or crack in your hands when you attempt to roll it out. If this is the case for you, your putty is either too old or improperly stored, and you’ll need to replace it before continuing your project. Storing plumber’s putty the right way will guarantee that it functions when you need to use it. Seal the container as tightly as possible and store it away from high temperatures to keep it in working order.
Plumber’s putty will always remain as soft and damp as when you first took it out of the container—just as long as it stays out of extremely high temperatures. In especially cold or humid conditions, you may need to wait 10 minutes before using a plumbing fixture to allow the seal to form. But, in most cases, you can expect plumber’s putty to do its job just moments after application. In comparison, the dry time for silicone caulk is 30 minutes to a couple of hours (plus another 24 hours to cure).
Applying plumber’s putty takes just a few minutes and doesn’t require any prior experience. Follow the steps below to get your broken plumbing fixture back in working order ASAP.
Plumber’s putty doesn’t adhere as easily to dirty surfaces, so it’s important to clean anything that will come into contact with the putty before getting started, like the base of your sink or the space between connecting pipes. Spray surfaces with an all-purpose cleaner or clean them with a sponge, warm water, and soap. Then dry with a microfiber cloth to ensure no residual dust or debris remains.
Take a small amount of putty—roughly the size of a walnut—and roll it into a snake shape about 1/4 to 1/2 inch wide. Wrap the putty around the object you’re working with—like the base of a sink drainpipe. The two ends of the snake should touch; smooth them together so there are no gaps. If the putty is too short or not thick enough when applied, start over with a new piece to get the correct dimensions.
Let’s use the example of the sink drain again: Once you’ve applied your putty, place the drainpipe back into the sink. Then, push down lightly to secure the putty and drainpipe to the sink. Tighten the pipe from below to lock it into place, then wipe away the excess putty from inside the sink. Turn your sink on to test for leaks, and repeat the process with slightly more putty if your first attempt didn’t work.
To ensure your plumber's putty works well, double-check the quality of your product and make sure it's been stored in an airtight container in a cool, dry place.
If it’s in its original container, double-check the putty's label to ensure you only use it on the intended surfaces. You should also toss any old putty that's been sitting around for years because it will be less effective.
After you apply the plumber’s putty, be sure to let it set before you run water over it. Finally, you should tighten the ring to test for leaks. If it's not tight enough, you could get some dribbling.
Although plumber’s putty and silicone caulk share many similarities, a couple of differences will help you decide between the two for your project. For starters, silicone caulk hardens and dries out completely, and plumber’s putty always remains soft and malleable (unless exposed to air). While this characteristic makes putty easier to remove, it’s not suited for projects requiring a firm, solid seal that won’t budge from contact—like caulking around a shower or tub.
Silicone creates a watertight and airtight seal around your plumbing fixtures to limit the risk of leaks. It’s also resistant to heat and mold, making it ideal for areas where plumbing is exposed to heat or humidity.
In most cases, you’ll get the best results by using plumber's putty to repair fixtures that are unlikely to see much action, like the drainpipe in the cabinet below your sink. Plus, if you end up with a clog or leak later on, you won’t have to spend an extended period of time scraping away sealant as you would with silicone caulk. It can also fill wide gaps and it’s easier to use and correct mistakes during application.
Positive experience. As previously stated, the replacement/repair could not be completed (no fault of the plumbing tech) b/c misinformation was rec?d by property management maintenance. Thanks to the plumbing tech for your efforts. Appreciate you!
 The Waterworks
If you want to pay the most exorbitant prices possible for your job, this is the company for you. “By the job” pricing is a rip-off, at least how these people use it. Every job is plugged into a category and prices are set by category. You might have a job that takes half an hour or one that...
 Benjamin Franklin Plumbing
Cole has been handling plumbing and general contracting for our four properties over the past three years, and he’s always done a great job. Most recently, he installed a sink and countertop in our retail store where none existed before, and it turned out exactly how we needed. He’s...
 ANB Renovations LLC
Matt is a consummate professional. The work turned out to be far more difficult than expected and rather than turn the job down, Matt rose to the occasion and completed a near impossible task. I can not recommend Greene's Plumbing Service more highly. On a scale of 1-5 I would give Matt a...
Involved an extensive bathroom remodel, including removing tub & installing walk in shower, new drywall, custome tile work to ceiling, plumbing, etc. Overall, job was done on time and on budget. Nick & his team were very professional and had high attention to detail. Quality was great. Highly...
 Stamos Flooring and Remodeling LLC
Awesome company. Had a jacuzzi tub taken out and replaced with huge walk in shower with partial glass enclosure. Onyx to the ceiling with a decorative border, moved plumbing and installed hand held shower, new ceiling, flooring, and paint. Replaced window with glass block. Everything was done...
 Columbus Bath Design
The initial quoted price from a walk-through seemed high, but we discussed that the quote represented worst case scenario (re-wiring to two floors) and we were excited about the opportunity to have the work done in a timely manner with closing for fire safety reasons, etc. When the job was...
Initially, I called the Service People to have a leaking garbage disposal replaced. I had purchased a special deal through Angie's List: $79 for $200-worth of plumbing services. <br /> When I went to schedule the work, the earliest date I could get through Angie's List was after the upcoming...
This company did a very good job on the brick wall and it looks just amazing. The staff was always professional and was practically OCD on how the bricks were stacked and how they were laid. Although it took longer than expected, I am willing to sacrifice time over perfection anyday. The...
 My Handy Mate LLC Improvement & Remodeling
<p>I am so glad we called Rotor-Rooter. I was hesitant to call them because we usually prefer to give business to local providers. But when we had sewage back up in our basement on a Saturday evening, I had a hard time getting a hold of someone, not to mention the high weekend/evening rate...
From average costs to expert advice, get all the answers you need to get your job done.
Dry wells are handy for anyone who’s experiencing drainage problems. But dry well installation costs can vary depending on its size, location, and volume.

Looking to estimate the cost of rough-in plumbing for your new home? We’ve got you covered with a guide that covers the different cost factors for this type of job.
A bidet—stand-alone, attachment, spray nozzle, or toilet combo—reduces toilet paper usage and saves money, but how much is a bidet? Here’s how much you’ll pay.
Understanding the difference between plumber's putty and silicone will help you choose the right one for the job—read on to find out more.
If you’re wondering how long it takes for grout to dry, our guide has the answers. Letting grout dry and cure completely ensures a long-lasting tile job.
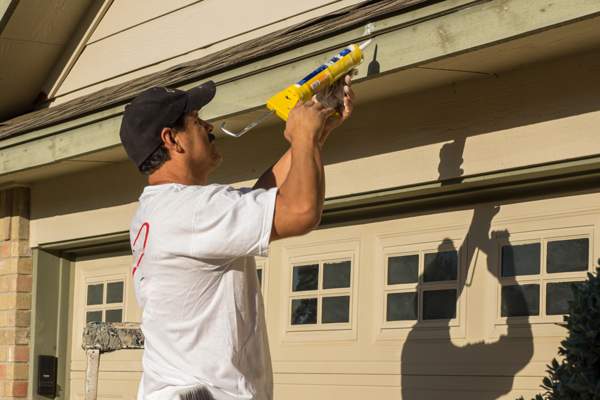
Allowing your caulk to fully dry and cure is key to long-lasting results. But how long does it take for caulk to dry? Learn the factors that affect the process.