Wayne's plastering LLC
Serving Casco, WI and surrounding areas
Approved
In business since 2022
Customers say: True professional
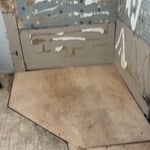
"Kasey was thorough and reasonably priced. He covered the floor to keep it protected. He was able to ignore our barking dogs. He told us he would return to fix the plaster if it cracked again."
+55
Recommended by100%of homeowners