




Top-rated backsplash installation pros.

Get matched with top backsplash installation pros in Martinsburg, MO

Enter your zip and get matched with up to 5 pros

Need a pro for your backsplash installation project in Martinsburg, MO?

Select your specific project to find the pro for you.

TRUSTED BY MARTINSBURG, MO HOMEOWNERS

  • Average homeowner rating star icon4.4
    Average homeowner rating
  • Verified reviews icon31
    Verified backsplash installation services reviews

Find Backsplash installation pros in Martinsburg

Avatar for Jones Floor and More
Jones Floor and More
New to Angi
Tile: Ceramic and Porcelain - InstallTile: Ceramic and Porcelain - Install - For BusinessTile: Natural Stone (Granite, Marble, Slate, Quartz, etc) - Install+1 more

Serving Martinsburg, MO and surrounding areas

Approved

In business since 2024

Free estimates

Credit card accepted

We take great pride in our experience, expertise, quality, and customer service that we provide to meet the consumer's needs. It is our mission to provide excellent workmanship and complete customer satisfaction, from the start to the completion of a project. In order to understand the needs and expectations of our customers, we take great care to work and communicate with every customer in a professional manner. Our reputation is based on service, safety, and quality, regardless of how large or small the job. Please Note: We do not provide carpeting services and we are not profiled with them on Angi.
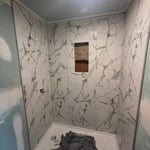
3 neighbors recently requested a quote
Avatar for Re-Bath
Re-Bath
4.2(
38
)
Tile: Ceramic and Porcelain - InstallTile: Ceramic and Porcelain - Install - For BusinessTile: Natural Stone (Granite, Marble, Slate, Quartz, etc) - Install+1 more

Serving Martinsburg, MO and surrounding areas

In business since 1979

Free estimates

Credit card accepted

"Email communication was hit-or-miss.  Sometimes I would get an immediate response, other times weeks went by and I didn't get a response until I prompted them for an update.  The installer was polite and professional but several of the trim pieces were damaged on installation and the fit and finish is not great.  It took over a month to get the damaged parts replaced and one of the replacement parts is also damaged in the same location as the first piece.  It's not noticeable enough that it's worth taking another day off work to have it replaced again, though.  The caulk lines are not very even, the drain is not centered in the floor of the shower, and the trim piece around the shower handle is off-center as well.  I will admit that I can be fussy about these sorts of things and these may not be issues for other people but it's bothersome enough to me that I wouldn't use Re-Bath again.
"
Additional Photos
Additional Photos
Additional Photos
Additional Photos
Additional Photos

+8

Recommended by70%of homeowners
Showing 1-10 of 36
Backsplash Installation questions, answered by experts

You can use sanded or unsanded grout for a shower pan, but sanded grout isn’t the best option for shower walls. For those areas, you’ll want to use unsanded grout, which works well on vertical surfaces and is less likely to slump than sanded grout. Alternatively, you can use epoxy grout for shower walls.

You can purchase natural stone tiles from your local home improvement store or stone distributor. 

Simply put, natural stone flooring is a high-end style that outlasts its wood and carpet counterparts. After finding a style you love, a stone flooring company near you can help source and install them for a reliably clean look.

When tiling over concrete, you should install an anti-fracture membrane after the concrete has been prepared. The anti-fracture membrane acts as a moisture barrier and should be installed to protect the tiles from moisture which helps maintain their integrity. Often, Ditra, a brand name, is used interchangeably with moisture barrier.

To maintain tile and grout, clean the surfaces regularly with mild, non-abrasive cleaners and wipe up spills promptly to prevent buildup. It is also important to reseal the grout every 1-2 years to maintain its durability.

If you’re handling your tile removal yourself, seal the room using painter’s tape and heavy-duty contractor bags to prevent dust and shards from escaping. Use a claw hammer or a pry bar and a mallet to get behind the tile and pry it away from the floor or wall. Once your tiles are all removed, sweep everything into contractor bags for disposal, being careful not to overfill them. Make sure you wear a dust mask, safety goggles, and work gloves to keep yourself safe from injury while you work.

The Martinsburg, MO homeowners’ guide to backsplash installation services

From average costs to expert advice, get all the answers you need to get your job done.