On average, a reverse osmosis water filter costs around $2,200, but there are a few variables that impact the total price. Learn about them in this guide.
It's not hard to keep your water soft
Hiring a water softener pro costs between $170 and $980, but it can prevent expensive repairs or premature system replacements.
Mishandling electrical connections or pressurized lines can lead to leaks, flooding, or electrical hazards.
Resetting timers or control valves incorrectly can cause the system to regenerate too often or not often enough.
A professional knows how to safely service your system, use the right salt and cleaner, and maintain your warranty.
If you're unsure how to handle any part of the process, it's likely safer and more cost-effective to bring in a water treatment pro.
A “water softener” may have a bit of a confusing name since it doesn’t make your water into a plush, fuzzy-feeling material. Instead, it focuses on removing specific minerals, such as magnesium and calcium, which can cause dry skin and scale if there’s too much of it in the water. Water softener maintenance is extremely important to keep your water fresh, but it can be difficult to know where to start. Here are 11 tips to make sure your water softener is always up and running.
If you don't have prior experience installing or repairing a water softener, consider contacting a plumber for assistance.
Without proper maintenance, your water softener can stop working properly and potentially let hard water into your home. When this happens, you might end up with white residue on your dishes and silverware, drier skin and hair, and reduced water pressure. Plus, your drinking water won’t taste as crisp as you’re used to.
Keep in mind that newer water softeners don’t need to be fully cleaned yearly, despite their constant usage, but you should clean them every five to 10 years. If your water softener is more than 15 years old, though, you do need to call in a pro to clean it every year. Even though in-depth cleanings don’t need to be done quite so often, you should keep up with a few essential water softener maintenance tasks to prolong the life of your system and increase the time between full cleanings.

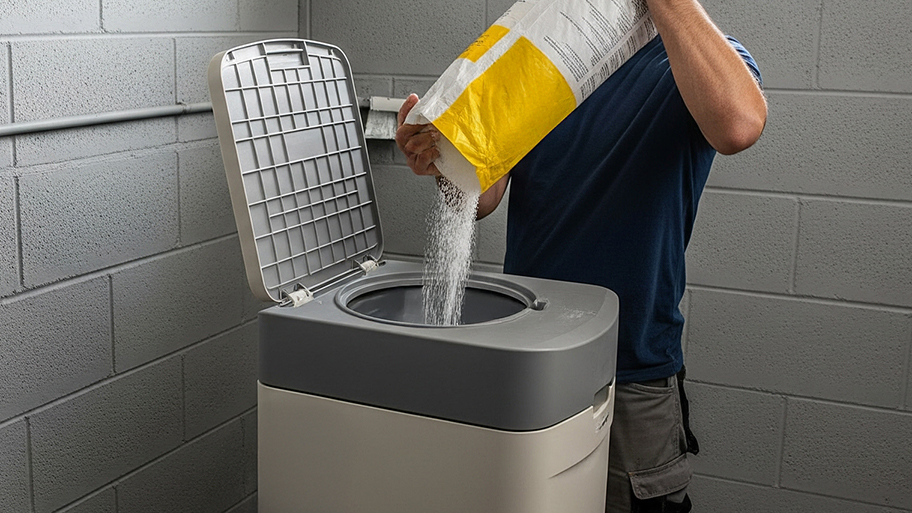
Resin beads in a water softener need salt to perform their job. The resin beads are responsible for the regeneration process of removing the magnesium and calcium and replacing it with sodium and potassium. Check the salt levels at least once per month.
Your user manual should include information about the quantity of salt your water softener needs. There’s also a good chance that there’s a fill line in the tank. If there’s no manual or line, you can fill the brine tank halfway with salt.
During the summer and if you have a pool, sprinklers, or shower more often than others, you’ll need to refill the salt more regularly.
Cleaning your brine tank once per year will prevent salt from clumping inside the tank and help your unit run smoothly. Here’s how to do it:
Shut off the incoming water valve and unplug the water softener.
Disconnect the brine tank from the water softener.
Remove the brine grid and put it aside.
Dump out the salt into a gravel bed or hole in your backyard, making sure to keep it away from plants or flowers.
Add a few drops of dish soap into a bucket with water.
Dip a bristle brush or non-abrasive sponge in the soapy water and use it to scrub inside the tank.
Rinse out the tank thoroughly with clean water, ensuring all soap is removed from the tank.
Replace the brine grid and reconnect the tank to the water softener.
Refill the salt and water to the recommended levels.
Let it sit for two hours, then turn on the water softener.
Salt bridges occur when salt has clumped together in a section of the tank and can no longer mix with the water below. They can occur at any place in the tank. If you notice your salt levels never going down, this is a sign of a salt bridge.
To break up salt bridges, pour hot water into the tank over the salt. This will loosen it up, making your life easier. From there, take a broom handle and gently push the salt down into the water. If it’s still not coming loose with a gentle nudge, don’t push harder, as you could damage the system. Call a pro to handle any stubborn salt bridges.
Whenever you’re pouring in salt, ensure there are no salt piles built up too high at the base of the tank. These piles won’t always dissolve on their own, but they don’t need to be removed. If your tank is too deep to reach the pile, it’s time to grab the broomstick again and flatten the pile out.
Speaking of salt, you should always make sure you’re using the right type of salt in the brine tank. There are three main types of salt that a water softener might use:
Rock salt
Solar salt
Evaporated salt
Check the manufacturer’s guide to make sure you’re always using the right type of salt. Often, a water softener can support multiple types, but it’s better to be safe than sorry.
While doing your monthly inspection of the salt levels, give the valves a twist and turn to ensure they’re working well. If not, you may need to replace the faulty valve (or hire a local water softener installation company to do it for you). If you plan to change it yourself, make sure to order the right replacement part, then check the user manual for installation instructions.
Most of the cleaning work happens inside the tank, but water softener maintenance means giving the outside some love, too.
To clean the exterior of your water softener, mix a little bit of liquid soap with water, then wipe it down with a soft cloth. You can do this on an as-needed basis to keep the softener free from dirt and dust. While you’re cleaning, look out for signs of rust or pest damage. If you see any, contact a water softener pro or pest control company to find out what to do next.
Once a quarter or even bi-annually, consider using a water softener cleaner. You’ll need to run a regeneration process while using a cleaner though, so make sure you have adequate salt levels in the tank. The point of a cleaner is to keep the resin beads in good shape so that they keep doing their job.
One way to improve the performance of your water softener is to install a prefilter that treats water before it reaches your softening system. These types of water filters stop large particles and sediment chunks from damaging your water softener by filtering them out before they reach your softener. Prefilters can also remove certain chemicals that alter the taste, odor, and color of water. Experts recommend installing a prefilter when installing, repairing, or replacing a whole-house water softener.
Notice a dent, leak, or constantly low salt levels? Don’t waste any more time trying to troubleshoot alone. Hire a local water softener repair company to help. The longer your system runs while there are problems, the more likely it is for permanent damage to occur, causing your water softener to fail.
Common water softener problems to look out for include:
Power issues
Resin bed depletion
Constant salt bridges
Incorrect timer display
A constant regeneration cycle running
While salt-free water softeners have their advantages, they aren’t true water softeners and are considered water conditioners. Salt-free water softeners won’t require as much water softener maintenance, but you’ll still need to schedule regular cleanings to ensure nothing becomes corroded.
If you've noticed sluggish performance with your water softener, you may be wondering if you should repair or replace your water softener. Many common problems with water softeners can be fixed once you identify the underlying cause. However, older softeners and softeners with system-wide issues may need to be replaced.
A damaged resin bed, clogged bypass valve, faulty bypass valve, and salt blockage are some of the common problems that can be addressed with water softener repair. Even some larger issues with water softeners that seem complicated can be repaired.
While a salt bridge in your brine tank is frustrating, it's fixable. A drainage issue with a water softener is also fixable because most drainage issues are caused by motor problems. On average, repairing a water softener costs $160 to $975, but prices depend on the type of water softener and the specific problem.
If your water softener needs repeated repairs, this is a sign that it’s time for an upgrade. Electrical issues with a water softener also indicate that your system is beyond repair. Additionally, if your household's water usage has changed since the water softener was first installed, you should consider a replacement. Just make sure you know how to size your water softener, first.
Any water softener that's 15 to 20 years old should be replaced once it begins having repeated issues. With most manufacturer warranties expiring after 10 years, homeowners can avoid paying out-of-pocket repair costs every time something goes wrong by upgrading their systems. Installing a new water softener costs between $200 and $6,000, depending on the type of softener, the size of your home, and other factors.
Scott Dylan Westerlund contributed to this piece.
From average costs to expert advice, get all the answers you need to get your job done.

On average, a reverse osmosis water filter costs around $2,200, but there are a few variables that impact the total price. Learn about them in this guide.

Discover how much well water treatment systems cost, including installation, maintenance, and tips to save. Get expert insights to plan your water system project.

How much a water softener costs depends on your home’s size, and the system’s type and capacity. Our expert guide explores all the price factors.

Clean drinking water is a must-have for every household. If you don’t have access to potable water, explore these five ways to make water safe for drinking.

Discover the key differences between a water filter versus water purifier. Find out which option is best for your household's water needs.

While not all symptoms of too much chlorine in water are cause for concern, there are times when you should call a pro. Get the details in this article.