

The cost to install travertine tile depends on materials and the size of the project. This guide to travertine tile cost will help you budget accordingly.
Using the right tools is essential for a job well done

Your tile trowel size chart guidelines depend on tile size, placement, and type, with larger tiles needing more mortar coverage than smaller ones.
Wet areas like showers need at least 95% mortar coverage under tile, while dry areas like floors require a minimum of 80% coverage.
You can measure trowel notch sizes by width and depth, which determines how much mortar remains on your subfloor to attach tiles securely.
Hiring a local tile professional removes the guesswork from trowel selection and mortar coverage, helping you avoid loose tiles and costly repairs.
You might be tempted to rush into your tiling job and start the work with whatever tiling installation tools you have on hand. But do some research first—the size and type of trowel you choose matters. The best trowel for tiling will vary depending on the type and size of tile, the type of adhesive or mortar, and the surface you’re applying the tile to. You may even need multiple trowels for the same job.
Here’s what you need to know about what size trowel to choose for tiling projects.
To get the right amount of mortar, thinset, or adhesive coverage, you need to consider where you’re installing tile.
Choose a trowel that lets you cover a minimum of 80% of the area below tile in dry areas like floors and backsplashes,
Choose a trowel that lets you cover at least 95% of the area below tile in wet areas like showers and exterior applications
Choose a trowel that lets you cover at least 95% of the area under natural stone tiles.
If you’re trying to save on tile installation costs by doing the work yourself, you want to do it like a professional. Choose the wrong trowel and you could end up with incomplete coverage, leading to cracked or loose tiles and having to redo the entire job. Avoid all this by simply choosing the right size trowel—or trowels—for the job.
Trowel sizes are measured by the size and spacing of the trowel teeth because that’s what dictates how much thinset adhesive will remain on the subfloor to attach the tiles.
When reviewing the product specifications for trowels, pay attention to the numbers you see. V-notch trowels usually have two measurements: the width and the depth of the notch. Square and U-notch trowels have three measurements: the width of the notch, the width of the space between the notches, and the depth of the notch. If a square-notch or U-notch trowel has only two listed measurements, it means the width of the teeth and the space between them are the same.
For example, if you’re researching how to install ceramic tiles and you choose a square-notched trowel that measures 1/2-inch by 1/2-inch, you can be sure that it will leave mortar ridges that are 1/2 inch wide with 1/2 inch air gap between ridges.

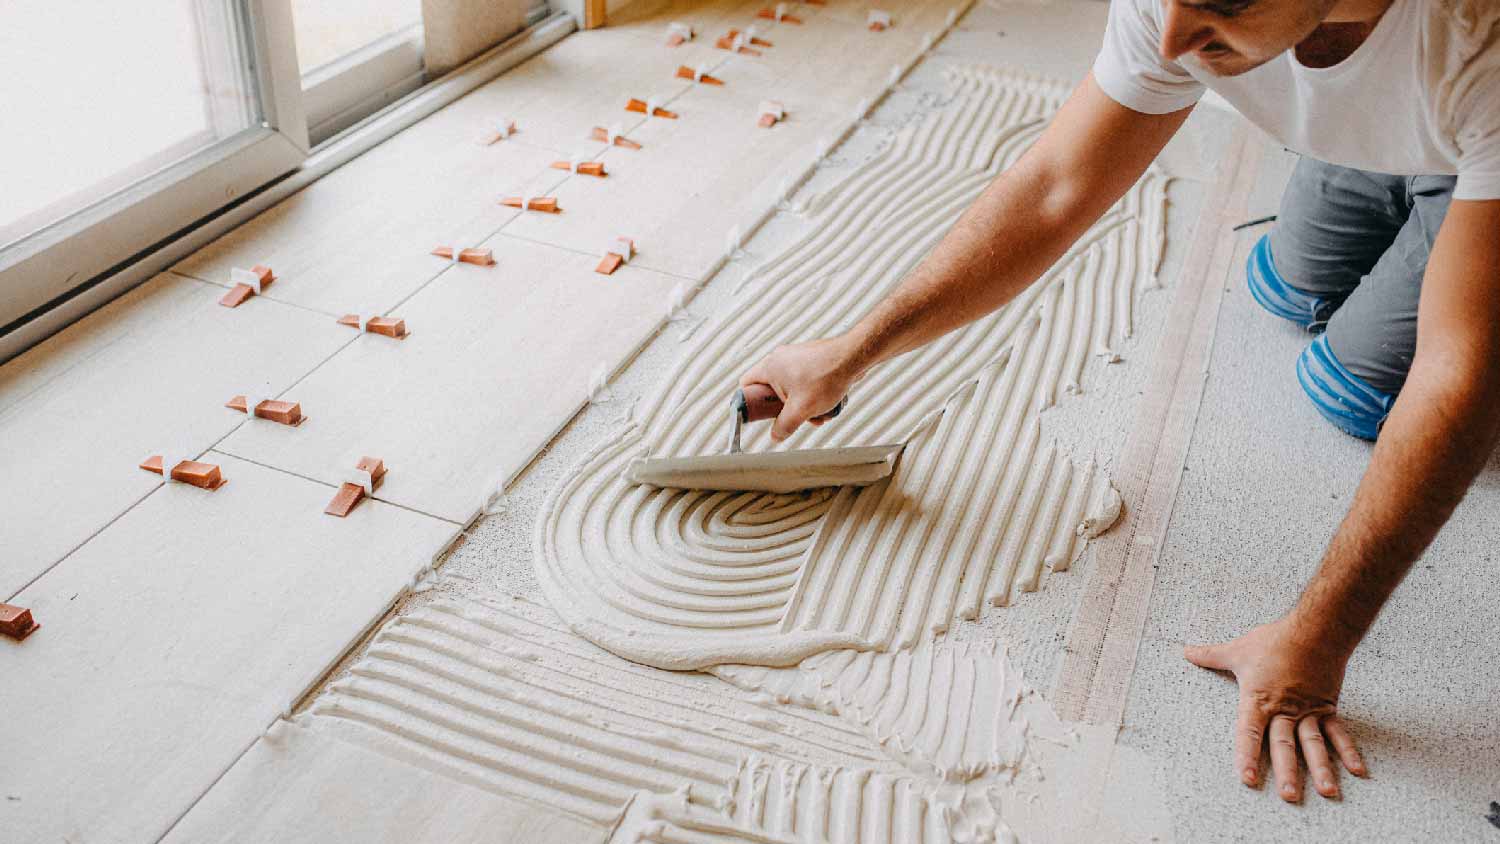
Trowel notches leave behind a consistent amount of mortar on which to set tiles. The notching pattern leaves lines of mortar flanked by gaps with no mortar so that, when pressed, the mortar can collapse into and fill those gaps, adhering the tile to the floor or wall.
There are three types of trowel notches: V-notches, U-notches, and square notches. Each is better suited to a specific set of applications.
V-notch troNels spread the least amount of thinset. The zig-zag pattern the teeth make is best for mosaic tiles, small tiles affixed on mesh backing, or small tile squares less than four inches wide. V-notch trowels are also the best choice for wall and ceiling tiles.
U-notch trowels spread a middling amount of thinset; more than V-notch trowels and less than square-notch trowels. This makes these trowels ideal for spreading mortar on medium-sized tiles that have at least one edge that’s longer than four inches.
These spread the most thinset, so tile installers often choose these trowels for large tiles, natural stone tiles, and flooring tile installations.

Trowel sizes and shapes vary—and for good reason. Each combination is suited to different tile types, tile sizes, locations, and surfaces. Knowledge like this is built into the cost to install tile floors, so if you’re going to do the work yourself, it’s a good idea to learn the basics.
The larger the tile, the more important proper mortar coverage is. Tiles four square inches or smaller and mosaic tiles need less mortar coverage because of their small size. Large format tiles—those measuring 12 inches by 24 inches and larger—require more mortar.
Floor tiles require more thinset to stay stable because weight and movement can cause them to shift if they aren’t properly adhered to the base floor. Tiles set onto sloping areas also need thicker mortar than tiles set on flat surfaces. Tiles in wet areas—like those needed for tile shower waterproofing—should also have more mortar.
Natural stone tiles and thicker tiles require plenty of mortar, while mosaic tiles with mesh backing and thinner tiles seen in modern bathroom tile trends require much less. Wall, ceiling, and backsplash tiles don’t get the same traffic or wear and tear as flooring tiles, so they need less mortar compared to tiles that people walk on. Likewise, thinner tiles or tiles made of more brittle materials will need a sturdier base and thicker mortar to completely affix them to prevent cracking and chipping.
Trowels come in three main shapes. The shape, together with the trowel size, helps dictate how each is best used.
Margin trowels are small and have square ends. They’re best for applying mortar or thinset to corners and angles where larger trowels won’t reach.
Bucket trowels are wide, flat trowels with flat fronts used to scoop mortar from buckets. These are commonly used by bricklayers.
Finishing trowels are long and flat with no notches best for smoothing mortar or adhesives.
The shape of the notch dictates how much mortar will end up between the tile and the base you’re affixing it to. Notches make even lines of mortar and blank spaces between the mortar, giving the air a path to escape when the tile is pressed down.
Use a square-notch trowel for tiles that need the most mortar, pick a V-notch trowel for tiles that don’t require much mortar, and choose a U-notch or square-notch trowel for applications in the middle.
Along with notch type, you can also choose notch size. Measurements listed on trowels show the width and depth of the notches (for V-notch trowels) and the the notch width, width between notches, and notch depth (for U-notch and square-notch trowels). The bigger the measurements, the more mortar the notch will leave behind during application. For best results, pair the type of notch and notch size to give you the optimal amount of mortar for the tiles you’re selected.
Your number-one concern when tiling is getting the right amount of mortar coverage under every single tile. The trowel you use will determine whether the mortar amount is correct or not.
Consider the size and thickness of the tile you’ve chosen, the tile material, where you're installing it, the conditions of the installation location, the subfloor, the type of mortar, and any other details of the job. All of these factors dictate how much mortar you need to apply to correctly adhere the tile to the base, and that will tell you what size trowel and type of trowel to choose.
If you are installing more than one kind of tile in the same area, such as a mosaic-tile break through a subway tile shower wall or similar shower tile ideas, you may need two (or more) trowel sizes to match the right trowel to the tile.
It’s important to get the sizing right, as the wrong trowel can leave too little mortar behind. This will result in tiles coming loose, tiles chipping or cracking, and grout damage, which can compromise the entire installation. If you’re not sure which trowel is best for your tiling project, talk with professional tile contractors near you or discuss your job with hardware store staff and ask for their trowel recommendations.

Terrible experience. Walls/trim/floors/cabinets/doors all have drip marks, overspray, etc. Tiling at the fireplace had to be redone by another vendor due to incorrect and shoddy install by Profect. Contractor had his children in our house while he was on site without prior authorization or...
 Profect painting & exteriors
It was wonderful working with Yordy and his team. They were very professional and are experts in what they do. They have completed the work on time, with better quality and with in fairly reasonable price. We just started with backsplash work , but liking his work, we went on to provide...
We were having 2”x 2” tile installed . There was a small installation error and the new additional replacement tile was from a different lot and the colors didn’t match. Joe assured us that he would rectify everything , which he did without hesitation. We decided to go with the 18” x 36” tile...
 CarifaTile
For several months I was looking for somebody to tile a wall in my master bath and move lighting fixtures, and could not find anybody who was responsive. I contacted Rowe through Home Advisor and within days they came by to assess the job and provide an estimate. The cost was very...
It went very well! The end product was amazing and we keep getting a lot of compliments from friends! M&E were very professional and they made sure we were happy with the product before leaving. They met with us in our home and at the tile shop to make sure we were okay with our tile and...
 M&E Remodeling
Involved an extensive bathroom remodel, including removing tub & installing walk in shower, new drywall, custome tile work to ceiling, plumbing, etc. Overall, job was done on time and on budget. Nick & his team were very professional and had high attention to detail. Quality was great. Highly...
 Stamos Flooring and Remodeling LLC
Very pleased with the service and level of professionalism. Courteous and very unobtrusive in performing service. Unlike several other companies, Bradford Xteriors was willing to perform work on a three story home with a clay tile roof. <br />
 Bradford Xteriors
This company did a very good job on the brick wall and it looks just amazing. The staff was always professional and was practically OCD on how the bricks were stacked and how they were laid. Although it took longer than expected, I am willing to sacrifice time over perfection anyday. The...
 My Handy Mate LLC Improvement & Remodeling
He did the tile work and he was good at it. He used other subcontractors for the rest of the work (like putting in the cabinetry) and they were okay but not great. He was a great guy! He was easy to work with and had a good eye for the detail of his work. There were a couple of things that I...
 Brian Miller Custom Remodeling
I was very impressed with Miller Cantrell! I live in an old home in which the sewage line that runs from my home to the sewage system is a line of clay tile. These eventually collapse and need to be replaced - an expensive problem and sure to happen at the worst time. I told them that my...
From average costs to expert advice, get all the answers you need to get your job done.
The cost to install travertine tile depends on materials and the size of the project. This guide to travertine tile cost will help you budget accordingly.
Tile and grout cleaning brings your tiled rooms back to life. In this guide, find out the details of how much it costs to hire tile and grout cleaners.

Tile varies dramatically in price, but there’s something for every budget. This guide will help you plan for tile installation costs, no matter the project.
From mosaic tiles to planks, tiles come in a huge range of sizes. Not sure which one you need for your project? Let’s review the most common tile sizes.
Calculating how much thinset you need involves multiple steps. Use this guide to determine exactly how much of the bonding material you’ll need.
Though ceiling tile sizes are standardized, choosing the best size for your drop ceiling requires some deep thinking. This guide can walk you through it.