

Are you looking to upgrade an old door in your home? Use this interior door installation cost guide to estimate the project's total cost and learn how to save.
A comprehensive look at your home’s first wind and moisture defense


The parts of a storm door contribute to its protective functionality, aesthetics, and energy efficiency.
Faulty, worn, or broken storm door parts often result in moisture, drafts, or insects entering the home.
Regular cleaning and maintenance are crucial for the longevity of storm doors and their parts.
When you think of your home, you envision a safe haven that protects you from the elements. One important factor in this equation is your storm door, which acts as a shield against harsh weather conditions. Understanding this home feature, as well as the parts of a storm door, is crucial to both maintaining it and addressing any functional issues that may pop up.
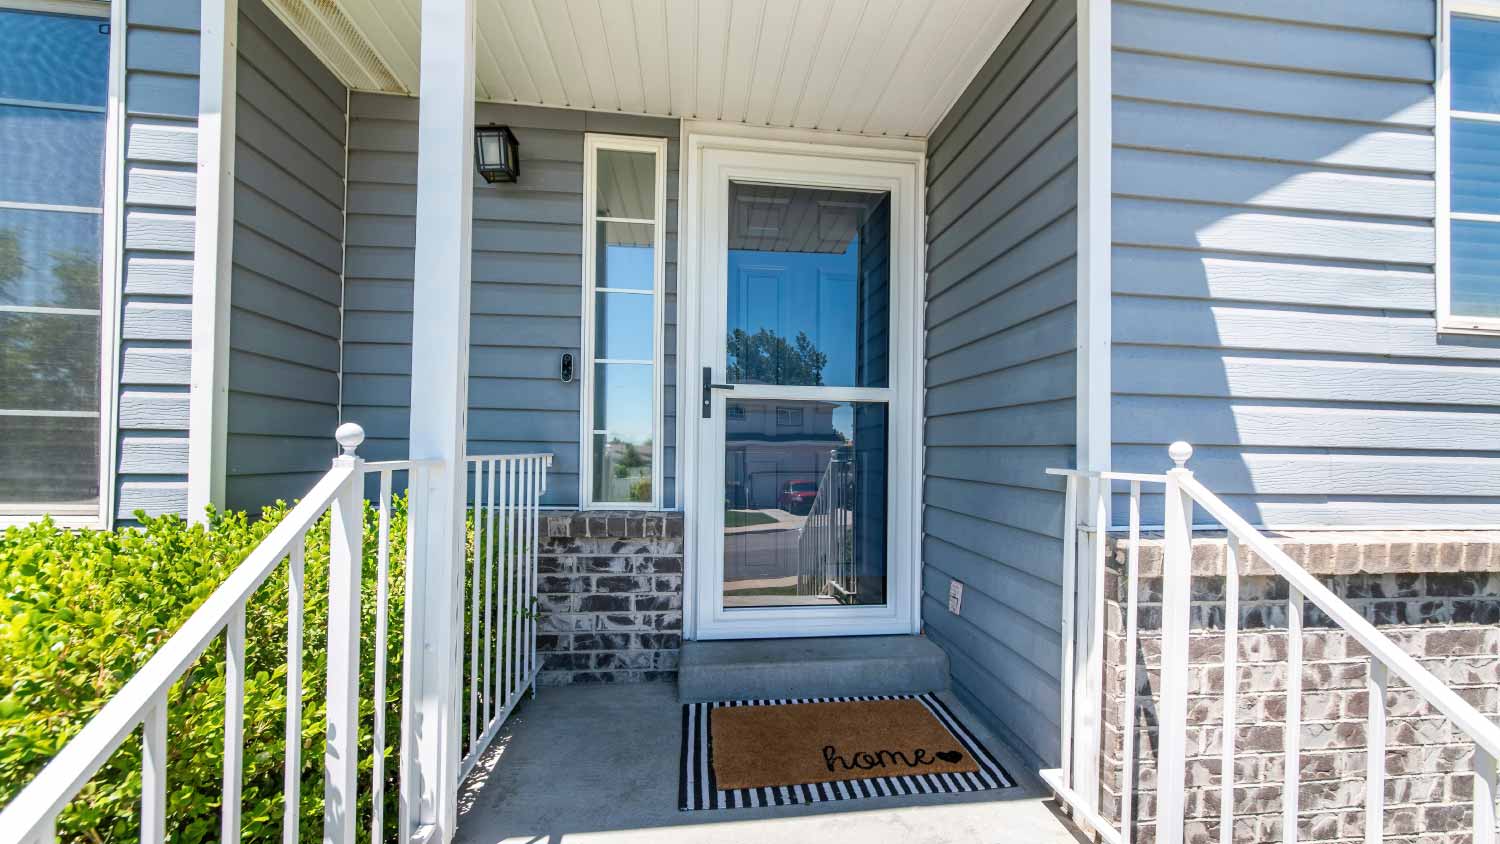
You can install a storm door as an additional layer of protection on the exterior of your home’s entrance door. Its main function is to act as a barrier against wind, rain, snow, and other environmental factors. Beyond its functional purpose, a storm door also provides your home with fresh air and ventilation while allowing natural light to filter into your home.
There are several different parts that make up a storm door, and each one contributes to the door’s functionality, purpose, and aesthetics. When one of these parts breaks or becomes faulty in some way, it can diminish the performance and appearance of the door overall. Let’s talk about each crucial part and what it does.
This is the primary structure that provides an extra layer of insulation and protection for your entry door. It’s usually made from materials like wood, fiberglass, aluminum, or PVC, and the material used can often impact the cost of the storm door.
Storm doors have a transparent glass panel that can be interchanged with screens, allowing you to adjust for different seasons and preferences related to your light and ventilation needs.
Narrow and (usually) flat pieces of material, retainer strips are designed to hold the glass or screen panel securely in place within the storm door frame. They are essential for storm doors with interchangeable panels, allowing you to easily switch between glass and screen inserts when needed.
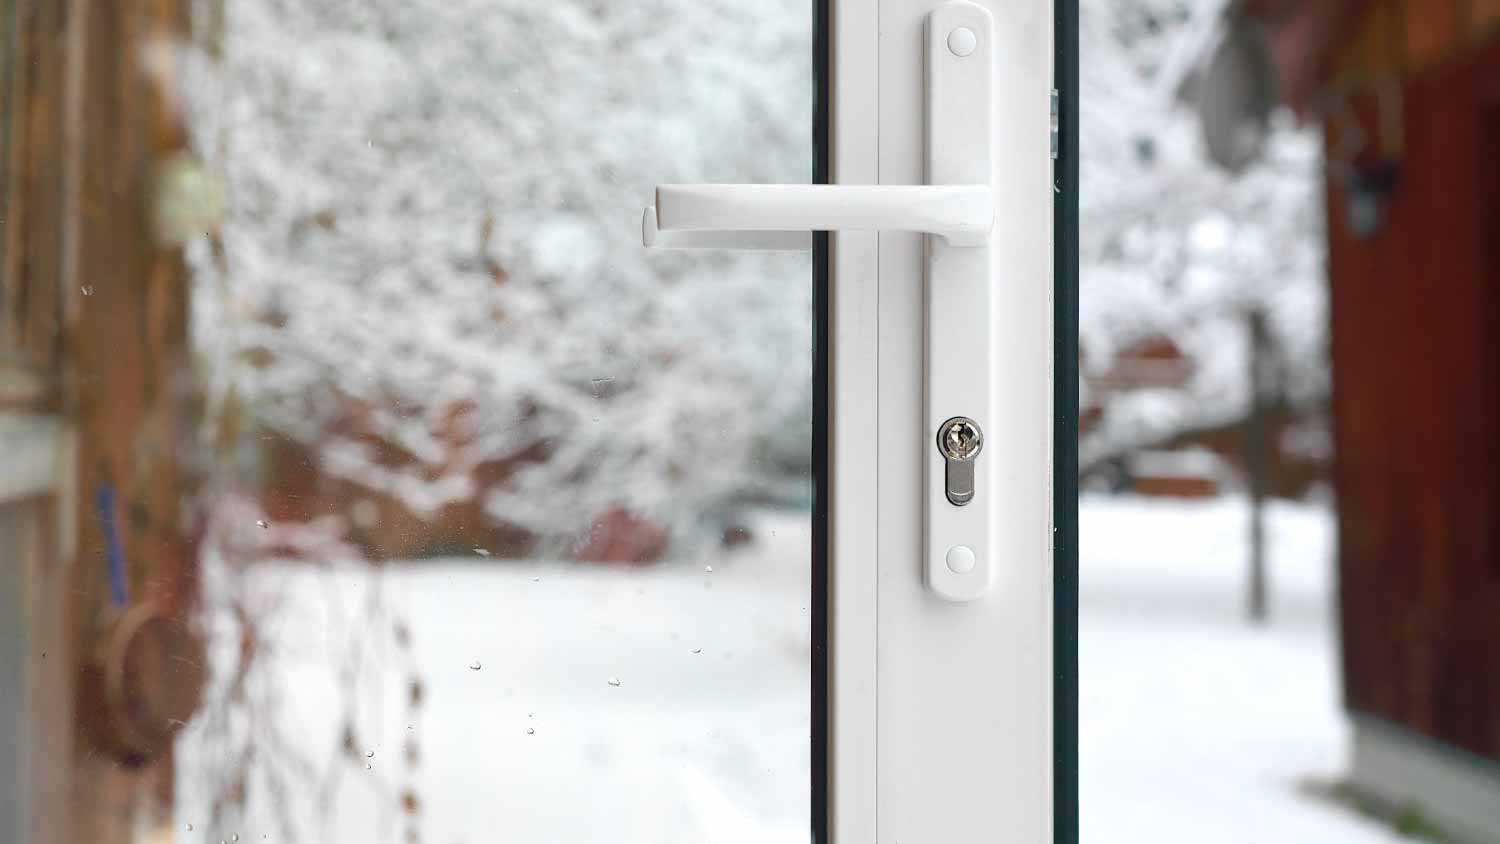
Like most doors, this is the lever or knob used to operate the door's latch and lock mechanisms. There are several different types of storm door handles, including mortise, knob, push-button, and pull.
These hydraulic mechanisms on the top and/or bottom of the storm door automatically close the door gently and securely after it is opened.
Horizontal strips are fixed at the top of the storm door, and they block rainwater, preventing moisture from seeping into the door frame. The drip cap is usually made from aluminum, plastic, or even copper materials.
This is a horizontal section located on the side of the storm door where the hinges are attached. The primary purpose of the hinge rail is to provide a sturdy and secure point of attachment for the hinges that connect the storm door to the door frame.
Another horizontal component, opposite the hinge rail, is the latch rail, which sits on the side of the storm door’s latch. The primary function of the latch rail is to provide a durable location for the door's latch mechanism to engage.
This additional strip or section can be added to the bottom of the storm door frame to extend the door’s length. Designed to accommodate door frames that are taller or wider than the standard dimensions, expanders help ensure a proper fit and alignment of the storm door within the existing doorway.
Similar in function to expanders, rail extenders are smaller pieces that extend the length of the hinge rail and latch rail. They’re installed at the bottom of each rail to ensure a proper fit and alignment.
A flexible strip or piece typically made of rubber, vinyl, or other weather-resistant material, the sweep is attached to the bottom of the storm door and extends across the threshold when the door is closed. Its primary purpose is to provide a seal against drafts, insects, debris, and outdoor elements that might enter your home under the gap between the door and the threshold.

While storm doors are designed to withstand the elements, they can face some common issues over time. These issues include rust, loose components, worn-out sweeps, and damaged glass panels. Regular inspection can help you catch these issues early on and fix the problems before they worsen.
When it comes to repairing or replacing parts of your storm door, you have two options: the DIY route or seeking professional help. If you're handy and enjoy tackling home projects, DIY repairs can be satisfying. However, for complex issues or if you're not comfortable with the idea of repairing or replacing your storm door, hiring a local storm door company can save you time and effort while ensuring the job is done correctly.
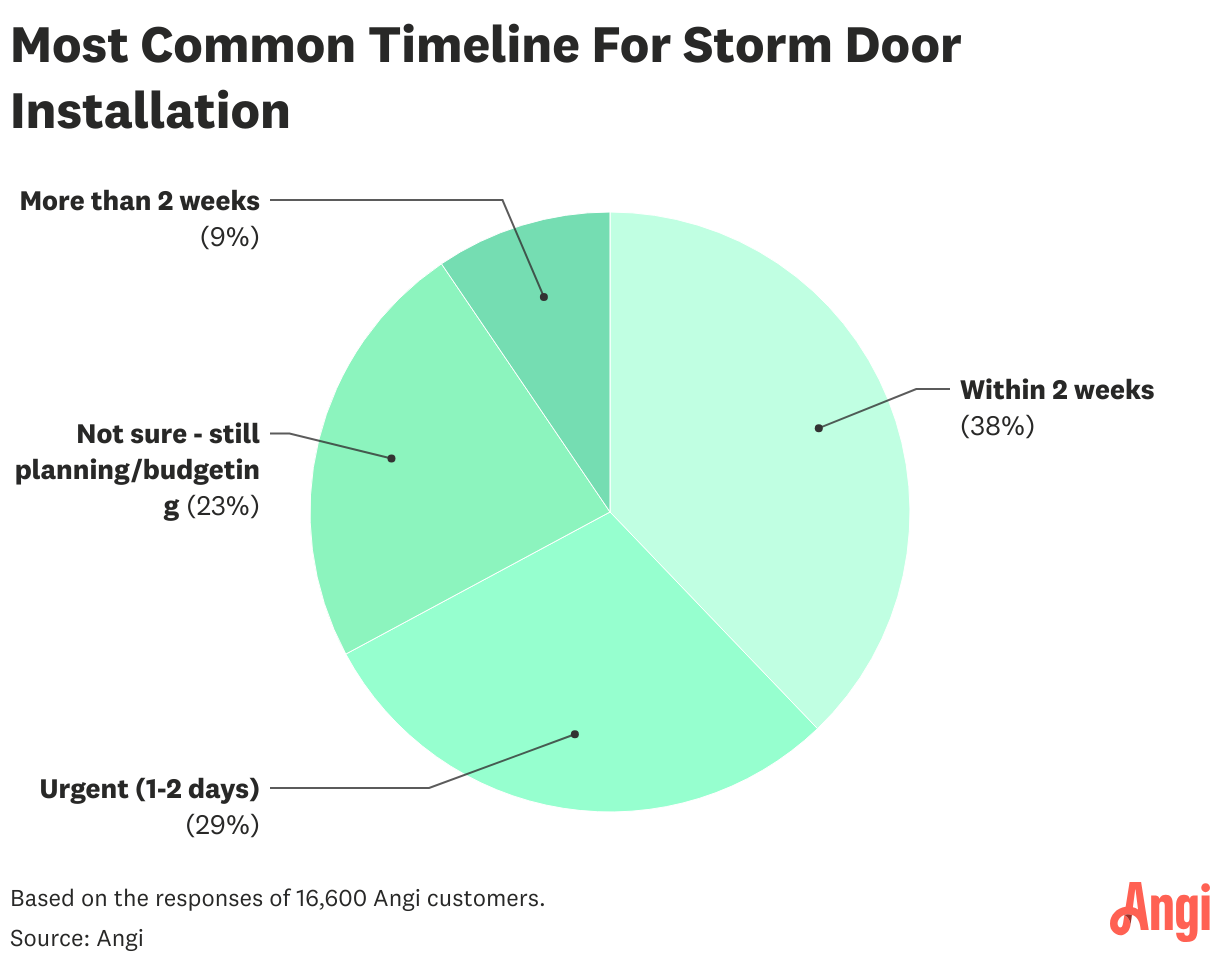
According to data from Angi, 38% of homeowners want to install a storm door within two weeks, while 29% need it installed within one to two days. The remaining homeowners are either still planning or can wait more than two weeks.
Verbally aggressive, rude, inappropriate and unnecessary. He worked on a door for my storage unit, swore at me, try to intimidate me and then when he realised I was a customer at the storage unit that was employing him he back tracked and tried to say nothing happened when I got a picture of...
The person came out to inspect the door. Promised me a proposal that same evening and a week later and no response to voice messages nor text messages. I am very disappointment since he seemed professional.
I don’t know what other good words to use to describe how well this garage door service long island company does their job. I’ve read great feedback for them, which is why I hired them to repair garage door repair. They deserve all the praises because they are truly incredible. Professional,...
 New York Garage Doors
Doug did an outstanding job. We contacted him back in July (based on his reviews on Angie's List)-- because we needed some carpentry work done at our home in Westhampton Beach. He was on time (actually arrived early for our first meeting), reliable, a pleasure to deal with and most of all his...
We had a very 1970's full bathroom that needed a lot of TLC but we didn't have the kind of budget that would allow a full gut and remodel. Susan figured out a way to make our bathroom updated and modern without having to replace the tub or toilet (which means huge savings). We had tacky...
From average costs to expert advice, get all the answers you need to get your job done.
Are you looking to upgrade an old door in your home? Use this interior door installation cost guide to estimate the project's total cost and learn how to save.

Whether you’re installing a new door or replacing an existing one, the cost of door installation varies based on location, door type, framing needs, and other factors.

Sprucing up the barn or adding a rustic touch to your home? Use this guide to estimate barn door installation costs, so you can budget for your next project.

Planning to install a new or replacement storm door? Learn how to measure for a storm door to ensure a snug, secure fit for your home.

Enjoy the fresh air at home by learning how to install a screen door in just a few simple steps.

If you need to install a storm door, you can call a local contractor, construction company, or hardware store to get the job done.