•
Discover true smoke detector installation costs. Learn about average prices, cost factors, and tips to save on your smoke detector installation project.
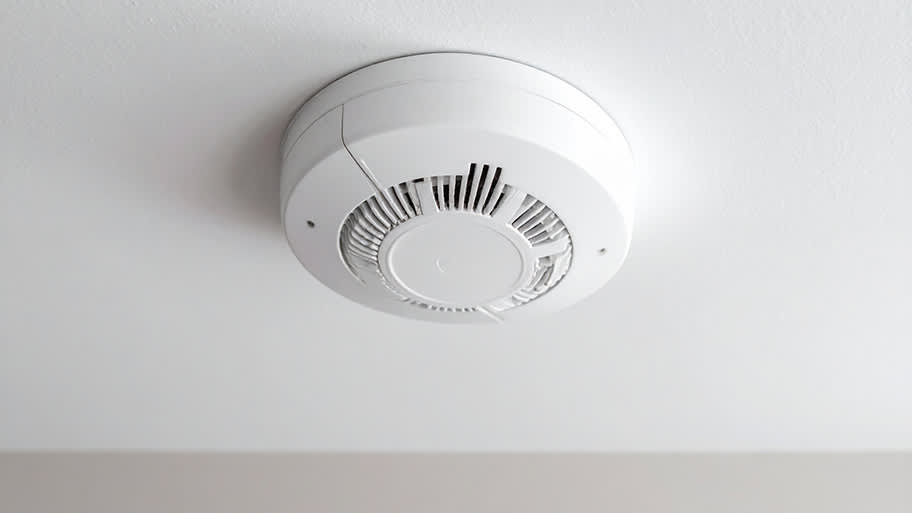
Don’t stress about swapping out your smoke detector—it’s a cinch

It’s easy to get complacent about fire hazards hiding in your home and neglect learning how to replace your smoke detectors—unless you’re constantly setting them off when you burn your morning toast. However, according to the National Fire Protection Association (NFPA), from 2014 to 2018, 41% of fire fatalities were in homes with no smoke alarms and 16% in properties with smoke alarms that failed to operate.
Smoke detectors are your first line of defense against fire hazards, so it’s important to regularly test your detectors and swap them out before they fail. Thankfully, learning how to replace a smoke detector is something most homeowners can DIY in just around 15 minutes.

Most modern smoke detectors are hardwired to your home’s electrical system with a backup battery. Less commonly, alarms are powered only by battery. This step-by-step guide focuses on how to replace a hardwired smoke detector.
Before you buy replacement hardwired smoke detectors, there are a few things to do:
Test existing devices: Even if your alarm isn’t due for immediate replacement, test detectors regularly. And if the alarm is making a warning chirp, this is another indicator it needs replacing—or at least the backup batteries do.
Pick an appropriate new model: To avoid having to replace the mount or doing complicated rewiring, purchase a new smoke detector compatible with the old version. Alternatively, buy a wire adapter to apply while fitting.
Check manufacturer’s instructions: Read the instructions that come with the model you have to ensure there isn't any bespoke installation guidance.
Always turn off the power on the linked circuit breaker before replacing a smoke detector. It might be marked “fire alarm” or could be on the same circuit as the room lighting.
Most of the time, you can simply twist the old alarm out of the mounting bracket. It’s ready to pull free when you hear a click. If the old mounting bracket isn’t compatible with the new detector, you might need to loosen the screws with your screwdriver and remove the bracket to replace it with a new one.
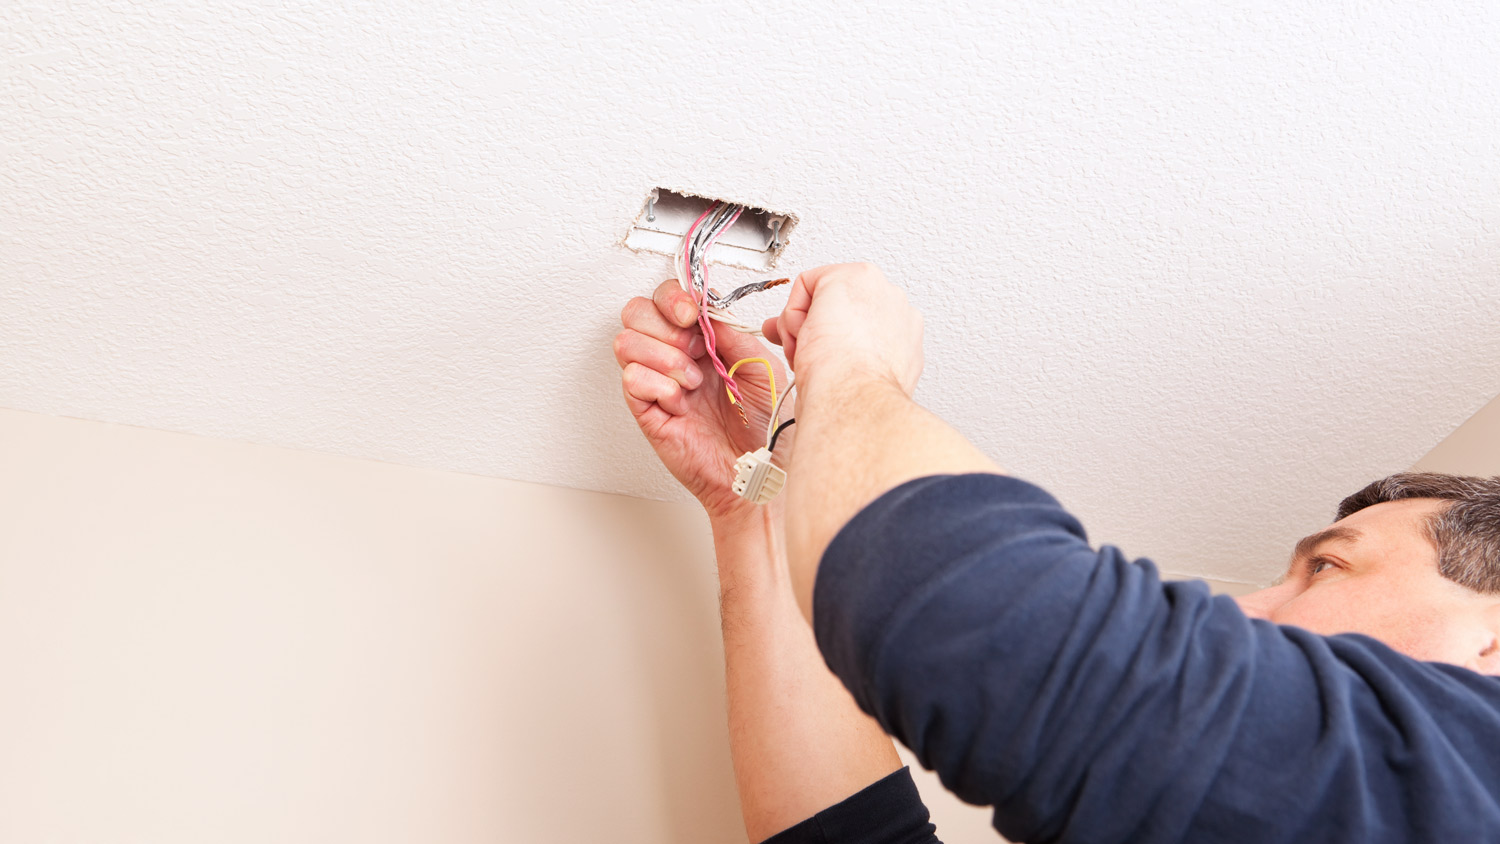
If you don’t have a compatible wiring harness or adapter, disconnect the old detector wiring first. There will be two or three wires. A 120-volt black wire, a neutral white wire, and there might be a red or yellow wire that is used if you have a multi-alarm system that is interconnected.
To release the wires, squeeze the side of the harness plug. You may need to remove electrical tape or wire caps before untwisting and removing the harness to expose the metal ends of the wires.
If you have a new detector that’s compatible with your wiring, connect the new alarm to the wiring harness. Don’t forget to add or activate the backup battery if the detector has this feature. If the wiring harness isn’t a match, you might be able to plug it into an adapter to connect to your new smoke detector and save you from fiddling around with the wiring.
If you have some experience with electrical work, you can carefully match up and twist the wires of the new alarm together with the exposed ones of the same color before replacing the wiring harness and adding new electrical tape or putting the wire caps back on.
Pair the black-to-black wire, white-to-white, and red-to-red or yellow-to-yellow. If you have a yellow wire on the new alarm, but the old wiring is red, twist these two together. You might need to use a wire stripper and wire nuts to expose enough wire and secure the connection.
Note: Do not play with the wires if you’re not confident in what you’re doing. Electrical work can be dangerous, so call in a local electrician to help you if you need it.
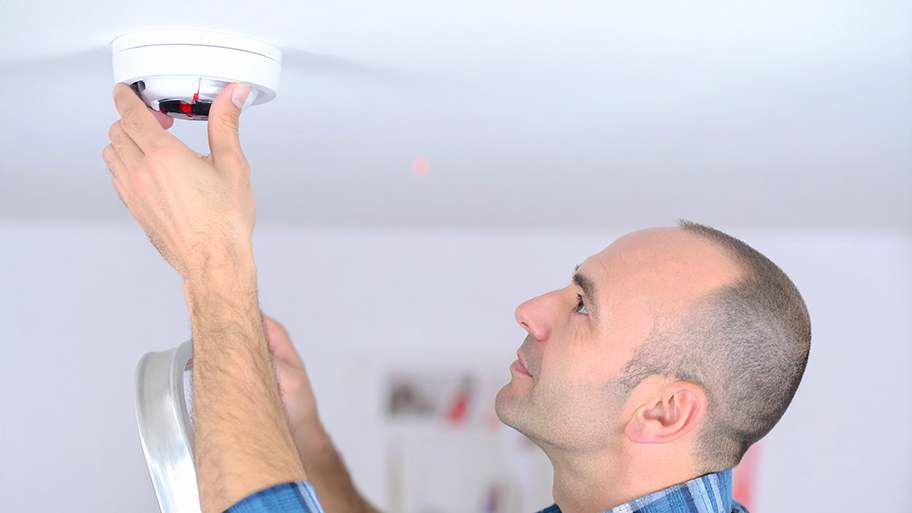
You can now click the smoke detector back into the mounting bracket. Alternatively, if the bracket isn’t compatible with the new alarm, you might need to screw in the new one.
Once the wiring is securely connected, turn the power back on at the circuit breaker. Your new alarm might beep, and an LED light could indicate everything is good to go. Warn everyone at home before pressing the test button on the new smoke detector to check it's functioning properly.
If the alarm doesn’t work, check if you flipped the right breaker switch. If it still doesn’t work, you can turn the power off again and check all the wire connections. Still not working? It might be worth asking for a replacement from the retailer before calling the pros.
Replacing a smoke detector is an easier DIY job than learning how to install a smoke alarm system from scratch, especially if you have a compatible wire harness or adapter because the wiring is already in place.
However, if you aren’t confident working with electrical, you can call an alarm company near you or a local electrician to assist. You may also need professional help if you’re replacing an older smoke alarm system with an updated one that doesn’t match your connectors.
The cost to install a smoke detector professionally ranges from $70 to $150 for a hardwired device. Or, a local handyman can help to replace your hardwired smoke detector at a price that might be lower than that of an electrician. It’s important to note that firefighters in most areas can install battery-operated smoke alarms in your home at no cost, but when it comes to hardwired units, calling in a pro is your best bet if you’re not taking the DIY route.
Great company! Price was competitive, technician showed up on time and completed the job (exterior electric Radon fan replacement) quickly. Would hire them again.
I conferred with 2 other contractors before Armstrong Electric. Nick and his crew showed me that the project was not as convoluted as the other contractors made it appear to be. They completed the entire project on time. They were professional, friendly and cleaned up after at completion. I...
 Armstrong Electric LLC
The techs on my project, Shawn and Cliff, were great. They were prompt, courteous, and efficient. I am very happy with the results and would definitely contact Mr. Electric for any future electrical projects.
Victor was wonderful. He was on time, professional, and explained everything he was doing. He was thorough and figured out that the problem was electrical instead of with my HVAC system. Very knowledgeable. I will be using this company in the future for any HVAC needs. Thanks!
 Hubbs Heating & Air LLC
They were excellent. They did a great job. I was totally satisfied. They put tremendous effort in making sure the work was completed. They were great. They provided immediate response to any inquires I made. I would hire them again. I would recommend them to anyone who needs electrical work....
 Property-Tech Industries, LLC
Initially, the repairman could not find the problem. Apparently, there was some electrical shortage, but he could not find the definite problem. He left, but called back later to say he had a new idea. He returned and replaced the light switches on the doors. The refrigerator seemed to return...
 Appliance Pro LLC
The initial quoted price from a walk-through seemed high, but we discussed that the quote represented worst case scenario (re-wiring to two floors) and we were excited about the opportunity to have the work done in a timely manner with closing for fire safety reasons, etc. When the job was...
I have to tell you I am all about customer service - I will go out of my way and even pay more for it if you give me great customer service. <br> <br>In a world where this is hard to find, these guys were awesome! I can not sing their praises enough. They were prompt, personable, funny, got...
 Waibel Electric
When I challenged the markup on the generator, Bruder Electric withdrew its bid. They only want naïve customers.
We had no power to any of the electrical outlets in the MBR. We'd had an intermittent problem for a few years and they finally went out all together. We live on the 3rd floor of a 100 year old building and I know from past experience the wiring has been added to in hodgepodge ways over the...
From average costs to expert advice, get all the answers you need to get your job done.
Discover true smoke detector installation costs. Learn about average prices, cost factors, and tips to save on your smoke detector installation project.

Need to get rid of lingering smoke odors in your home? Learn how much smoke remediation costs to budget accurately for this major undertaking.

Ozone treatment can help with lingering smoke odors. Learn about ozone smoke removal costs to get an accurate idea of how to budget for this service.
Who replaces smoke detectors in your home? Find out when to DIY, when to call a pro, and how much it costs to replace.
How long do smoke detectors last? Keep reading to find out when you should replace your smoke detectors and how to maintain them.
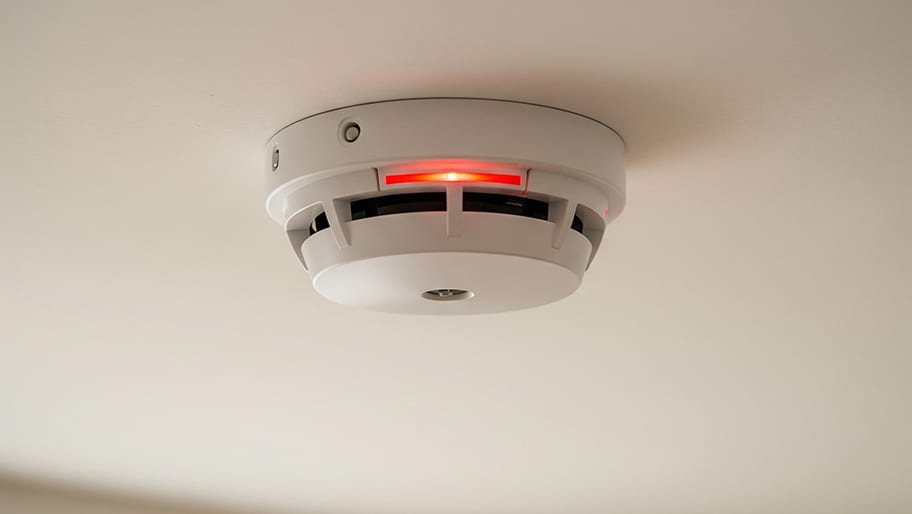
Don't ignore your smoke detector if it has flashing red lights. It could indicate a problem that needs immediate attention. Here's how to tell what to do.