
Find out how much you can expect your tile floor installation to cost depending on a range of factors, including tile type.
Take your tiling project to the next level

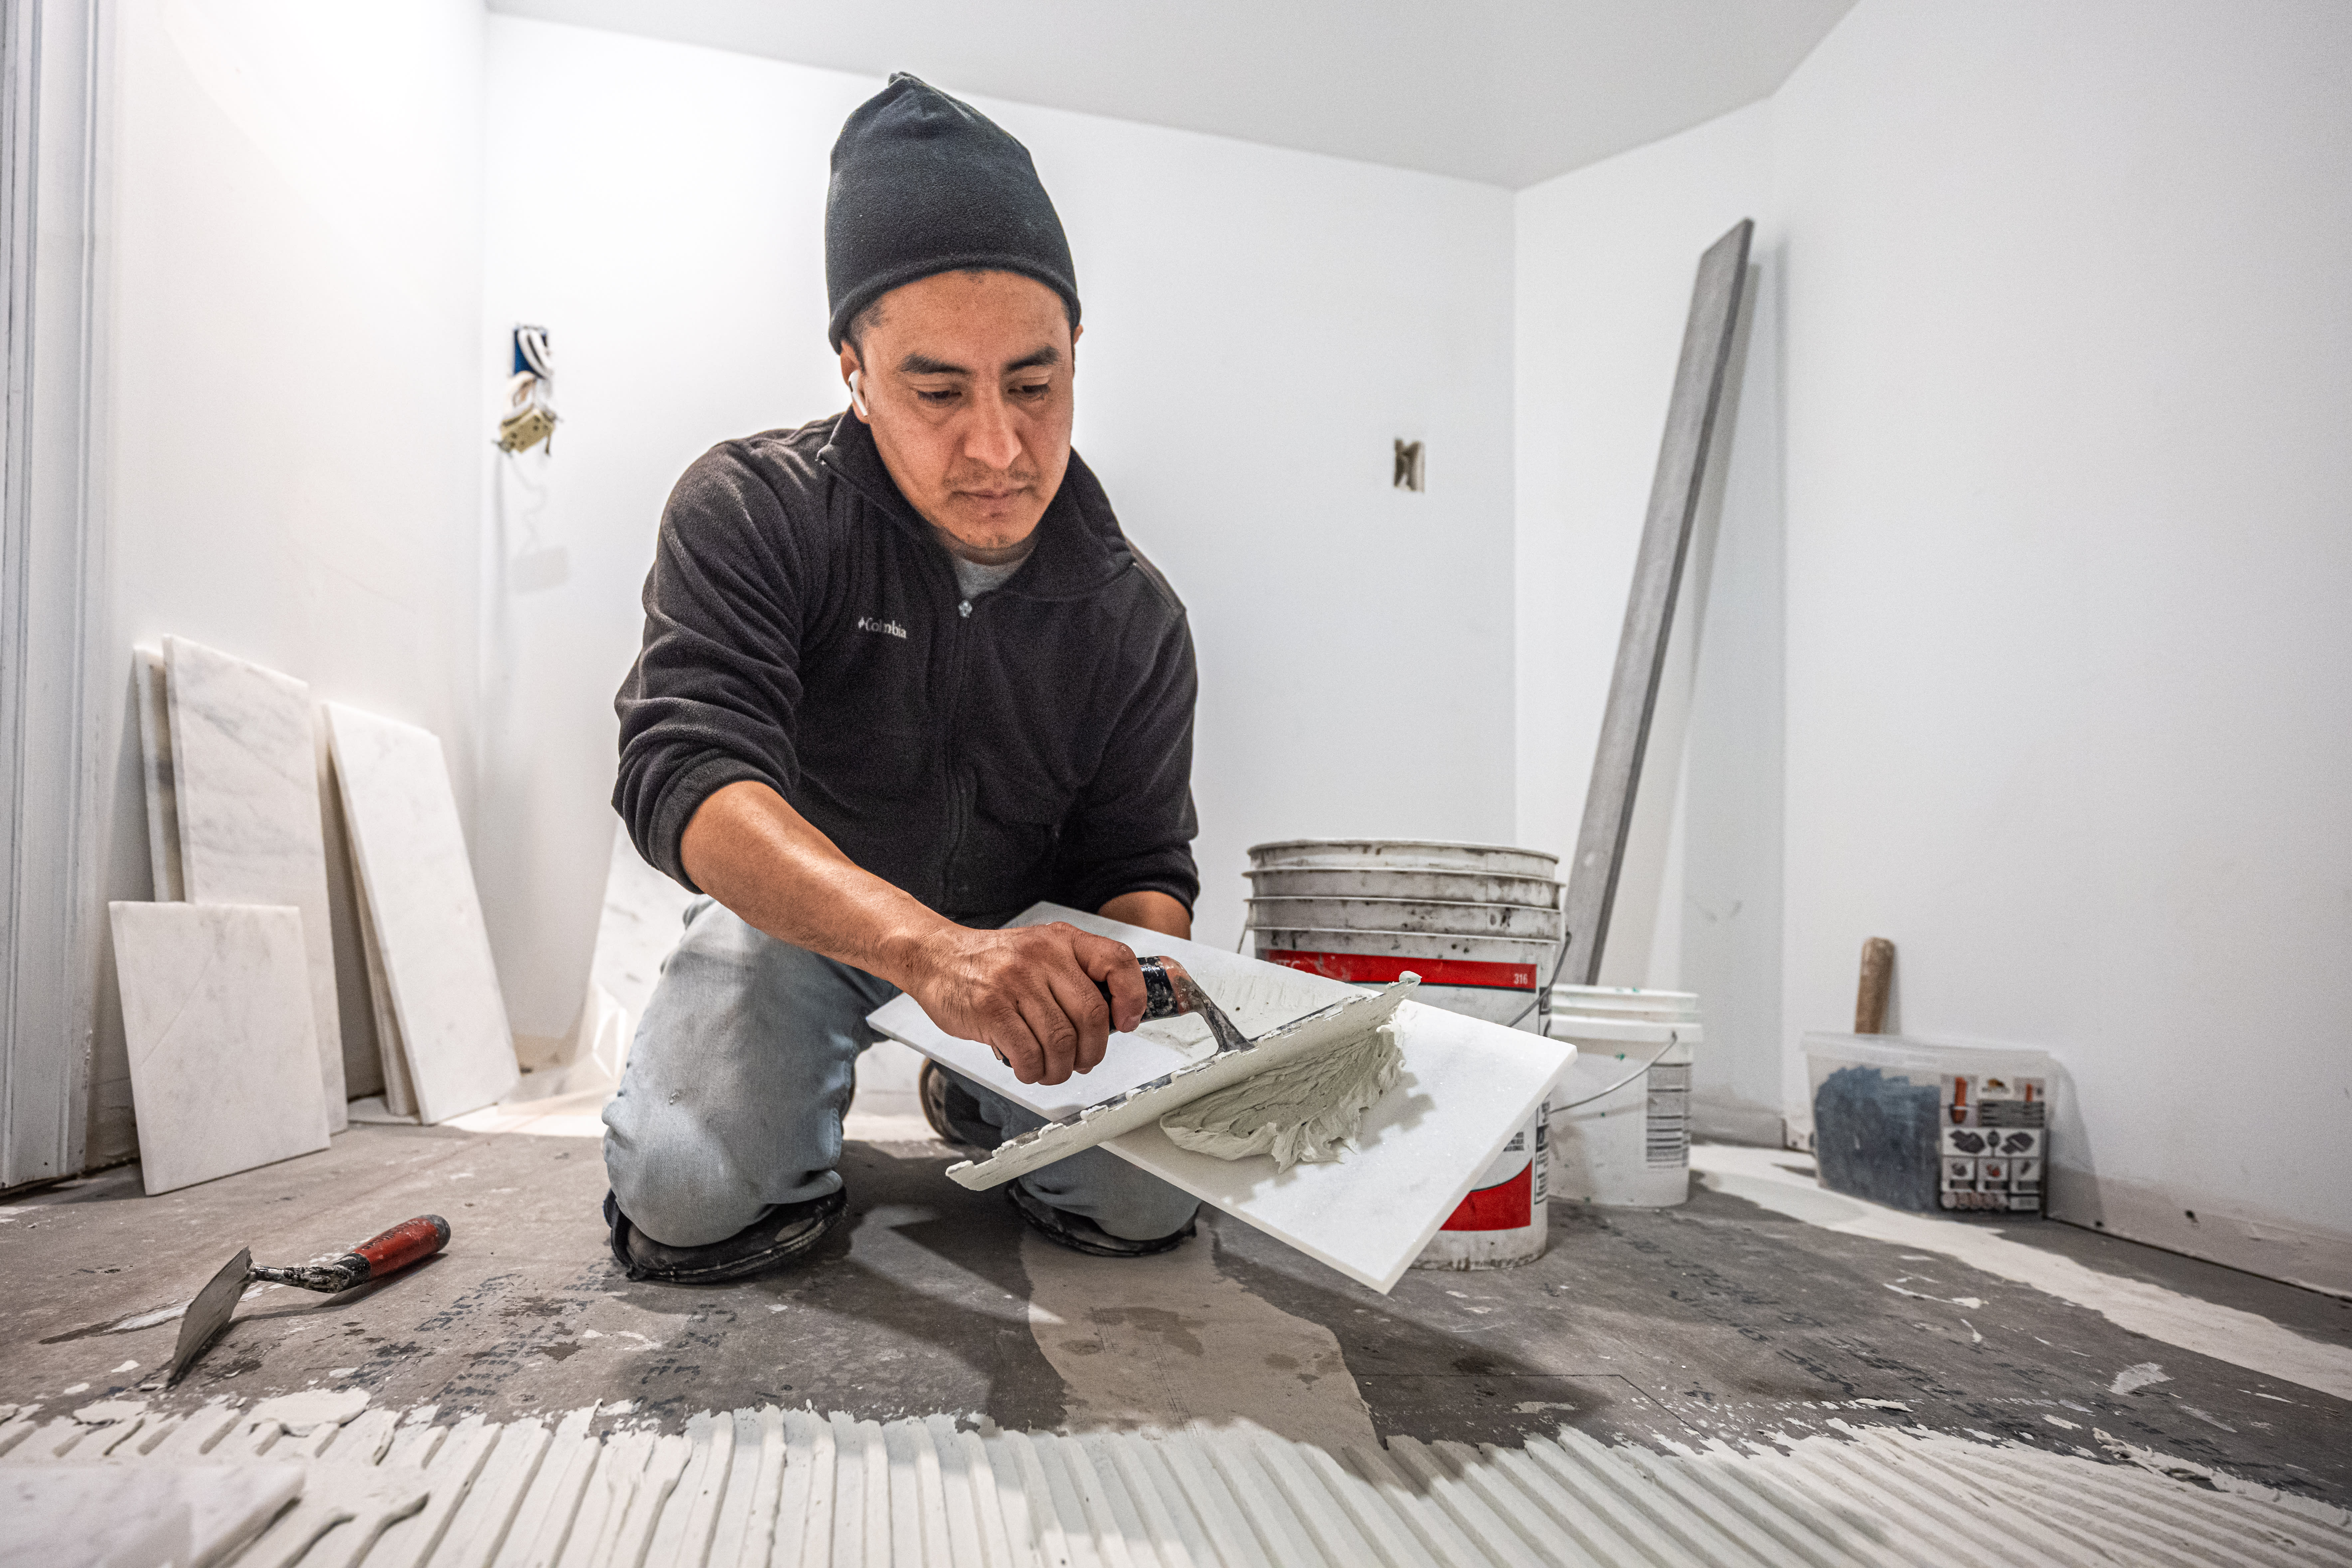
You’ve ripped out the old flooring in your kitchen or bathroom, and you’re eager to start laying the stunning new tiles you carefully picked out for the space. Not so fast! Before you can start spreading mortar, spacing tile, and applying grout, you need to make sure you’re giving your tile the best possible base, or you risk damaging the tiles in the long run. Here’s how to level a floor for tile installation like a pro—plus who to call if this project seems too overwhelming.
Before you start inspecting for uneven spots on the subflooring, there are a few prep tasks to check off your list. First, make sure to scrape off or pull up any excess adhesive, old mortar, or other debris. Sweep the entire area to ensure the floors are clean and ready for inspection and leveling.
You’ll also need to make repairs to any loose wood subfloor planks or cracks in a concrete subfloor. If you decide you need to replace your subfloors, it’s best to tap a flooring pro, since faulty subfloors can cause problems for your tiles in the long run.
Laying tile on an uneven floor means you’ll be dealing with tile repairs very soon after installation. In order to save yourself the money and grief of redoing your beautiful tile floors, you’ll need to put in the extra effort of smoothing out the floor first. Leveling a floor before you lay tile involves measuring low spots, sealing gaps and seams, applying self-leveling compound, sanding down high spots, and applying a backer board (if needed). Here’s how to do it.

Using a straight edge that’s at least four feet long, place the tool on the floor. As the name implies, the straight edge should sit straight along the floor, but if you notice any gaps, that identifies a low spot. If the tool is raised in some areas, that is evidence of a high spot.
Use chalk, a pencil, or another writing tool to mark any low points and high points. Repeat with the straight edge until you’ve checked the entire room.
Once you’ve noted where the low points are in the floor, use a measuring tape to note how deep these divots go. Jot down the measurements. This information will help you determine how much material you need to properly fill the low points.

If you’re working with wood subfloors, use caulk to seal any gaps, cover nails, and fill the seams between wood planks. This will help create the smoothest surface possible after you apply a self-leveling compound to the subfloors.
You can find self-leveling compound at a home improvement store, and this material will be your best friend in leveling a floor for tile installation. Suit up in your protective gear, then mix the self-leveling compound in a bucket according to the product instructions. Pour the resulting mixture in the low areas, spreading it out with a trowel. Follow the dry time listed in the instructions.
Head to the areas you marked as high spots while donning your protective gear, including gloves, a mask, goggles, and work boots. For wood subfloors, use a belt sander to sand down the high points. For concrete subfloors, you’ll need to rent a cement grinder to smooth out the peaks.
Revisit the areas you filled with self-leveling compound once the compound is fully dry. If there is too much compound in some areas, use the sander or grinder to smooth out these areas. Make sure to clean up the area with a wet-dry vacuum afterward to ensure the flooring is as clean and level as possible.
For wood subfloors, you can further ensure the most level surface possible by installing backer board. Using a backer board scoring tool, cut the backer board to the correct size to fit the space. Then, you’ll apply a thinset mortar to the subfloor with a trowel, creating notches with the notched end of the trowel for better adhesion. Lay each piece of backer board onto the mortar.
To finish installing the backer board, use a drill to screw the perimeter of the backer board into the wood subfloors. Place a screw about every eight inches, or follow the guided markings on the backer board. Stagger the boards, so the end of one board isn’t aligned with the edge of another board.
Use fiberglass tape to cover the backer board joints, then use the trowel to cover the tape with thinset mortar. If you choose to install backer board, it needs an extra one to two days for the thinset mortar to fully dry before you can begin tiling.

Once the floors are thoroughly leveled, make sure to pass through the room with a wet-dry vacuum to clean up any debris that kicked up while you worked. Once the materials are fully dry and the room is clean, you can begin the tile installation process.
For DIY floor leveling, you’ll spend at least $350 to $400 on the self-leveling compound needed to cover about 350 square feet of space. Backer board will cost another $5 to $10 per square foot, plus you’ll need to purchase thinset mortar, screws, and fiberglass tape to install backer board.
If you don’t own a cement grinder, renting one costs about $100 to $200 per day. Buying a belt sander for wood subfloors costs about $50 to $120, while renting a floor sander costs about $30 per day.
Installing tile floors costs about $1,900 on average for professional installation, with floor leveling costing an additional $2 to $30 per square foot. It may be more cost-effective, not to mention time-saving, to hire a pro for floor leveling and tile installation.
Leveling a floor for tile is a suitable DIY project for handy homeowners, but it requires several tools—like a belt sander or cement grinder—and supplies to get the job done. If you don’t feel confident in tackling this project, call a local tile installer right away to make light work of this important task.
Terrible experience. Walls/trim/floors/cabinets/doors all have drip marks, overspray, etc. Tiling at the fireplace had to be redone by another vendor due to incorrect and shoddy install by Profect. Contractor had his children in our house while he was on site without prior authorization or...
 Profect painting & exteriors
It was wonderful working with Yordy and his team. They were very professional and are experts in what they do. They have completed the work on time, with better quality and with in fairly reasonable price. We just started with backsplash work , but liking his work, we went on to provide...
We were having 2”x 2” tile installed . There was a small installation error and the new additional replacement tile was from a different lot and the colors didn’t match. Joe assured us that he would rectify everything , which he did without hesitation. We decided to go with the 18” x 36” tile...
 CarifaTile
For several months I was looking for somebody to tile a wall in my master bath and move lighting fixtures, and could not find anybody who was responsive. I contacted Rowe through Home Advisor and within days they came by to assess the job and provide an estimate. The cost was very...
It went very well! The end product was amazing and we keep getting a lot of compliments from friends! M&E were very professional and they made sure we were happy with the product before leaving. They met with us in our home and at the tile shop to make sure we were okay with our tile and...
 M&E Remodeling
Involved an extensive bathroom remodel, including removing tub & installing walk in shower, new drywall, custome tile work to ceiling, plumbing, etc. Overall, job was done on time and on budget. Nick & his team were very professional and had high attention to detail. Quality was great. Highly...
 Stamos Flooring and Remodeling LLC
Very pleased with the service and level of professionalism. Courteous and very unobtrusive in performing service. Unlike several other companies, Bradford Xteriors was willing to perform work on a three story home with a clay tile roof. <br />
 Bradford Xteriors
This company did a very good job on the brick wall and it looks just amazing. The staff was always professional and was practically OCD on how the bricks were stacked and how they were laid. Although it took longer than expected, I am willing to sacrifice time over perfection anyday. The...
 My Handy Mate LLC Improvement & Remodeling
He did the tile work and he was good at it. He used other subcontractors for the rest of the work (like putting in the cabinetry) and they were okay but not great. He was a great guy! He was easy to work with and had a good eye for the detail of his work. There were a couple of things that I...
 Brian Miller Custom Remodeling
I was very impressed with Miller Cantrell! I live in an old home in which the sewage line that runs from my home to the sewage system is a line of clay tile. These eventually collapse and need to be replaced - an expensive problem and sure to happen at the worst time. I told them that my...
From average costs to expert advice, get all the answers you need to get your job done.
Find out how much you can expect your tile floor installation to cost depending on a range of factors, including tile type.

How much does a Saltillo tile floor cost? It depends on the size of your space, but on average, you’ll pay between $6 and $28 per square foot for this tile.
Discover the true wood tile flooring cost and learn about installation, labor, and material prices, plus tips to save on your wood tile flooring project.
Tile can be fragile without the right preparation. To get the most out of your floors, level the surface to provide a strong foundation for your new tile.
Blending different flooring between rooms in an open floor plan can be challenging, but it’s not impossible if you follow these tips on how to transition wood floor to tile.
Can you install hardwood floors over tile? The answer is yes, if you do it the right way. Here’s everything you need to know to upgrade your floors.