

The cost of removing a fireplace insert depends on the type of insert that’s installed. Read on to learn why electric is cheaper than a gas or wood insert.
Add some sizzle to your fireplace’s style


This project requires a lot of experience, so we don’t recommend DIYing it. Hire a pro with the special skills and tools necessary to complete the job safely.
Putting concrete over brick fireplaces is becoming a more common way for people to modernize their living spaces. If you’re looking to upgrade the look of your fireplace, you’re likely curious about the process. This job is difficult and can take a long time to complete, so it’s better left to a pro, but here’s how an expert would put concrete over your fireplace.
Before starting, you’ll want to clear the area of rugs, furniture, and other decor to avoid getting everything covered in dust and debris. You’ll also want a clear working area with plenty of room to spread out your building materials. When mixing your concrete, be sure to do it outside or on a covered surface so that it doesn’t get stuck and harden on your floor.
If your fireplace sports faux-stone, or some other kind of material covering the brick, then you’re going to start the DIY process by chiseling this existing stone away.
For this, you’ll want the demolition hammer and your safety glasses ready to go. Carefully chisel away any pre-existing stone that covers your current fireplace, revealing the brick beneath it.
After you’ve gotten your fireplace to the place where it’s just brick, it’s time to cut the right dimensions for your fireplace. Use a straightedge to measure the correct dimensions that you’ll then use to cut the right-sized cement boards.
To cut the board, throw on your safety glasses and use a utility knife. This way, you’ll have perfectly sized pieces to install before making the fireplace the center of attention in your living room.
With your pre-cut cement boards in sight, you can now start applying the pieces to the brick fireplace. To do so, you can apply a strong construction adhesive to the back of the board. Then you’ll press this onto the brick fireplace.
If you want a more professional option, you can also apply furring strips as a wooden frame to your brick. However, this is a step better left to the professionals since you’d have to drill holes into the brick before framing a wall to then screw in the cement boards, which is dangerous without an expert.
Once the cement boards are secured, you’ll want to move forward with taping every seam. While this might sound tedious, it’s a really important step. All you’ll do is place appropriately sized pieces of mesh tape over all of the seams, and voila! You’re ready to mix the concrete.

Next up, you’re ready to start mixing your concrete skim coat. Using your mixing tool, follow the manufacturer's instructions to pour the concrete skim coat into a bucket with the directed amount of water.
Finally, the time has to come to apply the concrete skim coat. To do so, take your concrete trowel and put a generous portion of the concrete onto it. From here, you’ll apply the mixture to the cement boards smoothing as you apply.
(If you’re just adding concrete to the hearth, you’ll directly apply this mixture to your hearth, smoothing every step of the way. Just make sure you have the rest of the fireplace taped off to prevent concrete from getting on it.)
It’s a good idea to start at the tallest point of the fireplace, then work your way down, re-smoothing with every re-application. Once you have the entire fireplace coated and smooth, you’ll wait for the concrete to dry before sanding and repeating the application process. As a general rule of thumb, you can add up to five coats of concrete skim coat until the fireplace is your desired look.
Once the concrete work is finished, seal your concrete fireplace to lengthen its life span and enhance durability. Sealant types include acrylic and epoxy polyurethanes, and they will keep your new concrete fireplace or hearth protected from wear and tear.
After choosing a sealant, you’ll apply your coats to the renovated area with a paintbrush.

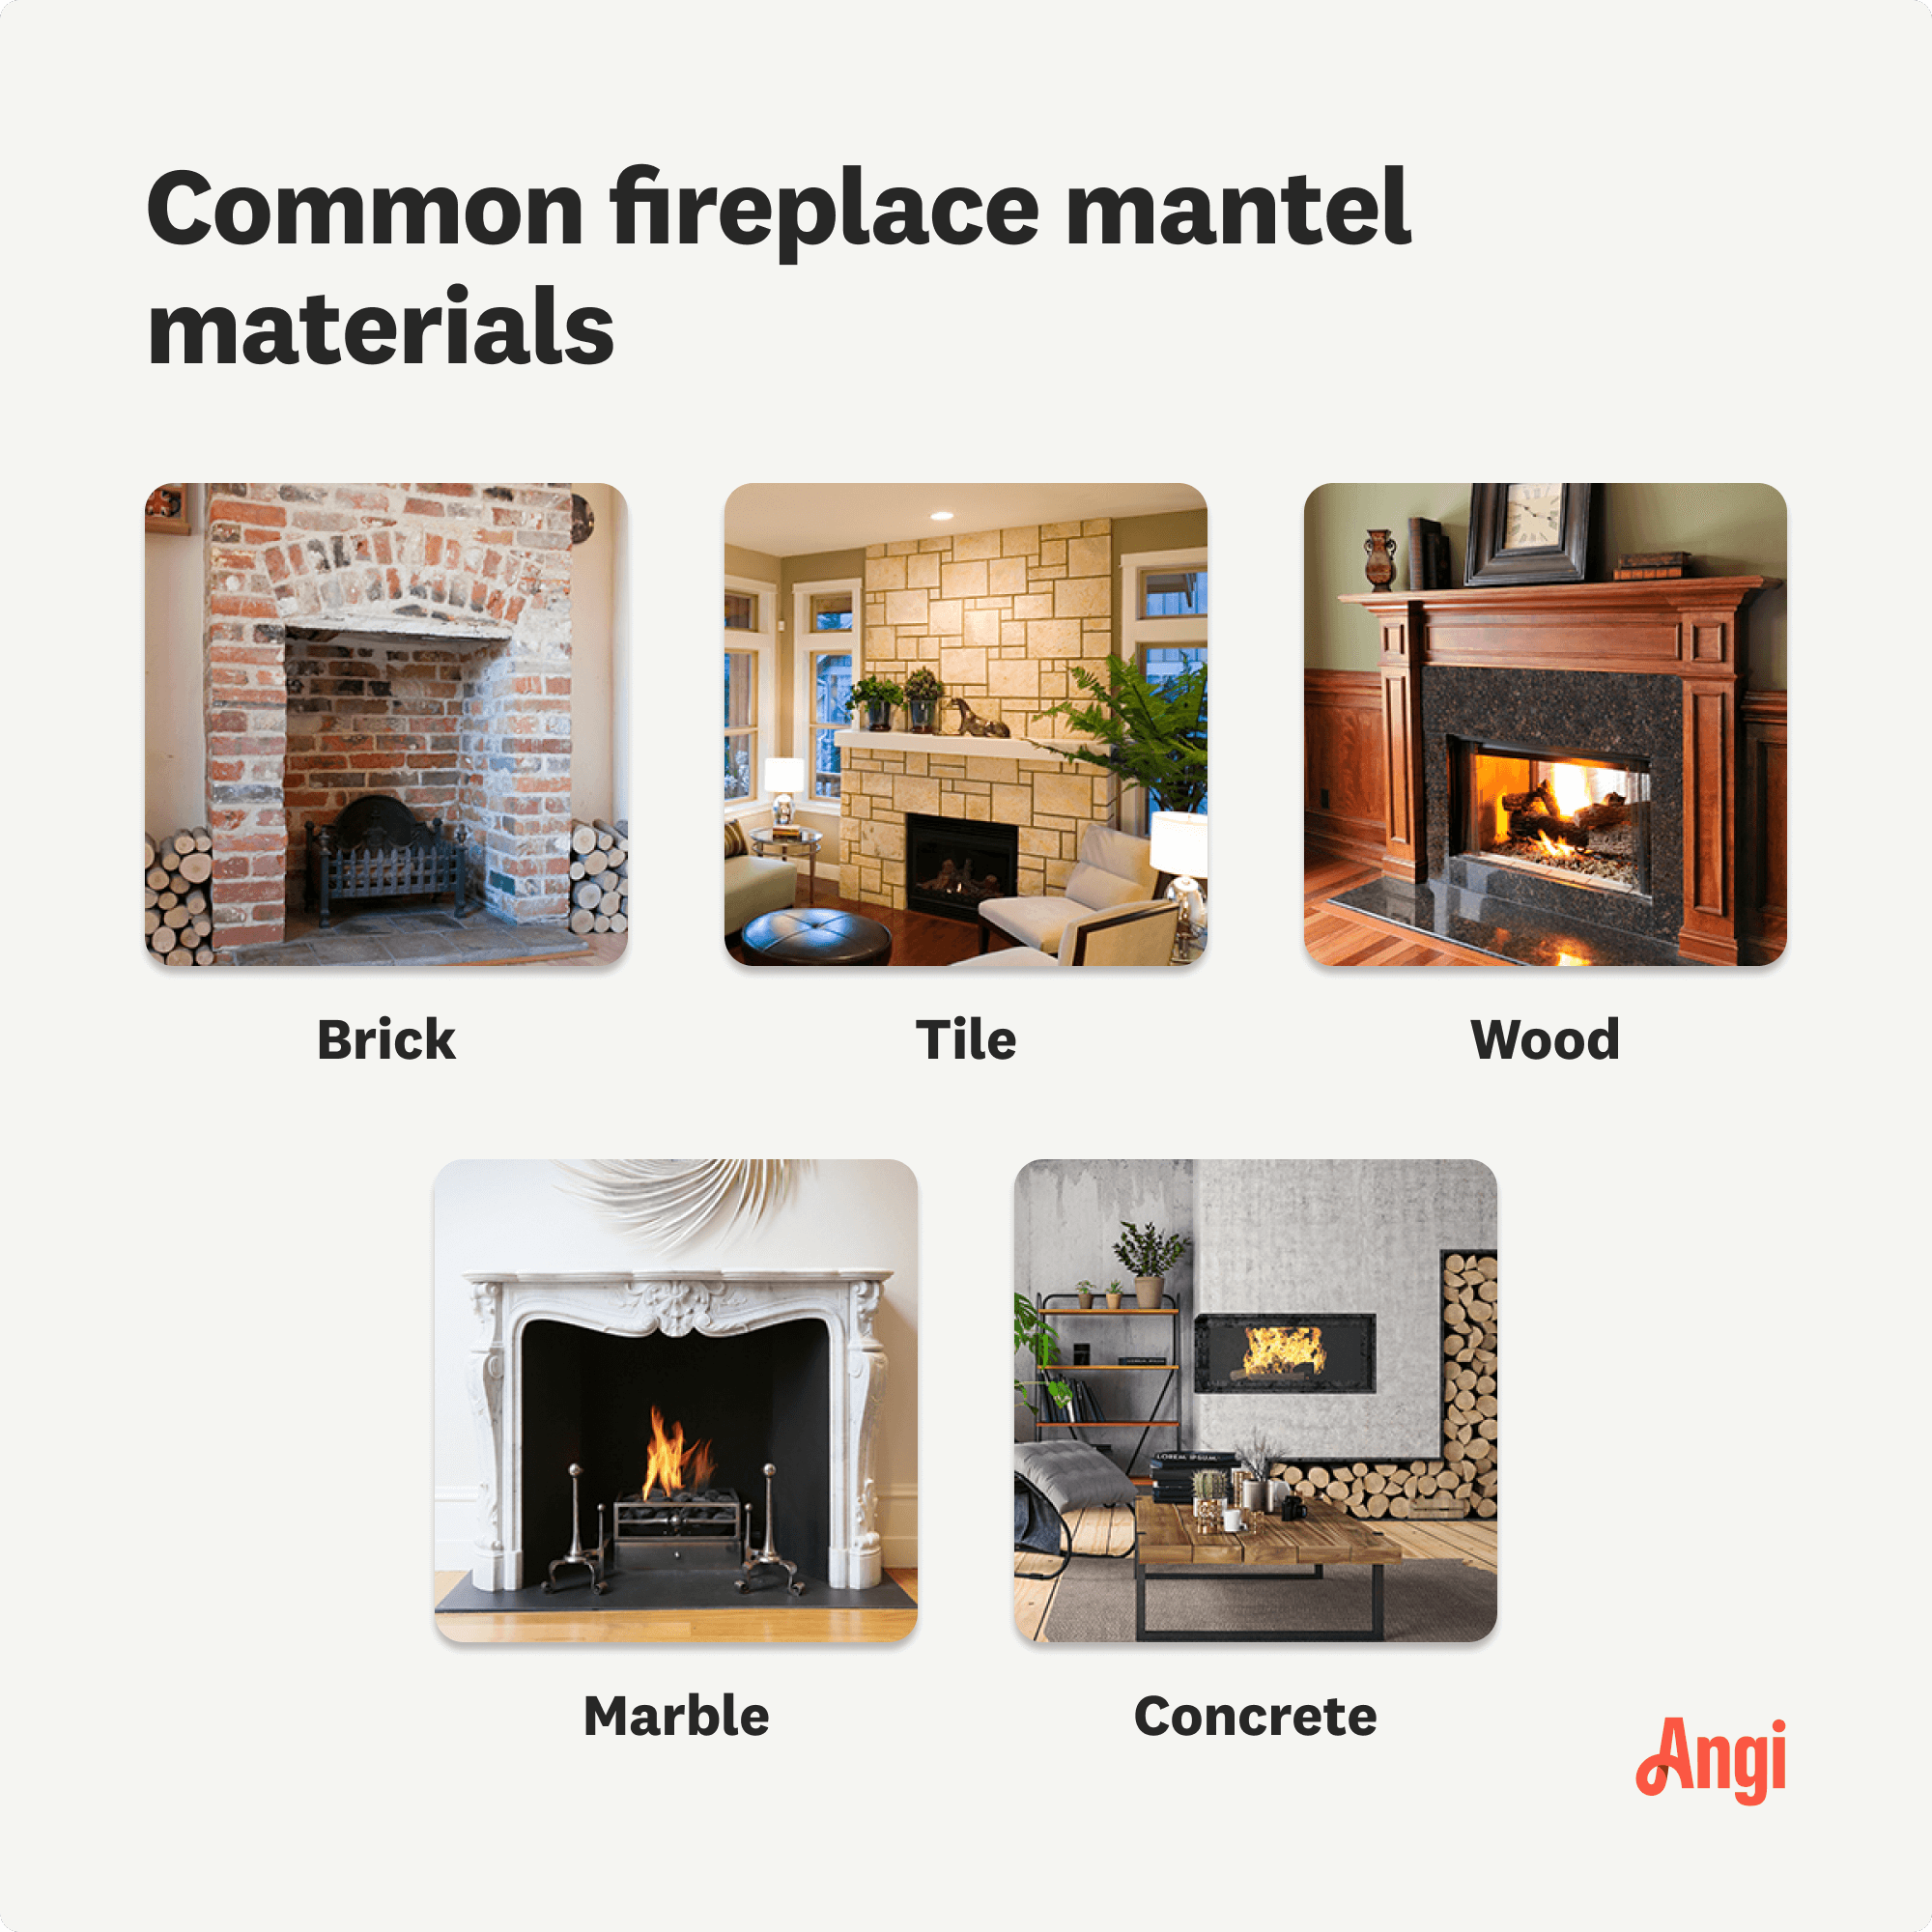
While this step is totally optional, adding a mantel is a fun way to add a bit more style to your fireplace. Choose from traditional white crown molding, rustic barn wood, or a modern black mantel.
Yes, it's perfectly safe to put concrete over a brick fireplace when done correctly. The easiest way to ensure a proper cement fireplace makeover is to hire a professional, but we get it if you want to challenge yourself with a new DIY. Here are some things to consider to make sure your remodel goes smoothly:
Remove anything on top of the existing brick, including paint or veneer.
Make sure all surfaces are as clean as possible. If you’ve had to clean them, wait until everything is fully dry to begin coating your fireplace in concrete. You don’t want any moisture trapped underneath.
Add multiple coats of concrete for extra security.
Seal the concrete.
Seriously, make sure you seal the concrete. Otherwise, you’ll have to redo the cement coating a lot sooner than you’d like.
A concrete fireplace renovation is a job better left for experienced DIYers due to the amount of power tools needed and danger it poses, since it requires drilling through brick and demoing existing stones. Look into hiring a general contractor near you or a local fireplace remodeling company with experience working with concrete and brickwork. While discussing your fireplace remodel idea, they can provide guidance on the best materials and potential timeline.
A fireplace remodel costs on average $1,200 but pays off long-term with the peace of mind it was done correctly and you won’t face costly repairs in the future.
I had Ace Fireplace Services install custom chimney caps for my home, and the results are stunning. They fit like a glove and have added a touch of sophistication to my chimney. I can't recommend their services enough.
 Ace Fireplace Services
Custom Paint Jobs LLC turned our outdated bathroom into a modern masterpiece.
Window Depot did an amazing job on my deck. I wasnt sure what I wanted to do, but their composite decking was affordable and will last a long time. I am excited to have family over, and I am no longer embarrassed by my backyard. Jeff and the ground crew were polite, respectful, and caring for...
We used Unique Hardwood Floor LLC three years ago to work on the floors of a 70 year old home that needed a great deal of work. Some floors needed repairs, some were replaced and others just needed to be refinished. It was a complicated job as they needed to blend the old and the new to...
 Unique Hardwood Floor LLC
He did a great job, gave a reasonable estimate and some advice and took care of the trees, they looked great when he was done. no muss, no fuss.
We visited their large showroom. Knowedgeable sale staff. They gave us various options. Installation was scheduled prompltly, and performed exactly as specified. My wife and I are extremely pleased with work, and went back to have them do the fireplace.
 KONKUS MARBLE & GRANITE
Person assisting us was very helpful and offered many suggestions
We decided to update our partially finished basement, with a budget. Gerald worked with me on the lighting and chair rail selections, and produced an end product that was everything we wanted and within our budget. The work was done quickly, and he and his crew were always prompt and...
Overall the work went well. We had some miscommunication over the damper, because of my lack of knowledge regarding fireplaces. When I pointed the issue out to New Buck they corrected the issue, and did not charge me. They were very clean, with their work considering how messy restoring a...
I WAS SO PLEASED THAT THEY WERE ABLE TO SOLVE THIS SO QUICKLY. I CAN'T BELIEVE THAT I WASTED ALL THAT TIME WITH MY ORIGINAL INSTALLER! I WILL NOW USE GUARANTEED FOR ALL MY FUTURE HEATING/COOLING NEEDS.
From average costs to expert advice, get all the answers you need to get your job done.
The cost of removing a fireplace insert depends on the type of insert that’s installed. Read on to learn why electric is cheaper than a gas or wood insert.

Many homeowners upgrade their old fireplace with inserts to get more heat and save energy and money. Learn more about the cost of installing a fireplace insert.

The average fireplace installation cost is $2,438, but prices vary depending on the type and size of the fireplace. Calculate your costs with our guide.

Smart chimney inspection questions can help prevent your fireplace from going up in smoke. Here’s what to discuss before hiring a chimney sweep.

Breathe life into your living space with these fireplace remodel ideas that increase your home’s cozy appeal while engaging your aesthetic.

Find out if you really need a chimney to install a fireplace in your home. This guide helps you understand your options, such as a ventless fireplace, when choosing the right fireplace for your home if you don't have a chimney.