
Looking to spruce up your outdoor area? Learn how much paver sealing and cleaning costs in Indianapolis, IN, and what factors to consider when budgeting.
When it comes to fixing paver problems, leave no stone unturned

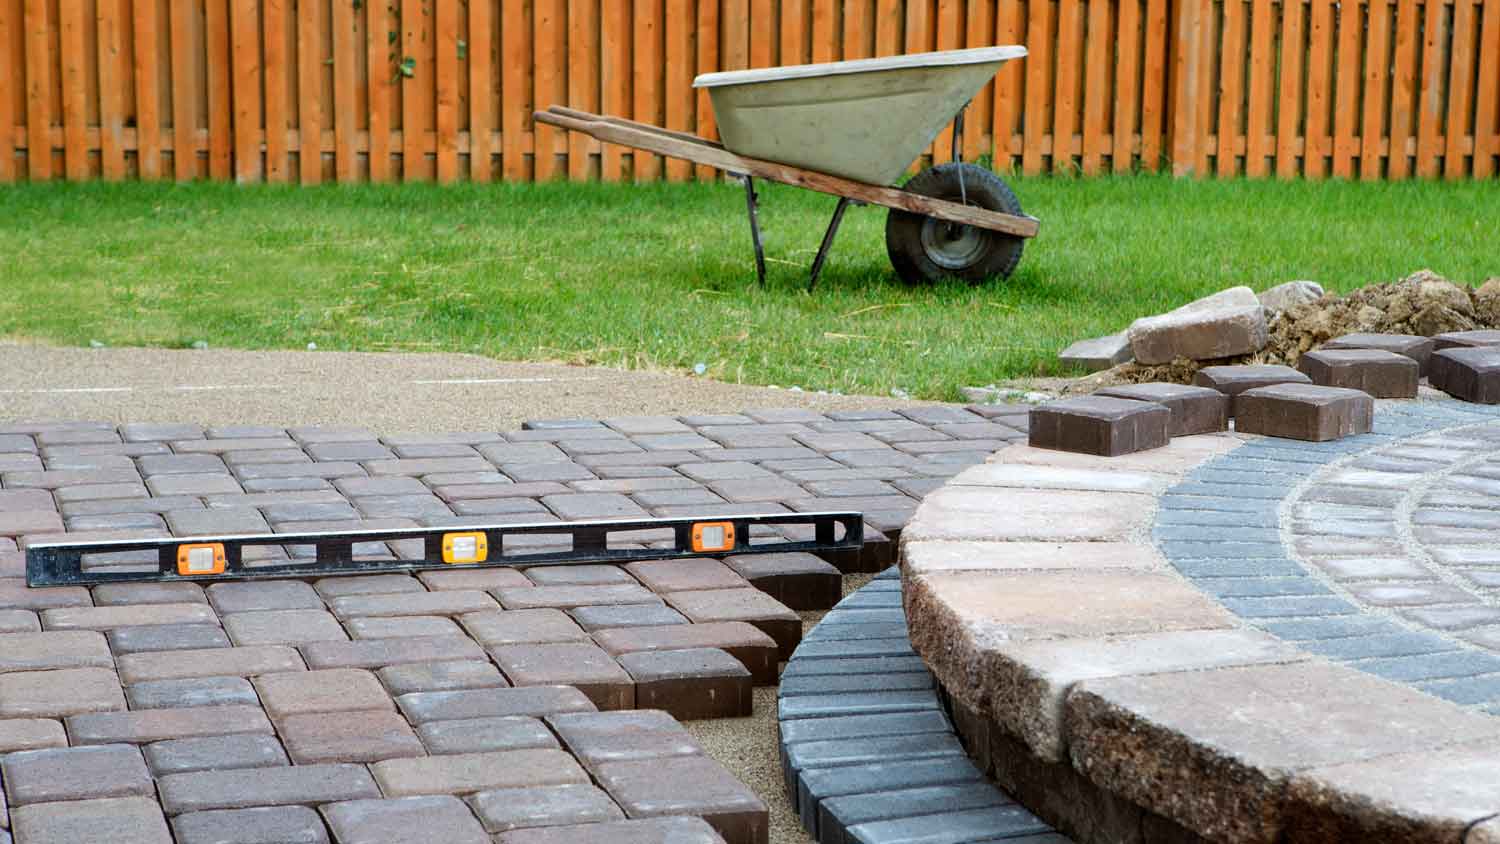
Uneven pavers signal poor base compaction or soil settling beneath your walkway, creating wobbling stones that shift underfoot and need prompt attention.
Expect to pay $2,400 to $7,000 for a new paver patio, so addressing loose or shifting pavers early helps protect your investment.
Fix loose pavers by removing each one, adding fresh joint sand, compacting the base, and tapping stones back into place with a rubber mallet.
Hiring a local hardscape professional provides reliable support for reworking paver beds and correcting drainage issues that cause sinking or shifting over time.
From winding brick paths to castle terraces, paver stones have appeared in architecture and landscaping for centuries. Adding pavers to your landscaping, whether it’s a paver patio, walkway, or driveway, can make any home feel like a castle. But even with their time-tested durability, pavers are prone to specific issues. Here are some of the most common paver problems and how to fix them.
Many of the most common paver problems aren’t necessarily due to installation problems or hardscape failures. They can be as basic as an errant stain or as complex as earthquake damage. The good news is that many solutions to these problems are fairly easy for homeowners to take on themselves.
Homeowners are often disheartened to see their beautiful pavers become stained or discolored over time. Pavers are vulnerable to staining because their porous nature allows oil, grease, rust, and organic materials that settle on the surface to be easily absorbed. In areas with heavy rain and high humidity, pavers are prone to efflorescence caused by salts. This is one of the reasons why sealing pavers to create a barrier against dirt and dust is highly recommended. Ideally, sealant should be reapplied every three to five years.
For most types of stains, washing pavers down with a hose will get everything looking new again. If stains are stubborn, use a mild cleaning solution consisting of diluted dishwashing soap or white vinegar with water to gently scrub pavers with a wire hand brush. Rinse pavers with a hose. If stains persist, consider making a mildly abrasive paste from water and baking soda that can sit on the stained area for 30 minutes before being scrubbed away.

One of the few downsides to paver stones versus stamped concrete is that weeds can grow in between the stones. Joint sand holds pavers together, and using the right joint sand can help prevent weed growth.
Polymeric sand is a joint sand that creates a durable joint between pavers, so many contractors opt to use it. Remove any existing weeds by hand and replace the joint sand with polymeric sand to stop weeds from growing between pavers.
While using polymeric sand as your joint sand between pavers can dramatically reduce weeds, you may still need weed maintenance for growth that creeps in around your pavers. If you're looking for safe, natural ways to stop weed growth between pavers, baking soda, salt, and vinegar all kill weeds by drawing out moisture. If weed growth is pervasive, herbicides or weedicides can be applied at both pre-emergence and post-emergence periods to prevent or remove weeds.
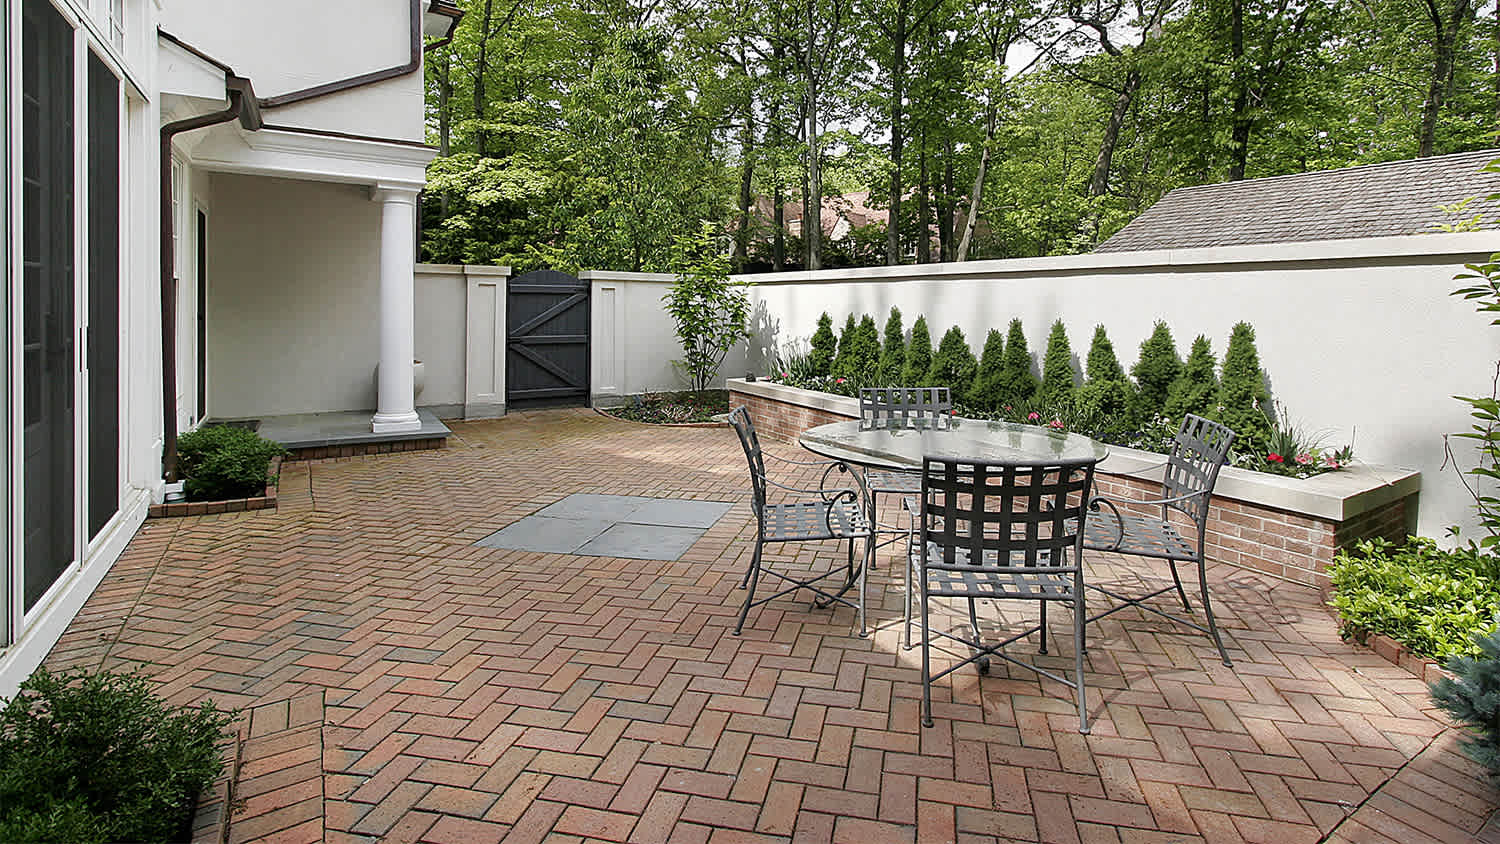
As sand settles between pavers, it can create pressure that pushes up or shifts pavers until they become loose. Foot traffic, weather conditions, general wear and tear, and erosion all contribute to loose pavers. If the base for your pavers wasn't properly compacted, this can exacerbate the effects of yard erosion and natural settling. With wobbling pavers creating uneven walking surfaces in your yard, it's essential to fix this problem as quickly as possible to reduce trip-and-fall hazards.
To correct loose paver tiles, it's necessary to remove each loose paver one at a time. Compact the area with new joint sand before returning each paver to its place. After replacing a paver, tap it down with a rubber mallet to ensure that it is firmly in place. If multiple pavers are loose, consider hiring a local hardscape contractor to redo the original sand bed.
Be sure to replace or repair pavers that are broken or crumbling to maintain the integrity of the walking surface and prevent tripping hazards.
Ideally, tree root removal takes place before paver installation. However, tree roots can grow up to three times their canopy spread, so it’s not uncommon for them to eventually interfere with your paver patio, which may be why your pavers are lifting.
If tree roots are uprooting your pavers, remove them before fixing your patio.
First, pry up your paver stones with a crowbar or a flat-head screwdriver.
Scoop out the polymeric sand holding the bricks or pavers in place. Keep as much of it as possible because you can reuse it.
Dig out the roots. If you’re lucky, you can use the sharp end of a shovel to cut through them. You may need a handsaw or large pruners to cut them.
If there are larger roots and the soil is compacted, you’ll have to rent a stump grinder.
Once you’ve removed all the roots, level the ground back out using a hoe and a tamper.
Add a layer of gravel as a root barrier.
Add sand and reinstall your pavers.
When tree roots wreak havoc on your pavers, you can hire a paver contractor who can help you get them under control.
Before you begin repairing your patio, remove the tree roots that are lifting your pavers to avoid a repeat scenario. To start, use a crowbar or flat-head screwdriver to pry up pavers. Next, scoop up the polymeric sand that holds the pavers in place. You can put the sand aside to reuse it when you replace your pavers. You should now have access to dig out the tree roots. Use a shovel or spade to chop at the roots. For thicker roots, a handsaw or large pruning tool may be necessary. Very thick roots may require grinding.
After clearing out the roots, level the ground with a tamper or hoe. Next, create a root barrier with a layer of gravel. You can now assemble your polymeric sand and pavers back in place. If you'd like to redesign your patio or update broken or damaged pavers, you can hire a paver contractor.
Tree roots are not the only culprit when it comes to moving paver stones. When the soil beneath the paver stones expands, it can cause shifting and gaps between the pavers. Earthquakes can also cause pavers to shift.
To remedy this issue, fill in the gaps with polymeric sand. If more extensive shifting has occurred, consider consulting a hardscape pro to assess the best course of action.
Shifting pavers indicate that your walkway or patio isn't holding a firm foundation. Adding more polymeric sand to fill in gaps is the easy solution. If shifting looks more extensive, consider digging down 6 to 8 inches below your current bed to add more compacted soil for a firmer base. Better compaction below your polymeric sand increases stabilization for everything on the surface. Additionally, consider installing edge restraints along the perimeter of your paver patio or walkway to increase stabilization.
Cracking is more likely to happen in climates that experience freeze-thaw cycles because contraction in cold temperatures, followed by expansion in warm temperatures, puts pressure on stones. In addition, natural wear and tear, thick weeds, and poor base preparation can all contribute to cracking. If you believe your cracking pavers are caused by the last scenario, bring in landscapers or paver pros to redo your paver bed to create added stability before addressing your pavers.
Thin, small cracks on pavers can usually be repaired using a binding agent or epoxy putty. Consider rotating a repaired paver to an area of your walkway or patio with less foot traffic to reduce the amount of pressure that will be placed on the bonded area. For more serious cracks, replace the paver.
Sunken pavers are usually caused by poor installation, when the soil wasn't properly compacted before they were placed. Drainage issues around a patio or walkway can also cause pavers to sink into the ground.
To repair sunken pavers, remove existing pavers to add more material to the paver bed. Compaction should be done with water-resistant materials like crushed gravel and polymeric sand. When replacing pavers, ensure that they are level and secure. Polymeric sand should then be used to fill in gaps between pavers to create a structured, stable surface.
Time and weather can take a toll on your paver patio. Extreme conditions like heavy rainfall, salt from deicing during the winter, sunlight, or flooding can cause major fading. If you’d like to give your pavers a fresh look, apply a new coat of paver sealer. There are many levels of gloss and color to enhance the appearance of your pavers.
The easiest way to give pavers a fresh look is to apply a new coat of sealer. This should be done once every three to five years to preserve pavers from staining and cracking. Select a high-gloss option to enhance the appearance of fading pavers. If fading is severe, consider a concrete stain to change the color of your pavers.
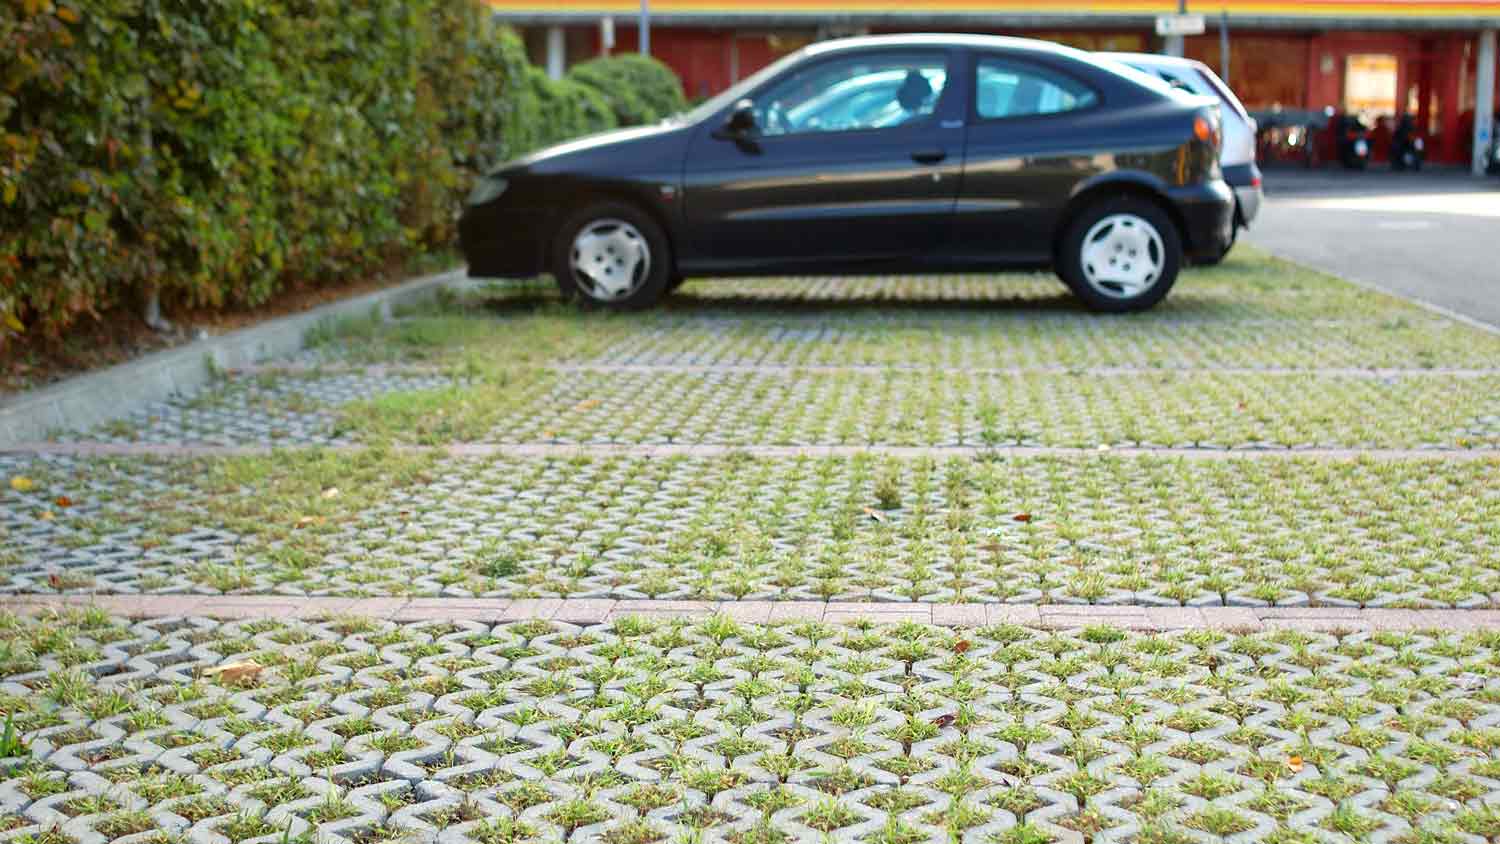
Permeable pavers allow water to drain off through an underground drainage system, sloped hardscaping, or both. If you notice sinking pavers or water pooling on your paver patio or driveway, this could indicate a drainage issue under your pavers.
Call a paver installation professional near you as soon as possible to evaluate the situation and determine if your patio needs repairs so you can relax on the patio or park on your one-of-a-kind driveway.
Solutions for correcting poor drainage under pavers can include everything from adding a patio drain that leads water out and away from pavers to constructing a dry well that collects water to give it time to slowly filter into the soil. Additionally, some homeowners correct drainage issues caused by a lack of slope using permeable geotextile materials that separate pavers from soil.
With poor drainage, there are many different environmental and landscaping details to consider. It's important to have the situation evaluated by a paver installation professional near you.
Sometimes, the pavers around the patio edge tend to lean as people step on them and drive them into the ground. This can also happen if the edge restraint was improperly installed or the base material wasn’t compacted properly. You can fix this paver problem by removing the affected pavers, adding and properly compacting more base material, and reinstalling the pavers with proper edge restraints.
Additional compacting and base material should take care of leaning pavers. To fix the issue, you'll need to remove pavers to add proper support. After your pavers are reinstalled, consider adding edge restraints to help keep pavers in place.
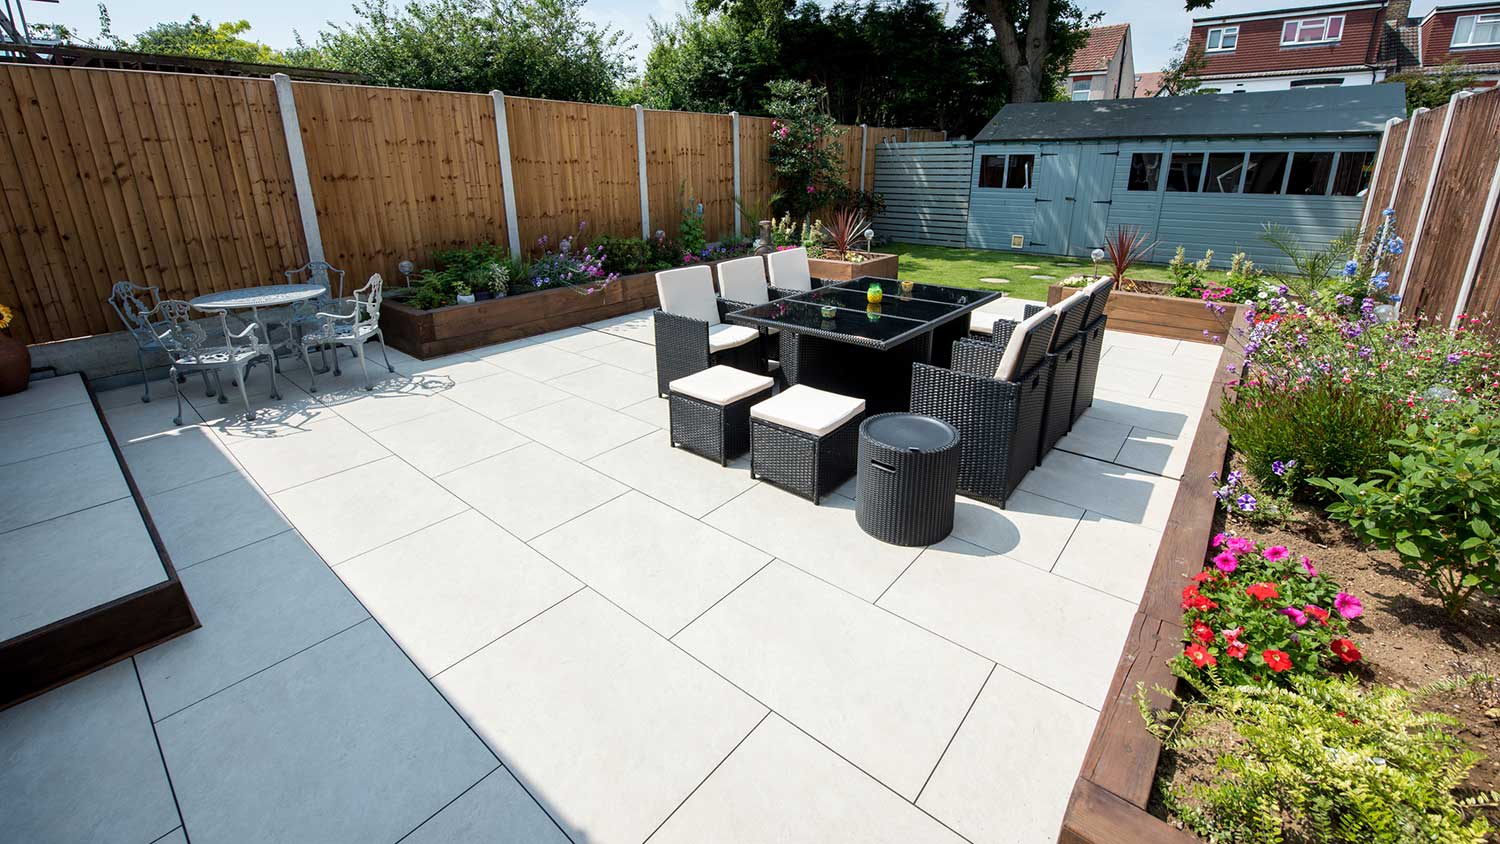
Most homeowners feel comfortable enough with their patio-maintenance skills to clean or reseal pavers on their own. However, it's still important not to hesitate to seek professional advice when you have questions about the best products or methods to use. For larger problems that involve fortifying a paver bed, removing tree roots, or creating new drainage solutions, seeking the help of a paver pro can help you get the best results without unintentionally damaging pavers. With the average cost of a paver patio ranging from $2,400 to $7,000, homeowners have good reason to want to preserve their current patios for as long as possible.
I recently moved to another state and chose United Trust Van Lines after comparing several companies. Their team was punctual, professional, and extremely careful with my belongings. I was especially impressed with how they handled my home office setup and fragile items. Everything arrived on...
Mitchell and the crew were top tier i am so happy with my new roof
This company does it right. Firstly, I want to say that Landan was a joy to work with. He was so kind, transparent, and had everything under control. His entire team showed up ready to work and they were all very respectful of the fact that we were in an office space. A little backstory – we...
D1 Roofing delivers outstanding service from beginning to end, backed by a strong warranty and expert teams. I highly recommend them for their excellence in meeting and surpassing expectations with unmatched communication. Choosing D1 Roofing was flawless decision
I'm a repeat customer of All Star Paving & Sealing and I appreciate the service that all start paving has done for me in the past. I just recently had them out for an estimate and things couldn't have gone better. The staff that they send out to do the estimates are very knowledgeable. The...
 All Star Paving and Sealing
Supreme Brick & Chimney did an excellent job restoring the brick and mortar joints on my home. Their team was professional, knowledgeable, and completed the work on time. I highly recommend them and will hire them again in the future! Thanks!
 Supreme brick & chimney
Window Depot did an amazing job on my deck. I wasnt sure what I wanted to do, but their composite decking was affordable and will last a long time. I am excited to have family over, and I am no longer embarrassed by my backyard. Jeff and the ground crew were polite, respectful, and caring for...
They are very reliable and available. They the drains all the time
 The Waterworks
Mary cleaning service does an amazing job cleaning my home. They go over and beyond the cleaning services that I have had in the past. They are very punctual and thorough with cleaning my home, I’m extremely happy with the service they provide and I highly recommend them.
We had a 20+ year old landscape lighting system that needed replacement. Midwest Lightscapes worked with us to design a much improved lighting system, lighting the exterior of the house and the back yard. Installation of the 45 light system took one and one-half days, and went very smoothly....
 Midwest Lightscapes
From average costs to expert advice, get all the answers you need to get your job done.
Looking to spruce up your outdoor area? Learn how much paver sealing and cleaning costs in Indianapolis, IN, and what factors to consider when budgeting.
Porcelain pavers are a high-end option for your home’s hardscaping that can completely transform your outdoor space. Here’s how much porcelain pavers cost.
Permeable pavers help reduce runoff, prevent flooding, and boost curb appeal. Use this guide to learn how much permeable paver installation costs based on factors like size and material.

Before you build a new patio or walkway, learn common paver installation mistakes that can affect how your project looks and how long it’ll last.
Many common patio problems can be addressed early. Here are ways to repair different types of patio damage and how to know your problem needs a pro.
Learn how to fix your paver patio drainage problem by determining the source of the water that is flooding your pavers and causing sinking, cracking, and other issues.