
Discover travertine pavers costs to learn about installation, materials, and labor prices, plus tips to save on your travertine paver project.
Make sure your barbecue doesn’t get hit with a flood warning


Proper drainage under patio pavers prevents water from pooling around your home, which protects your foundation and landscaping while keeping your outdoor space usable.
Geotextile fabric blocks soil particles while letting water pass through, helping you maintain your paver base integrity in high-traffic areas or clay-based soil conditions.
Creating a natural slope by adjusting gravel depth directs water away from your home, with the area graded at one-half inch for every 4 feet.
Hiring a local paver installation professional keeps your project on track with proper slope measurements and drainage system setup for lasting results.
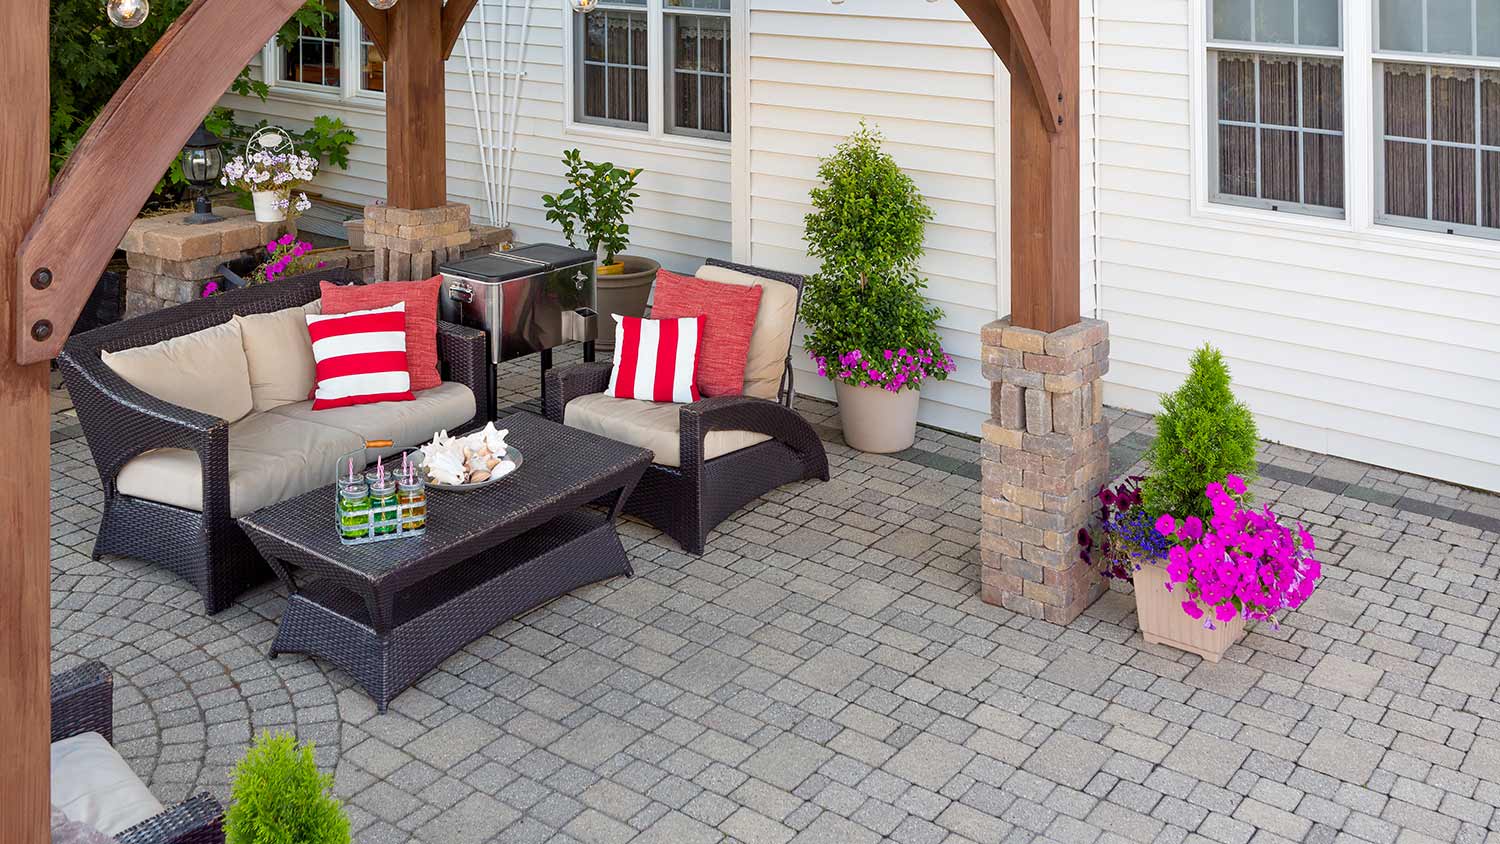
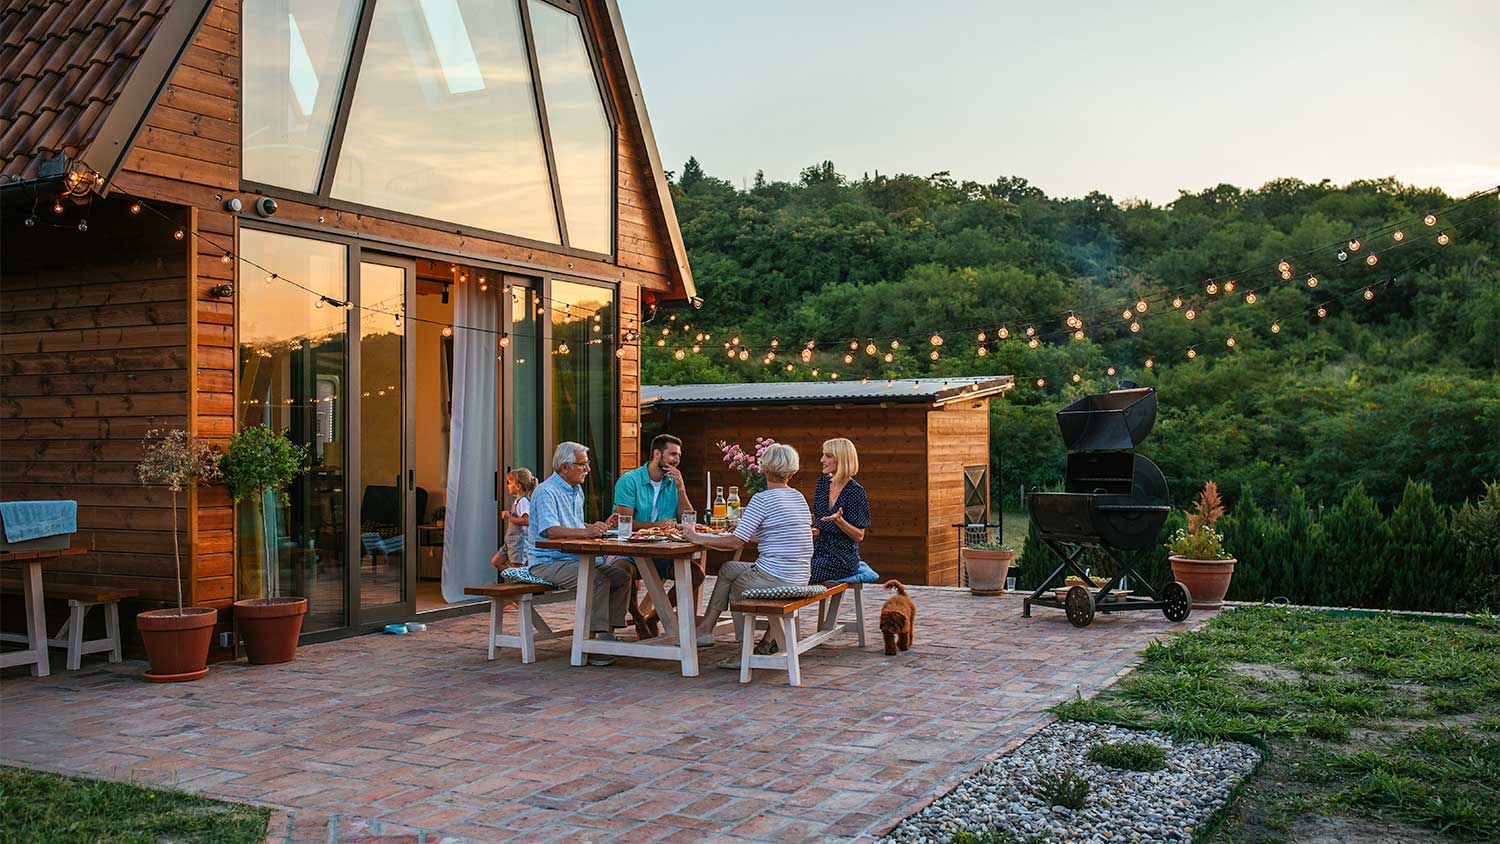
When it feels like summer is right around the corner and you’re ready to boost your backyard’s curb appeal, it might be time to install concrete pavers to create an optimal patio space for barbecuing, socializing, and lounging. Coming in a range of sizes, colors, and shapes, pavers resist cracks, prevent the growth of vegetation, and ensure longevity—regardless of traffic or weather conditions.
Before beginning your patio project, however, you need to understand how drainage under pavers works to prevent water damage that could create a big headache and cost you thousands of dollars to repair. Read on to learn how to create proper drainage under your pavers before you place them.
Water can be a home’s worst enemy. A build-up of moisture around your home can damage your foundation and your landscaping, cause mold and mildew, put you, your family, and your pets at risk of slipping and falling, and much more.
In addition, if you don’t have proper drainage, you might find your patio pooling water, making your favorite relaxation area undesirable to you but desirable to mosquitoes, and generally annoying to clean up after a rainstorm. Over time, too much water can erode the concrete pavers you have worked so hard to install.
There are a few ways to create proper drainage under your pavers to prevent water damage.

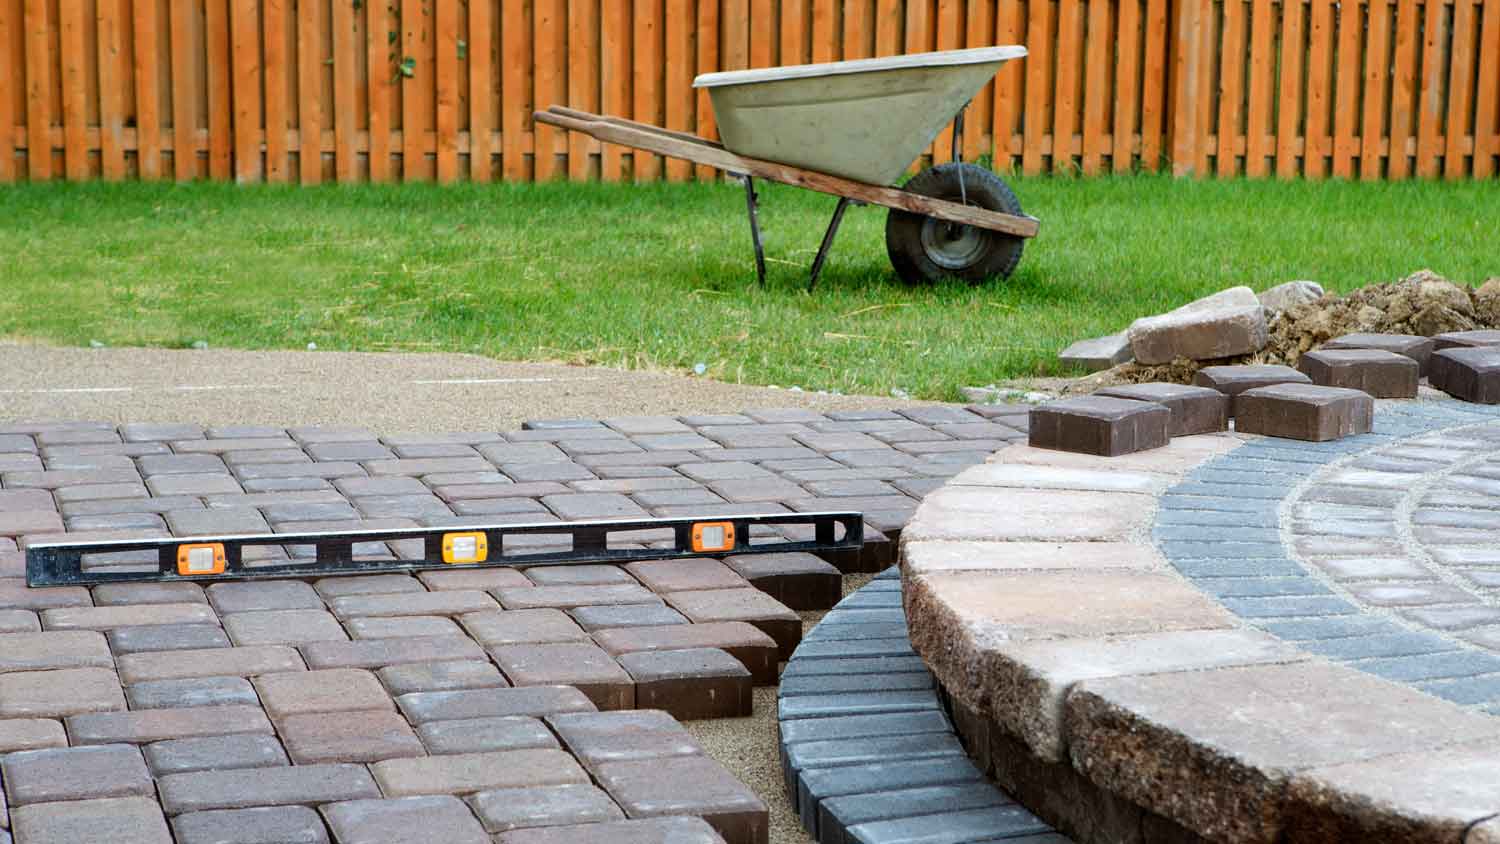
Before you install your pavers, you need to install a layer of gravel and sand. Make sure to dig into the ground 6 inches in addition to the height of the pavers to accommodate the gravel and sand.
After adding the initial 2 inches of gravel to the entire marked-out patio space, compact and then add an additional 2 inches of gravel to the area that should be higher—the patio area closer to your home. Then, adjust the gravel so it thins out as you get closer to the furthest away point of the patio, creating a natural slope.
“The sand should be placed in the same way,” says Tara Dudley, owner of Plant Life Designs. “Ideally, you want the area to be graded at one-half inch for every 4 feet, and you can use a level to guide you as you go.”
If you are installing pavers over clay or silt-based soil, or there is no way to create a slope away from your home, you should install geotextile (sometimes known as filter fabric). Geotextile is made up of permeable, plastic threads that block underlining soil particles, while simultaneously allowing passing water to move through the threads uninterrupted.
The textile prevents the underlying soil from mixing in with the base, helping to maintain the integrity of your paver patio. Geotextile can extend the life of your paver base by many years and is especially useful in high traffic areas with a lot of stormwater accumulation, such as paver driveways.
A dry well, made from a perforated plastic barrel surrounded by stones and connected to pipes, can be installed in a hole at the lowest point in your yard to slowly collect water and give it time to filter into the soil, instead of pooling in large areas.
You can also install a traditional patio drain that connects to a drain pipe. The pipe should be placed under the pavers and lead out to wherever you want the water to run. There are many types of drain systems on the market, varying in size, color, and price.
Ask an Interlocking Concrete Pavement Institute (ICPI) certified project manager or local paver installer to assist with selecting the best one for your patio, and make sure to ask about warranties and installation requirements.
I recently moved to another state and chose United Trust Van Lines after comparing several companies. Their team was punctual, professional, and extremely careful with my belongings. I was especially impressed with how they handled my home office setup and fragile items. Everything arrived on...
Mitchell and the crew were top tier i am so happy with my new roof
This company does it right. Firstly, I want to say that Landan was a joy to work with. He was so kind, transparent, and had everything under control. His entire team showed up ready to work and they were all very respectful of the fact that we were in an office space. A little backstory – we...
D1 Roofing delivers outstanding service from beginning to end, backed by a strong warranty and expert teams. I highly recommend them for their excellence in meeting and surpassing expectations with unmatched communication. Choosing D1 Roofing was flawless decision
I'm a repeat customer of All Star Paving & Sealing and I appreciate the service that all start paving has done for me in the past. I just recently had them out for an estimate and things couldn't have gone better. The staff that they send out to do the estimates are very knowledgeable. The...
 All Star Paving and Sealing
Supreme Brick & Chimney did an excellent job restoring the brick and mortar joints on my home. Their team was professional, knowledgeable, and completed the work on time. I highly recommend them and will hire them again in the future! Thanks!
 Supreme brick & chimney
Window Depot did an amazing job on my deck. I wasnt sure what I wanted to do, but their composite decking was affordable and will last a long time. I am excited to have family over, and I am no longer embarrassed by my backyard. Jeff and the ground crew were polite, respectful, and caring for...
They are very reliable and available. They the drains all the time
 The Waterworks
Mary cleaning service does an amazing job cleaning my home. They go over and beyond the cleaning services that I have had in the past. They are very punctual and thorough with cleaning my home, I’m extremely happy with the service they provide and I highly recommend them.
We had a 20+ year old landscape lighting system that needed replacement. Midwest Lightscapes worked with us to design a much improved lighting system, lighting the exterior of the house and the back yard. Installation of the 45 light system took one and one-half days, and went very smoothly....
 Midwest Lightscapes
From average costs to expert advice, get all the answers you need to get your job done.
Discover travertine pavers costs to learn about installation, materials, and labor prices, plus tips to save on your travertine paver project.
Learn how to fix your paver patio drainage problem by determining the source of the water that is flooding your pavers and causing sinking, cracking, and other issues.
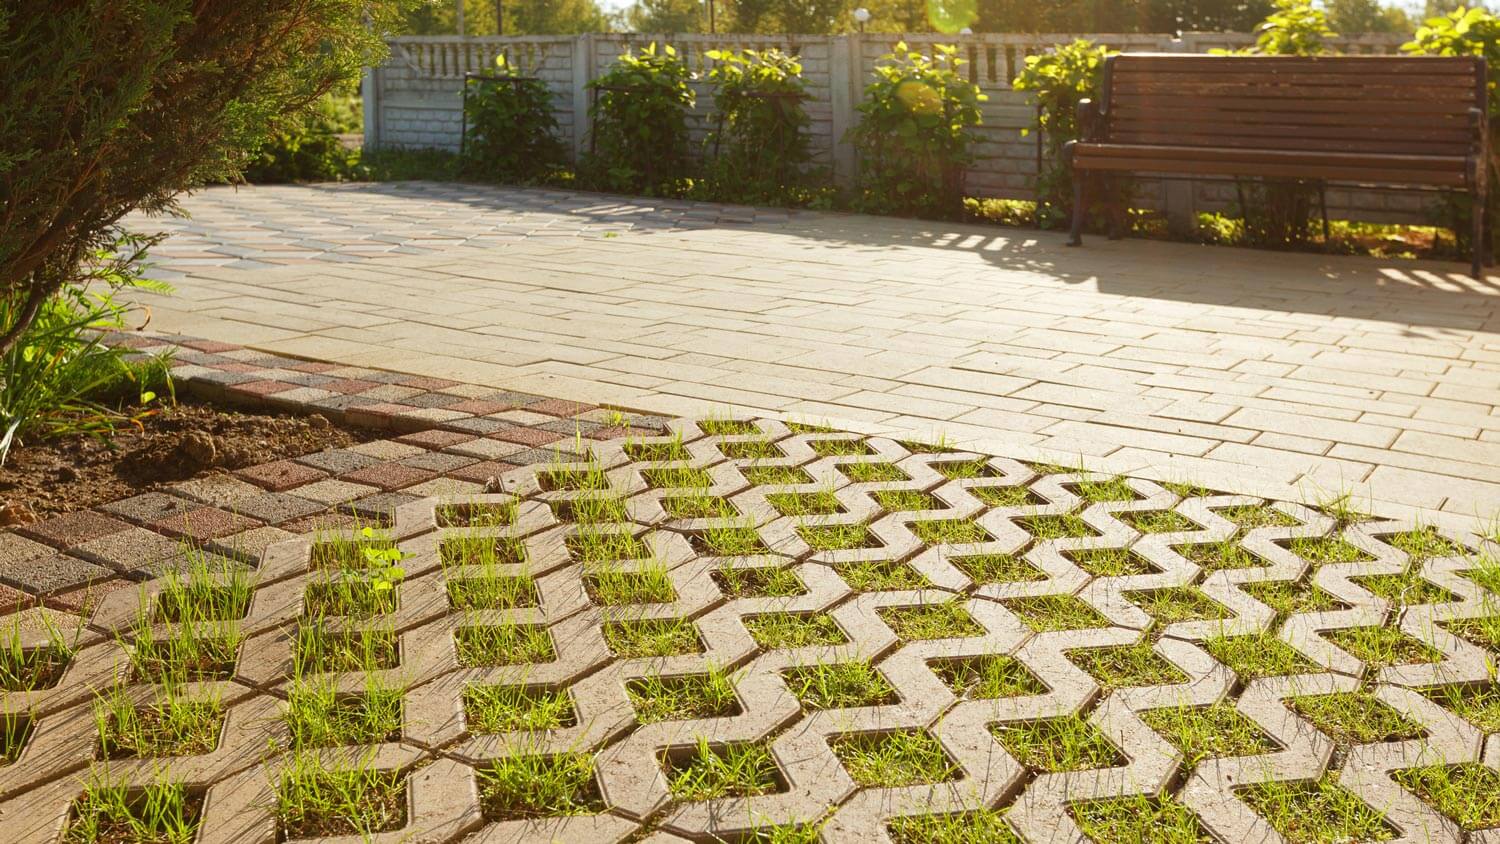
There's no need to cover up your entire lawn to install a driveway or walkway. Grass paver blocks offer a natural alternative to stone and concrete.
Whether you’re ready to upgrade or want to try something new, picking the best pavers for your patio and driveway can help elevate your outdoor space. We share some things you’ll want to consider before you install your pavers.

Before you build a new patio or walkway, learn common paver installation mistakes that can affect how your project looks and how long it’ll last.
Laying pavers in your yard is a relatively easy project, but it does require some preparation and labor. Keep reading to learn how to lay pavers.