

Both materials and labor determine hardwood floor installation costs. This guide breaks down all the prices you need to know before starting your new flooring project.
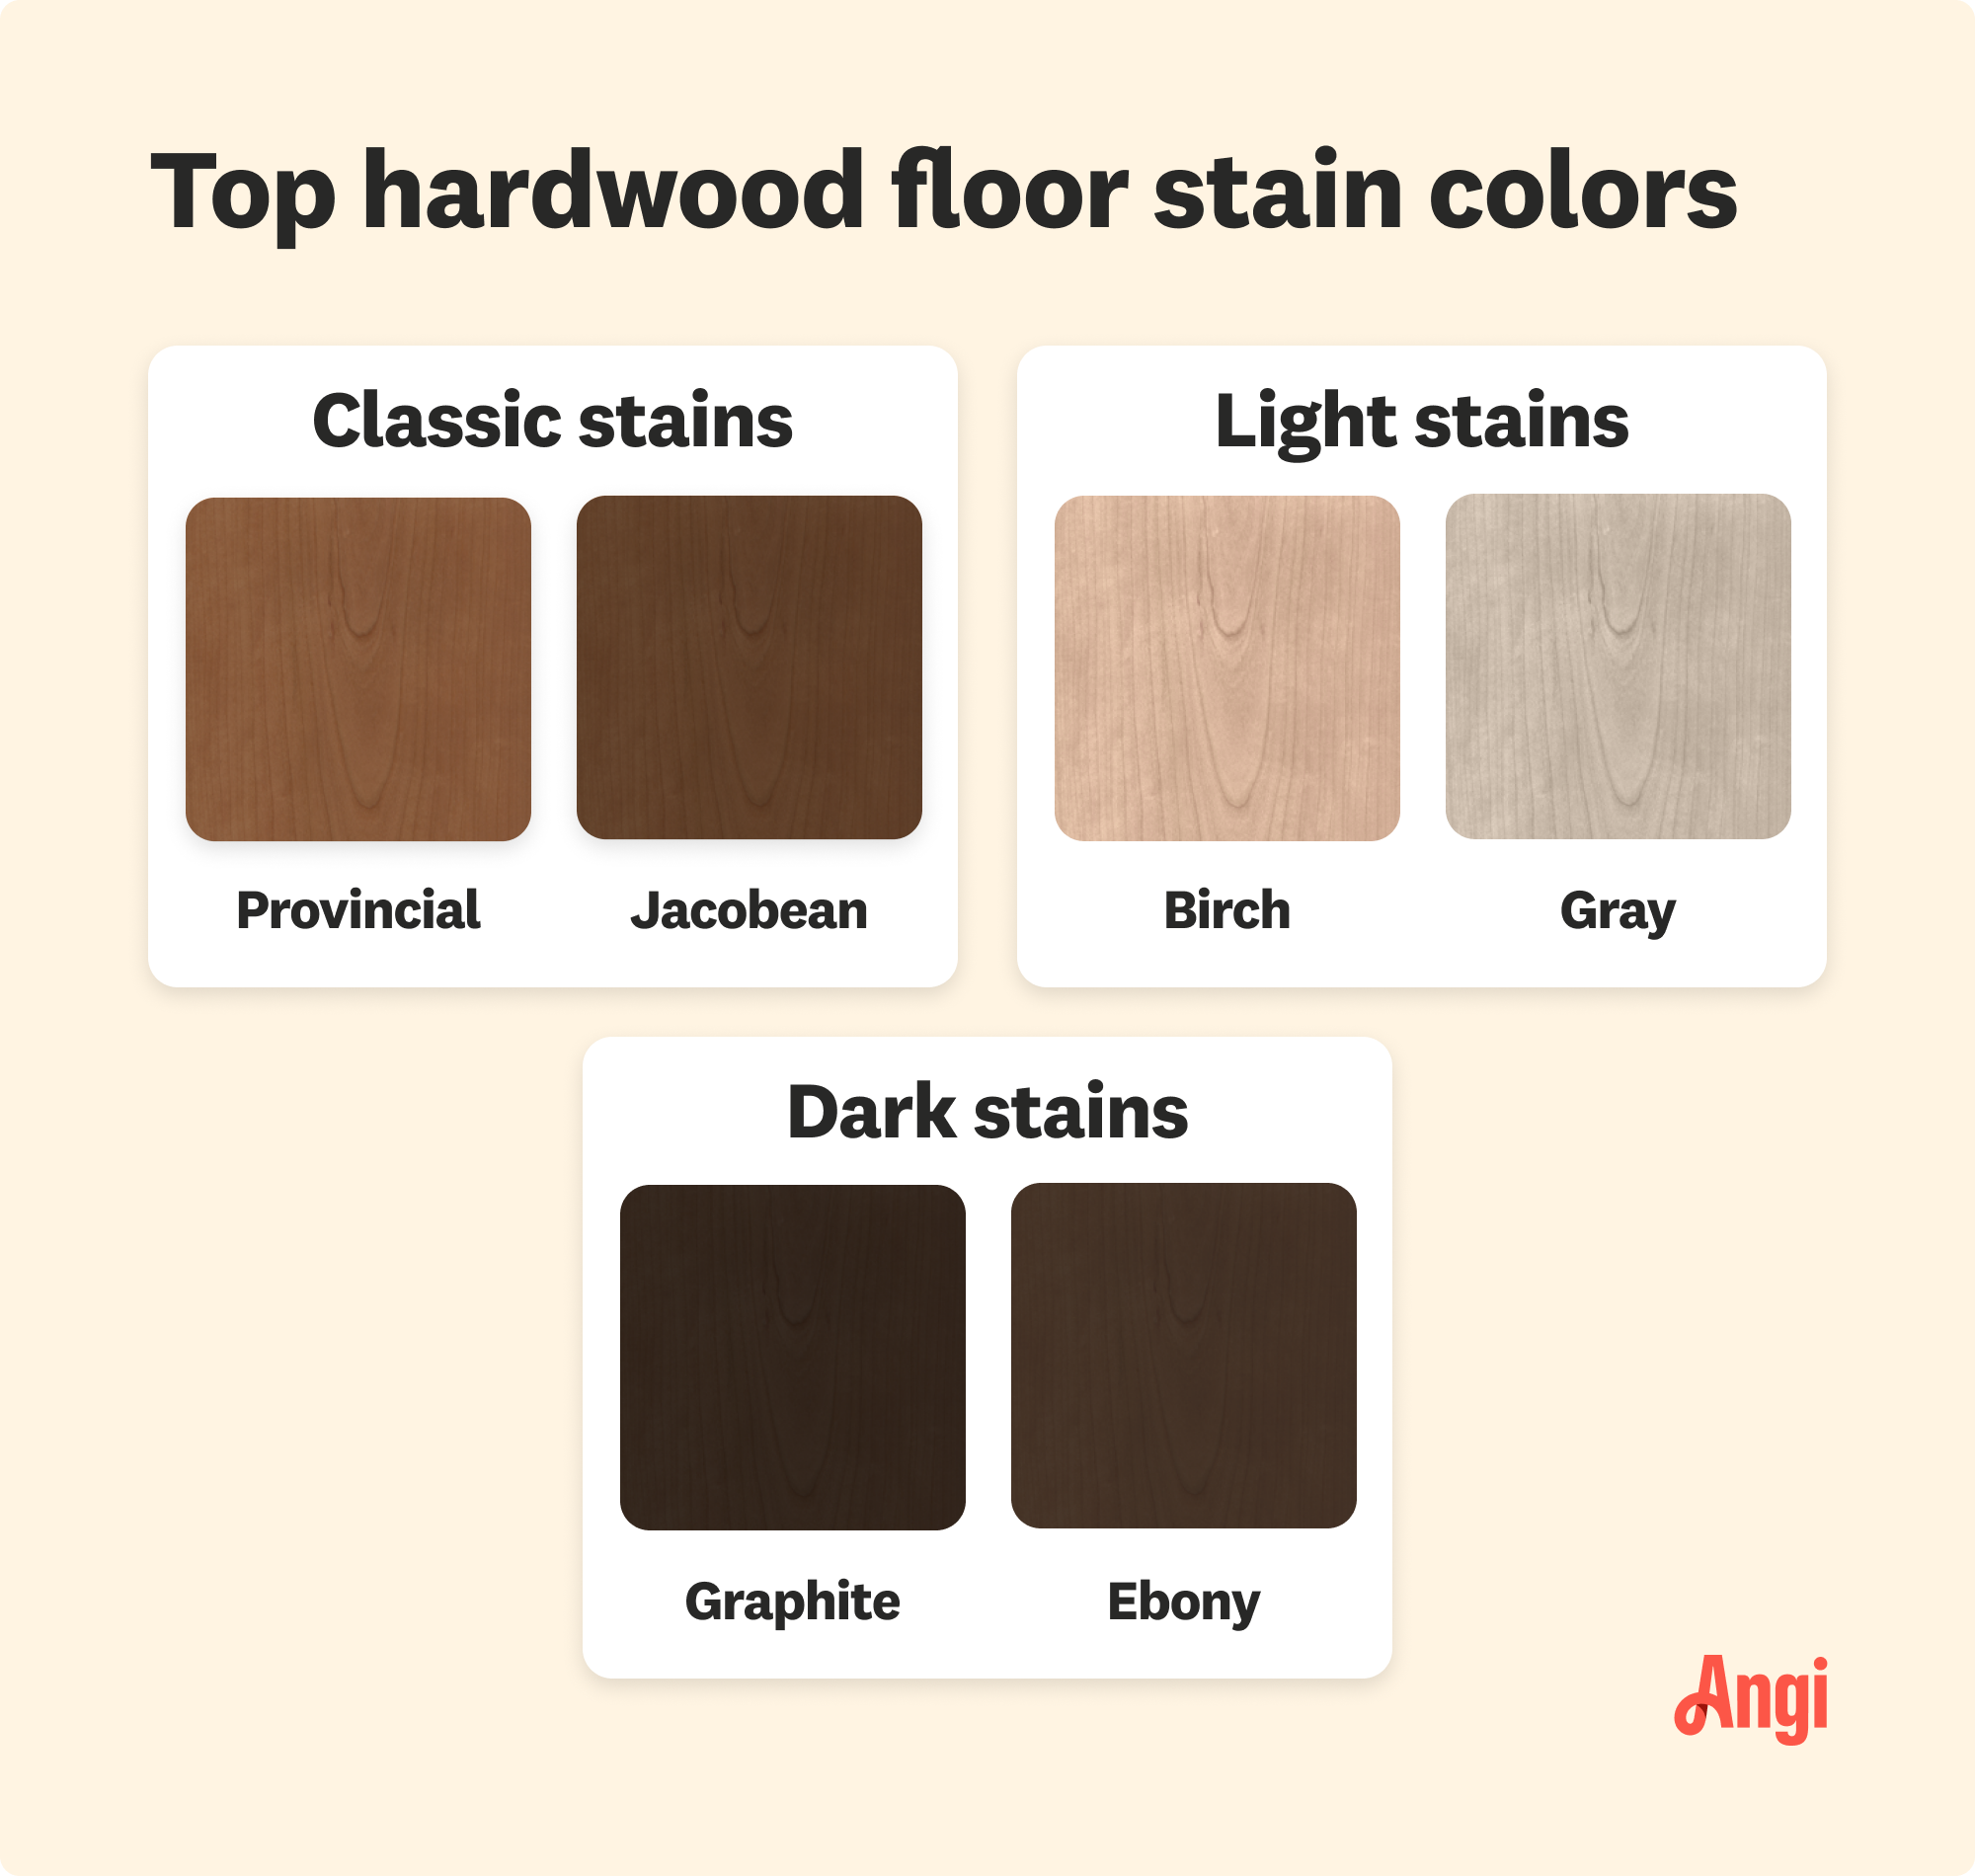
Say no to sanding and brighten your hardwood with alternative techniques


Hardwood floors make a home feel warm, cozy, and stylish. But over time, they can become scuffed, scratched, and lose their shine. Sanding or fully replacing your hardwood floors can be costly and time-intensive. Luckily, you can learn how to restore hardwood floors without sanding at all, and there are plenty of avenues for you to choose from.

Before starting this project, you’ll need to decide which refinishing method to take, depending on the condition of your floors. Recoating your floors with a polyurethane finish will provide a long-lasting solution. For a less invasive approach, you can purchase a store-bought chemical abrasion kit—which will run around $60 or revitalize your floors with a store-bought hardwood restorer, which will average $25.
You can expect to spend at least one day prepping your hardwood floors for refinishing with cleaning, buffing, roughing the floor’s edges, and thoroughly vacuuming up dust. Clean your wood floors gently with a microfiber or terry-cloth mop. If you need to resolve hard stains or deep scratches, use mineral spirits for a deeper scrub.
All of the below methods require proper safety equipment, including rubber gloves, a dust mask, and safety glasses. Don’t forget: If this feels like a little too much labor for your liking, a local hardwood refinishing company can get the job done smoothly and quickly without you having to lift a finger.
Chemical abrasion kits are known by different names under different brands, like a floor renewal kit or a floor refinishing kit, but for the most part, they all do the same thing. The kits include a refinishing solution, finish, applicator block (with an abrasive surface), and cleaning pads. These kits are best used on floors with superficial scratches.
Pour the refinishing solution into a paint pan, and apply it with the block by scrubbing back and forth with the grain of the wood. Put some pressure on the block to scratch the wood’s surface. Work in small sections to prevent the solution from seeping between boards.
Wipe off the excess etching solution with a clean towel or cloth before moving to the next section. You might need a few cloths and towels if they become saturated.
Put on shoe covers and use a sponge mop dipped in a bucket of warm water with a small amount of dishwashing liquid to remove the rest of the etching solution. Make sure to remove as much water from the mop as possible before cleaning the floor. If you create any puddles, wipe them up right away to prevent damaging the floor.
Regularly cleaning your flooring can go a long way in not only making it shine but also making it last. Dirt and debris can scratch your floor and create more problems. Clean your floors with the products and equipment recommended by the manufacturer.

Let the floor dry completely, and apply the finish according to the manufacturer’s instructions.

A buffer typically cannot reach all of the nooks in the perimeter of your room, so you’ll want to hand-sand hard-to-reach places.
Grab your 120-grit sandpaper and hand-buff floors with the grain four to six inches from the baseboard and continue sanding until there’s a top layer of powder. Run your hand over the wood to ensure a smooth finish.

Before starting the buffer, hammer down any protruding nails to avoid damage. Then, put on your dust mask and place your buffer in the middle of the room on a 120-grit sanding screen.
Start buffing in the middle of the floor to get a feel for the equipment. Once you figure out how to maneuver the buffer, you can move freely across the floor. Move with the direction of the grain and buff the hardwood floor from side to side.
Be sure to only go over each area once or twice to avoid cutting into the hardwood finish. The old finish will turn to powder, so you’ll want to stop and vacuum up the dust frequently.
Once you’ve finished buffing the floor, leave the room sealed shut for up to 15 minutes to let the powder layer settle.
Once settled, use a shop vacuum to clean the floors thoroughly and remove all powder—double-check the strips in the floorboards. Use a microfiber mop to remove all dust and debris from the floor. Ensure there is no remaining residue.
Now it’s time to don the respirator that covers your nose and mouth and the booties for your shoes. By now, you’ve chosen to use either oil-based polyurethane, which takes longer to dry between each coat, or water-based polyurethane, which is considered more durable.
Tape your baseboards along the perimeter of the wall. Next, take your finish and strain it through a cone filter into a clean watering can without the sprinkler head. Then pour the finish into a plastic container.
Choose a starting point that’s furthest from the door. For an oil-based finish, use a natural bristle brush and a synthetic brush for water-based finishes. Take your brush and start stroking the polyurethane along the perimeter of your room.
Pro tip: You may want to apply a base coat to water-based polyurethane solutions to provide proper coloration and smoothness.

Grab your long-handled roller with a ¼-inch thick nap cover. Pour your finish in line with the grain, and use your roller to work with the grain, and then move across your floor. Continue to overlap your strokes and keep a wet edge.
Pour more finish onto the hardwood and roll across the floor until the entire floor is covered. Keep in mind that water-based polyurethane dries very quickly, so you’ll have about 10 minutes to spread your finish across the floor.
Wait for three hours for water-based and up to eight hours for an oil-based finish to dry. Add another coat. Wait a week before putting your furniture back in the room to avoid scratching and scuffing.
Hardwood floor revitalizers are like super cleaners that go much deeper than your average dish soap. They clean deep into gouges and scratches while also filling the space to hide the damage.
You’ll need protective equipment, including rubber gloves and safety glasses. Use painter’s tape to tape off baseboards and vents to prevent the revitalizer from getting on them. Next, use a paint brush or roller to evenly coat the floor with the revitalizer. These solutions generally come out of the bottle a white color but become translucent as they dry.
Let the revitalizer dry according to the manufacturer’s directions, and do not move any furniture (or anything else) onto the floor until after drying is complete.
Hardwood floors build character over time, but there’s a point where the character can turn a little worse for wear. That’s when it’s time for restoration. The telltale signs include scratches and fading. A few scratches are no big deal, but if scratches cover most of the wood floor and you’ve got gouges, too, it might be time for a little TLC. With fading, the sun can bleach hardwood, but you can restore its vibrancy with the right methods.
More extensive damage might go beyond restoration. These signs include board discoloration, mold, mildew, board separation, and cupping, and these all result from excessive water exposure.

On average, it costs $1,870 to refinish hardwood floors. However, the cost to refinish hardwood floors varies by the type of wood along with the condition, shape, and size of the floors. Pros typically charge between $3 and $8 per square foot. Additional fees might get tacked on if you opt for a dust-free finish or any special coatings.
There’s a fine line between when you’d be better off sanding and when you’d be better off restoring without the sander. The age of the home, your goals for the home, and the size of your budget are all factors that influence whether you skip the sander or not.
If the floor has damage that extends deep into the wood or if large areas are discolored, warped, or otherwise visibly damaged, that’s when you’d want to completely refinish or replace parts of the floor versus restoring it. Restoration methods are less intrusive and often less expensive. They don’t usually involve replacing boards or removing layers of wood using a sander. If you’re not sure which option would be better, consult with a local wood floor installer or refinisher.
However, if the floors just need a good cleaning and revitalization, restoration methods can often bring them back to life. At the same time, they can save you money and set the floors up for years worth of use before they need to be refinished.
Daily, weekly, and quarterly maintenance will ensure the health of your hardwood floors. Dust the floor daily using a soft microfiber cloth. This removes dirt and debris that could potentially scratch the floor. If you use a broom, make sure it has soft, angled bristles.
On a weekly basis, use a hardwood floor cleaner that’s approved for the finish of your floor. Keep contact with liquids to a minimum, making sure to remove as much liquid from the mop as possible. Do not use acidic or abrasive cleaners.
Every few months you’ll want to use a hardwood floor polish to spruce up the floors. Opt for water- or urethane-based polishes because they don’t leave residue or waxy buildup behind.
Other ways to maintain your floors:
Use floor protectors under furniture
Do not wear high heels on hardwood floors
Wipe up spills right away
Don’t use steam cleaners, wax, or vinegar on the floors
DIYers can save an average of $1 to $2.50 per square foot by buffing floors themselves and up to $300 by tackling the job of polishing hardwood floors.
However, handy homeowners need to account for the cost of renting a buffer and shop vacuum and purchasing the tools and supplies required for this project.
When you hire a hardwood flooring pro, they’ll come equipped with the necessary tools, supplies, and expertise to get the job done right and help you choose the proper polyurethane finish. A pro can also help you assess whether your floors were previously waxed or coated in chemicals, which could pose a bonding problem with the new finish.
From average costs to expert advice, get all the answers you need to get your job done.
Both materials and labor determine hardwood floor installation costs. This guide breaks down all the prices you need to know before starting your new flooring project.

Hardwood floor repair costs depend on the problem. This guide breaks down common costs based on factors like the type of problem, repair method, and whether you hire a pro or DIY.

It’s impossible to keep floors damage-free over the years. Thankfully, the cost to refinish hardwood floors is far less than the price tag to replace them altogether.
Before repairing or partially replacing flooring, make sure to discuss these hardwood floor repair questions with a pro.

Replacing hardwood floor planks without replacing the entire floor is an intermediate DIY project that most homeowners can take on. Learn how in this guide.

One of the many great things about hardwood flooring is that you can repurpose it. Find out how to properly remove your hardwood flooring for reuse in this guide.