This guide lays out the cost to install a roof vent on your home depending on the type of ventilation that's best for your roof based on several factors.
Give your attic a breath of fresh air


Most of us know that heat rises—but we may not understand exactly what that means for our roof or attic. The truth is, a warm roof or attic usually is not an issue. But an extremely hot attic full of stale air can cause serious problems, especially if moisture creeps in. The possibility of structural damage due to mold and heat should give homeowners reason to take action. Fortunately, installing a roof vent can help alleviate these issues. Learn how to install a roof vent in this step-by-step guide.
Before installing a roof vent, you should determine your roof ventilation needs—mainly, what size and how many you need based on your home’s square footage. You will also have to determine which type of roof vent you need based on installation location and the needs of the attic.
Contrary to popular myths about roof vents, more vents are not necessarily better. You will need to determine the right size based on how big your roof is, which you can calculate simply by finding how much attic surface area you have.
A good guideline to follow is 150:1, which means that, for every 150 square feet of ceiling space in your attic, you will need one square foot of ventilation. So, for a 450-square-foot roof, you would want to install three one-square-foot ventilation holes.
If your roof has a vapor barrier, which is used to prevent moisture from entering your attic, use a ratio of 300:1. This is because vapor barriers put a cap on how much moisture can creep in. Too much ventilation will just leave your attic colder in the winter without the benefit of pushing air and moisture out.
There are three main types of roof vents to choose from, with some more specific subcategories to consider, as well. These are:
Static exhaust vents
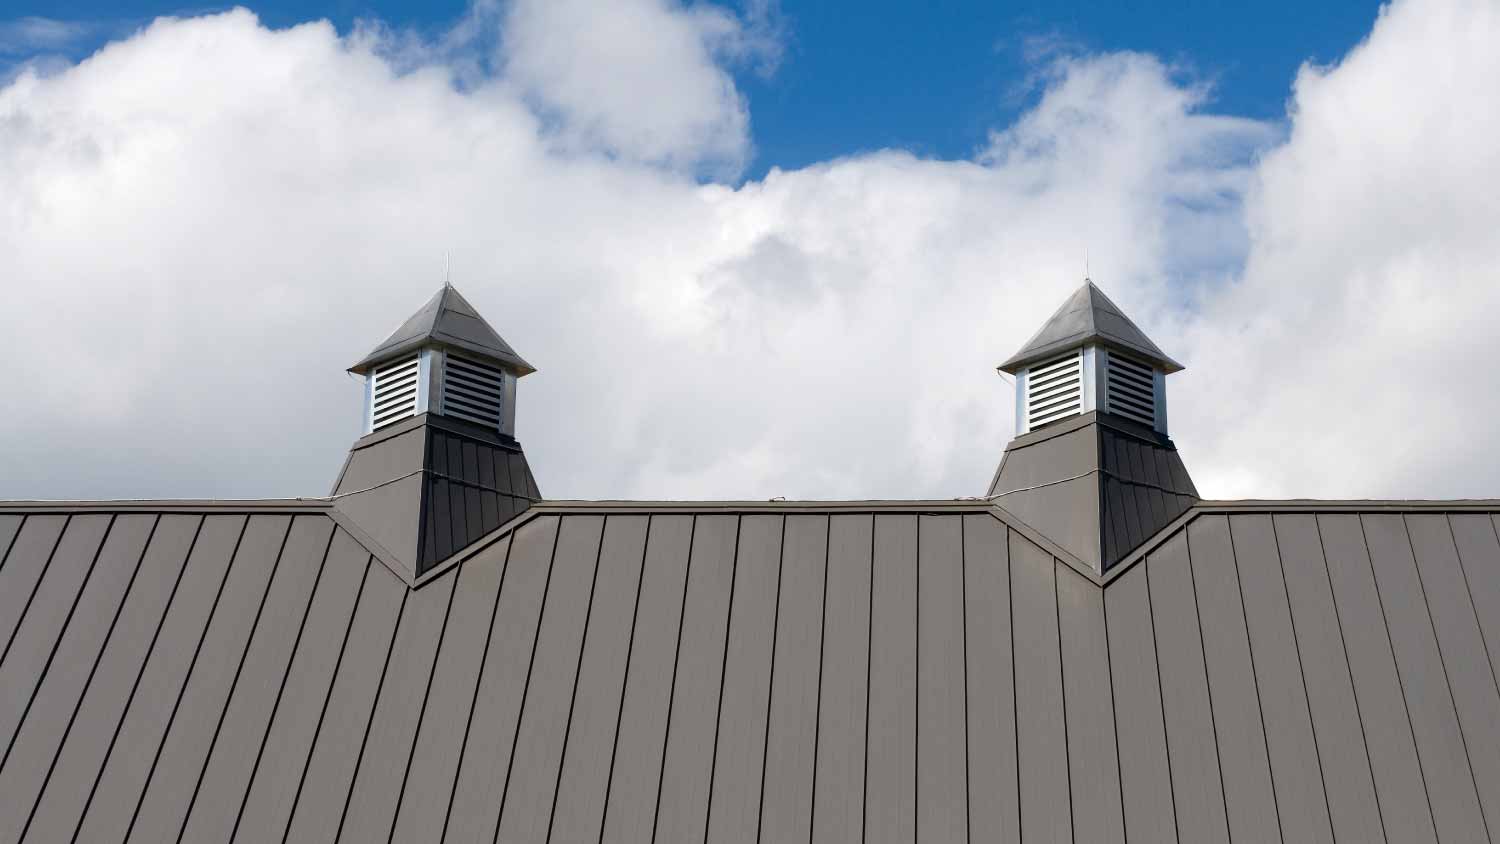
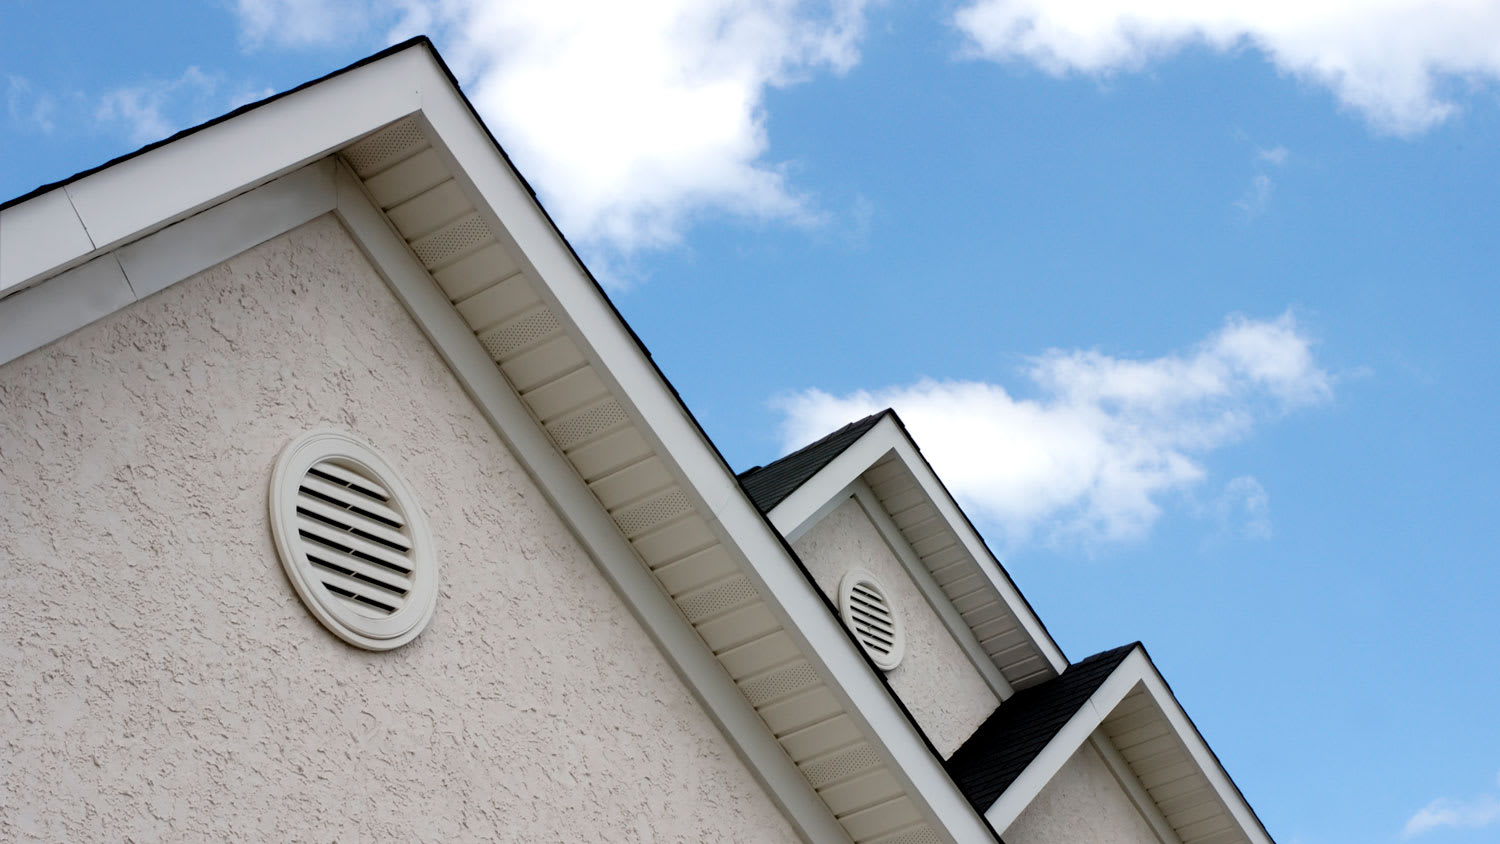
Ridge vents
Soffit vents
Most roof ridge vents cost up to $650. This price is a good guideline for soffit vents and static exhaust vents, too.
While ridge and soffit vents are popular options, ridge vents require a single peak ridge on your roof, which some homes do not have. Soffit vents, similar to the types some people install as a bathroom vent, are installed under the eaves of your roof, which, depending on your attic's layout, may not be an effective position to let out hot air.
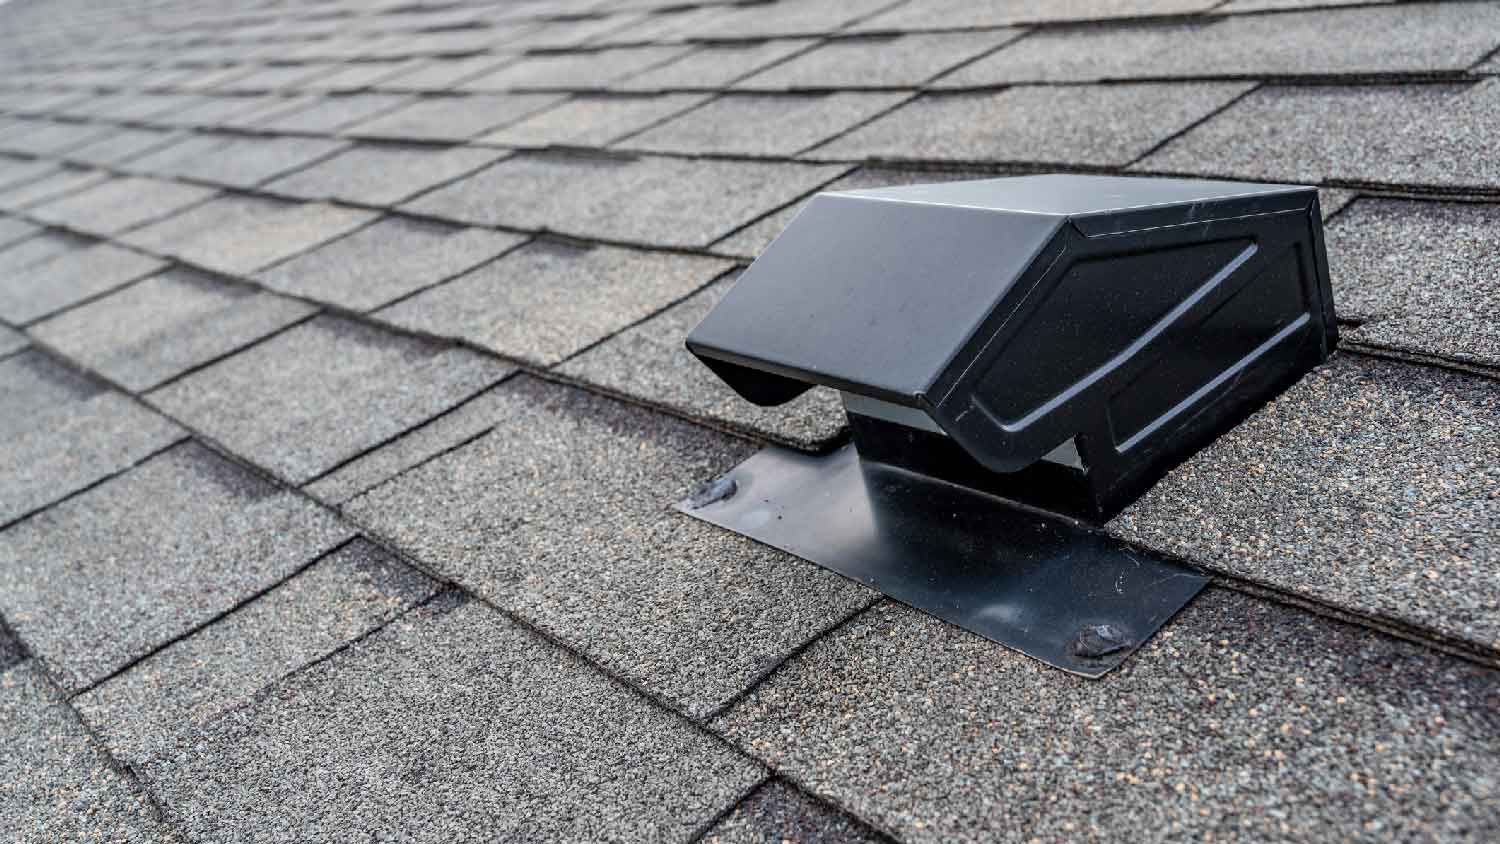
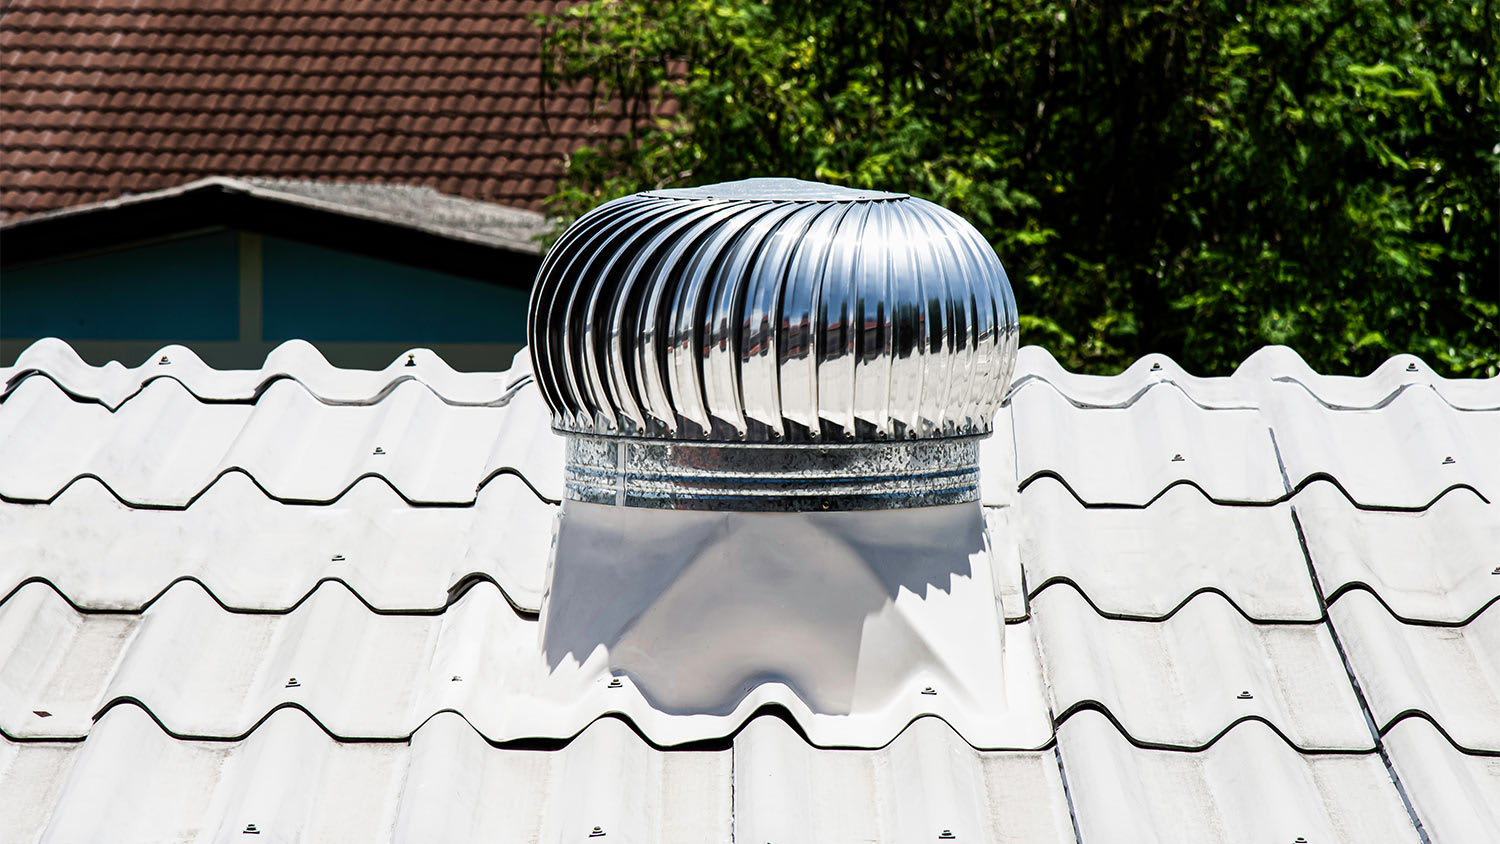
A static exhaust vent is the best option for many homeowners because it gives you the most flexibility. These come in various shapes and sizes (cone, cylindrical, box, etc.) and can be installed on almost any type of roof.
If you are climbing on the roof for this type of DIY job, it’s crucial to take steps to keep yourself safe.
Secure the ladder: In addition to adhering to the ladder safety tips we’ll discuss next, you can purchase a ridge ladder hook to attach your ladder securely to the roof ridge, reducing the chance of it slipping out of place and leading to a fall.
Use a safety harness: Purchase a safety harness and attach it to a secure item on the roof to prevent falls to the ground in case of a slip.
Wear protective footwear: At a minimum, you want rubber-soled shoes or boots for maximum traction. Some people like the traction of skate shoes for roofing, but they are less durable than work boots.
Clean the work area: Don’t leave tools or other items on the roof where you could trip over them.
Avoid working on wet days: If at all possible, don’t start to install a roof vent on a wet day, or you’ll increase your chances of slipping.
You will need to climb onto your roof and prepare the area from the outside. Be sure to practice good ladder safety, such as having someone hold the ladder from the bottom while you work. Only work in good weather conditions, meaning no wind, rain, or extreme temperatures, and be sure to climb slowly and one rung at a time. Ask a local roof repair professional for help with installing your new vents if you are not comfortable climbing onto a roof.

The first step to installing a roof vent is to decide on the best location. For static roof vents, the best place is somewhere near the peak of the roof. Heat rising will escape naturally, helping to create essentially a vacuum effect that moves out warm air and moisture.
Determine the ideal location, then use a hammer and a nail to mark the point where you will cut into your roof for each roof vent.
Avoid cutting the hole in a spot where support trusses or rafters are directly underneath, or you could damage these support materials. To avoid this issue, go into your attic, where you can see the trusses and rafters. From the attic, pick the best spot for the roof vent installation that avoids the support materials. Then drive the nail upward through the roof in the desired spot. Look for the point of the nail that marks the desired location of the vent when you climb back on the roof.
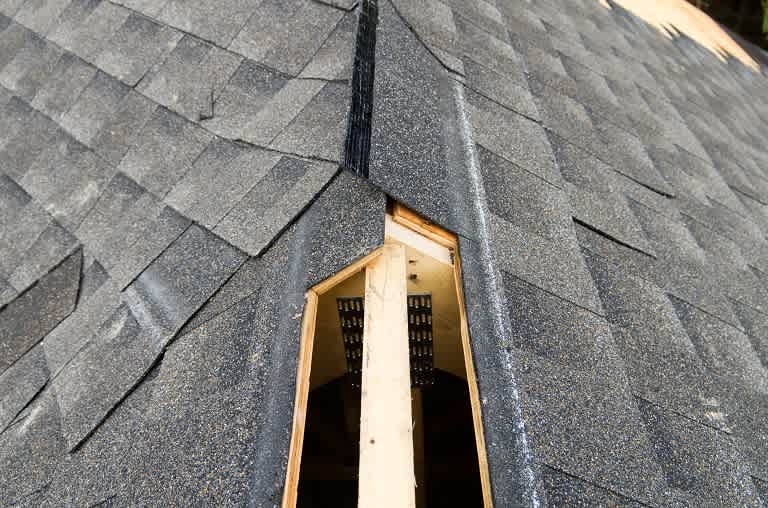
In the spot where you will install the roof vent, remove the full shingles that are over the spot where the hole will be. Use a pry bar to pull up the roofing nails used to attach the shingles. If screws hold your shingles in place, use a drill with a screwdriver bit in reverse mode to remove the screws and detach the shingles where the vent will go.
Do this step carefully to avoid damaging the shingles you’re removing or the nearby shingles. Set the removed shingles aside, as you’ll need to reattach them later.

Find the nail marking the vent’s location and draw a circle or square around it that matches the diameter of the vent. Use the hole saw or jigsaw to cut through the wood of the roof deck and whatever type of underlayment material you have on the roof to create the hole for the vent pipe. You may want to cut the underlayment with a utility knife and remove it before using the saw directly on the wood roof deck.
To help cut the deck, use a drill bit to create a hole large enough to accommodate the jigsaw blade. Insert the blade in the hole and start cutting. Afterward, remove the wood and make sure the vent fits. If the hole is too small, expand the size of the hole as needed. You want the vent pipe to fit snugly.
Now you’ll need to cut the removed materials before reattaching them. The replaced shingles need to go under the vent, so you must cut them with the utility knife to account for the vent hole.
Use the tape measure and mark the exact spots to cut. When finished, you should have holes in the shingles that will match the hole in the roof deck when you reattach the shingles.
Cut a similar hole in the underlayment you removed and replace it. Then refasten the old shingles with roof nails or screws around the hole. You can also use roof glue to ensure a tight seal. Use caulk on any old nail holes in the roof deck to prevent leaks.

Slide the vent into place, working the flange under the surrounding shingles or other roofing material. Fit each exhaust vent to each hole you create.
Some ventilation systems may give you the option to screw or nail the device directly into the roof. This is a good way to secure it, but caulking will also provide enough protection, so long as you cut the hole properly to fit.
Because a roof vent’s main job is to ventilate the attic and prevent moisture buildup, most of the signs that you should install one deal with the consequences of excess moisture. Proper roof vent installation can help prevent many of these issues.
It is probably safe to say that most of us do not spend a ton of time in our attic—but moisture does. It makes its way there as it rises from the lower areas of the house and can form on the underside of the roof deck when the temperature and relative humidity is different outside than it is inside. If you suspect there is a moisture issue in your attic, it is time to head up there and do an inspection. Moisture can result in dark stains, rust on nails or screws, frost, and wet insulation.
If moisture is left too long, it can create mold and mildew—fungi that grow as a result of excess moisture that may damage the structural integrity of the roof deck and rafters, as well as create health hazards to people and pets. Mold and mildew in an attic is a sign that you may need more roof vents.
Ice dams form in the gutters as ice and snow on the roof melts and refreezes throughout the winter. This ice can work its way under the shingles on the edge of the roof and cause leaks in the attic. So, what do roof vents have to do with melting ice and snow on top of the roof? If the attic is not properly ventilated, it can cause the roof to be warm in some places and too cool in others, which causes the snow to melt unevenly and exacerbate ice dam formation.
Leaks in the attic can happen as a result of ice dams, condensation, and improperly installed or worn-out roof penetrations, including roof vents. If there is a leak in the attic, it is important to track it down and repair it as quickly as possible. And this may mean installing a new roof vent to prevent more leaks in the future.
Proper ventilation also helps to keep temperatures in your home stable, so if you notice a larger-than-average energy bill, it could be that your HVAC system is working overtime to control the temperature, due to improper attic ventilation.
The cost to install roof vents depends on the type of roof vent. On the low end, roof vents can cost around $150 to install, but for more complex roof vents, the total can be closer to $1,000 or more. Here are a few common examples.
Ridge vent: $300 to $650
Soffit vent: $300 to $350
Gable vent: $150 to $200
Turbine vent: $150 to $200
Electric vent: $1,000 to $2,000
You should only do DIY roof installation or repairs if you feel comfortable working on your roof. If you are not comfortable with being up there, your best bet is to hire a local roofing professional.
Always hire a roofing expert who is licensed and insured. This is important because, in the event that something goes wrong, you will not be held liable. It is also smart to ask for references ahead of time.
Stephanie Mickelson contributed to this piece.
Mitchell and the crew were top tier i am so happy with my new roof
D1 Roofing delivers outstanding service from beginning to end, backed by a strong warranty and expert teams. I highly recommend them for their excellence in meeting and surpassing expectations with unmatched communication. Choosing D1 Roofing was flawless decision
This place took $25,000 for a flat roof job with a five-year warranty and never returned to fix the leaks that were caused by their work. These people are not professionals and should not be doing this type of work. They incorrectly changed the pitch of the roof, and caused more damage than...
The technician was very professional and friendly. He answered all my questions and was very thorough. He left the fireplace area very clean . He inspected from the roof and advised me as to other work that might need to be done. There was no pressure there. I was very satisfied with the...
 Supreme brick & chimney
I am really impressed with their timeliness and turnaround. Mitchell came out, and we decided to move forward with their pricing. Our roof was on within a week, and we could not be happier with their team! Amazing company, great prices and honest, dependable craftsmanship. I highly recommend...
Manuel Calvillo is the best option in the area for roofing and you won't be disappointed.
They damaged multiple items on my property, including a marble slab used as a table top, tried to hide it, and refused to pay or replace. Arrived day one without a ladder to access roof & delayed a day. Left a mess in back yard; didn't wear face masks; no show by owner to property to see damages
I've hired Gary/Cherokee Roofing for two different homes, work quality, responsiveness, and completion have been great both times. And the prices quoted were very competitive. I would definitely hire again.
Lyle did a great job removing asbestos shingles from our front porch roof. They worked together with our roofer to make sure that the new roof was able to be installed on the same day that Lyle removed the asbestos shingles.
 Lyle Environmental
Bradley Builders did a good job replacing the roof on our front porch. They color-matched the existing shingles on the rest of the house and installed a metal ridge roll since we live in a historical neighborhood. They did the job while we were out of town. When we got back, everything was...
 Bradley Builders, Inc.
From average costs to expert advice, get all the answers you need to get your job done.
This guide lays out the cost to install a roof vent on your home depending on the type of ventilation that's best for your roof based on several factors.
Roof ridge vents protect your home by reducing moisture in the attic. A number of factors affect ridge vent cost, and we break them down here.
The cost to replace roof vent boots depends on a few factors, like the size of the vent, its location, and your existing roof material.
Who installs roof vents? Your best bet is to pick a licensed, professional roofing contractor to do the job. Learn why in this guide.
Hot or humid attic? Installing roof vents can keep your home cooler and save on utility bills. Learn about roof ventilation systems, pros and cons, and more.
The first step to choosing the right roof vent for your home is deciding between intake vents and exhaust vents. Keep the air flowing with these roof vent options