
Discover drip irrigation system cost estimates, key price factors, and ways to save. Get transparent pricing to plan your home irrigation project confidently.
Conserve water while ensuring the health of your precious plants

In today's world of eco-conscious gardening and water conservation, drip irrigation has emerged as a popular and efficient method for watering gardens. A drip irrigation system delivers a controlled amount of water directly to the base of each plant, as opposed to traditional sprinkler systems that spray water over a wide area. It’s highly efficient and conserves water while keeping plants healthy and controlling weed growth. If you're wondering how to install drip irrigation in your garden, you're in the right place. We'll walk you through each step of the process.
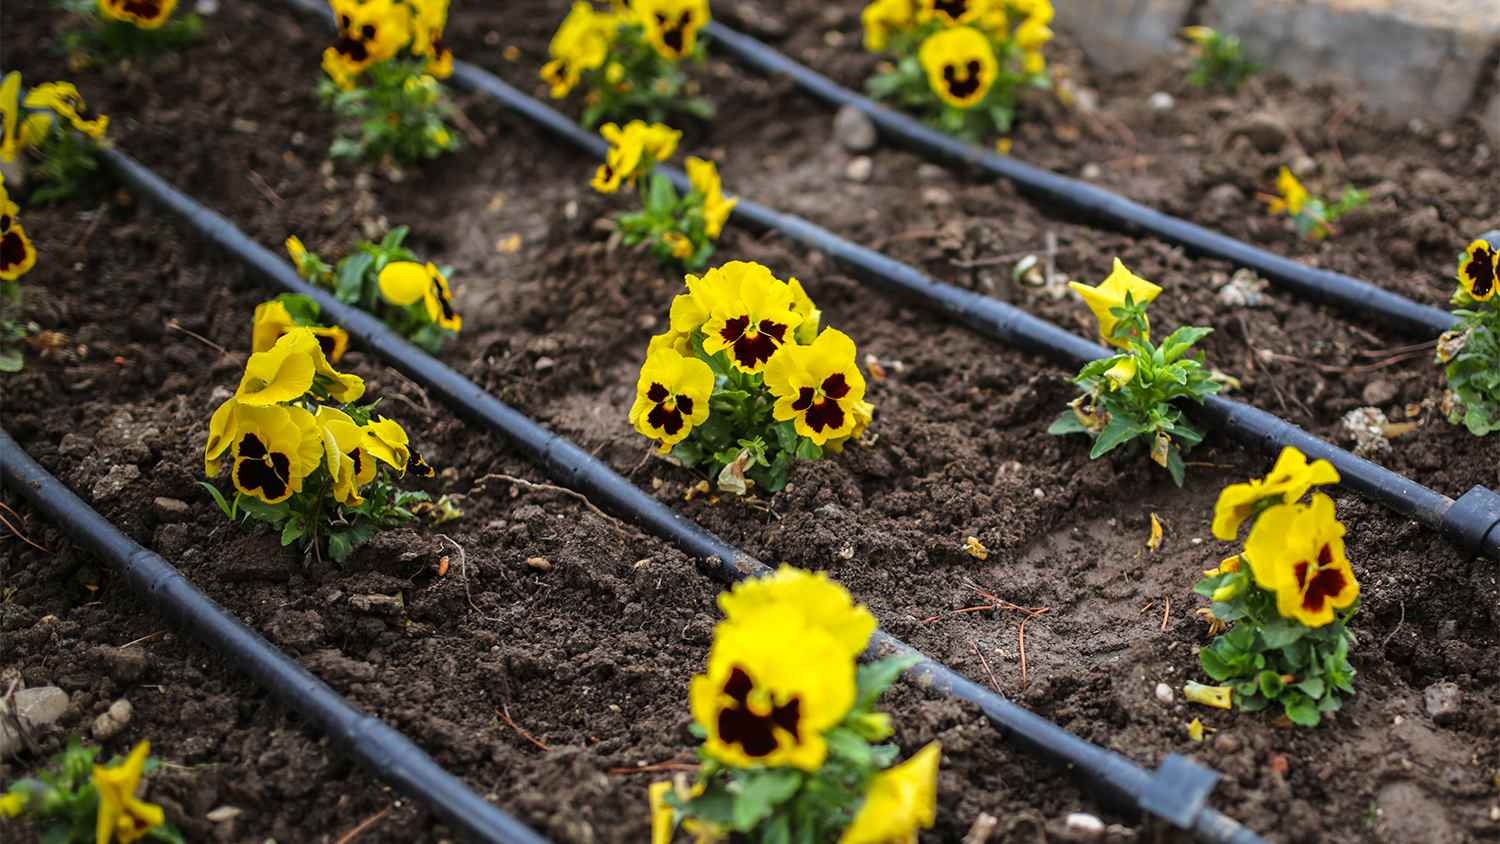
Before you start laying out your drip irrigation system, it's important to map out your grid plan. This plan will help you visualize where you need to place hoses, emitters, and feeder lines to cover your entire garden efficiently.
First, measure your garden and take note of any irregularities, such as corners, slopes, or obstacles. Identify the locations of your plants and mark them on your grid plan. Each plant should be within 1 foot of an emitter. You should also plan the routes for your main hose lines, ensuring they reach all your marked plants. If your garden has slopes or changes in elevation, plan for this in your grid, ensuring that water can flow properly.

Once you have your grid plan in place, it's time to start connecting the hoses. Before connecting any hoses, you need to install a backflow preventer valve to your outdoor faucet. This device prevents contaminated water from flowing back into your main water supply when the outdoor faucet is turned on.
Next, attach the hose adapter and connect the main hose to the adapter, ensuring a secure connection to prevent leaks. Following your grid plan, lay out the main hose line through your garden, making sure it reaches all the areas you marked for irrigation. Secure the hose in place using stakes or clips to prevent it from shifting or getting damaged.

To navigate corners, obstacles, or changes in direction, you'll need to cut the main hose and install tee connectors. These connectors allow you to branch off in different directions.
First, use a pipe cutter to make clean and precise cuts in the main hose where you need to install tees. Then, insert tee connectors at the cut points. Secure each tee to the ground with a clamp to prevent movement.

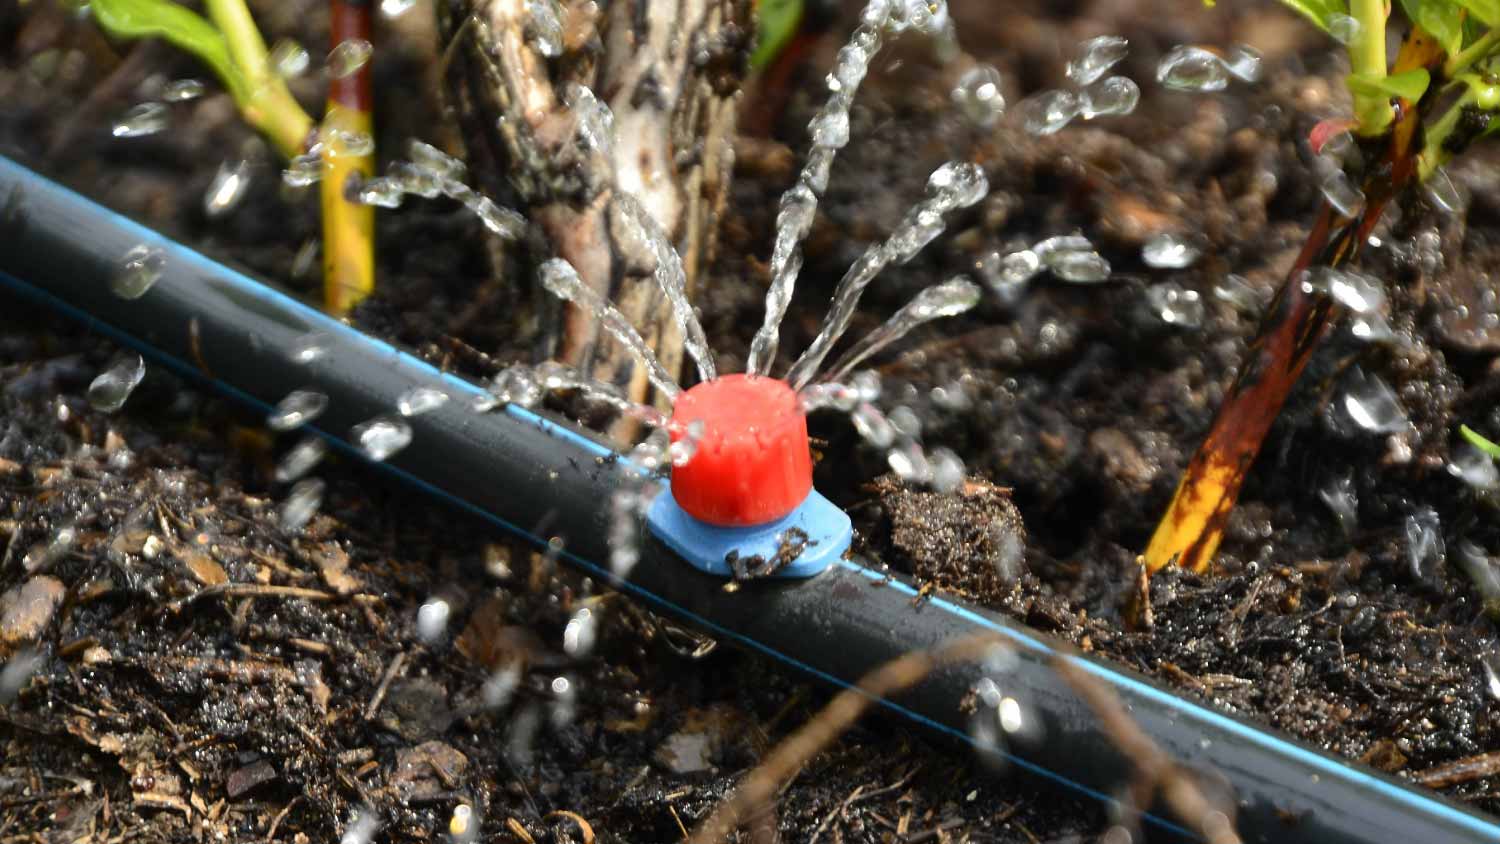
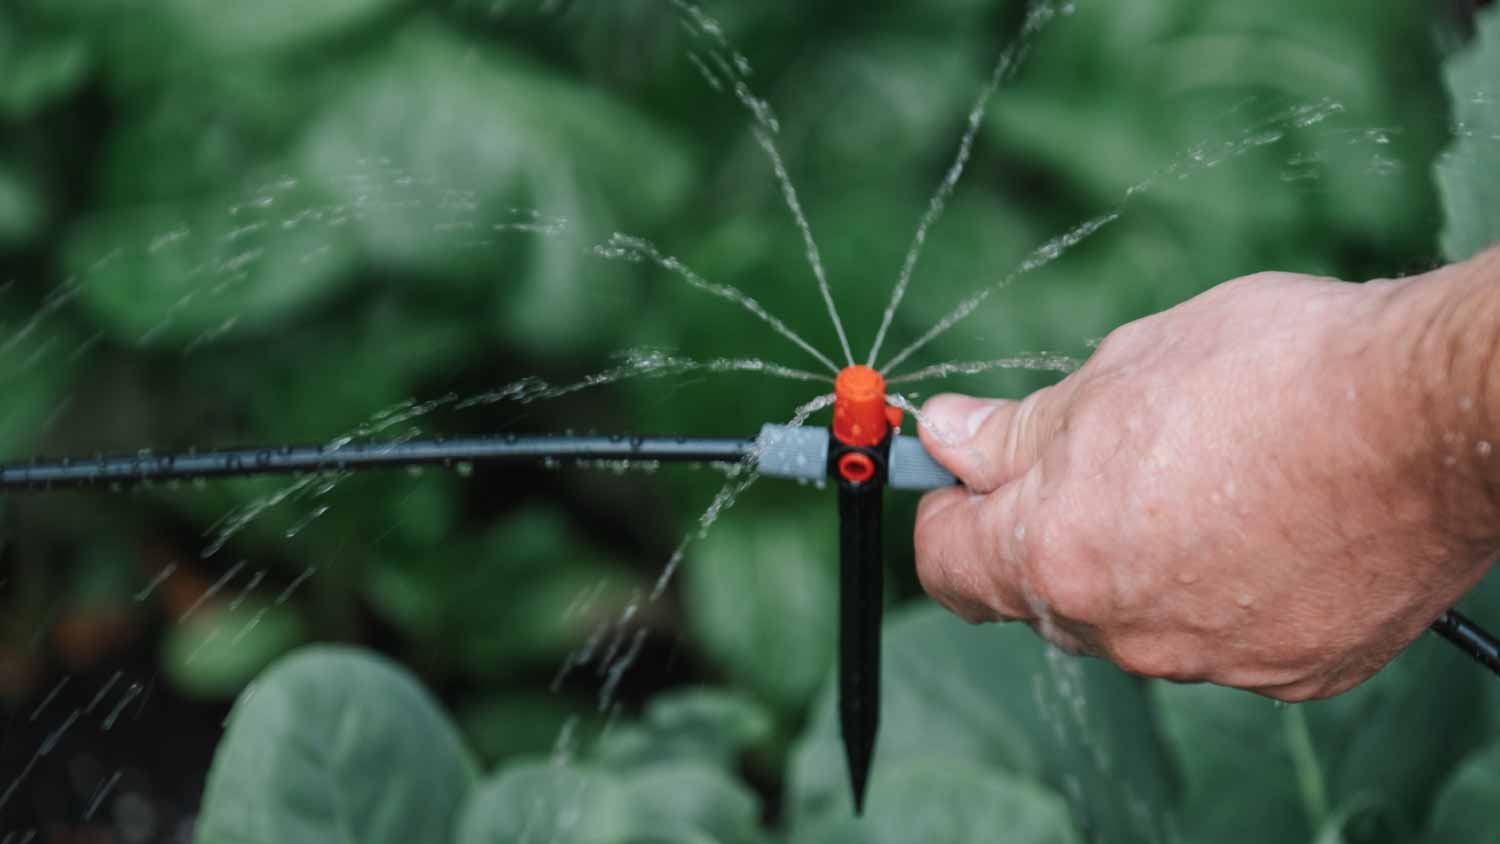
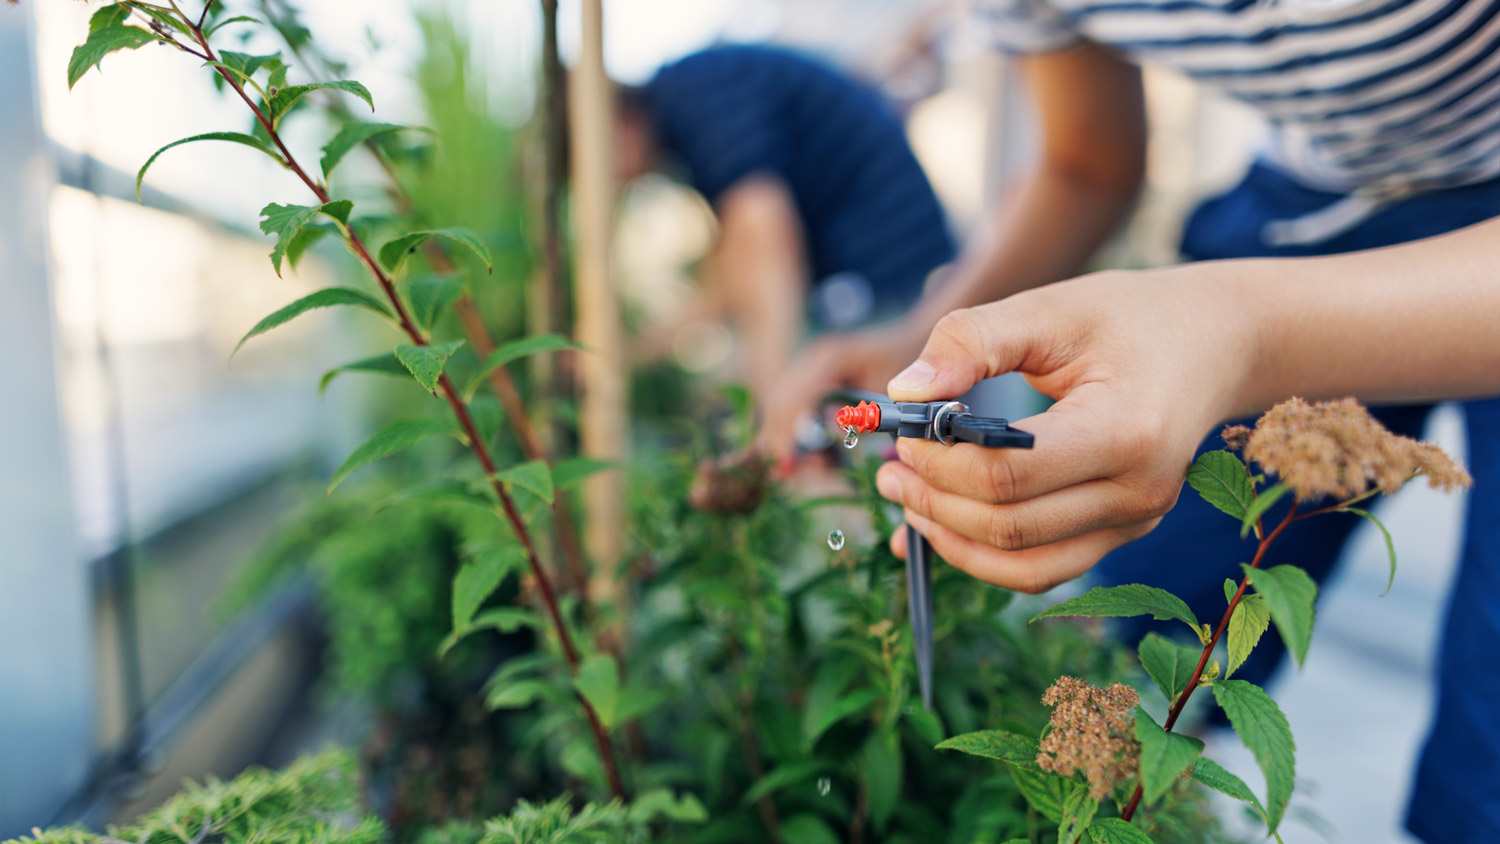
Now that your main hose is in place, it's time to add feeder lines and emitters to deliver water to individual plants. Feeder lines are basically smaller hoses that connect your main hose and deliver water to specific areas of your vegetable garden or flower bed. Emitters are devices that connect the feeder line to the main hose and are also installed on the feeder line to release water directly at the base of each plant.
To install these components, use an emitter tool to punch small holes in the main hose tubing where the feeder lines will connect. Insert emitters into the hose and connect the feeder lines, ensuring a secure fit.
Use your emitter tool again to strategically punch holes in the feeder line tubing where you want to place more emitters. Insert emitters into the holes you created, positioning them near the base of each plant.

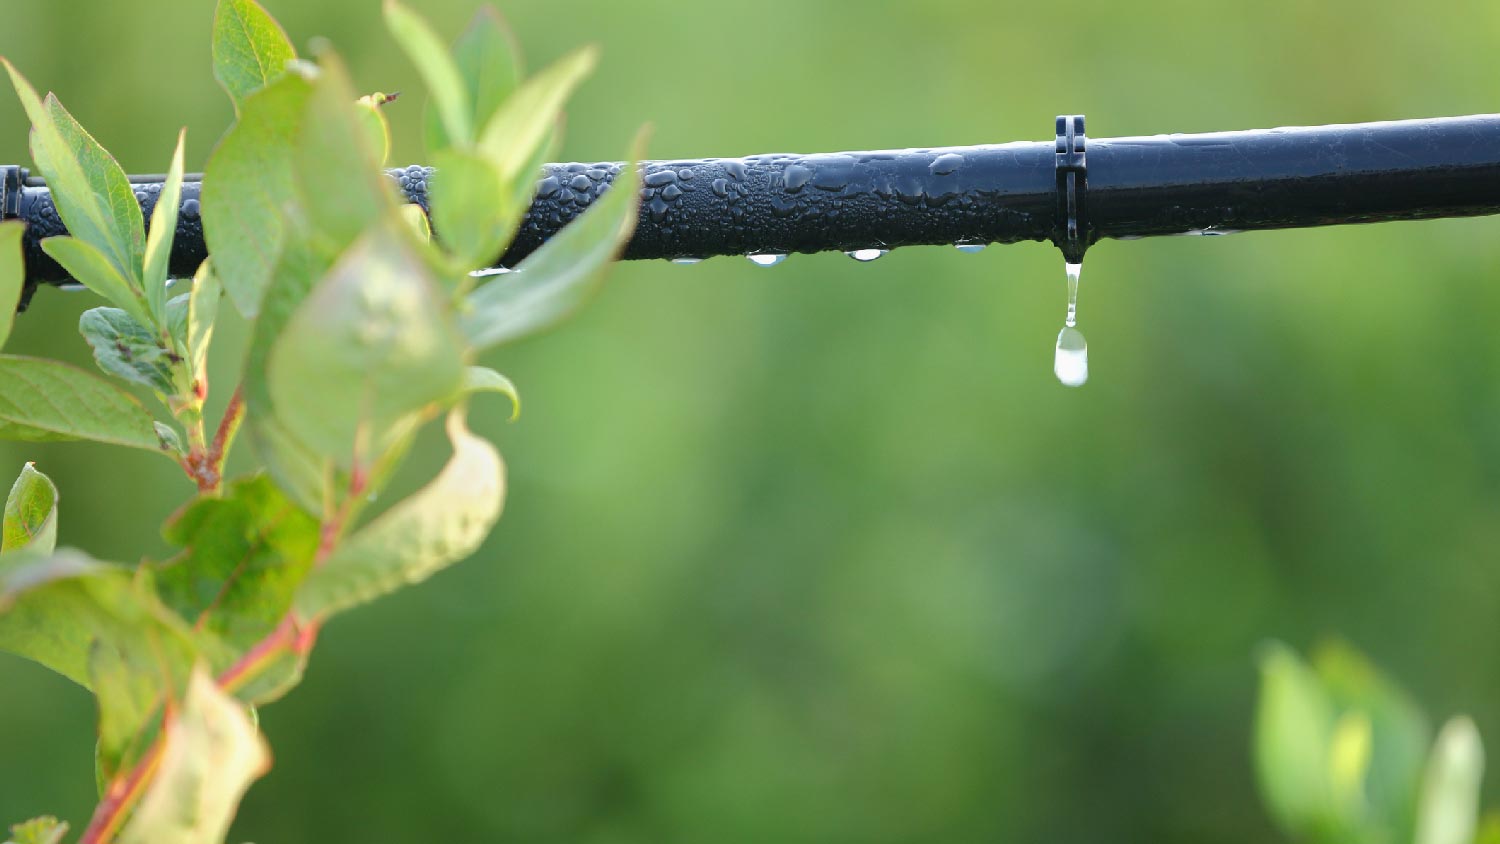
To keep water flow within your drip irrigation system, you’ll need to plug up the ends of your hose lines that are not used for watering. This prevents water from escaping at the ends and directs it to the plants instead. Secure the ends of unused lines with clamps or plugs designed for drip irrigation systems.

To maximize the efficiency of your drip irrigation system, use a layer of mulch. Mulch helps retain soil moisture, prevents water evaporation, and keeps the system concealed for a neat appearance in your garden.
Spread a layer of organic mulch, such as wood chips or straw, over the tubing and around your plants. Be sure not to bury the emitters, as they need direct access to the soil.
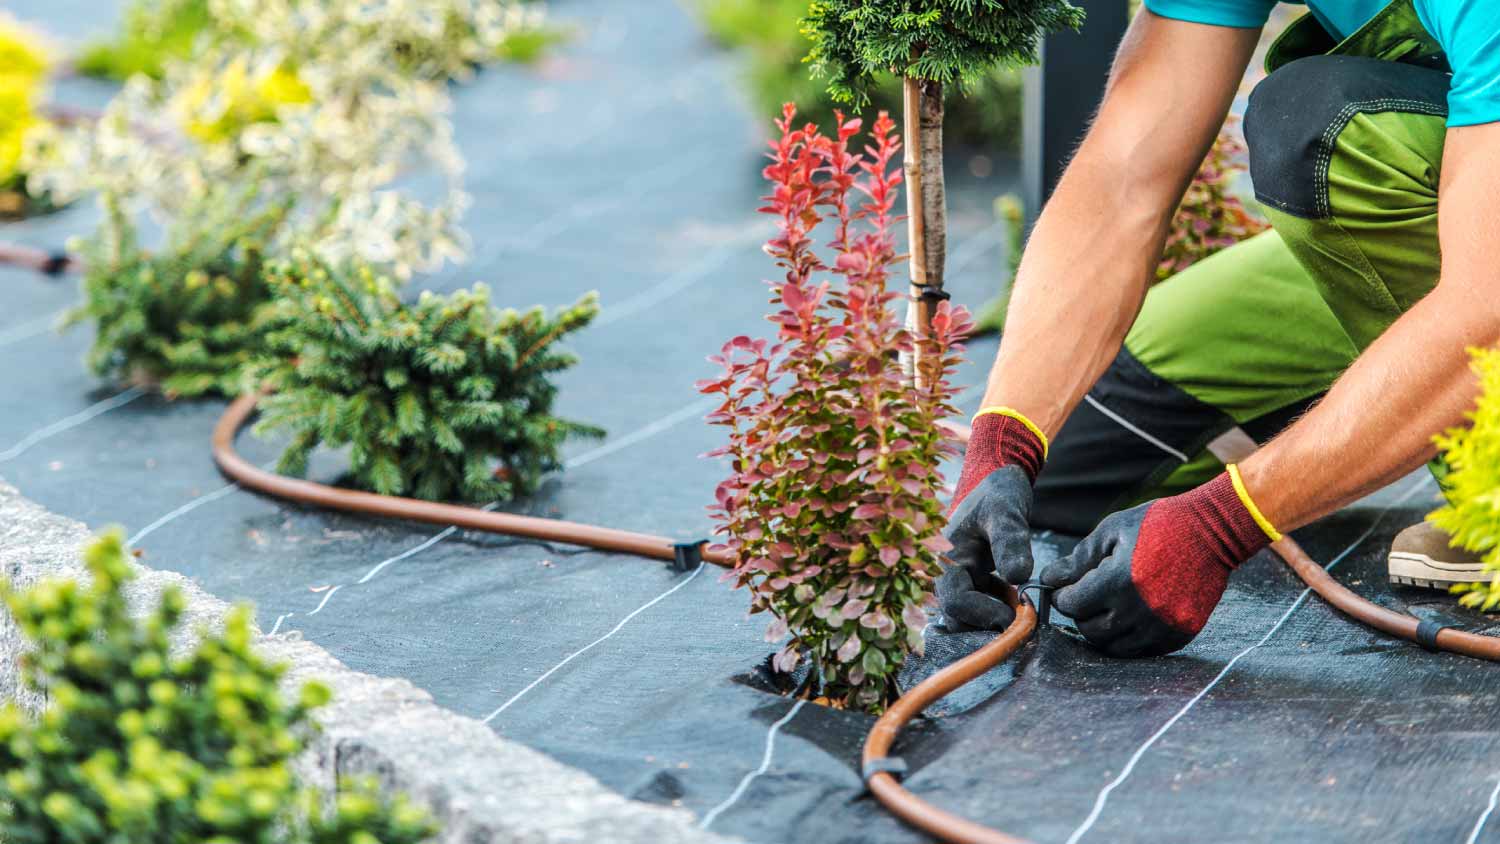
Now that you have a clear understanding of the steps involved in installing drip irrigation, the next decision you'll need to make is whether to take on the project yourself or enlist the services of a local sprinkler company. Both options come with their own set of advantages.
If you opt for a DIY installation, you’ll benefit from cost savings as you won't incur labor costs. Additionally, installing your drip irrigation system can serve as a valuable learning experience, allowing you to gain hands-on knowledge about the inner workings of the system.
On the other hand, a professional brings a wealth of expertise to the table, ensuring that your system is well-designed and operates efficiently. The cost to install a drip irrigation system— between $200 and $850 on average—with a professional can save you time and effort as they handle the intricate aspects of installation.
Ultimately, the choice between DIY and professional installation hinges on your budget, the time you can dedicate to the project, and your confidence in your DIY skills. For those with expansive or complex gardens, enlisting the services of a professional sprinkler company may prove to be the most suitable option.
Cody did a great job!
Wonderful. I am going to have them remove and replace my driveway in the spring.
 All Star Paving and Sealing
We had a 20+ year old landscape lighting system that needed replacement. Midwest Lightscapes worked with us to design a much improved lighting system, lighting the exterior of the house and the back yard. Installation of the 45 light system took one and one-half days, and went very smoothly....
 Midwest Lightscapes
Did an amazing job transforming my yard. Also installed sod in places, would recommend to everyone.
Always been satisfied with the service work and how they have taken care of my pool.
Bill Gerhardt sold the company to his employees at the end of 2019, apparently without a workable succession plan and without notifying prospective customers of this fact. Most aspects of the maintenance contract have not been fulfilled: no installation of anual plantings per contract, no...
They show up and they did take us on as a client which seems to be a problem with other lawn care providers. We have multiple properties and this one was located close to downtown and no one really wants to mess with it.
I was very happy with the service provided by AK Irrigation. They responded quickly to my email, and the woman I spoke with was polite and professional. I was able to get an appointment that same week. <br /> The technician (Tyler) arrived on time. He was very knowledgeable, and worked...
 AK Irrigation
The worker came out when he was supposed to come. He informed me he would honor the Angie's List deal, but would not do any more work for me since my son in law owns lawn care company as well, even though they do not do the same type of work. He said he did not feel comfortable giving me...
 Bello Giardino LLC
E & L Lawn Care was super. They were very responsive before and after service. They were efficient and were able to complete the job within 1 day. I have had concern about one section of sod - the owner was pro-active and did a visit to evaluate. I have no doubt they will stand behind...
 E&L lawn care
From average costs to expert advice, get all the answers you need to get your job done.
Discover drip irrigation system cost estimates, key price factors, and ways to save. Get transparent pricing to plan your home irrigation project confidently.
A sprinkler system saves time and money, but what are the pros and cons of a drip irrigation system? Here’s what you should consider.
Need an effective solution for watering your garden? Here are four types of drip irrigation systems that can help you nurture your plants to perfection.
Drip irrigation is ideal if you want to conserve water while keeping your plants well-nourished. So, what is a drip irrigation system and how does it work?
Drip irrigation vs. soaker hose: Which should a gardener choose? Here’s how to tell which of these watering options will work best for your landscaping needs.
Learning how to convert your sprinkler to drip irrigation saves you money on water use and reduces weed growth. Follow this guide to learn how to do it.