
A brand-new pantry can free up a lot of space in your kitchen. But how much does it cost to build a pantry? This guide breaks it down.
Build your way to sturdy, no-nonsense organization

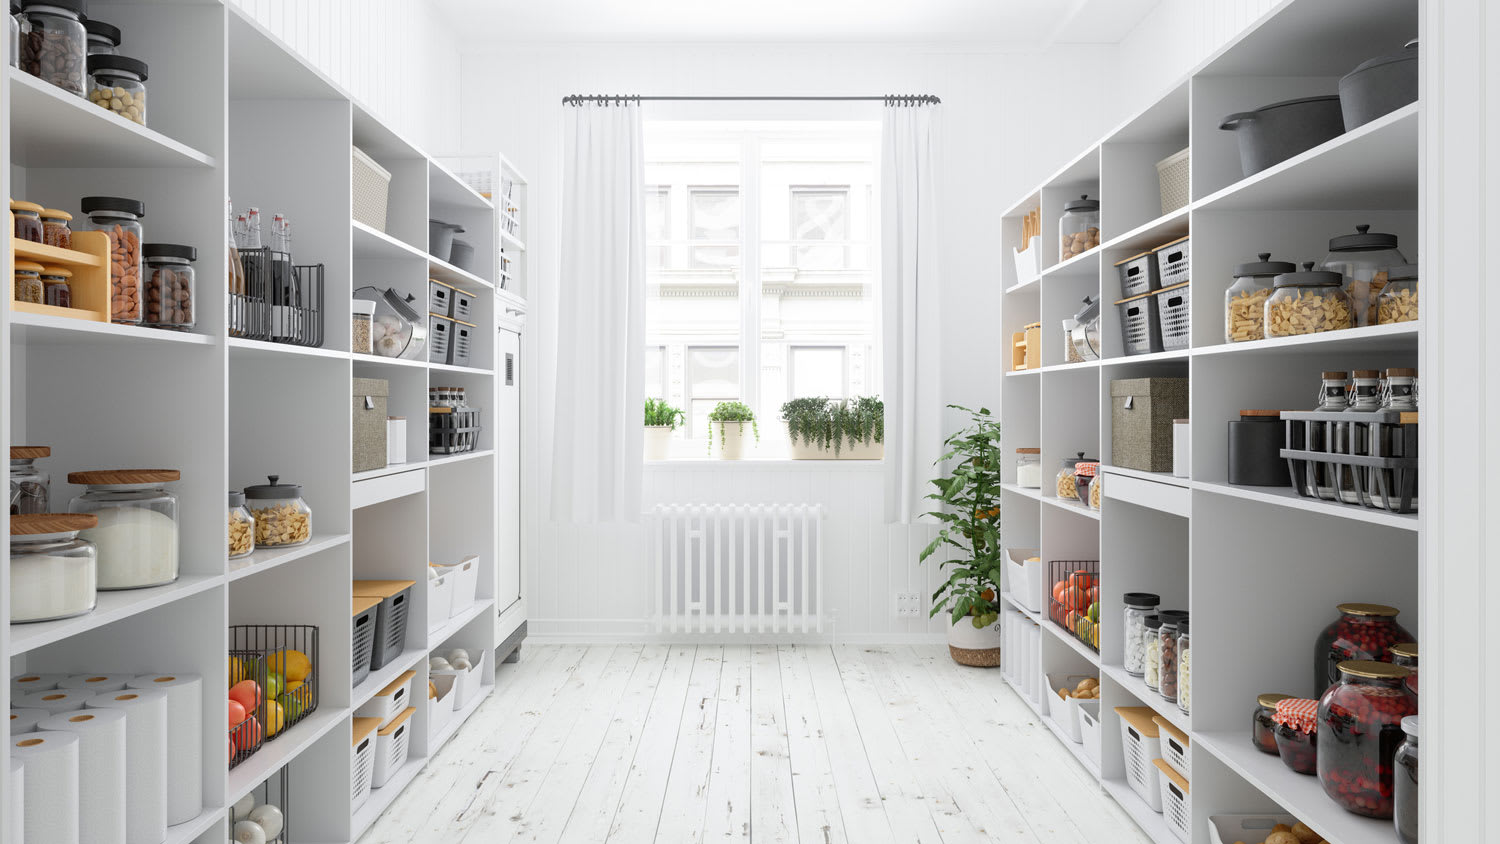
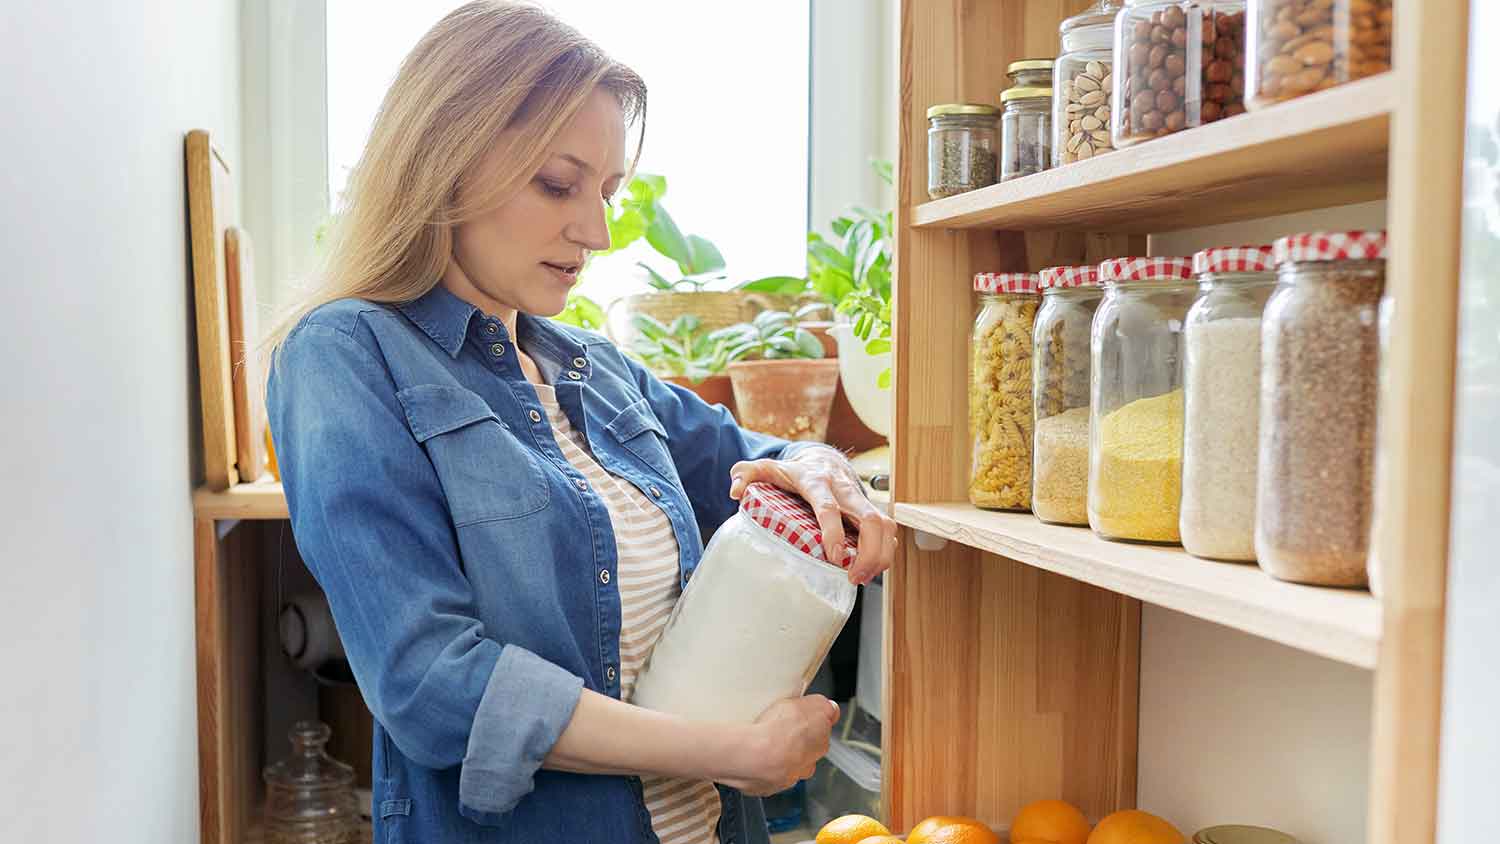
Building DIY pantry shelves requires precise measurements for shelf spacing, with 12 to 16 inches between shelves and 20 inches for floor clearance.
Professional labor costs $20 to $40 per square foot for pantry installation, so a 25-square-foot pantry runs around $500 plus materials.
Use 3/4-inch plywood or pine boards with 1-by-2 support strips, securing each shelf to wall studs with metal brackets for stability.
Hiring a local kitchen designing professional removes guesswork from measurements and ensures your shelves fit perfectly after cutting into existing pantry space.
From your growing collection of spatulas to multiple boxes of your favorite cereals, kitchens have a way of accumulating lots of stuff. You can transform your kitchen space and streamline your cupboard contents by learning how to build pantry shelves inside your existing pantry using plywood, solid wood, or MDF boards. Learn how to build DIY pantry shelves in this step-by-step guide.
If your pantry looks cluttered and lacks any kind of organizational system, it’s difficult to find food items and keep track of them. Building pantry shelves is a surefire way to maximize storage space within your pantry, whether it’s a luxurious walk-in pantry or a small corner space. Plus, you’ll save time and money by knowing exactly where each dry food item, kitchen tool, and cooking appliance is located in your pantry.
Of course, you’ll need to collect the appropriate tools and materials to make your pantry shelving dreams into a reality. Gather the following items:
Paintbrush or roller
Miter saw
Drill
Stud finder
Level
Wood stain or paint
¾-inch thick plywood or pine boards
1-by-2 board
2-by-2 board
Painter's tape
Stainless steel brackets or brads
Pencil
Caulk
Before diving into this DIY project, follow these prep steps for best results.

Most savvy homeowners can build simple shelves, especially if they purchase a pre-assembled closet organizing system. On the other hand, custom pantry shelves, heavy-duty shelves with specific weight ratings, or serious pantry organization strategies require more planning.
Begin by asking yourself: What are your pantry shelving needs? What do you plan to store on the shelves? Measure your pantry from floor to ceiling to determine the total space. Next, determine how many shelves you need to store all your go-to items. Head back into the kitchen and measure the tallest items you plan to keep on each shelf.
Remember that not all shelves need to be the same distance apart. For example, you should leave extra space between the floor and the first shelf to store taller items that do best on the floor, such as large bins, small appliances, or heavy storage. Moving up the wall, designate each shelf for either tall, short, or mid-sized items.
Here's an example:
20 inches from the floor to the first shelf
12 inches from the first to the second shelf
16 inches from the second to the third shelf
10 inches from the third to the fourth shelf
20 inches from the fourth shelf to the ceiling
This breakup allows plenty of space for heavy tall items on the floor and lighter, rarely used items on the top shelf. Shorter shelves make way for cans, small containers, and baskets, whereas taller ones are ideal for tall jars and boxes.
Remember to consider the width of your pantry boards, brackets, and trim board when determining your measurements. If you plan to install lighting or complete other projects along the way, it’s likely worth hiring a local kitchen remodeling or renovation specialist. These tasks are more complicated than a simple DIY pantry shelf project, so you’ll want to hire a pantry shelf pro to ensure it goes according to plan.
Before you hang your pantry shelves, it’s important to locate the studs in the wall to ensure they’re attached securely. You can use a stud finder by placing it upright, depressing the button, and moving it slowly across the drywall until it lights up. Alternatively, you can knock on the wall until you hear a solid (not hollow) sound. Once you’ve found the studs, mark them with a pencil to easily reference where you’ll hang the pantry shelves.
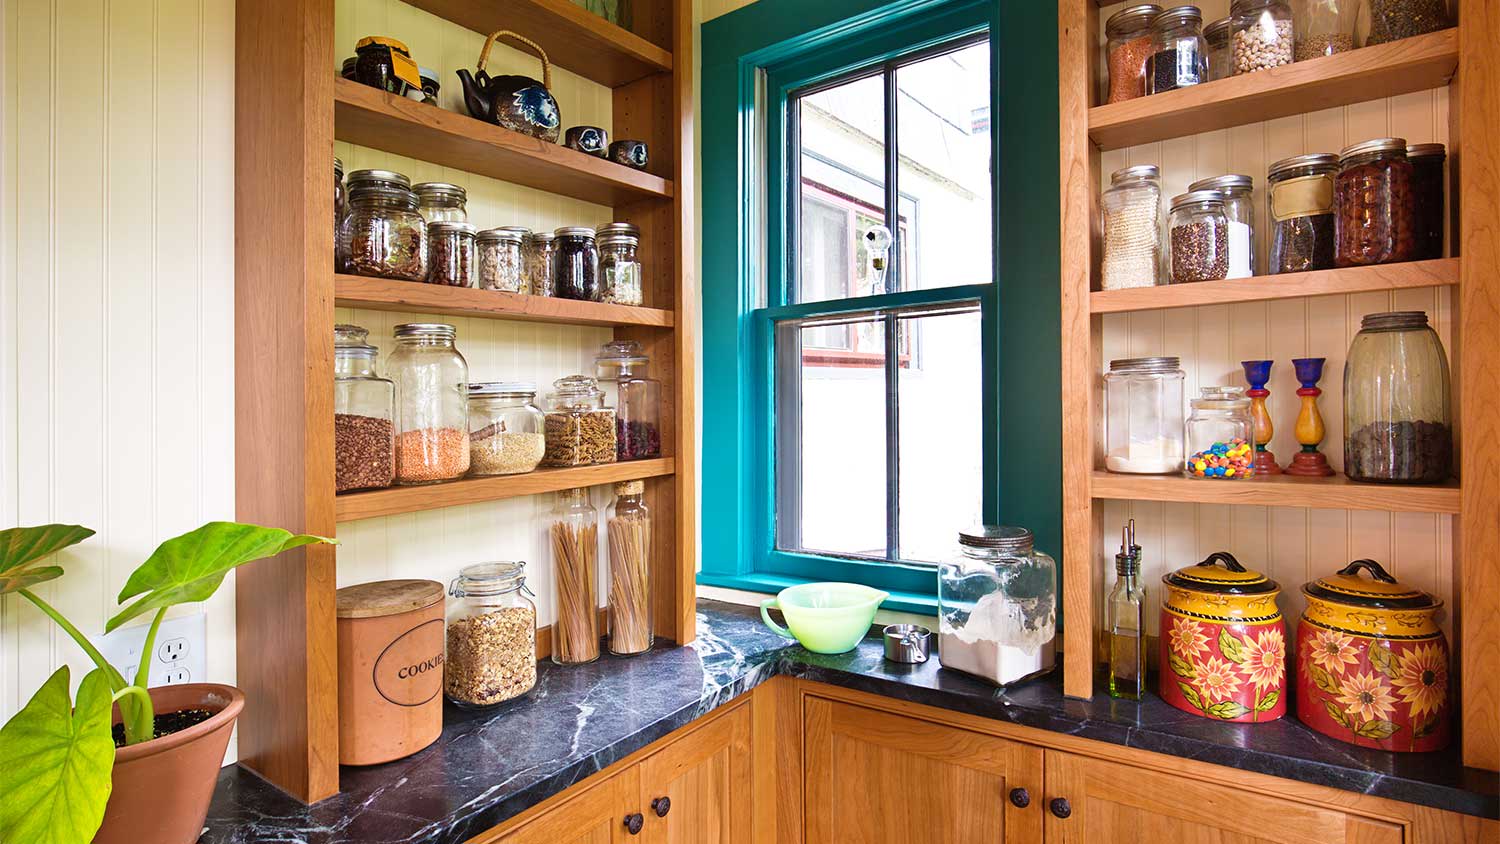
When shopping for pantry materials, you’ll need to pick out a type of wood to use for the shelving. Plywood is a go-to choice for this project because it’s versatile and easy to cut to fit any type of space. However, you should also consider pinewood, maple, or oak for a durable wood choice or hardwoods like ash or cherry that add a touch of hardiness.
Plywood, pine, and MDF are the most common and affordable types of wood used for shelves. You can also find edge-glue board lumber at your local hardware store, often with mitered outer edges for a rounded look. While MDF is often the least expensive option, it can crumble when sawed and is more likely to buckle with too much weight.
Look inside your pantry and evaluate what shelving style will fit best in the space. Here are some options to consider:
One-wall: Standard, back-wall shelf setup
U-shaped: Three-wall shelf setup inside a closet
L-shaped: Two-wall shelf setup with one blank wall
While it’s not essential to light your pantry separately from your kitchen, it’s a helpful addition. You have various options for lighting pantry shelves, depending on your needs, budget, and space. One of the best options is to upgrade your lighting by adding lights underneath each pantry shelf. You can purchase stickable lighting options and apply them on the underside of each shelf to make it easy to find items you need.
As much a visualization exercise as a foundational step for installing cabinets, use painter's tape—and a level—to mark off where to install your shelves. Line the tape exactly one inch below where your shelf will hang so it sits just under where you will install the 1-by-2 wood support strips. This way, you can install the boards right on top of the tape line and then rip the tape away after installation.
Always use a stud finder to determine where you should secure the shelves to the wall. Mark these spots with a pencil. Wall studs are usually 16 inches apart but could be as far as 24 inches.

Here are the cuts and pieces of wood you'll need for your new DIY pantry shelf:
¾-inch thick plywood, wood, or MDF boards
1-by-2 boards
Based on your earlier measurements and wall markings, determine how many pieces of wood you need for 1-by-2 support strips and the ¾-inch shelf boards. You will need to place one 1-by-2 strip below each board for initial support. Always measure twice and cut once. Use a miter or circular saw to cut each piece to size. If you're not working with pre-cut shelving boards, you will also need to determine the depth of your shelves. Standard shelves are 12 and 24 inches deep, depending on space, and it’s standard to have 12 to 16 inches in height between each shelf. Consider a less-deep shelf at the top of the pantry for better accessibility.
Like other areas in your kitchen, pantry shelves face a lot of wear and tear. Adding a coat of paint or staining and sealing the wood can keep your shelves looking fresher longer. You'll also need to stain and paint the wood strips for a streamlined look.
If you opt for paint, choose a high or semi-gloss sheen to make them easier to clean and stronger against kicks from soup cans or storage bins.
However, if you have extra time, consider a polyurethane stain and sealant to retain the natural wood look.
Be sure to follow the instructions on your paint, stain, or sealant can and wait for drying before installing the shelves.
The 1-by-2 wood strips are the support base for your shelves against the walls, so they need to be secured carefully. Move along the painter's tape line you marked earlier and make new marks for where each stud sits along the shelf. Double-check your strips with a level one last time before securing them.
Using a screw gun and three-inch screws, connect the wood strips along each shelf base along the back wall, adding a screw at each stud. Next, add the strips to the side walls where the short edges of the shelves will sit.
Starting with the bottom shelf, mount each board on top of the wood strips. You can use a nail gun to attach them to the strips or add a screw every two feet into pre-drilled holes in the strip below. You may need to make small adjustments to your shelf boards if you're installing an L-shaped or U-shaped pantry. Sand down or adjust the length of your board in the corners to find the right fit before securing.
Your shelves are not ready to go until you've reinforced them with metal or wooden brackets. Attach a metal L-bracket under the front edge of where each shelf meets the wall. If you're building an L- or U-shaped cabinet, add a flat corner brace under the transition of each corner of the pantry shelf. You can also choose to add a DIY wooden brace with leftover 1-by-2 wood, with at least two braces below each side of the shelf.
Caulk is an optional final step to seal any gaps at the back of your shelves or where two separate shelves meet. Add a line of caulk to the seams of the pantry and over the screw for a clean look and additional reinforcement. Let the caulk dry before adding items to the pantry.
To make L-shaped corner shelves for your pantry, here’s what to do:
Measure and cut a back support piece for one side, using a piece of 1-by-2 lumber cut to the width of the self.
Cut three pieces of 2-by-2 lumber to 10½ inches and space them evenly on the 1-by-2 board.
Attach the pieces to the 1-by-2 board using wood glue and two 2½-inch screws per piece.
Attach the assembly to the wall using 3-inch screws, ensuring they align with the marked studs.
Cut two additional pieces of 1-by-2 lumber to 10½ inches; attach one directly to the left wall and the other to the right cabinet.
Cut another piece of 1-by-2 lumber to the width of the shelf and attach it to the front of the framework using wood glue and 1½-inch 16-gauge nails.
Build another framework for the other wall in the same way; attach it to the wall and connect it to the first frame to create an L-shaped shelf.
Add an end 1-by-2 piece to the side shelf framework and attach it to the front.
Cut ½-inch plywood to cover the top and bottom of the shelf frame.
Attach the plywood using wood glue and 1½-inch 16-gauge nails; repeat this process for the side shelf.
Add trim pieces to the edges of the shelves to cover the plywood edge and cut them to size with a saw.
Finish the shelves by filling nail holes and cracks with wood filler, sanding, and applying caulk where the shelf meets the walls.
Prime and paint the shelves to complete the project.
Shelves can be a costly project to outsource, especially in the kitchen. You'll pay about $20 to $40 per square foot in labor when budgeting the costs to install a pantry. A small pantry of 25 square feet can cost $500, plus the cost of materials.
A basic build using MDF boards, plywood, pine boards, or even wire shelves will take you only a few hours of work to install—minus dry time—and can be a perfectly suitable option.
However, always consider hiring a kitchen remodeling contractor if you want pantry shelves that feature electric hookups for lights, appliances, or shelves that need to hold ample weight.
Terrible experience. Walls/trim/floors/cabinets/doors all have drip marks, overspray, etc. Tiling at the fireplace had to be redone by another vendor due to incorrect and shoddy install by Profect. Contractor had his children in our house while he was on site without prior authorization or...
 Profect painting & exteriors
My kitchen cabinets look brand new thanks to Custom Paint Jobs LLC. Their refinishing is exceptional.
If I could give 10 stars for Kitchen Tune Up, I would. I cannot say enough good things about my experience with Kitchen Tune Up and the entire team involved in the process of my kitchen project. They went above and beyond as far as service and quality with my cabinets, paint, countertops, and...
We live in a condo and had space to add a tall cabinet. The problem was the space was already occupied by our catsâ litter box. We needed to still keep the litter box in that same corner. Beiler Custom Cabinets was able to work with our need and design request. What was created was an...
Absolutely amazing, Rob and his team are extremely efficient and professional. Pink Dumpster Rentals, Demolition, And Hauling is a go to for getting my property cleared up so we can pursue the upgrades we want to make on our home.
 Pink Dumpster Rentals, Demolition, And Hauling
They work that 360 did on my kitchen cabinets is nothing short of amazing. I still cannot believe the difference from before and after. Jon and Jeff were both so incredibly professional throughout the whole process and their communications with me were constant and consistent. These guys...
 360 Painting Columbus
I had a variety of projects around my house. The work was done quickly and correctly. I was kept informed of every step during the projects and they followed up with me to make sure it was all good.
Phil understood the style I wanted and suggested options for materials (unlike the standard kitchen folks who kept pushing the same cabinets everyone buys). He stepped through all the decisions about the details with me, using his computer program to show the differences between the choices....
 Baker Group Remodeling
I had a great experience with this company. They installed a small TV on the wall of my kitchen between two cabinets. Team came out and did a very thorough inspection and quote. The rep who installed the TV had to do some extra work to snake the cords behind the wall from the top cabinets...
 The Theater People
I couldn't be more pleased with the job Ryan and his team did! My old oak kitchen cabinets now look like brand new white ones. They were able to provide an estimate based on my photos that was far below other companies I checked with, and that was the final price too. They were able to come...
 Rhino Painting & Color Consulting LLC
From average costs to expert advice, get all the answers you need to get your job done.
A brand-new pantry can free up a lot of space in your kitchen. But how much does it cost to build a pantry? This guide breaks it down.
Are you planning on adding more kitchen storage? Read on for a complete guide on how to build a kitchen pantry, a key storage element for home cooks.
Want to showcase your book collection or increase storage in your kitchen? Learn how to build a custom wood DIY shelf unit of any size in 12 steps.

House your best hardcovers on a DIY bookshelf made by hand. Here are seven ways to do it and all the tips you need to make it strong and sturdy.
Use these 25 pantry organization ideas and hacks to take your kitchen pantry from drab and cluttered to neat and stylish.
There are many elements to consider when designing a walk-in pantry. Our guide will help you find the best walk-in pantry ideas to create your dream space.