







Top-rated mailbox repairers.

Get matched with top mailbox repairers in Cascade, MT

Enter your zip and get matched with up to 5 pros

Need a pro for your mailbox repair project in Cascade, MT?

Select your specific project to find the pro for you.

Find Mailbox repairers in Cascade

SouthWest Flooring
New to Angi
Handyman for Multiple Small Projects

Serving Cascade, MT and surrounding areas

Warranties offered

Small jobs welcome

I’m a skilled finish carpenter and multi-trade professional with over 20 years of hands-on experience, proudly running my own business since 2004. My background includes finish carpentry, tile setting, drywall installation, and flooring—giving me a well-rounded skill set to handle projects from start to finish with precision and attention to detail.\nWhat really sets me apart is my ability to solve problems. Whether it’s fixing something that wasn’t done right the first time or tackling a unique challenge, I take pride in figuring out practical, long-lasting solutions. I treat every job like it’s my own home, focusing on quality craftsmanship, clean work, and results that stand the test of time.\n\nIf you’re looking for someone reliable, experienced, and capable of getting it done right the first time—or fixing what others couldn’t—I’m your guy.

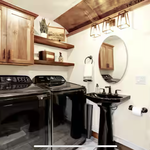
John P Bath full remodel

+1

Montana Handyman Service.com
0.5(
1
)
Handyman for Multiple Small Projects

Serving Cascade, MT and surrounding areas

In business since 1986

Warranties offered

Small jobs welcome

I'm a montana farm boy that started surveying in the 1980's and got my 1st construction job in 1986 working for Don Boutin he was one of the carpenters in town. In 1991 i opened my 1st handyman business. that was my 1st complete bathroom remodal. In 1994 i opened my second business in Heilbronn germany where I learned the ropes of two speaks one idea..In germany I installed doors,floors, trim and a few kitchens too mostly just high end kitches with exotic trim one of my specailitys.. I never used a nail in five years or puddy. most al of my costomers where new builds for one builder I build as manager a 14 aptment complexe and 20 due-plex's.. everything was in geman so I still have problems with words but I get along good with the hutterites... I'm thier to please the costomer and give them what they want without over burding thier wallet.. I don't lie so I'm kind of blunt but worthy of any job.. I'll time it so you can time your life around my work. I'm very clean and it takes extra.

Response time5 days
Response rate87%
Showing 1-10 of 21
Mailbox Repair questions, answered by experts

If you don’t want to purchase furniture sliders, there are several household items that can be used as makeshift sliders. Thick towels or blankets placed under furniture legs can reduce friction and make it easier to slide the furniture without causing damage to the floor. Additionally, plastic or paper plates can be placed under each leg for easy sliding. You can also cut up pieces of a cardboard box to slide beneath the legs of the furniture.

Yes, in most cases it’s a good idea to wrap furniture in plastic to protect it from dirt, dust, and damage during storage. However, natural and porous materials such as wood or leather should have breathable fabric covers to prevent moisture damage from condensation. Either way, it’s always important to ensure proper ventilation to prevent moisture buildup, especially in humid climates. 

Professionals conduct lamp repair by diagnosing the issue, addressing electrical problems, replacing damaged parts, rewiring if needed, and testing to ensure safe operation.

Fixing a drawer that is sticky, askew, or broken depends on the specific problem. Start by removing the drawer and examining the slides and tracks for any damage, bent parts, or loose hardware.

For minor issues:

  • Clean and Lubricate: If the slides are just sticky, clean them and the corresponding tracks with a hot, damp cloth. Then, apply a lubricant like silicone spray or bar soap to help them glide smoothly. Also, check any roller wheels for problems.

  • Tighten Screws: Tighten any loose screws on the slides and tracks. If screw holes are stripped, you may need to fill them and re-drill.

For more significant damage:

  • Bent Hardware: If a slide is bent, you may be able to remove it, straighten it out, and reinstall it.

  • Broken Parts: If a slide or track is broken or severely damaged, it will need to be replaced. Unscrew the damaged part and install a replacement that matches the type and size of the original.

After performing the repair, reinsert the drawer and test it to ensure it opens and closes smoothly, making any final adjustments for proper alignment. It can also be helpful to consult the manufacturer's guidelines for your specific drawer system.

To reinstall a sliding drawer, align the tracks on both sides of the drawer with the corresponding grooves in the cabinet. Tilt the front of the drawer upward and carefully slide it into place, ensuring that the wheels or rollers on the drawer fit securely into the tracks. Gently push the drawer in until it fully engages with the cabinet. Test the sliding motion to confirm it's properly aligned and functioning. Adjust as needed for a smooth operation.

The Cascade, MT homeowners’ guide to mailbox repairs

From average costs to expert advice, get all the answers you need to get your job done.