Curious about how much it will cost to add a return air vent? Our guide will help you discover the cost factors and ways to save on this project.
Advanced DIYers might find it a breeze

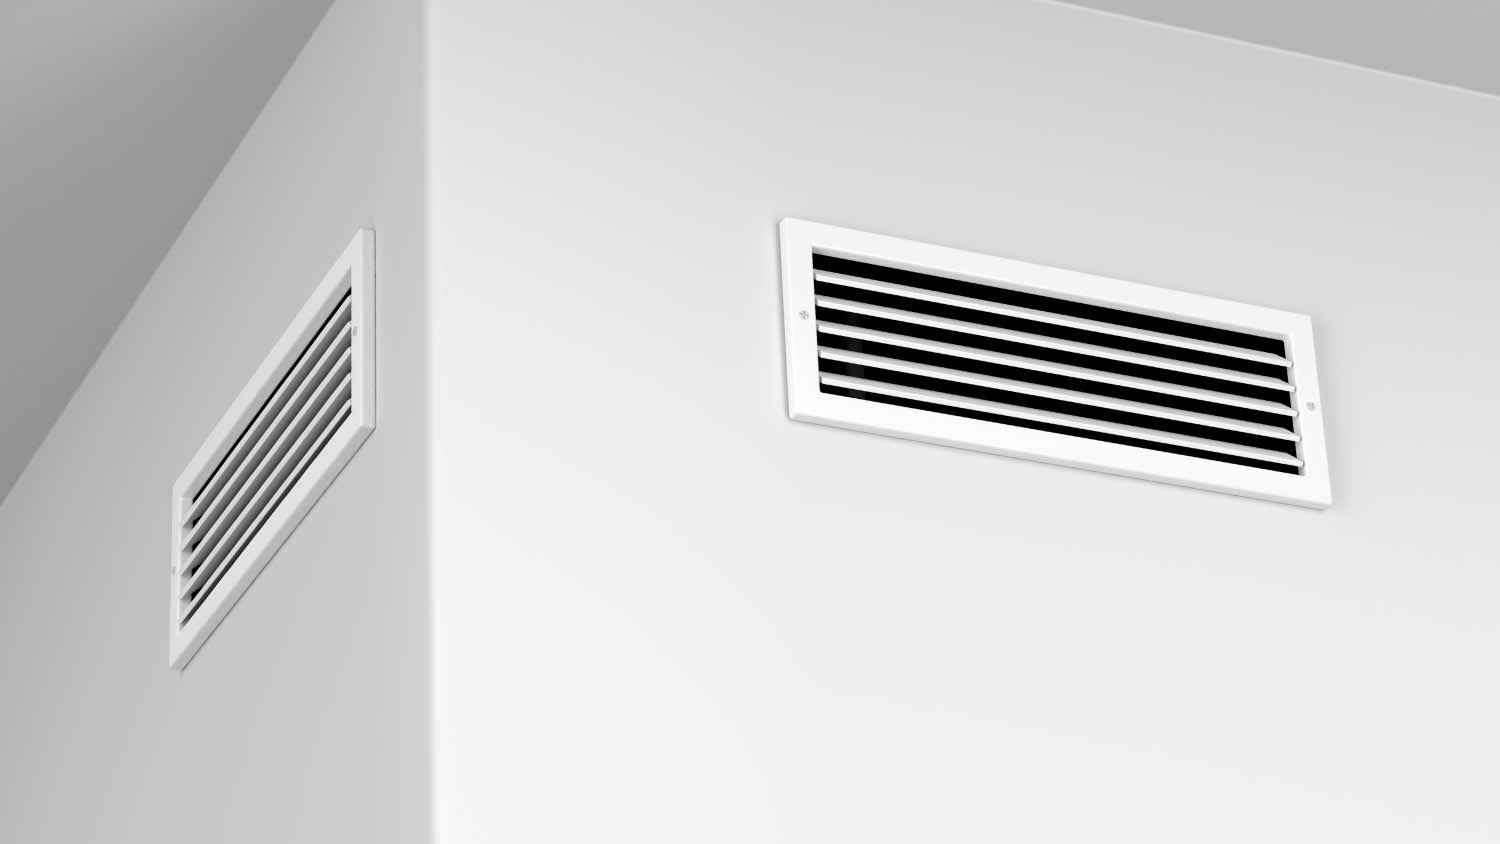
Having central air at home is convenient, but the location of your air ducts might be anything but. If you’re finding that the airflow could be better, or you’re simply tired of decorating around an unsightly grill cover, you might consider moving an air vent to a new location in the wall.
It’s easy enough to call an HVAC pro to move the air vent for you, but if you’re an experienced DIYer, it’s not too hard to learn how to DIY. Here’s how you can move an air vent yourself.
Before you take apart the current ductwork, decide on the location of your new vent. While personal preference plays a role, the room's layout will ultimately determine where you can and can’t place a new vent.
Don’t rush this initial step. You’ll want to confirm that it’s possible for you to install a new vent in the new location before you dismantle the old ductwork. If it’s good to go, mark the spot by drilling a screw through the wall to mark the center of where the vent cover will go. Note: Don’t simply mark the wall with a piece of tape or swipe of a pencil.

Even though you’re not touching any wiring, you’ll want to shut off the power to the heat/cooling system so that no air is moving through the ductwork as you’re working on it.
Next, lay out a tarp or plastic cover underneath the spot where you’ll be cutting a hole for the new vent—it’ll be easier to clean later.
Take your measuring tape and painter’s tape and head up to your attic, crawl space, or other spot that’s housing your current ductwork. (Put on those safety goggles and a face mask to keep away dust and other airborne particles that might irritate your eyes and nasal passages.) With a piece of tape, mark the spot where the screw has come through the wall to designate the new duct location.
Locate the spot of the existing duct and measure the distance between that and the screw to determine the length of ductwork you’ll need to add, if any. Keep in mind that if you’ve got flexible ductwork and aren’t moving the vent far, you might not need to add any new ductwork at all.
The way you disconnect your ductwork will depend on the type you currently have installed. If you have a newer home, you’ll likely have flexible ductwork in your walls, but if you’ve got an older home, you might have rigid ductwork. Here’s how to handle them:
Flexible ductwork is indeed more flexible to work with. All you have to do is loosen the clamp that’s attaching it to the vent and remove the vent collar.
Rigid ductwork might be connected to the vent with clamps or duct tape. If clamps are present, loosen them to remove them. If it’s duct tape, use a utility knife to cut the tape.

If the current air vent was installed properly and you plan to use the same vent cover, you can measure the existing cutout in the drywall and make one the same size in the new vent location.
Otherwise, if you’re using a new vent cover, you’ll want to measure for a new cutout. Using the new cover as a guide, measure the length and width of the grills. Remember, you’re not cutting out the same size of the cover because the edges of the vent cover need to attach to the drywall. Draw or trace the grill area on the piece of cardboard, then cut the cardboard using the utility knife. This will serve as your outline for the cut you’ll make in the drywall.
Using the screw in the wall as the center of the vent cover, trace the outline of the piece of cardboard on the wall. Then, using your putty knife, cut into the drywall and remove it. You might use a jigsaw here for quicker removal of the drywall.
When you’ve cut out the spot where the vent will go, take the sandpaper and lightly remove any roughness around the edges of the cutout to ensure the vent cover attaches smoothly and securely.
If you do have to add a length of ductwork, connect the new vent’s collar to the AC blower in the same spot where the old one was connected. Use S-cleats and drive clamps to join rectangular ducts; for round ducts, use couplings and sheet metal screws to connect. Duct tape can be used but only as a temporary connection as the adhesive is known to deteriorate over time.

Take your drill and screw the vent cover into place over the opening in the drywall. Use the level to make sure it’s on straight.
Turn the power back on and turn up the AC. Stand near the new vent and feel the air coming through it. You’ll want to ensure it’s blowing properly before you seal up the spot where the vent originally was.
Replace the drywall to cover up the old vent opening. Vacuum up any dust or debris that accumulated as you worked. You’re done!
If you don’t have to add ductwork or move the air vent far, this might be a good chance to flex your DIY skills. But if you find that you have to redirect ductwork or deal with wiring, it’s time to call a duct installer near you to discuss your options.
I normally do not leave reviews, but my experience with Worthington Air was extremely frustrating and disappointing. About 30 days ago, I had a consultation done for an HVAC replacement and was quoted approximately $15,079. Based on that quote, I applied for financing through their company...
Great company! Price was competitive, technician showed up on time and completed the job (exterior electric Radon fan replacement) quickly. Would hire them again.
Raven and crew does absolutely fantastic job. They are very professional if any concerns were to occur with any of her work she always took responsibility and finished out with a great job. I have worked with her business for a year and have always been satisfied. Very trusted business and...
I would recommend this company to anyone! He showed up on time, was friendly, completed a very difficult repair on our dryer vent cover, was responsive, and pricing was extremely fair and competitive. I would have him back to do any of our repairs or cleanings without hesitation!
Ace Fireplace Services' chimney sweep service is truly exceptional. They used advanced technology to ensure a thorough cleaning process, and my chimney has never looked better. I highly recommend their services.
 Ace Fireplace Services
The technician was very professional and friendly. He answered all my questions and was very thorough. He left the fireplace area very clean . He inspected from the roof and advised me as to other work that might need to be done. There was no pressure there. I was very satisfied with the...
 Supreme brick & chimney
Excellent experience with hiring Tether House to Mount our 77’ Samsung TV in our bedroom. Fast, friendly, and knowledgeable. Highly recommend.
On time, clean and finished fast. Windows seem sturdy and the finish is good. Caulking was done with no smudges. Would recommend.
Great job...edging and pre clean up went well with a great job with seal coat. Friendly, efficient and professional.
 All Star Paving and Sealing
Good workers and they do a good job.
From average costs to expert advice, get all the answers you need to get your job done.
Curious about how much it will cost to add a return air vent? Our guide will help you discover the cost factors and ways to save on this project.

Curious about air duct cleaning costs? Get insights into pricing factors, benefits, and how to tell when it’s time for a good cleaning.

Your home’s vent placement matters, so where should return air vents be located? We discuss what factors impact your return vent’s performance.

Our guide looks at whether return air vents can be on the floor, how to spot one, and what causes air vents to stop working.

Learn how to redirect air vents with an easy-to-install deflector. You’ll have better airflow without having to call an HVAC pro.
How do you know which vent is return air versus supply air? Learn how to tell your HVAC vents apart with our easy guide.