
The cost to replace trim depends on factors such as style, material, and whether you hire a pro. Find out what your budget could look like for this project.
Accurate measuring reduces cost and frustration

Learning how to measure baseboard trim accurately is partially a lesson in taking measurements and partially about visualization when it's time to make cuts with your saw. Precise measuring will increase installation speed and can save on material costs. This guide walks you through several measuring techniques, depending on which part of the baseboard you're working on.

Before beginning your installation, baseboard repairs, or replacement, you'll need materials. Measure the wall lengths in each room you'll work in, subtracting for door openings and any places where you won't install the material. Add 10% to your total to account for waste. These can be relatively rough measurements, but the more accurate, the better.
When it's time to make precise measurements for cutting, it's essential to know that the loose end on your tape measure is your friend. The looseness accounts for the width of the hook. Test your tape accuracy by taking two measurements. First, pull the tape from the end of a scrap piece of wood and mark your spot. For the second, hold the same wood piece against a flush surface and push the tape into the surface instead of pulling it from the end of the wood. Your mark should land in the same spot.
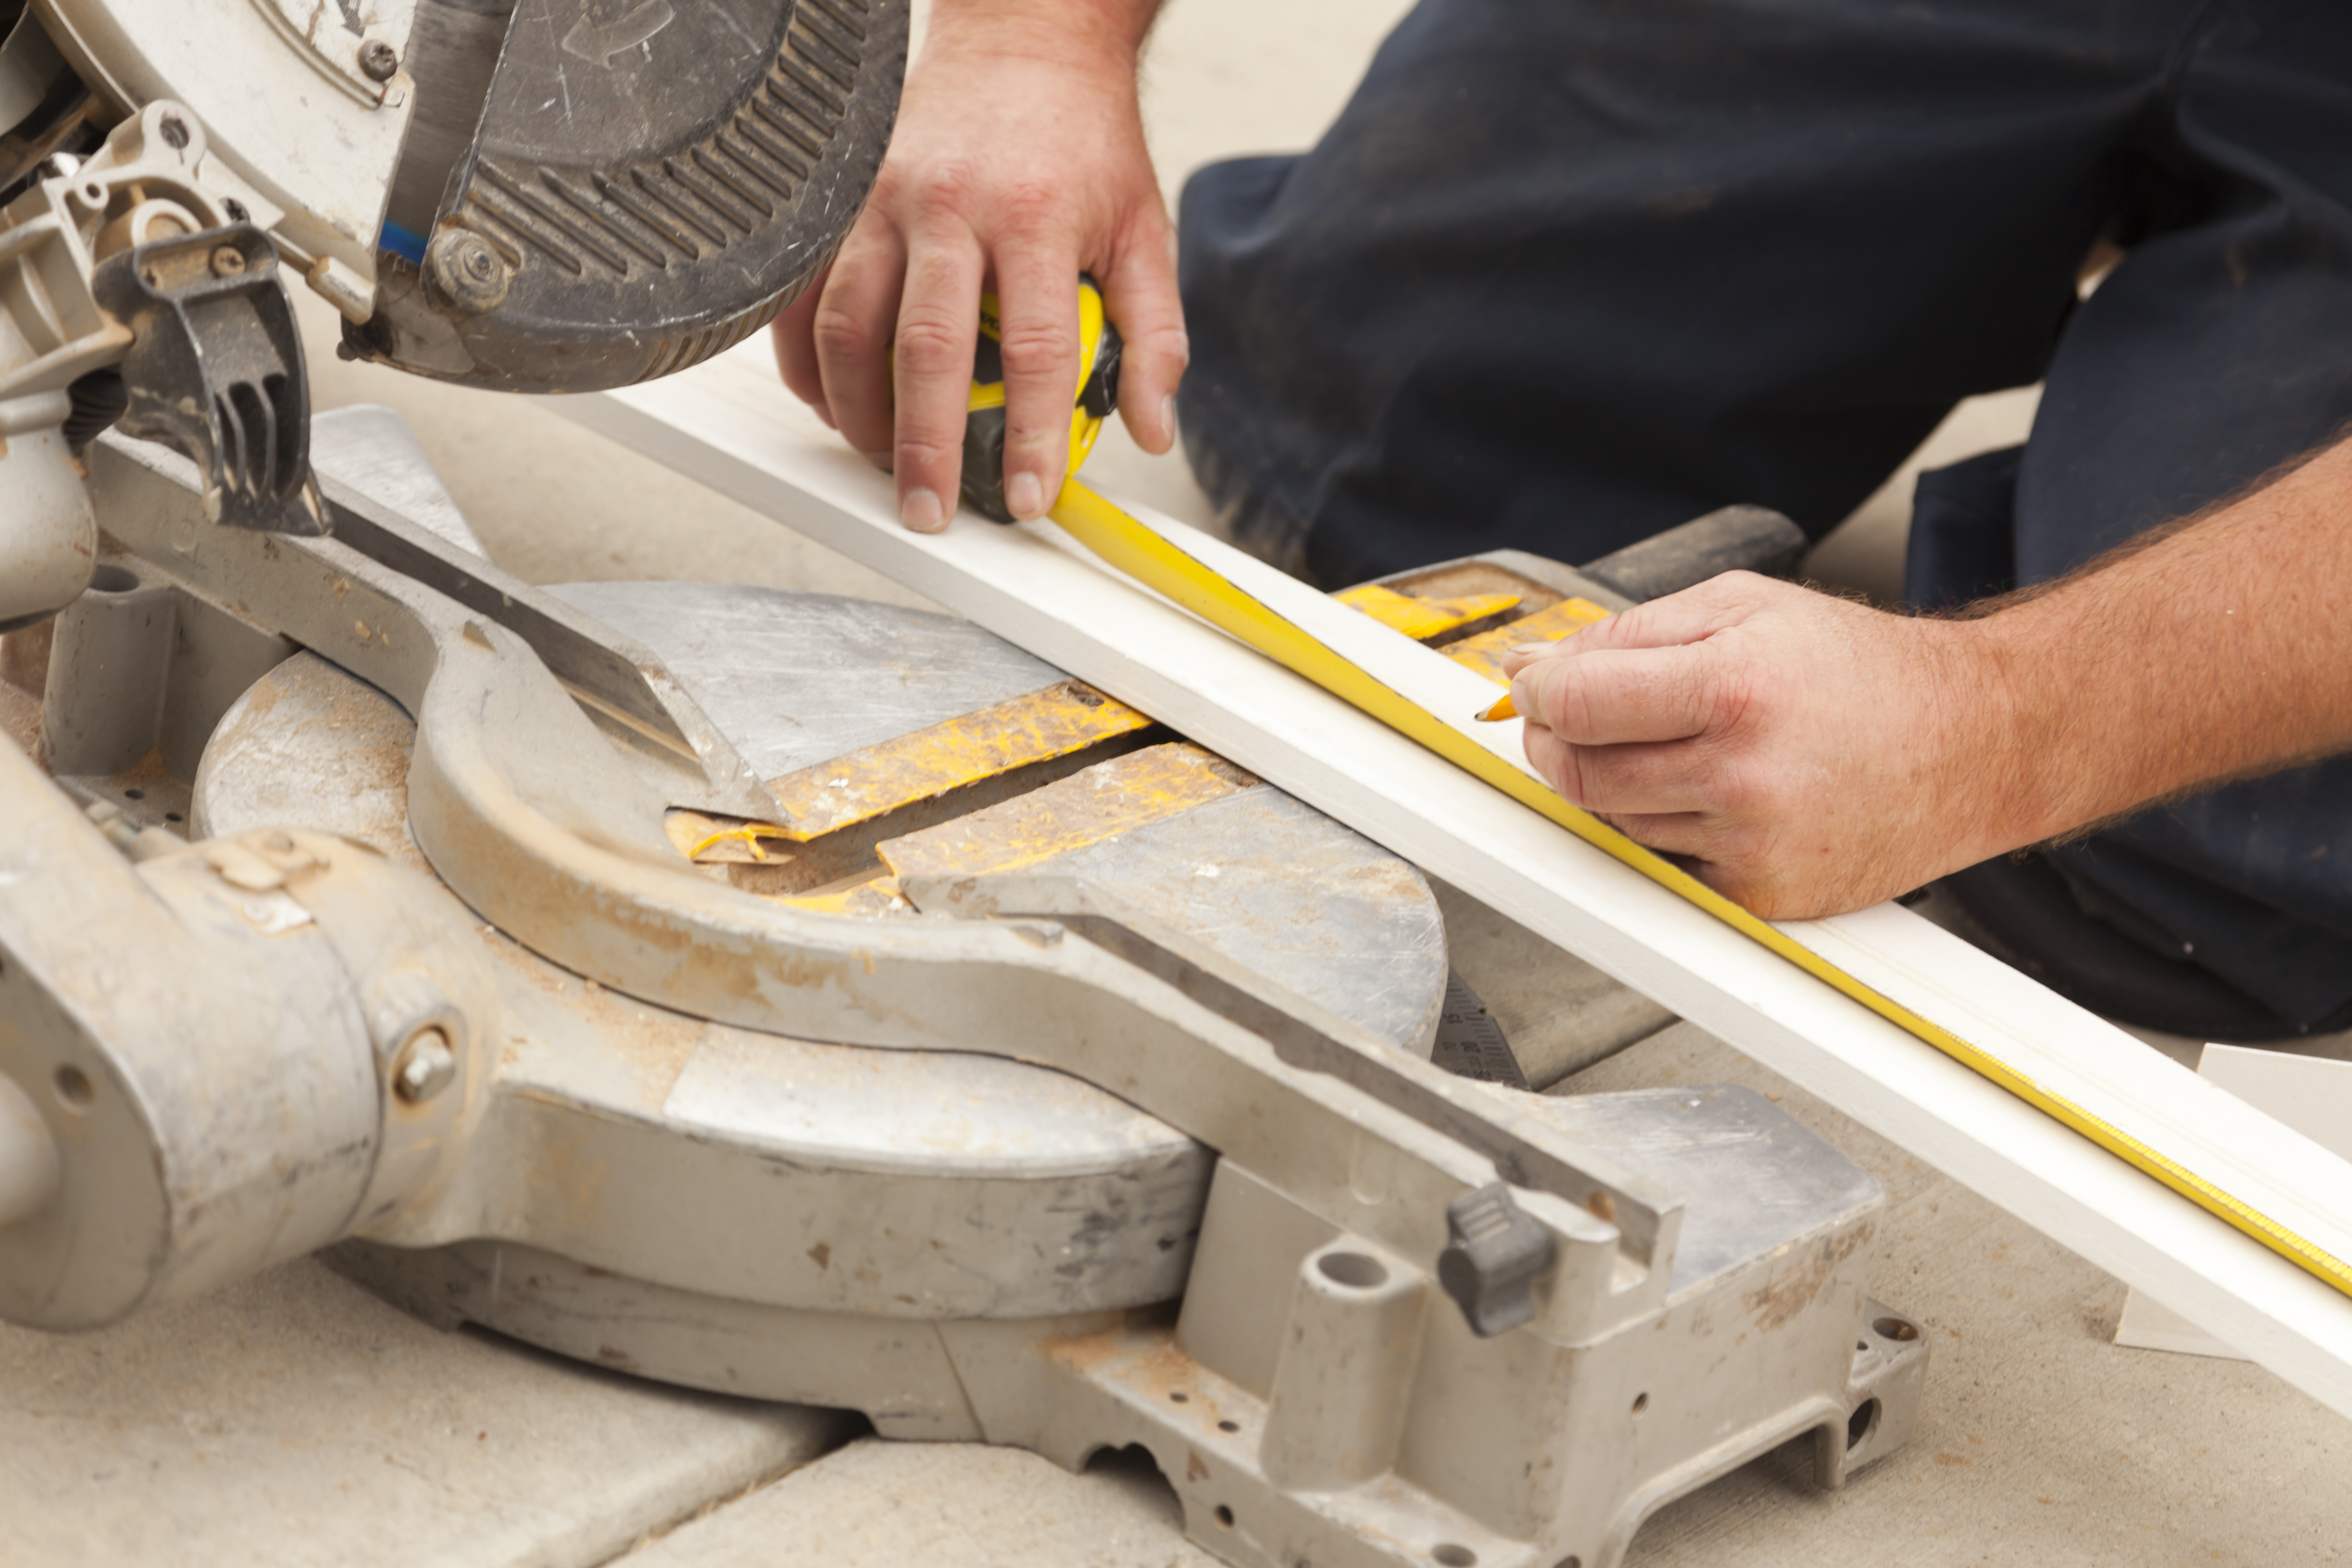
An essential part of measuring accurately and making perfect cuts is visualization. When marking your baseboard for cuts, picture which side of your marks to cut on with your saw. You'll almost never cut directly on your line, as the kerf, or width, of the saw blade can make a big difference in how your trim work will fit. Cut on one side or the other of your mark, depending on how you measured for the piece.
Because your tape measure is flexible, push the hook into the end wall when measuring for longer baseboard pieces. Additionally, because your material is also flexible, especially vinyl baseboards and similar types, place it on a hard surface or a scrap length of lumber to keep it straight and rigid when transferring your measurement to the trim piece. For runs longer than the length of your baseboard, account for a splice angle of 22.5, 30, or 45 degrees in your measurements.
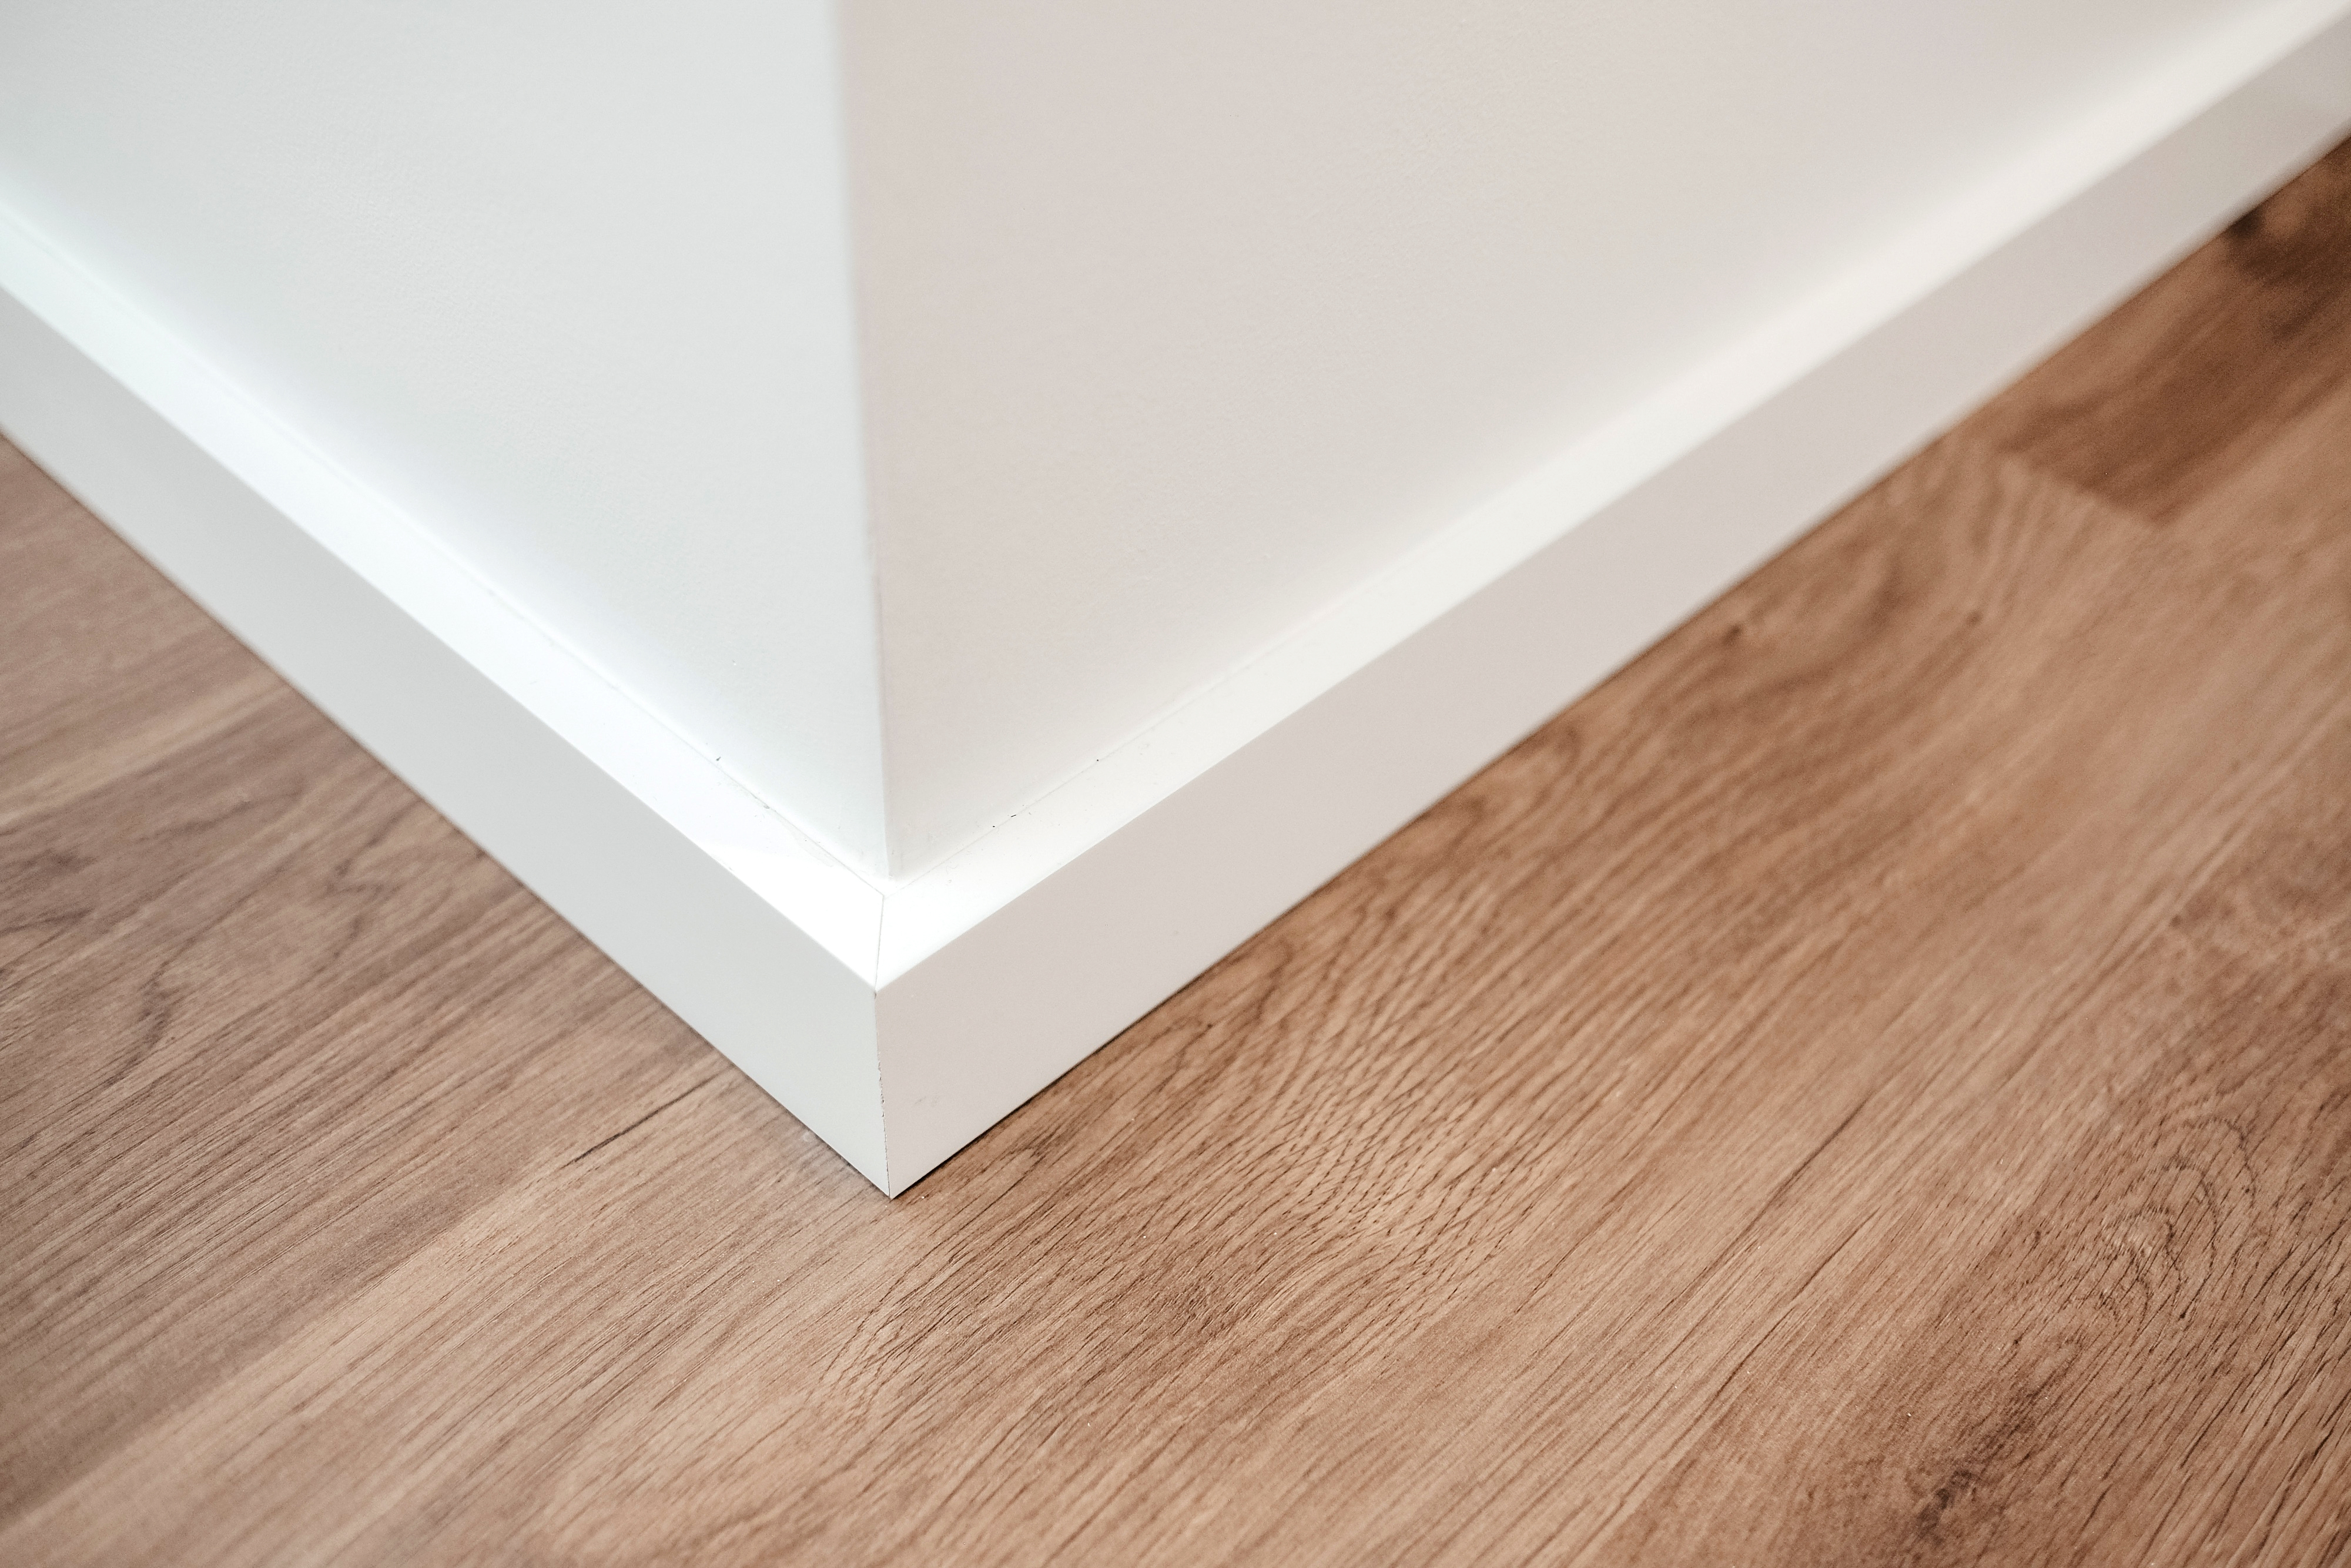
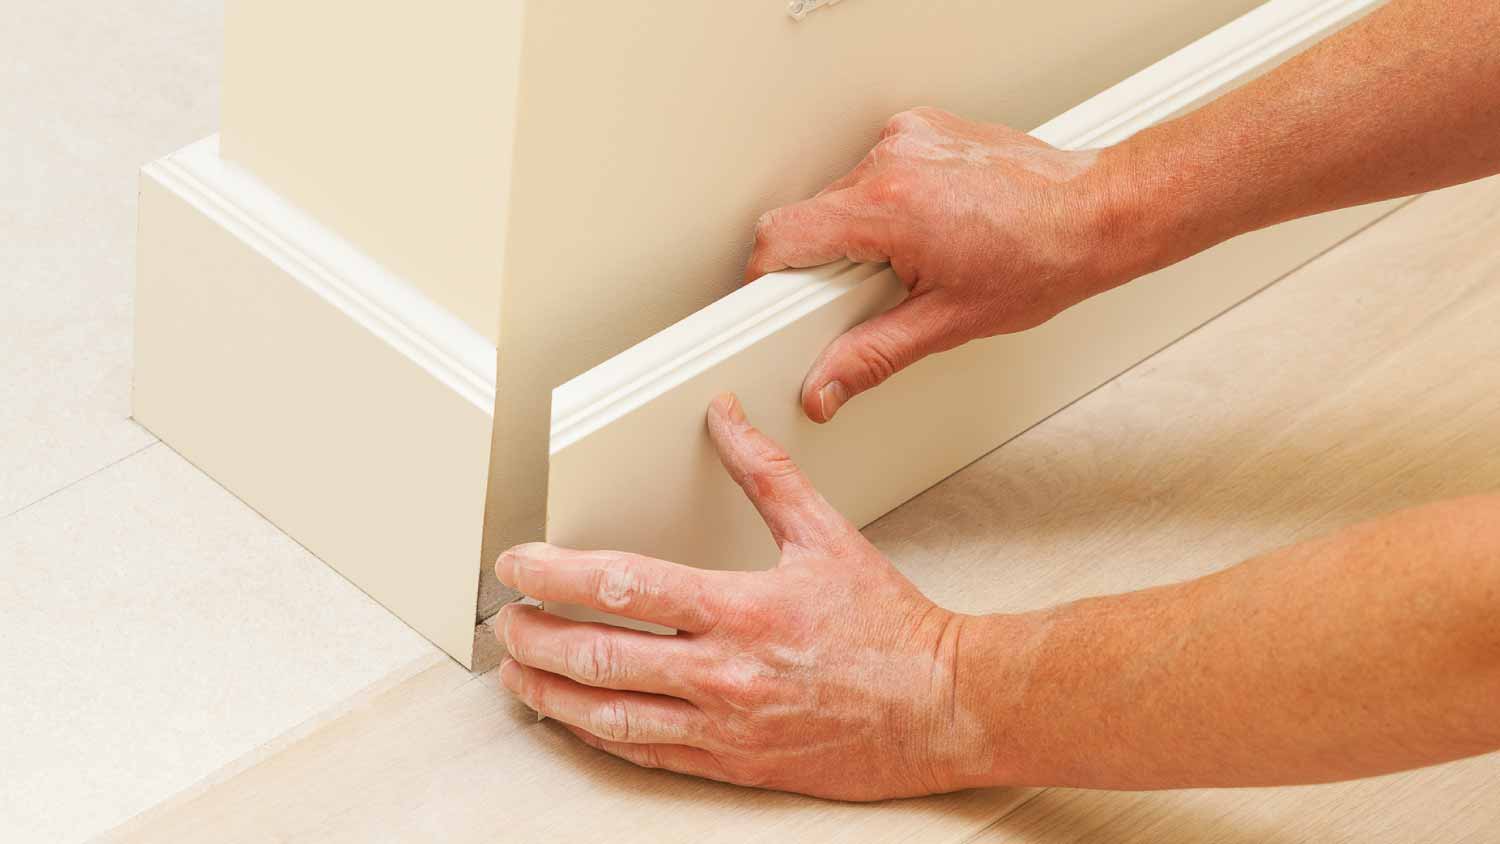
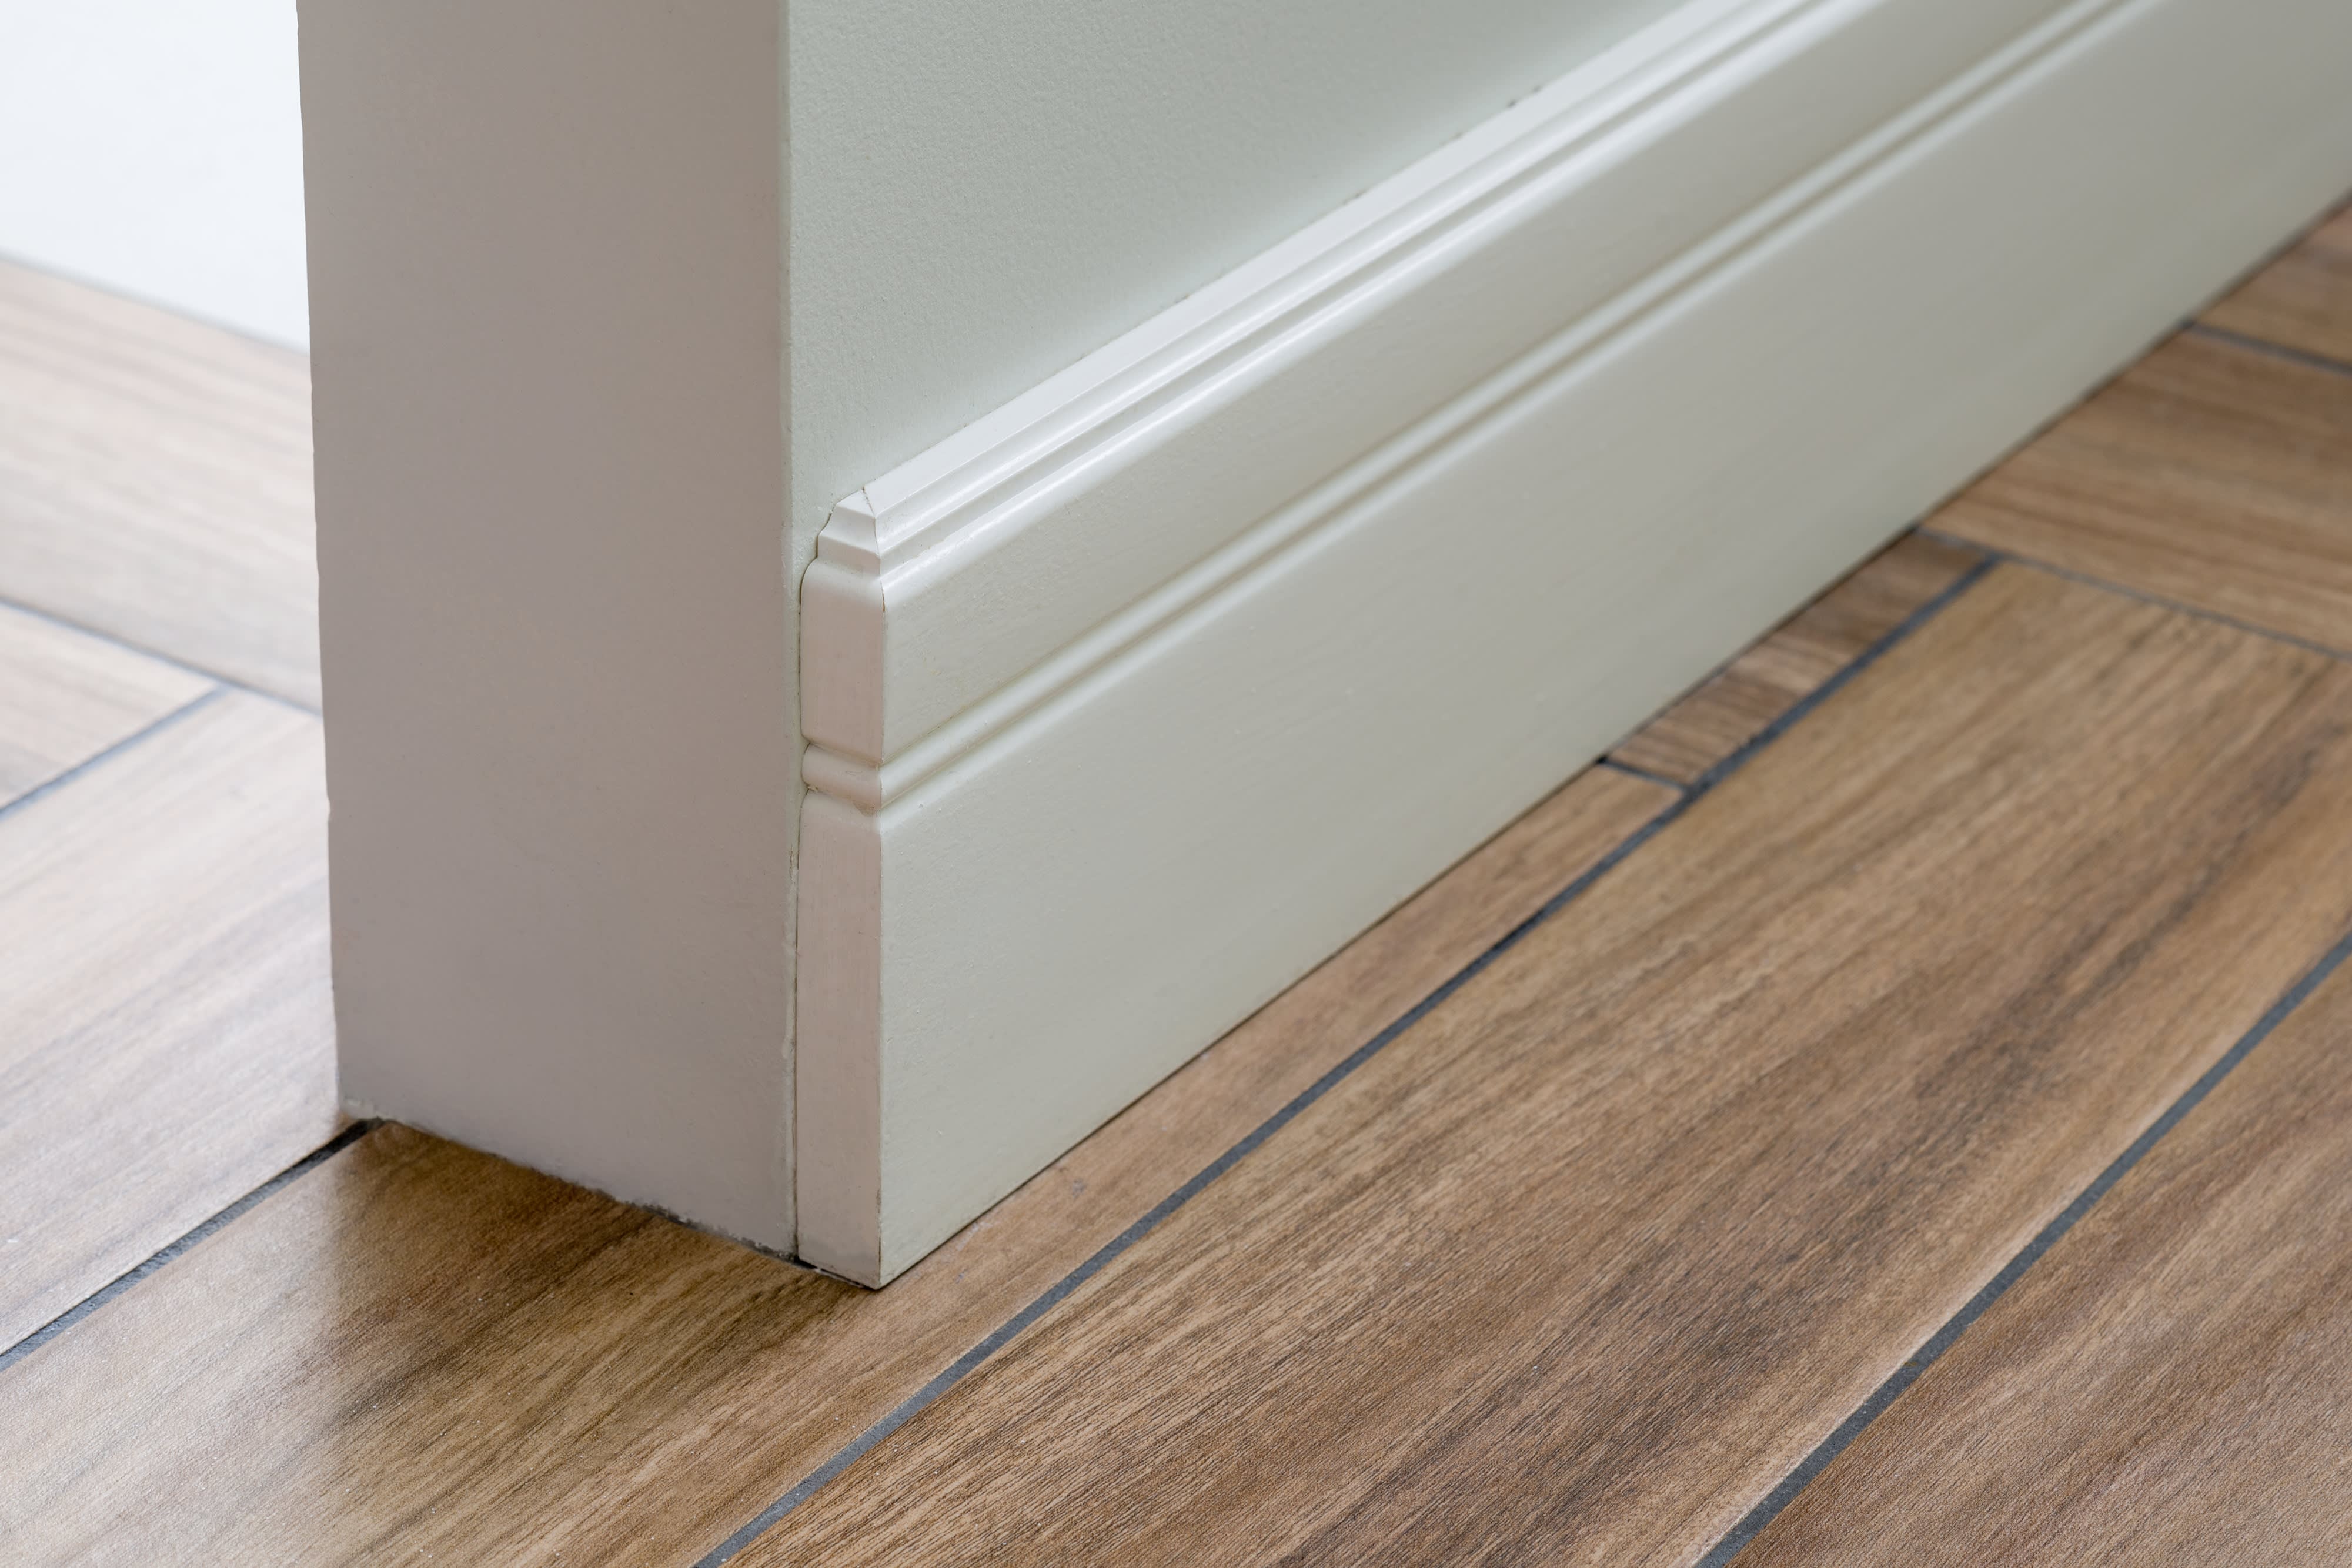
The best way to measure for outside corners is to set the actual piece of trim you're installing in its location and mark the back of it where it meets the corner. You won't even need your tape measure. Use your speed square to extend the mark to the trim's edge. Make your 45-degree cut so the face of the baseboard is the long side.
If directly using the trim piece isn't possible, take your measurement at the wall corner and transfer it to the back of the trim piece.
There are a few tricks for measuring inside corners for baseboard trim.
If you're measuring from the end of another piece of installed baseboard, measure from the piece to the wall and then from the wall to the piece to help ensure accuracy.
If you're measuring from one inside corner to another, place your speed square against one corner and push your tape into the other corner. Measure to the end of your square and add the square's length to the total.
When transferring your marks and cutting, your 45-degree cuts will face inward toward the face of the trim.
If there's already trim in one of the corners, measure to its face and add the thickness of it to your total measurement.
For coped joint corners, use the same measuring techniques as you would for a mitered inside corner. However, leave the first piece as a butt joint against the perpendicular wall. Make a 45-degree cut toward the baseboard's face to make the coping joint cut in the second piece.

Creating returns where baseboard trim ends abruptly provides a finished look. To make one, measure to the end point of the run and mark the front of the trim piece. Your first cut will be a 45-degree angle, so the piece's front side will be the longer one. For the return piece, simply measure the widest thickness of your baseboard and use that number to mark for the opposing 45-degree cut.
If you're installing baseboard trim for the first time, allow yourself some extra time and material for mistakes. The most common mistakes are relatively simple to minimize.
Buying too little: The rule of thumb that pros use is to purchase between 5% and 10% more than they measure for. As a beginner, consider buying a couple of extra pieces, or up to 20% more than necessary, to save yourself a trip back to the store.
Cutting too short: Cutting on the wrong side of your mark or imprecise measuring are the most common reasons for cutting too short. Measure twice, cut once is a good guideline. However, with trimwork, there's no shame in intentionally cutting long and creeping up on the correct measurement with subsequent cuts.
Measuring and accurately cutting baseboard trim is pretty straightforward. However, things like unlevel floors, obstructions, and tight spaces can make the task challenging, or at least tedious. For first-timers, the job can get frustrating.
Carpenters, handypersons, trim installation specialists, or trim carpenters can all install baseboards at an expert level. Installing baseboard is a popular task for avid DIYers who can save up to 50% of the job cost by doing it themselves. However, it comes at the cost of giving up a weekend of free time.
Most homeowners hire the job out to a local baseboard installation company to save time and ensure an attractive finish.
Incredible workers! Very skilled with the machinery, climbing, cutting, roping, and removal. Handled everything. Professionals!
 Hoffman Expert Tree Services
I m so impressed with Custom Paint Jobs LLC s craftsmanship. They truly care about quality.
Window Depot did an amazing job on my deck. I wasnt sure what I wanted to do, but their composite decking was affordable and will last a long time. I am excited to have family over, and I am no longer embarrassed by my backyard. Jeff and the ground crew were polite, respectful, and caring for...
Storms Mobile Welding was great to work with. They were prompt, professional and did an overall excellent job on the project. I highly recommend.
Great job...edging and pre clean up went well with a great job with seal coat. Friendly, efficient and professional.
 All Star Paving and Sealing
Great tree company, very professional and honest. Glad we found them, they had the best pricing
It was wonderful working with Yordy and his team. They were very professional and are experts in what they do. They have completed the work on time, with better quality and with in fairly reasonable price. We just started with backsplash work , but liking his work, we went on to provide...
We hired Jim to replace our hardwood floors with new hardwood. He and his helper Jerry did a fantastic job. Their work ethic is impeccable!! We would highly recommend McColl Floors!
The job went extremely well. Work was done as promised and the job came out better than expected due to Mr. Moyer's commitment to excellence and personal pride in providing the best work possible. He is one of those professionals who is not satisfied until the customer is completely happy...
 Pro Flooring
We needed to have a wall cabinet resized so that we could fit a larger refrigerator underneath. I removed the cabinet from the wall myself and brought it in, where Wally was able to resize it for me in his shop. The results were perfect: it's exactly the size that I asked for, and...
 Pioneer Woodworks
From average costs to expert advice, get all the answers you need to get your job done.
The cost to replace trim depends on factors such as style, material, and whether you hire a pro. Find out what your budget could look like for this project.
Installing trim can give your home a finished, polished appearance. Learn how much it costs to install trim and what factors affect how much you’ll pay.
Baseboard trim protects your walls and adds character to your home. Our guide explains common baseboard trim sizes and how to choose the right one.
What are baseboards? They’re the narrow pieces of trim that fit along the walls near the floor, providing a stylish look and protection for walls.

Learn how to close gaps between your floor and baseboard with caulk, molding, or strips. Discover the best methods for different gap sizes in this DIY guide.
Interior trim creates cohesion and a refined finish in any room. Learn what finish works best in your home with this guide to the best paint for trim.