
The cost to build a root cellar depends on size, location, materials, and other variables. Our guide will help you decide which option is best for you.
Tap into nature’s original refrigerator

Building a root cellar requires choosing the right location for your space, with options ranging from crawl spaces starting at $200 to underground cellars costing $10,000 to $55,000.
Expect to pay $5 to $200 per cubic yard for excavation, or $1,200 to $2,000 for permits if you're digging under an existing structure to create your storage space.
Your root cellar needs proper insulation on indoor walls and adequate ventilation with screened openings to keep air circulating and prevent humidity from spoiling your stored produce.
Hiring a local excavation company takes the heavy lifting off your plate, handling the digging, backfilling, and permit requirements so your root cellar project stays on track.
Whether you’re a wine connoisseur or a gardener who harvests more produce than you know what to do with, finding space to store your perishables can be an ongoing battle. Root cellars offer a practical and convenient solution for keeping items fresh for longer than your pantry, especially during the summer. So, get building and start storing your produce and beverages with these seven steps on how to DIY build a root cellar.
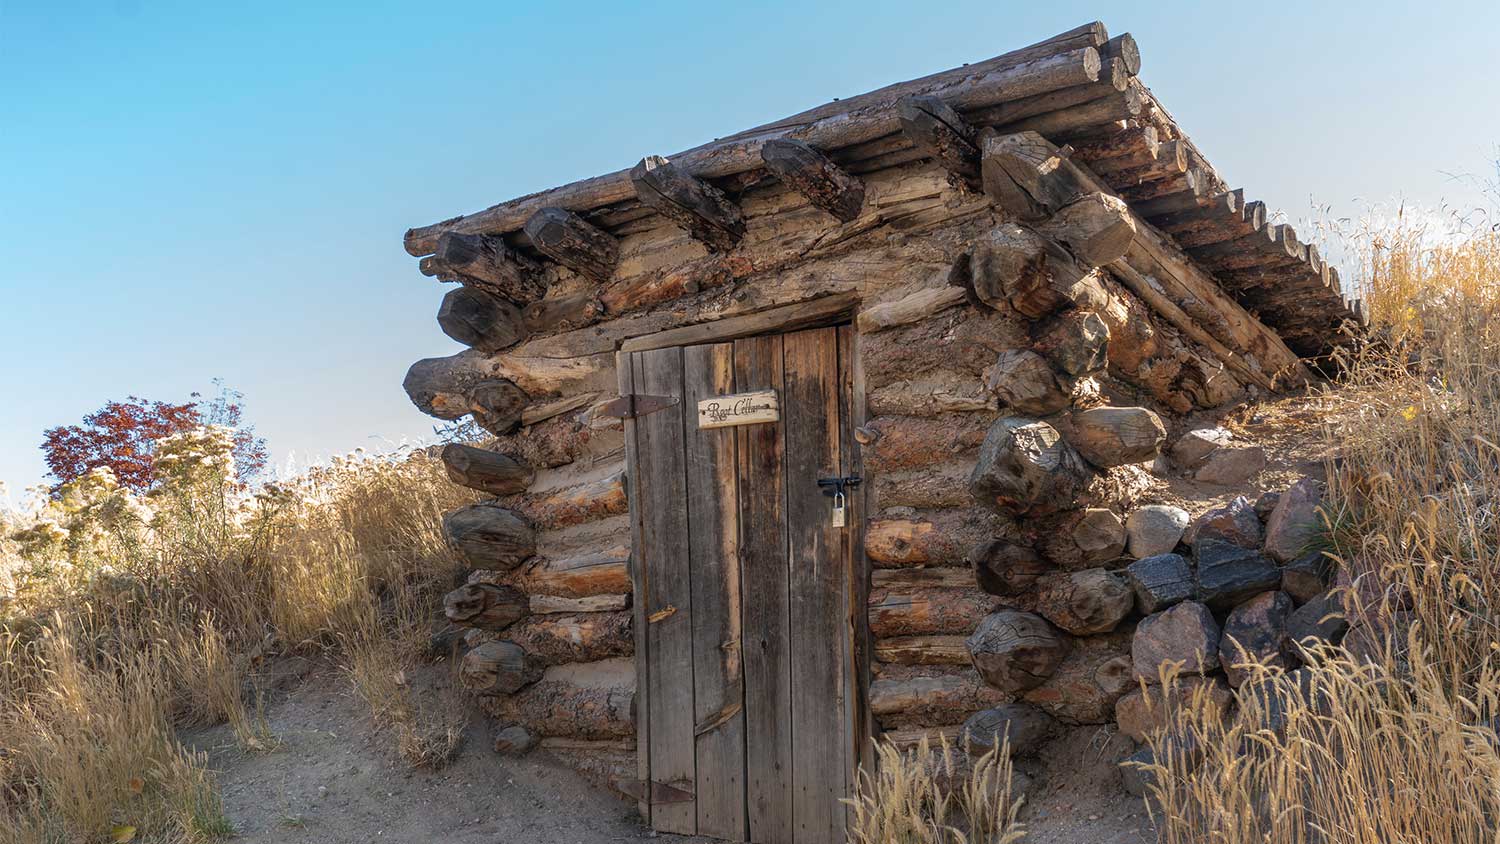
The cost to build a root cellar depends on a few factors, including its site location. So once you’ve sent up your budget, you can plan its location. A few popular locations for installing a root cellar include a crawl space, an earth berm, a basement, under a staircase, and underground in your yard. A crawl space is the least expensive option, starting at $200, while an underground root cellar can cost anywhere from $10,000 to $55,000 to build.
The size, type, and building process of your root cellar are major factors in budgeting for the project.
For the most part, an eight- by eight-foot root cellar offers decent storage space for the average homeowner. Not to mention, they’re easier to maintain and regulate. If you find your estimated costs to be higher than your budget, consider decreasing the size of the space to accommodate your project.
If you already have a basement or dark space to build a root cellar, you have an advantage because you don’t need to invest in excavation costs. If you don’t yet have a space for your root cellar and plan on excavating or building an above-ground berm, you’ll need to factor these costs in.
Excavating a basement costs anywhere from $5 to $200 per cubic yard. If you’re adding a basement to your home or converting a crawl space into a basement before you DIY your root cellar, this will cost more—at least $75 to $150 per cubic yard of dirt. You’ll also need a permit to excavate below a building, which can cost $1,200 to $2,000.
You can easily spend as much or as little as you want on a root cellar, but these investments are necessary:
Refrigeration: $1,000–$10,000
Floors and Walls: $2,500–$8,000
Temperature and Humidity Control: $100–$3,500
Door(s): $500–$3,500
Storage shelves and/or Containers: $250–$1,500
Make sure you have all the required materials for keeping your root cellar cool, dark, and at the proper humidity levels. For storage, you can purchase basic wood shelving to save money or invest in walk-in pantry shelving for a luxurious root cellar.
It’s time to get to work. But before you do, put on the proper safety gear. Eye protection, and face shields if you plan on cutting wood are a must. If you’re demolishing an old basement to make room for the root cellar, you should wear respiratory protection to remove old insulation.
Installing spray foam insulation requires respiratory protection. The Environmental Protection Agency (EPA) says that exposure to polyurethane foam can potentially cause several health effects, such as asthma, asthma attacks, lung damage, skin and eye irritation, and breathing problems, so always follow safety guidelines.

Now that you’re ready to get started on the active part of your root cellar project, it’s time to dig the space for the root cellar. This step is only necessary if you don’t already have an established structure, like a crawl space or area under the stairs. You can either rent an excavator for larger projects or start digging on your own with a good, old shovel if you’re burying a small container. If this part of the project feels like too much to DIY, you can call a local excavation company to do it for you.
Next, you’ll want to add insulation to the walls of your root cellar. For underground or berm projects, do not put insulation on walls in direct contact with soil. You’ll need to use cinder blocks, bags of sand, or tires to create a protective barrier between the root cellar and Mother Nature.
For indoor root cellars, add your rigid insulation (preferred) or spray foam to all of the walls to keep the cellar insulated.
Either create ventilation holes or use a window with mesh screening and a vent to keep out light and allow for air to pass in and out. Ventilation keeps air circulating in your root cellar, which prevents humidity from spoiling produce and keeps the gases emitted from fruits and vegetables from lingering in the air.
Many plants release ethylene gas when their seeds ripen. A few common culprits include apples, tomatoes, avocadoes, and bananas. On the other hand, some plants actually ripen faster when exposed to ethylene gas. These plants include broccoli, asparagus, cucumbers, and carrots.
Now that your structure is properly insulated and ventilated, it’s time for the fun part—organizing your storage! Again, wooden shelving is the most ideal option for storing your produce. Wood won’t rust in humid climates, and it conducts less heat than metal shelving. If shelves aren’t your aesthetic, you can also use barrels to store fruits, vegetables, and bottled or jarred liquids.
If you’re not confident about ticking all the boxes for your root cellar, here are some important tips to keep in mind to ensure your root cellar works as planned:
Underground root cellars should be at least 10 feet deep with 10 feet of space around the perimeters for most projects.
Root cellars in colder climates need to be under the permafrost level or your produce might freeze.
Set a time frame for your project to complete it on time.
Make sure you’ve obtained building permits, if necessary.
Check with an inspector if you live in the South to see if you can install a root cellar on your property.
Conduct a smoke test to see if the vents are working properly before stocking your cellar.
Keep your shelves at least one to three inches away from your root cellar’s walls to allow for proper circulation.
Sometimes, it’s not what you do that makes or breaks a DIY project but rather what you don’t do. Here are a handful of don’ts to building your own root cellar:
Some dry climates or properties with sandy soil need to excavate deeper than 10 feet, so don’t forget to factor in your soil type before you build.
Never use treated wood in your root cellar. Opt for waterproof, untreated wood instead.
Water sources can help cool your root cellar, but be wary of digging too close to a water source due to underground water levels.
Avoid storing plants that can be harmed from ethylene gas next to plants that produce ethylene gas.
Whether or not you can install a root cellar in a hot climate zone depends on your soil quality and water level. Underground root cellars are perfect for temperate or colder regions, but may not be ideal for some southern climate zones where daytime temperatures rise in the 100s or water tables are too high for the depth of a root cellar.
It can take anywhere between a few days to a few weeks to build a root cellar. If you’re excavating and building the root cellar from the ground up, it will take much longer than simply adding insulation and ventilation to a basement.
Though root cellars were originally used to store root vegetables like potatoes, parsnips, carrots, and turnips, you can use your root cellar to store fruit, nuts, wine, and more!
For some, DIYing a root cellar can prove to be too big of a project. This is especially true if you have to renovate your basement or build an underground root cellar or berm root cellar. In these cases, you might want to hire a local basement remodeling contractor to install your root cellar.
Custom Paint Jobs LLC made our home feel like a piece of art. Thank you for your creativity!
Window Depot did an amazing job on my deck. I wasnt sure what I wanted to do, but their composite decking was affordable and will last a long time. I am excited to have family over, and I am no longer embarrassed by my backyard. Jeff and the ground crew were polite, respectful, and caring for...
First of all, the gentleman I dealt with (Cam?) was very responsive to my many questions and concerns throughout the project, which is a huge plus to me. From the first time I met him for the estimate all the way til the completion of the job, he and his crew were professional and respectful....
 All Star Paving and Sealing
We had a 20+ year old landscape lighting system that needed replacement. Midwest Lightscapes worked with us to design a much improved lighting system, lighting the exterior of the house and the back yard. Installation of the 45 light system took one and one-half days, and went very smoothly....
 Midwest Lightscapes
Another great success for me on home advisor. This company did an awesome job on my landscaping and stayed within my budget. The best part, the work was complete within 2 days of my initial request. Professional and responsive. I highly recommend!
The company no showed on me twice. The 2nd time was no call no show. They were responsive to set up the first appointment to perform the "landscape cleanup". 3 hours after their initial scheduled appointment time they called me to let me know they had some "problem" with the truck and their...
 Ruby Home and Hauling Services
Received ideas for future landscape plans...quote to do the work seemed a bit high but I did not have any other quotes to compare it to, so perhaps that is the going rates. <br />
 Landscapes By Terra, Inc
All around they have done a really great job. <br /> I have used JL Landscapes for the past 8 years. I own and operate my own commercial/residential real estate company where we own, operate, and maintain our own properties. JL Landscapes has been our exclusive landscaper for both our...
 J.L. Landscapes
Bought a half a cord of firewood from Pitzer with stacking last month. I waited to report so I could see how the wood burned. <br /> <br /> I have three pet peeves regarding landscapers, but Pitzer scored "A"s regarding all three. First, rather than having customers "leave a message" and...
 Pitzer Landscaping
I left a message on Sunday requesting to schedule a time to obtain an estimate/walk-through and received a return call in the morning of the following Monday. Mark worked with me and agreed to schedule the estimate/walk-through for the following Saturday. When Mark arrived for the...
From average costs to expert advice, get all the answers you need to get your job done.
The cost to build a root cellar depends on size, location, materials, and other variables. Our guide will help you decide which option is best for you.
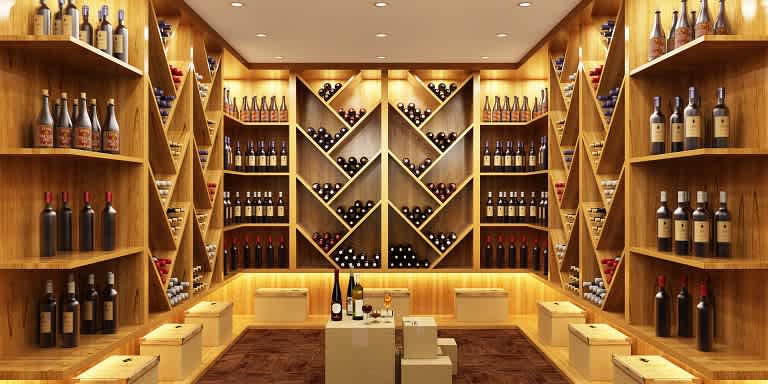
The cost of installing a wine cellar varies based on square footage, the type of wine cellar or wine cave, materials used, where it is located in the property, and where you live. Use this guide to find how much your wine cellar will cost.

Find out the average cost to remove roots from pipes, what impacts pricing, and expert budgeting tips for root removal, and protect your plumbing.

Root cellars are a low-cost, sustainable alternative to refrigeration. Learn the benefits of this traditional food storage area and what’s needed to build one.

If your home’s basement is forgettable, consider turning it into a place you’ll love to showcase instead. Try these cellar renovation ideas at your home.
If your tree is still giving you grief after you remove it, knowing how to stop tree roots from growing back can ease your mind and keep your home safe.