
A GFCI outlet can keep your family safe and is relatively inexpensive to install. Learn how much replacing GFCI outlets will cost you, and what factors into those costs.
Before you upgrade your outlet, make sure you understand the differences between these terms

GFCI line vs load wiring matters because line terminals connect incoming power from your electrical panel, while load terminals connect outgoing power to downstream outlets.
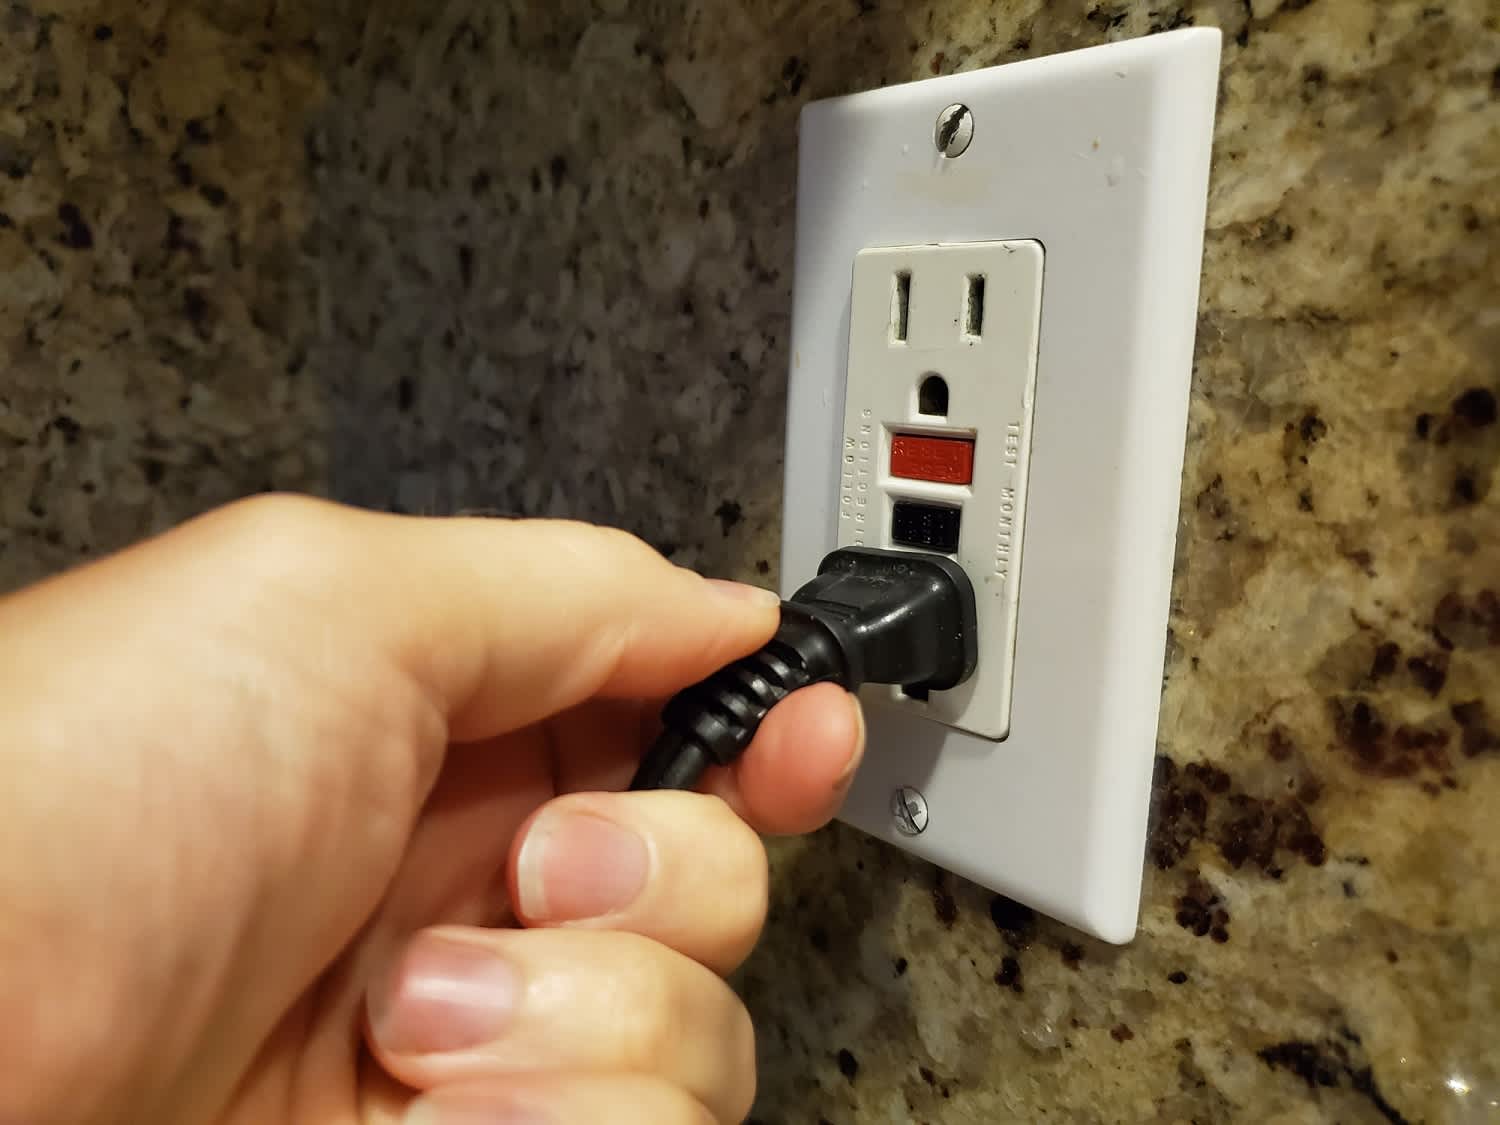
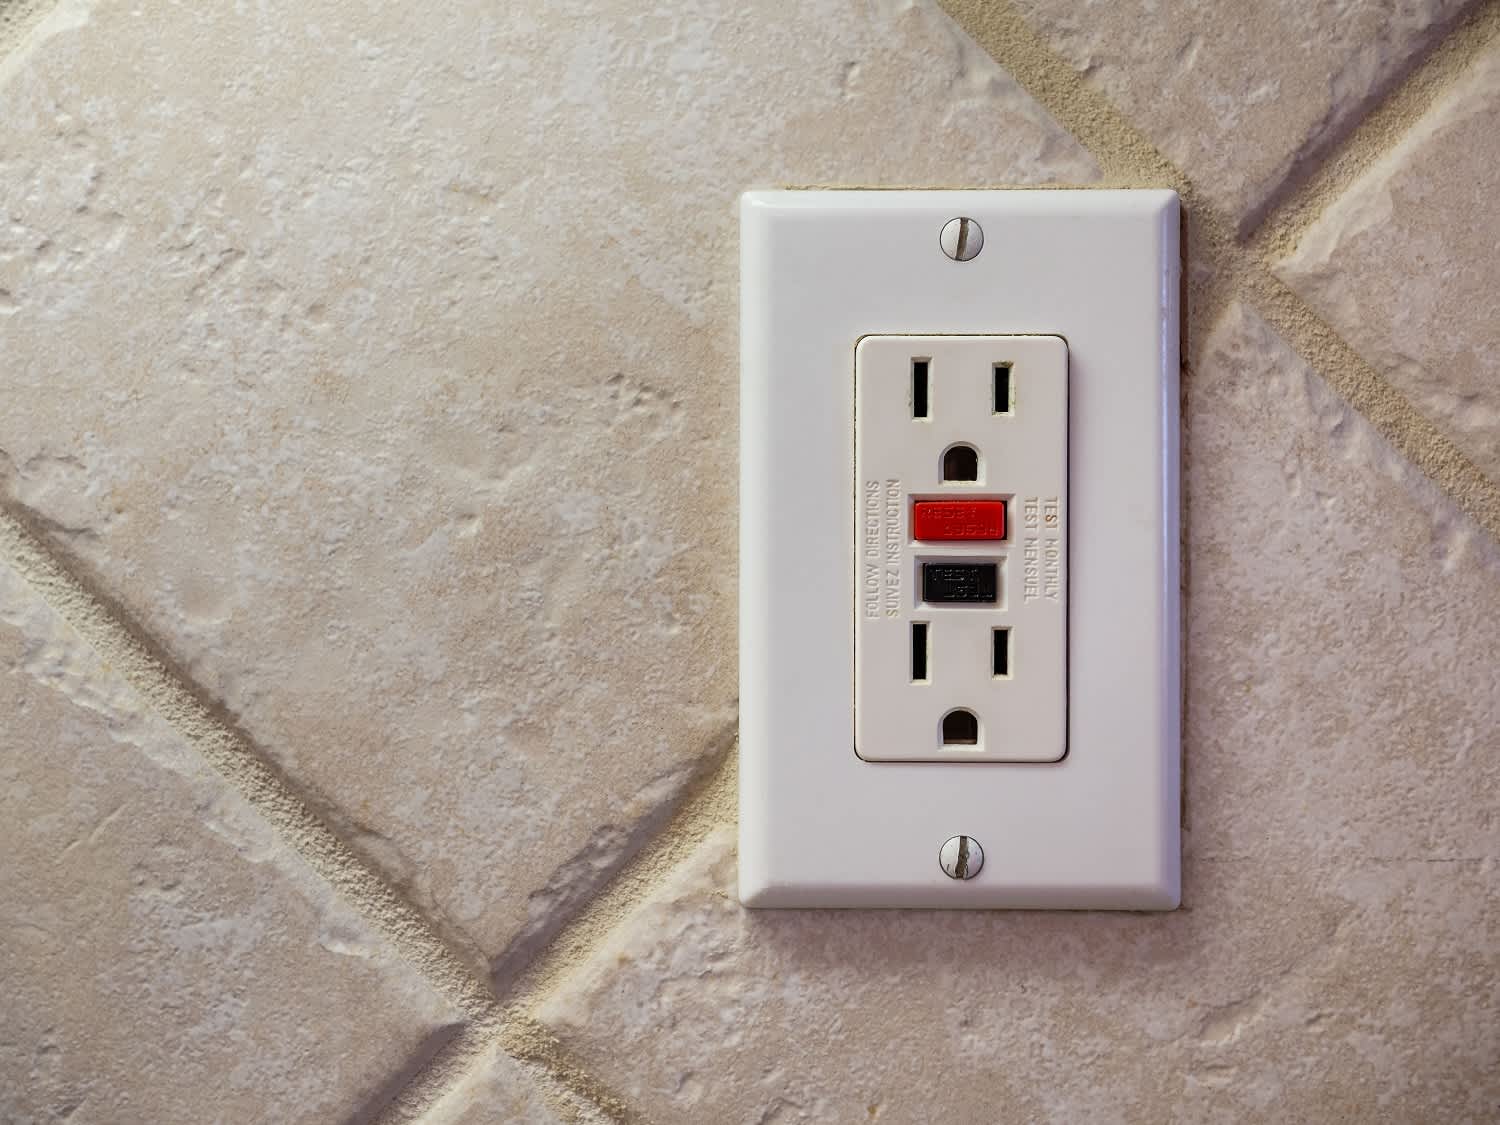
Your GFCI outlet back has clear labels showing line terminals at the bottom and load terminals at the top, with arrows guiding your wire connections.
Choosing the right wiring setup depends on whether you want to protect just one outlet or extend GFCI protection to multiple outlets downstream on the circuit.
Hiring a local electrical professional keeps your installation safe and correct, helping you test connections and avoid the common mistake of reversing line and load.
Installing a GFCI outlet adds important shock protection to your home. With some research and care, this can be a DIY project, but it’s more complicated than installing a standard outlet. You’ll need to understand GFCI outlet wiring line vs. load, for example. Our guide breaks down the differences so you know exactly what to do.
A GFCI outlet has terminals labeled “line” and “load.” Wiring it correctly will enable it to detect sudden changes in power levels that can indicate a ground fault. The GFCI outlet will instantly shut down power if it detects diverted amps—fast enough to prevent a shock or other problems.
| Type of Difference | GFCI Line | GFCI Load |
|---|---|---|
| Electrical | Incoming current | Outgoing current |
| Voltage Reading | Hot; about 120 volts | Inert; no voltage |
| Location of Terminals | Bottom of outlet | Top of outlet |

Electricity in a building needs to complete a closed circuit as it’s used. Since GFCI outlets work by monitoring for changes in power levels, they need to know in which direction the electrical current is flowing. That’s why line and load are important. Here’s the breakdown:
Connect incoming power wires to the line terminals. GFCI line wires carry power “upstream” from the electrical panel.
Connect outgoing power wires to the load terminals. GFCI load wires carry power “downstream” to other outlets and hardware, eventually completing the circuit.

If you’re hoping to save on the costs to replace electrical outlets by DIYing the work, you’ll need to test the wires with a non-contact voltmeter or multimeter to make sure you know which is which.
You’ll need to keep the power on to test for the line and load, so proceed with caution. Then, shut the power down on your circuit breaker before you begin attaching wires to lower the risk of an electrical shock while you’re working. Do not turn the power back on before fully connecting all line, load, neutral, and ground wires in the outlet.
Here’s how to tell line and load wires apart:
GFCI line: The line wire will read as “hot.” It will show voltage near the expected 120 volts for an American power outlet. If you are using a multimeter, you can also test using ohms: In this case, the line wire will register ohms because electricity is flowing through, allowing the multimeter to measure resistance.
GFCI load: The load wire will not register as hot and won’t show signs of a live current. It should not show any voltage, and an ohms reading will come back negative because there’s no current to test.
If you feel uncomfortable with any of these steps, hire a local electrician near you instead.
On most GFCI receptacles produced in the United States, the back is very clearly marked with which terminals are which.
GFCI line: Line terminals are usually on the bottom of a GFCI receptacle. On the back, receptacles are typically labeled “LINE” with arrows showing you where to connect hot and neutral wires. It’s not always as easy to see, but the terminals for the hot wires are usually gold, too.
GFCI load: The load terminals are on the top of the GFCI outlet and usually marked with a clear “LOAD” label. As with the line, there are arrows showing you where to connect hot and neutral wires.
It’s best to connect wires in a sequential manner. Connect line wires to line terminals first, and then load wires to load terminals. Always test your connections when you are finished.
Great company! Price was competitive, technician showed up on time and completed the job (exterior electric Radon fan replacement) quickly. Would hire them again.
I conferred with 2 other contractors before Armstrong Electric. Nick and his crew showed me that the project was not as convoluted as the other contractors made it appear to be. They completed the entire project on time. They were professional, friendly and cleaned up after at completion. I...
 Armstrong Electric LLC
The techs on my project, Shawn and Cliff, were great. They were prompt, courteous, and efficient. I am very happy with the results and would definitely contact Mr. Electric for any future electrical projects.
Victor was wonderful. He was on time, professional, and explained everything he was doing. He was thorough and figured out that the problem was electrical instead of with my HVAC system. Very knowledgeable. I will be using this company in the future for any HVAC needs. Thanks!
 Hubbs Heating & Air LLC
They were excellent. They did a great job. I was totally satisfied. They put tremendous effort in making sure the work was completed. They were great. They provided immediate response to any inquires I made. I would hire them again. I would recommend them to anyone who needs electrical work....
 Property-Tech Industries, LLC
Initially, the repairman could not find the problem. Apparently, there was some electrical shortage, but he could not find the definite problem. He left, but called back later to say he had a new idea. He returned and replaced the light switches on the doors. The refrigerator seemed to return...
 Appliance Pro LLC
The initial quoted price from a walk-through seemed high, but we discussed that the quote represented worst case scenario (re-wiring to two floors) and we were excited about the opportunity to have the work done in a timely manner with closing for fire safety reasons, etc. When the job was...
I have to tell you I am all about customer service - I will go out of my way and even pay more for it if you give me great customer service. <br> <br>In a world where this is hard to find, these guys were awesome! I can not sing their praises enough. They were prompt, personable, funny, got...
 Waibel Electric
When I challenged the markup on the generator, Bruder Electric withdrew its bid. They only want naïve customers.
We had no power to any of the electrical outlets in the MBR. We'd had an intermittent problem for a few years and they finally went out all together. We live on the 3rd floor of a 100 year old building and I know from past experience the wiring has been added to in hodgepodge ways over the...
From average costs to expert advice, get all the answers you need to get your job done.
A GFCI outlet can keep your family safe and is relatively inexpensive to install. Learn how much replacing GFCI outlets will cost you, and what factors into those costs.
The average cost to install an electrical outlet is $133 to $296 each. This guide explains what factors impact the total cost of installing an outlet.

Installing an outdoor outlet is a relatively affordable way to take your outdoor space to the next level. Find out the cost to install outdoor outlets

Can’t tell the difference between line vs. load wire? The line wire receives the incoming electricity and the load wire shares it with other outlets.
If you want to upgrade outdated outlets, you may be wondering if you can replace ungrounded outlets with GFCI outlets. Keep reading to find out.

Grounded circuits are happy (and safe) circuits, but what if you live in an older home with pre-grounded receptacles? Here are ways to ground without a wire.